AVer PTZ330 User Manual
Professional ptz camera
Hide thumbs
Also See for PTZ330:
- User manual (71 pages) ,
- Manual (13 pages) ,
- Quick start manual (12 pages)
Table of Contents
Advertisement
Quick Links
Advertisement
Table of Contents

Subscribe to Our Youtube Channel
Related Manuals for AVer PTZ330


Summary of Contents for AVer PTZ330
- Page 1 PTZ310/330 PTZ310W/330W PTZ310N/330N Professional PTZ Camera User Manual V.2.0.3...
- Page 2 FCC NOTICE (Class A) This device complies with Part 15 of the FCC Rules. The operation is subject to the following two conditions: (1) this device may not cause harmful interference, and (2) this device must accept any interference received, includi ng interference that may cause undesired operation.
- Page 3 © 2018 AVer Information Inc. All rights reserved. All rights of this object belong to AVer Information Inc. Reproduced or transmitted in any form or by any means without the prior written permission of AVer Information Inc. is prohibited. All information or specifications are subject to change without prior notice.
- Page 4 WARNING To reduce the risk of fire or electric shock, do not expose this appliance to rain or moisture. Warranty will be void if any unauthorized modifications are done to the product. Do not drop the camera or subject it to physical shock. ...
-
Page 5: Table Of Contents
Contents Package Contents ...................... 1 Product Introduction ....................2 Overview ....................... 2 LED Indicator ......................2 Pan and Tilt Angle ....................3 Device Connection ....................3 Video Output Connection ..................4 RS232 and RS422 Connection ................5 Audio Input Connection ..................7 PoE Connection .................... - Page 6 Advanced Setting .................... 15 System ......................16 Web Setup ......................17 Using the AVer IPCam Utility to Find the Camera ..........17 Make a Connection to the Camera via Browser ..........18 Live View ......................19 Pan-Tilt-Zoom Control ..................19 Focus ......................
- Page 7 SmartFrame ....................29 System ........................ 29 Using RTSP Connect to Camera ................. 29 Firmware Update ....................30 Web Firmware Update ..................30 USB Update ..............錯誤! 尚未定義書籤。 RS232 Command Table ..................31 Specification ......................36 PTZ310/310W ..................... 36 PTZ330/330W ..................... 39...
-
Page 8: Package Contents
Package Contents Menu PTZ310/PTZ330 Power adapter & HDMI cable Remote Power cord controller PTZ 310W/PTZ330W Cable Fixing plate Screw for wall Cable ties(x5) Quick Guide mount Din8 to D-Sub9 cable RS232 In/Out Y cable Batteries(x2) *The power cord will vary depending on the standard power outlet of the country where it is sold. -
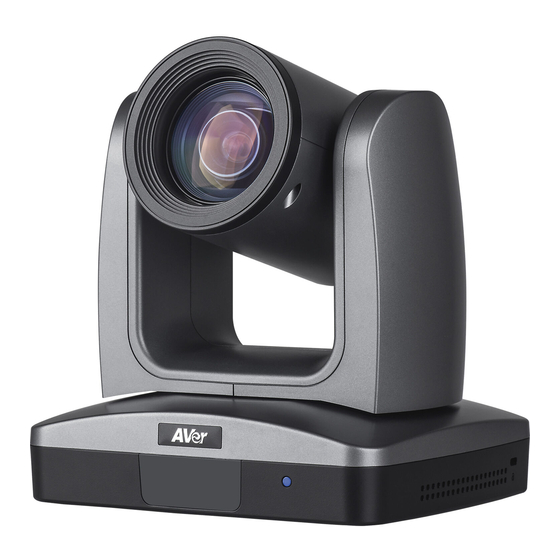
Page 9: Product Introduction
Product Introduction Overview (5) (6) (7)(8)(9) (11) (10) (12) (1) Camera lens (5) PoE+ port (9) micro-USB port (2) IR sensor (6) RS232 port (10) HDMI port (3) LED indicator (7) RS422 port (11) 3G-SDI port (4) Kensington lock (8) Audio in* (12) DC Power jack *Line input level: 1Vrms (max.). -
Page 10: Pan And Tilt Angle
Pan and Tilt Angle 90° ±130° 30° Device Connection Joystick (Camera control) Laptop (Management/Presentation) Microphone Audio input RS232 RS422 3G-SDI Monitor/TV PoE+ (Display) Lecture capture system HDMI PTZ 310/PTZ330 (Record) PTZ310W/PTZ330W Web application (Remote Management) -
Page 11: Video Output Connection
Video Output Connection HDMI Use the HDMI cable to connect with monitor or TV for video output. HDMI cable Monitor/TV 3G-SDI Connect to 3G-SDI monitor for video output. 3G-SDI cable (Not inculded) SDI Monitor [Note] HDMI and 3G-SDI monitors can be connected to camera and output live video simultaneously; Assuming HDMI monitor is well connected before the camera turned on, the OSD menu will be displayed on HDMI monitor in default.”... -
Page 12: Rs232 And Rs422 Connection
RS232 and RS422 Connection Connect through the RS232 or RS422 for camera control. RS232 (this cable is not include in the package, only provide Y cable for RS232 in/out) RS232(VISCA) cable (Not inculded) Joystick Laptop ● RS232 Port Pin definition ●... - Page 13 RS422 [Note] Use cat5e splitter for multi-camera connection. RS422 Pin Cat5e splitter pin assignment: PTZ310/330 PTZ310W/330W Camera/Joystick Camera/Joystick...
-
Page 14: Audio Input Connection
Audio Input Connection Connect the audio device for audio receiving. [Note] If use MIC-in device (ex: microphone), please use 3 to 4 MIC-in cable to connect camera and MIC-in device. Line input level: 1Vrms (max.). Mic input level: 50mVrms (max.); Supplied voltage:2.5V. Microphone Auido mixer... -
Page 15: Poe Connection
PoE Connection Connect the camera to the router or switch through the PoE+ port. [Note] Only support IEEE 802.3AT PoE+ standard. Ethernet cable (Not inculded) Router/PoE Switch Install Cable Fixing Plate... -
Page 17: Remote Controller
Remote Controller Menu (10) (11) (12) (13) (14) (15) (16) (17) Name Function Turn the unit on/standby. (1) Power Select 1~4 PTZ camera. Set the camera ID in OSD menu: System > Camera Selector, ex: (2) Camera Select camera ID is set to 1. Then, press the “camera select” button “1” to control the camera. - Page 18 Name Function Reset the Pan-Tilt position. (11 ) PT Reset Zoom in/out slow. (12) Zoom Slow Zoom in/out fast. (13) Zoom Fast Enable manual focus. Use Far/Near to adjust the focus. (14) MF/Far/Near Auto focus. (15) AF Pan-Tilt speed adjustment. There are totally 24 levels for pan-tilt speed (16) Pan-tilt Fast/Slow adjustment;...
-
Page 19: Setup The Camera
Setup the Camera OSD Menu button on the remote controller to call out the OSD menu and use ▲ , ▼ , , and Press Menu button to operate the OSD menu. -
Page 20: Setup Ip Address Of The Camera
Setup IP Address of the Camera Static IP 1. Press button on the remote controller to call out OSD menu. Menu 2. Go to Network > Static IP. [Note] Turn the DHCP off before setup static IP (Network > DHCP > Off). and use, , number 3. -
Page 21: Osd Tree
OSD Tree Camera Setup camera parameters – Exposure mode, White balance, Pan-Tilt Zoom, Noise reduction, Frequency, Saturation, Contrast, Sharpness, Mirror, and Flip. Camera Exposure Mode Full Auto Exposure Value/Gain Limit Level/Slow Shutter Shutter Priority Exposure Value/Shutter Speed/Gain Limit Level Iris Priority Exposure Value/Iris Level/Gain Limit Level/Slow Shutter Manual Shutter Speed/Iris Level/Gain Level... -
Page 22: Video Output
Video Output Select video resolution. Video Output Auto 1080P/60 1080P/59.94 1080P/30 1080P/29.97 1080I/60 1080I/59.94 720P/60 720P/59.94 1080P/50 1080P/25 1080I/50 720P/50 Network Setup IP mode – DHCP or static IP. Network DHCP Off/On Static IP IP Address Gateway Mask Advanced Setting Advanced Setting Audio Input Type... -
Page 23: System
Power saving: Enable this function for the power saving, and only allow RS-232 or Remote control to power on. System Camera Selector Status OSD Off/On Language English/日本語/繁體中文/簡體中文/한국어/Tiếng việt Off/On CameraID PTZ330 Latency Reduction Off/On Power Saving Off/On Information Model Name/Version/IP Address/MAC Factory Default Off/On... -
Page 24: Web Setup
Web Setup Connect the camera from a remote site through the internet. Using the AVer IPCam Utility to Find the Camera To find the IP address of your cameras, you can execute the IPCam Utility installer. Follow the below steps to find the IP address of the camera. -
Page 25: Make A Connection To The Camera Via Browser
Make a Connection to the Camera via Browser Find the IP address of the camera. Call out OSD menu and select “System” > “Information”. Open the browser and enter the IP address of the camera. The PC/laptop is required an internet access. -
Page 26: Live View
Live View In live view, the user can setup zoom in/out, preset, focus (Auto, Manual, One push, and Focus Near Limit), the speed of zoom, pan-tilt, and preset and view preset. Pan-Tilt-Zoom Control To operate the PTZ Camera motion. , and to adjust the camera view position and use zoom. -
Page 27: Focus
Focus Switch to auto (AF) or manual (MF) focus. The manual focus use + and – to adjust focus. Press “+” to adjust focus to the far end and focusing on a far subject; press “-“to adjust focus to near end and focusing on a near subject. -
Page 28: Preset
Preset Setup preset position and view preset position. 1. Select the “Preset” tab in live view interface. 2. Use , and to adjust camera view position. 3. Enter preset position number (0~255) in Save Preset column and select “Save” to save the position. -
Page 29: Camera Settings
Camera Settings Exposure Setup the exposure type -- Full auto, Iris priority, Shutter priority, or manual. Image Process Setup the white balance, saturation, contrast, sharpness, noise filter, power frequency, flip, and mirror. Select the “Image Process” tab in camera setting interface. -
Page 30: Video & Audio
Video & Audio The user can setup Video Mode, Video output, Framerate, Bitrate, I-VOP internal, Encode type, Rate control, Audio input type, Audio volume, and Sampling Rate. (*NDI function only support of PTZ310N/PTZ330N) Video mode in the stream only, the frame rate is up to 60fps and in USB+ Streaming mode is up to 30fps. - Page 31 NDI Function: The PTZ310N and PTZ330N both support “NDI function”. Please refer to the following description to setup NDI function. The NDI function is enabled in default. Select Video & Audio. In Video & Audio page, you can see the “NDI” is enabled in Video mode section.
- Page 32 Set the identity name for display on NDI interface. Select System > Camera ID(NDI). Enter the name as user wanted. The maximum character is 10. After entering the name, select the Set button to save and manually restart the PTZ camera for the settings to take effect. The following characters can be displayed for camera ID: Numeric characters 0123456789...
-
Page 33: Network
Network Setup IP address of camera – DHCP or static IP, netmask, gateway, and DNS. After setting, select “Confirm” to apply settings. RTMP Setting Setup for uploading the camera’s live view to the broadcasting platform (ex: Youtube). Get the RTMP server URL and stream key from the broadcasting platform and enter in “Server URL” and “Stream key”... -
Page 34: Advanced Setting
Advanced Setting SmartShoot Setup the block area for the camera to detect object and follow-up the object to move the camera when the object is in block area that user has set. 1. In the advanced setting interface, select the “Number of block” (2, 3, or 4). Each block is corresponding to one preset position. - Page 35 2. Set the preset positions in order (preset 6 to preset 9). Use direction control panel to move the camera to wanted position and select “save” to save the preset position. And, a snapshot of the preset image will show at corresponding image display box. Repeat the step to set another preset position.
-
Page 36: Smartframe
SmartFrame Press button 2 seconds on the remote controller, it will enable to auto focus the face of object and zoom in. Select “Enable” to activate the function. System The system information of Camera is displayed in this page, including Model name, IP address, MAC address, and firmware version. -
Page 37: Firmware Update
Firmware Update Web Firmware Update 1. Download the newest firmware from http://www.aver.com/download-center 2. Connect to the camera through the browser. 3. Select System > Upgrade firmware > Browse. 4. Select the firmware and select the “Upgrade” button. After updating, refresh the browser, and the password will set to default (), please setting your... -
Page 38: Rs232 Command Table
RS232 Command Table Command Set Command Command Packet Comments I/F Clear IF_Clear Broardcast 88 01 00 01 FF Zoom Control CAM_Zoom Stop 8x 01 04 07 00 FF CAM_Zoom Tele (Standard) 8x 01 04 07 02 FF CAM_Zoom Wide (Standard) 8x 01 04 07 03 FF p=0 (Low) to 7 (High) CAM_Zoom... - Page 39 Command Set Command Command Packet Comments Normal Auto CAM_WB Auto 8x 01 04 35 00 FF Indoor mode CAM_WB Indoor 8x 01 04 35 01 FF Out door mode CAM_WB Outdoor 8x 01 04 35 02 FF One Push WB mode CAM_WB One Push WB 8x 01 04 35 03 FF...
- Page 40 Command Set Command Command Packet Comments Back Light Comp ON/OFF CAM_BackLight 8x 01 04 33 02 FF CAM_BackLight 8x 01 04 33 03 FF Mirror Image ON/OFF CAM_LR_Reverse On 8x 01 04 61 02 FF CAM_LR_Reverse Off 8x 01 04 61 03 FF pp: 0x00 To 0xFF CAM_Memory Reset...
- Page 41 Command Set Command Command Packet Comments SYS_Menu Menu Enter 8x 01 7E 01 02 00 01 FF menu enter pq 00→1920 x 1080p/59.94 Video Format 8x 01 7E 01 1E 0p 0q FF pq 02→1920 x 1080p/29.97 Change 4)_ (Video pq 03→1920 x 1080i/59.94 System Rotary pq 04→1280 x 720p/59.94...
- Page 42 Command Command Packet Comments Factory Reset System Factroy Reset 8x 01 04 3F 03 00 FF p: 0 to 2, 0:150/s, 1:250/s, 2: Preset Speed Set Preset Speed 8x 01 06 20 0p FF 300/s (Lumens) p:0 to 5, (AVer)
-
Page 43: Specification
Specification PTZ310/310W/PTZ310N Camera 1/2.8” 1080p 60fps Exmor CMOS Image sensor Effective picture elements Approx. 2.1 Megapixels Auto, 1080p/60, 1080p/59.94, 1080p/50, 1080i/60, 1080i/59.94, Output Resolution 1080i/50, 1080p/30, 1080p/29.97, 1080p/25, 720p/60, 720p/59.94, 720p/50 Minimum Illumination 0.4 lux (IRE50, F1.6, 30FPS) S/N ratio >... - Page 44 Camera Camera Control - Interface RS232 (DIN8) / RS422 (RJ45) Camera Control - Protocol VISCA/PELCO-D (RS232/RS422/IP), CGI (IP) Image Processing Noise Reduction (2/3D), Flip, Mirror Power Frequency Auto/50Hz/60Hz Audio Audio - Channel 2ch (stereo) Audio - Codec AAC-LC (48/44.1.32.24K), G.711/PCM (16K/8K) Audio - Sample Rate 48/44.1/32/24/16/8Khz Interface...
- Page 45 IP Streaming Resolution 1920x1080, 1280x720, 960x540, 640x480 Network Video Compress H.264 (High Profile), MJPEG Format Maximum Frame Rate H.264: 60fps (1920x1080), MJPEG: 30fps (1920x1080) Bit-rate Control Mode VBR/CBR (selectable) Range of Bit-rate setting 512Kbps ~ 32Mbps Network Interface 10/100/1000Base-T Multi-stream Capability IPv4, TCP, UDP, ARP, IMCP, IGMP, HTTP, DHCP, RTP/RTCP, Network Protocol RTSP, VISCA over IP...
-
Page 46: Ptz330/330W
PTZ330/330W/PTZ330N Camera 1/2.8” 1080p 60fps Exmor CMOS Image sensor Effective picture elements Approx. 2.1 Megapixels Auto, 1080p/60, 1080p/59.94, 1080p/50, 1080i/60, 1080i/59.94, Output Resolution 1080i/50, 1080p/30, 1080p/29.97, 1080p/25, 720p/60, 720p/59.94, 720p/50 Minimum Illumination 0.3 lux (IRE50, F1.6, 30FPS) S/N ratio > 50dB... - Page 47 Camera Camera Control - Protocol VISCA/PELCO-D (RS232/RS422/IP), CGI (IP) Image Processing Noise Reduction (2/3D), Filp, Mirror Power Frequency Auto/50Hz/60Hz Audio Audio - Channel 2ch (stereo) Audio - Codec AAC-LC (48/44.1.32.24K), G.711/PCM (16K/8K) Audio - Sample Rate 48/44.1/32/24/16/8Khz Interface Video Output 3G-SDI, HDMI, IP Audio Output 3G-SDI, HDMI, IP...
- Page 48 General Accessory Remote control, 12V/5A power adapter; IP Streaming Resolution 1920x1080, 1280x720, 960x540, 640x480 Network Video Compress Format H.264 (High Profile), MJPEG Maximum Frame Rate H.264: 60fps (1920x1080), MJPEG: 30fps (1920x1080) Bit-rate Control Mode VBR/CBR (selectable) Range of Bit-rate setting 512Kbps ~ 32Mbps Network Interface 10/100/1000Base-T...
Need help?
Do you have a question about the PTZ330 and is the answer not in the manual?
Questions and answers