Haulotte OPTIMUM 8 Training Manual
Hide thumbs
Also See for OPTIMUM 8:
- Maintenance book (238 pages) ,
- Operator's manual (124 pages) ,
- Operator's manual (132 pages)

Related Manuals for Haulotte OPTIMUM 8


Summary of Contents for Haulotte OPTIMUM 8
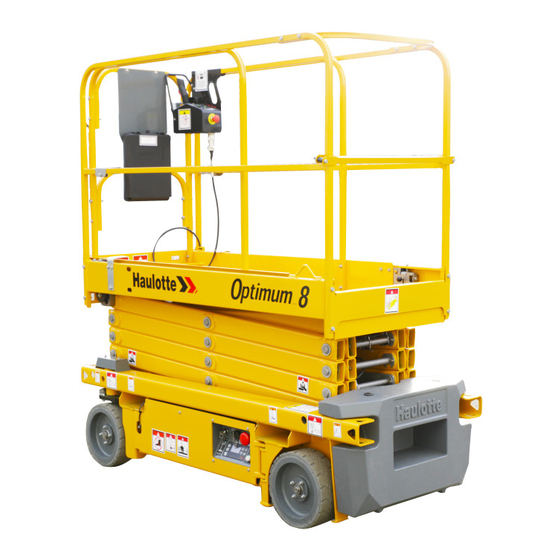
- Page 1 Training manual Training manual OPTIMUM 8 - OPTIMUM 1931 E 4000595920 E 05.17 USA /...
- Page 2 OPTIMUM 8 - OPTIMUM 1931 E 4000595920 E 05.17 USA /...
-
Page 3: Table Of Contents
Layout ..........2.3.2 - HAULOTTE Activ'Screen ......2.3.2.1 - LCD screen . - Page 4 Training manual 2 - List of actuators and sensors ... . . 2.1 - Sensors and actuators......... 2.2 - Sensors detail.
- Page 5 Training manual STUDY OF THE HYDRAULIC SCHEMA 1 - Hydraulic units ......1.1 - General overview ..........1.1.1 - The hydraulic components .
- Page 6 Training manual SIMPLIFIED BREAKDOWN GUIDE 1 - No start ....... 2 - No lift .
-
Page 7: Foreword
MAINTENANCE AND REPAIR OPERATIONS ON YOUR HAULOTTE® MACHINE MAY ONLY BE PERFORMED BY TRAINED AND EXPERIENCED TECHNICIANS You are in possession of the summary document provided during the HAULOTTE® technical training programme. It will allow you to find the information necessary for performing maintenance and repairs on your HAULOTTE®... -
Page 8: Revision
OPTIMUM 8 - OPTIMUM 1931 E - Foreword Section E : The adjustments It will include the following elements : • The way to use/connect the console of diagnostic. • The list of main menus and its architecture. • The list of alarms with their explanation. -
Page 9: Main Features And Functions
OPTIMUM 8 - OPTIMUM 1931 E - Main features and functions Main features and functions 1 - Models description REGULATION MODELS ANSI and CSA standards OPTIMUM 1931 E CE, AS and EAC standards OPTIMUM 8 4000595920 E 05.17 USA /... -
Page 10: Primary Machine Components
OPTIMUM 8 - OPTIMUM 1931 E - Main features and functions 2 - Primary machine components 2.1 - WORKING AREA / RANGE OF MOTION OPTIMUM 8 - OPTIMUM 1931 E 4000595920 E 05.17 USA /... -
Page 11: Transportation
OPTIMUM 8 - OPTIMUM 1931 E - Main features and functions 2.2 - TRANSPORTATION 2.2.1 - Machine layout 4000595920 E 05.17 USA /... -
Page 12: Ground Control Box
OPTIMUM 8 - OPTIMUM 1931 E - Main features and functions 2.3 - GROUND CONTROL BOX 2.3.1 - Layout General view ACTIV’ Screen Controls and indicators MARKING DESCRIPTION FUNCTION Pulled out : Ground control box energized E-stop button Pushed in : De-energizes control system... -
Page 13: Haulotte Activ'screen
OPTIMUM 8 - OPTIMUM 1931 E - Main features and functions 2.3.2 - HAULOTTE Activ'Screen Upon starting and during operation of the machine, the LCD screen "Activ'Screen" located on the ground control box displays in real time the machine operating status. -
Page 14: Lcd Screen
OPTIMUM 8 - OPTIMUM 1931 E - Main features and functions 2.3.2.1 - LCD screen At startup At startup with the ground or platform controls selected; system initiates a self check : • Bar gets filled up. • Home screen comes on with status icon of the machine - okay to proceed functioning the controls. - Page 15 OPTIMUM 8 - OPTIMUM 1931 E - Main features and functions • After pressing on SYMBOL DESCRIPTION Software part number Software version + Screen software version + Screen version Screen identification + Screen software version Machine serial number displayed • After again pressing on •...
- Page 16 OPTIMUM 8 - OPTIMUM 1931 E - Main features and functions Alarm status Alarm status displayed as applicable - samples shown below • Tilt • Overload • Low battery 4000595920 E 05.17 USA /...
- Page 17 OPTIMUM 8 - OPTIMUM 1931 E - Main features and functions • Present fault • Platform control box E-stop button pressed in (de-energized) 4000595920 E 05.17 USA /...
-
Page 18: Platform Control Box
OPTIMUM 8 - OPTIMUM 1931 E - Main features and functions 2.4 - PLATFORM CONTROL BOX 2.4.1 - Layout General view 4000595920 E 05.17 USA /... - Page 19 OPTIMUM 8 - OPTIMUM 1931 E - Main features and functions Controls and indicators MARKING NAME DESCRIPTION FUNCTION HL800 Tilt indicator Machine on excessive slope HL802 Overload indicator Platform overloaded SA907 Horn button Move upwards and hold to activate horn...
- Page 20 OPTIMUM 8 - OPTIMUM 1931 E - Main features and functions Notes 4000595920 E 05.17 USA /...
-
Page 21: Study Of The Wiring Diagram
OPTIMUM 8 - OPTIMUM 1931 E - Study of the wiring diagram Study of the wiring diagram 1 - System architecture 4000595920 E 05.17 USA /... -
Page 22: Power Circuit
OPTIMUM 8 - OPTIMUM 1931 E - Study of the wiring diagram 1.1 - POWER CIRCUIT 4000595920 E 05.17 USA /... -
Page 23: Logic Circuit
OPTIMUM 8 - OPTIMUM 1931 E - Study of the wiring diagram 1.2 - LOGIC CIRCUIT 4000595920 E 05.17 USA /... -
Page 24: Drive Circuit
OPTIMUM 8 - OPTIMUM 1931 E - Study of the wiring diagram 1.3 - DRIVE CIRCUIT The traction is controlled by 2 asynchronous 3 phases motors (24VAC - 1KW). Each motor is piloted by one variator ( COMBIACX master for RR motor and ACEX slave for RL motor) through CAN - BUS network. - Page 25 OPTIMUM 8 - OPTIMUM 1931 E - Study of the wiring diagram The whole unit is located in the chassis (rear side as shown below) 4000595920 E 05.17 USA /...
-
Page 26: Function Of The Variators
I/O too. • The software upload process is done by connecting the DIAG PAD console or HAULOTTE DIAG application. • The ACEX variator (slave) controls the traction of RL motor (no need to upload software on it). -
Page 27: Control Of The Traction
OPTIMUM 8 - OPTIMUM 1931 E - Study of the wiring diagram 1.3.1.1 - Control of the traction 1.3.1.2 - Control of the pump (other movements) 4000595920 E 05.17 USA /... -
Page 28: Details Of Sensors
OPTIMUM 8 - OPTIMUM 1931 E - Study of the wiring diagram 1.3.1.3 - Details of sensors • The speed rotation of each motor is controlled through an encoder with 2 signals shifted at 90° each and 48 impulses per round. -
Page 29: Detail Of The Connections
OPTIMUM 8 - OPTIMUM 1931 E - Study of the wiring diagram 1.3.1.5 - Detail of the connections 4000595920 E 05.17 USA /... - Page 30 OPTIMUM 8 - OPTIMUM 1931 E - Study of the wiring diagram Detail of the connectors on variators. For any connector, the pin 1 always starts at the lower right corner as shown below. Connector are labelled as follow : •...
-
Page 31: Scissors Arm
OPTIMUM 8 - OPTIMUM 1931 E - Study of the wiring diagram 1.3.2 - Scissors arm The arms stack are independent and equipped with standards axles secured by clips and ring (see below). 4000595920 E 05.17 USA /... -
Page 32: List Of Actuators And Sensors
OPTIMUM 8 - OPTIMUM 1931 E - Study of the wiring diagram 2 - List of actuators and sensors 2.1 - SENSORS AND ACTUATORS Sensors and actuators 4000595920 E 05.17 USA /... - Page 33 OPTIMUM 8 - OPTIMUM 1931 E - Study of the wiring diagram NAME DESCRIPTION SP400 Pressure sensor SQ144 Pothole limit sensor SQ145 Pothole limit sensor SQ800 Tilt sensor SR150 Steering potentiometer SR420 Tilt sensor low position SR722 Arm angle sensor...
-
Page 34: Sensors Detail
OPTIMUM 8 - OPTIMUM 1931 E - Study of the wiring diagram 2.2 - SENSORS DETAIL 2.2.1 - Limit switchs for potholes MARKING FUNCTION DESCRIPTION SQ144 Sensors = 1 when potholes are retracted SQ145 4000595920 E 05.17 USA /... -
Page 35: Steering Potentiometer
OPTIMUM 8 - OPTIMUM 1931 E - Study of the wiring diagram 2.2.2 - Steering potentiometer MARKING FUNCTION DESCRIPTION Value 2.5 kΏ, supply in 12 VDC (coming from ACEX variator) Before to launch the calibration, the pre-setting has to be done at mid-... -
Page 36: Angle Transducers
OPTIMUM 8 - OPTIMUM 1931 E - Study of the wiring diagram 2.2.3 - Angle transducers MARKING FUNCTION DESCRIPTION Analogic sensor (0.5/4.5VDC), detection of low position SR420 Value adjustable according to scissors angle (~ 74 – 535 pts) Calibration system angle/pressure through consoles or active screen... -
Page 37: Pressure Transducer
OPTIMUM 8 - OPTIMUM 1931 E - Study of the wiring diagram 2.2.4 - Pressure transducer MARKING FUNCTION DESCRIPTION Analogic transducer (4-20mA), value variable depends of the pressure on SP400 big chamber of the lifting cylinder Calibration system angle/pressure through consoles or active screen 4000595920 E 05.17... -
Page 38: Slope Sensor
OPTIMUM 8 - OPTIMUM 1931 E - Study of the wiring diagram 2.2.5 - Slope sensor MARKING FUNCTION DESCRIPTION Tilt Y = 1.5° / X =3° (wire 12 = Vbat if machine on flat surface) SQ800 1=red=+Batt / 2=white=signal / 3=black=GND 2.2.6 - Battery charger... -
Page 39: Fuses And Relays
OPTIMUM 8 - OPTIMUM 1931 E - Study of the wiring diagram 2.2.7 - Fuses and relays MARKING FUNCTION DESCRIPTION Protection electrovalve circuit (10A) Protection main circuit (10A) Protection accessories circuit (10A) SA103 Toggle switch for manual brake release function... -
Page 40: Actuators And Their Location
OPTIMUM 8 - OPTIMUM 1931 E - Study of the wiring diagram 2.3 - ACTUATORS AND THEIR LOCATION 2.3.1 - List of actuators In the following tables : • The column n°2 indicates the position on the connector on modules (if required). -
Page 41: Fuses
OPTIMUM 8 - OPTIMUM 1931 E - Study of the wiring diagram 2.3.3 - Fuses FUSES NAME LOCATION CONNECTOR FUNCTION FU1A 01 - 03 Protection ACEX variator (125 A) FU1C 01 - 07 Protection COMBIACX variator (300 A) 01 - 08... - Page 42 OPTIMUM 8 - OPTIMUM 1931 E - Study of the wiring diagram SENSORS NAME LOCATION CONNECTOR FUNCTION Pressure transducer 4 - 20 mA located in large SP400 02 - 06 CXC.9 chamber of lifting cylinder (14) SQ144 / SQ145 02 - 18 AXA.4...
-
Page 43: Outputs
OPTIMUM 8 - OPTIMUM 1931 E - Study of the wiring diagram 2.3.5 - Outputs RELAYS-MOTORS NAME LOCATION CONNECTOR FUNCTION 01 - 07 Main relay for commands (115) 02 - 17 AXB.7 Horn command (70) 02 - 20 AXA.8 Flashing light command (89) 02 - 10 CXB.1/5... - Page 44 OPTIMUM 8 - OPTIMUM 1931 E - Study of the wiring diagram BUZZER AND LIGHTS NAME LOCATION CONNECTOR FUNCTION HA901 05 - 13 CXA.9 Buzzer (04) HA907 03 - 13 Horn (184) EL901/B 06 - 05 Option flashing light (32)
-
Page 45: Cut Out Conditions Of Every Function
OPTIMUM 8 - OPTIMUM 1931 E - Study of the wiring diagram 2.4 - CUT OUT CONDITIONS OF EVERY FUNCTION 2.4.1 - Glossary MARKING DESIGNATION Down Left Right F/FWD Forward REV/B Reverse/backward SETP Setpoint A IN Analogic input D IN... -
Page 46: Power Supply/Commands
OPTIMUM 8 - OPTIMUM 1931 E - Study of the wiring diagram 2.4.2 - Power supply/commands N.B.-:- • The diagnostic menu is very important on this model as it will permit to the technician to focuse only on the dysfunction encountered and then save time to repair the machine. - Page 47 OPTIMUM 8 - OPTIMUM 1931 E - Study of the wiring diagram Explanation of the cinematic Explanation of the Cuttings function This is valid for every movement including drive mode. CUT-OFF CONDITIONS DESCRIPTION Enable General movement deactivation General General Inhibition...
- Page 48 OPTIMUM 8 - OPTIMUM 1931 E - Study of the wiring diagram REQUIREMENTS DEFINITION Machine is powered ON with key SA901 of lower control box if no emergency stop is pushed (EMSTOP=ON and PowerON=1). At power on, the relays close : SB801=ON & KAH=ON •...
-
Page 49: Drive
OPTIMUM 8 - OPTIMUM 1931 E - Study of the wiring diagram 2.4.3 - Drive 2.4.3.1 - Validation REQUIREMENTS DEFINITION The drive movement happens relative to the activated panel, in the specified direction and set point and DSV01 regarding to validation and slowdown conditions : SETP[Drive]=FWD|N|REV:[0-100]%... - Page 50 OPTIMUM 8 - OPTIMUM 1931 E - Study of the wiring diagram REQUIREMENTS DEFINITION CUT-OFF TILT CUT-OFF CONDITIONS Tilt activated with unfolded machine and tilt cut-off DSV03 Tilt activated (some countries or tilt safety configuration) out of production mode REQUIREMENTS...
- Page 51 OPTIMUM 8 - OPTIMUM 1931 E - Study of the wiring diagram REQUIREMENTS DEFINITION Following limits are applied on the set point (SETP[Drive]): DIRECTIONS MOVEMENT SET POINT LIMIT CONDITIONS Unfolded machine (micro speed) and not SPEED[uS Drive Fwd] SPEED[uS Drive Rev] masked DSV04.2...
-
Page 52: Steering
OPTIMUM 8 - OPTIMUM 1931 E - Study of the wiring diagram 2.4.4 - Steering 2.4.4.1 - Validation REQUIREMENTS DEFINITION The steering movement happens in the specified direction and set point, regarding to validation and slow STV01 down conditions : SETP[Steering]=LEFT|N|RIGHT:[0-100]%... - Page 53 OPTIMUM 8 - OPTIMUM 1931 E - Study of the wiring diagram REQUIREMENTS DEFINITION CUT-OFF TILT CUT-OFF CONDITIONS Tilt activated with unfolded machine and tilt cut-off STV03 Tilt activated (some countries or tilt safety configuration) out of production mode REQUIREMENTS...
-
Page 54: Actuators
OPTIMUM 8 - OPTIMUM 1931 E - Study of the wiring diagram REQUIREMENTS DEFINITION STV04 There is not limitation of steering set point 2.4.4.2 - Actuators REQUIREMENTS DEFINITION The formatted control (CTRL[Steering]) is applied on the actuators driving the movement... -
Page 55: Arm
OPTIMUM 8 - OPTIMUM 1931 E - Study of the wiring diagram 2.4.5 - Arm 2.4.5.1 - Validation REQUIREMENTS DEFINITION Steering movements happen in the specified direction and set point regarding to validation and slowdown AMV01 conditions : SETP[Arm]=UP|N|DOWN:[0-100]% REQUIREMENTS... - Page 56 OPTIMUM 8 - OPTIMUM 1931 E - Study of the wiring diagram REQUIREMENTS DEFINITION CUT-OFF TILT CUT-OFF CONDITIONS Tilt activated with unfolded machine and tilt cut-off AMV03 Tilt activated (some countries or movement tilt safety option) REQUIREMENTS DEFINITION CUT-OFF REACH LIMIT CUT-OFF CONDITIONS...
- Page 57 OPTIMUM 8 - OPTIMUM 1931 E - Study of the wiring diagram REQUIREMENTS DEFINITION Following limits are applied on the set point ((SETP[Arm])) DIRECTIONS MOVEMENT SET POINT LIMIT CONDITIONS Tilt and machine unfolded AMV04 Chassis control box active and load management calibration not in...
-
Page 58: Actuators
OPTIMUM 8 - OPTIMUM 1931 E - Study of the wiring diagram 2.4.5.2 - Actuators REQUIREMENTS DEFINITION The formatted control (CTRL[Arm]) is applied on the actuators driving the movement Raise movement : • Hydraulic pump guarantees the proportionality of raise movement: control pump value (CTRL[PumpArm]) is computed from the arm raise value (CTRL[Arm]). - Page 59 OPTIMUM 8 - OPTIMUM 1931 E - Study of the wiring diagram REQUIREMENTS DEFINITION After a movement of raise or descent, if the country is not USA, the arm cylinder valve YV420 is controlled at low values to suppress the pressure due to dynamics and then enable a reliable and repetitive measure of pressure for load management system.
-
Page 60: Brake Release
OPTIMUM 8 - OPTIMUM 1931 E - Study of the wiring diagram 2.4.6 - Brake release REQUIREMENTS DEFINITION The release of brake is controlled : • Automatically during the normal operating mode. • Or on special conditions during test mode. -
Page 61: Potholes
OPTIMUM 8 - OPTIMUM 1931 E - Study of the wiring diagram 2.4.7 - Potholes 2.4.7.1 - Validation REQUIREMENTS DEFINITION Steering movements happen in the specified direction and set point regarding to validation and slowdown conditions. The potholes set point is automatically computed based on the control of drive movement or arm movement : CTRL[Drive]≠N:0 &... - Page 62 OPTIMUM 8 - OPTIMUM 1931 E - Study of the wiring diagram REQUIREMENTS DEFINITION CUT-OFF TILT CUT-OFF CONDITIONS POV03.1 Tilt REQUIREMENTS DEFINITION CUT-OFF REACH LIMIT CUT-OFF CONDITIONS POV03.1 Reach limit REQUIREMENTS DEFINITION CUT-OFF FAILURE CUT-OFF CONDITIONS POV03.1 Power contactor stuck...
-
Page 63: Actuators
OPTIMUM 8 - OPTIMUM 1931 E - Study of the wiring diagram 2.4.7.2 - Actuators REQUIREMENTS DEFINITION The formatted control (CTRL[Steering]) is applied on the actuators driving the movement CTRL Pump YV121 YV122 YV903 CTRL[PumpSteering] NEUTRAL CTRL[PumpSteering] Potholes extension :... - Page 64 OPTIMUM 8 - OPTIMUM 1931 E - Study of the wiring diagram Notes 4000595920 E 05.17 USA /...
-
Page 65: Study Of The Hydraulic Schema
OPTIMUM 8 - OPTIMUM 1931 E - Study of the hydraulic schema Study of the hydraulic schema 1 - Hydraulic units 1.1 - GENERAL OVERVIEW 1.1.1 - The hydraulic components 1.1.1.1 - Pump unit MARKING FUNCTION DESCRIPTION YV903 By-pass valve (pump is in pressure) -
Page 66: Selection Valve Potholes/Steering
OPTIMUM 8 - OPTIMUM 1931 E - Study of the hydraulic schema 1.1.1.2 - Selection valve potholes/steering MARKING FUNCTION DESCRIPTION Valve 6 ways / 2 positions for selection potholes or steering (priority for YV120 potholes) 4000595920 E 05.17 USA /... -
Page 67: Lifting Cylinder Valve
OPTIMUM 8 - OPTIMUM 1931 E - Study of the hydraulic schema 1.1.1.3 - Lifting cylinder valve MARKING FUNCTION DESCRIPTION Valve PWM (Pulse Width Modulation) lift/descent of platform (Slow YV420 descent when PF < 3 meters. Information coming from angle sensor... - Page 68 OPTIMUM 8 - OPTIMUM 1931 E - Study of the hydraulic schema Notes 4000595920 E 05.17 USA /...
-
Page 69: Adjustments With Diag Pad Console
The adjustments/parameters settings /list of alarms, calibration of the machine are accessible on on-board activ screen console, as well as this console below or Haulotte Diag application installed in laptop. The VCI (Vehicle Computer Interface) adapter could be connected from any controls (turret or in platform) using wireless or cable connection. -
Page 70: List Of Menus
OPTIMUM 8 - OPTIMUM 1931 E - Adjustments 2 - List of menus See end of manual 2.1 - MACHINE SETTINGS 2.1.1 - Speeds and ramps See end of manual : Annex 1 2.1.2 - Options See end of manual : Annex 2 2.1.3 - Configurations... -
Page 71: Failures List
OPTIMUM 8 - OPTIMUM 1931 E - Adjustments 3 - Failures list • For any type A (ACTIVE) failure code, it will appear on display in lower control and the warning light will flicker on upper controls (see below). • For any type D (DETECTED) failure code, it will also appear on display in lower control and the warning light will flicker on upper controls. -
Page 72: List Of Failures Per Category
OPTIMUM 8 - OPTIMUM 1931 E - Adjustments 3.1 - LIST OF FAILURES PER CATEGORY FAILURES DESCRIPTION INVERTER COMBIACX: Failure in the high current hardware protection circuit. • Internal fault. • Replace the inverter. COMBIACX: When no current is applied to the traction motor, the current feedbacks are out of permitted standby range. - Page 73 OPTIMUM 8 - OPTIMUM 1931 E - Adjustments FAILURES DESCRIPTION COMBIACX: The controller has reached thermal cutout (temperature of the controller base plate is higher than 85°C). • Power down and allow to cool. • Do not operate in ambient temperatures over to 60°C.
- Page 74 OPTIMUM 8 - OPTIMUM 1931 E - Adjustments FAILURES DESCRIPTION ACEX: Short circuit detected on electromechanical brake or main contactor output (overcurrent). • Main contactor drive coil : Check connections and wiring for interruptions between controller and coil. • Motor brake coil : Check connections and wiring for interruptions between controller coil.
- Page 75 OPTIMUM 8 - OPTIMUM 1931 E - Adjustments FAILURES DESCRIPTION CONTACTOR The driver of main contactor drive coil is shorted, or its coil is disconnected. • Ensure there is no short or low-impedance pull-down between MC and -Vbatt. • Check connections and wiring for interruptions of MC DRIVE coil.
- Page 76 OPTIMUM 8 - OPTIMUM 1931 E - Adjustments FAILURES DESCRIPTION JOYSTICKS Analog signal SM901 is out of allowed range : F05.01 --> SM901 < 0.2V | SM901 > 4.8V Arm/Drive Incoherence between analog signal and out of neutral signals for SM901 joystick : joystick -->...
- Page 77 OPTIMUM 8 - OPTIMUM 1931 E - Adjustments FAILURES DESCRIPTION SENSORS COMBIACX: The motor temperature sensor is not correctly connected or damaged. F07.05 • Key OFF/ON. • Check wiring. Motor temperature ACEX: The motor temperature sensor is not correctly connected or damaged.
- Page 78 OPTIMUM 8 - OPTIMUM 1931 E - Adjustments FAILURES DESCRIPTION ELECTRIC CIRCUIT COMBIACX: Power capacitors voltage does not increase at start-up. • Ensure that no external device is connected to the batteries. • Check battery, power cables and connections. COMBIACX: The controller detects an overvoltage or under voltage condition.
- Page 79 OPTIMUM 8 - OPTIMUM 1931 E - Adjustments FAILURES DESCRIPTION Two panels are selected : Check selector key : F08.07 --> SA901T=ON & S0901PF=ON Circuit No panel is selected : Check selector key : selector --> SA901T=OFF & S0901PF=OFF COMBI ACX: The PEV connector (B2) is not connected to the battery or the voltage is different.
- Page 80 OPTIMUM 8 - OPTIMUM 1931 E - Adjustments FAILURES DESCRIPTION FUNCTIONS F10.14 Steering Steer angle is not calibrated. angle not Perform steer angle calibration. calibrated F10.16 Arm angle is not calibrated. Arm angle not Perform arm angle calibration. calibrated FAILURES...
- Page 81 OPTIMUM 8 - OPTIMUM 1931 E - Adjustments FAILURES DESCRIPTION INTERNAL FAULTS For all failure details : • Check wiring. • Check the Can Bus connections. • Ensure that all the connectors pins are properly in place and the connectors are free of moisture or oxidation.
- Page 82 OPTIMUM 8 - OPTIMUM 1931 E - Adjustments FAILURES DESCRIPTION Model not set (not possible => always Optimum8) Model = Not Set Country not set : Set country Country = Not Set Serial number = 0: set serial number F12.05 SerialNumber = "000000"...
- Page 83 OPTIMUM 8 - OPTIMUM 1931 E - Adjustments FAILURES DESCRIPTION ACEX: Software watchdog active. • Key OFF/ON. ACEX: Problem on the Analog/Digitial conversion of micro controller. • Key OFF/ON. ACEX: Watchdog circuit output became high due to hardware or software problem (WDG1).
- Page 84 OPTIMUM 8 - OPTIMUM 1931 E - Adjustments FAILURES DESCRIPTION SWITCHES Incoherence between the 2 signals of front steering switch of platform box (both active) : F13.02 --> SM901L = 1 & SM901R = 1 Platform switches Incoherence between the 2 signals of movement selection : Check switches -->...
- Page 85 OPTIMUM 8 - OPTIMUM 1931 E - Adjustments FAILURES DESCRIPTION ENGINE COMBIACX: Motor maximum temperature reached. • Check the thermal sensor wiring and ohm value. • Improve the air cooling of the motor. F16.01 • If the warning is present when the motor is cool, then the problem is inside the controller : Replace it.
- Page 86 OPTIMUM 8 - OPTIMUM 1931 E - Adjustments FAILURES DESCRIPTION COMBIACX: During drive, motor output voltage is lower than expected. • Check the motor power wiring and connections. • Check the motor phases for proper insulation with the chassis. • Check that MC DRIVE power contact close properly, with a good contact.
-
Page 87: Maximum Height Adjustment
OPTIMUM 8 - OPTIMUM 1931 E - Adjustments 4 - Maximum height adjustment 4000595920 E 05.17... -
Page 88: Cutback Speed Position Height Adjustment
OPTIMUM 8 - OPTIMUM 1931 E - Adjustments 5 - Cutback speed position height adjustment 4000595920 E 05.17 USA /... -
Page 89: Load Management System
OPTIMUM 8 - OPTIMUM 1931 E - Adjustments 6 - Load management system 6.1 - CALIBRATION PROCEDURES N.B.-:- Before starting the calibration, check that the sensors are well mounted mechanically (Lift the scissors in order to get access to theses sensors). - Page 90 OPTIMUM 8 - OPTIMUM 1931 E - Adjustments Pre setting of the transducers MARKING SENSORS LOW POSITION UPPER POSITION SR420 ~ 74 pts ~ 530 pts SR722 ~ 420 pts ~ 530 pts 4000595920 E 05.17 USA /...
-
Page 91: Steering
OPTIMUM 8 - OPTIMUM 1931 E - Adjustments 6.2 - STEERING The calibration is required for multiple reasons : • When the variator COMBIACX or one component linked to the steering has been changed. • When the pump doesn't stop when steering at full lock (left or right). -
Page 92: Steering Calibration Procedure
OPTIMUM 8 - OPTIMUM 1931 E - Adjustments 6.2.1 - Steering calibration procedure Preadjust the potentiometer so as to obtain the "steer angle" parameter at 0° to Activ’ Screen display ANGLE SENSORS CALIBRATION VALID RANGE V (approx.) Left (-75.19°) SR150 [150 ;... -
Page 93: Calibration Arm Angle Sensors (Honeywell Sensors)
OPTIMUM 8 - OPTIMUM 1931 E - Adjustments 6.3 - CALIBRATION ARM ANGLE SENSORS (HONEYWELL SENSORS) ANGLE SENSORS CALIBRATION VALID RANGE V (approx.) SR420 Low (0°) [60 ; 160] [0.615 ; 1.641] SR722 Low (0°) [320 ; 420] [3.283 ; 4.309] SR420 High (57°) -
Page 94: Calibration Arm Angle Sensors (Elobau Sensors)
OPTIMUM 8 - OPTIMUM 1931 E - Adjustments 6.4 - CALIBRATION ARM ANGLE SENSORS (ELOBAU SENSORS) ANGLE SENSORS CALIBRATION VALID RANGE V (approx.) SR420 Low (0°) [60 ; 160] [0.615 ; 1.641] SR722 Low (0°) [320 ; 420] [3.283 ; 4.309] SR420 High (57°) -
Page 95: Adjustment Of Pressures
OPTIMUM 8 - OPTIMUM 1931 E - Adjustments 7 - Adjustment of pressures 7.1 - MAIN PRESSURE The setting and minimess plug is unique for all movements. MARKING DESIGNATION VALUE Main pressure 180bar +-5b 7.2 - THE SPEEDS MARKING DESIGNATION... - Page 96 OPTIMUM 8 - OPTIMUM 1931 E - Adjustments Notes 4000595920 E 05.17 USA /...
-
Page 97: Simplified Breakdown Guide
OPTIMUM 8 - OPTIMUM 1931 E - Simplified breakdown guide Simplified breakdown guide This guide does not replace the cut out conditions described previously in this manual. It allows the technician to have a logical step of breakdown service, detailing the successive steps to be followed starting from general tips until the details. -
Page 98: No Drive
OPTIMUM 8 - OPTIMUM 1931 E - Simplified breakdown guide 3 - No drive • Toggle switch SA908. • Joystick SM901. • Foot pedal switch SB800( US only). • AC motor M370 - M371. • Brakes YB100 - YB101. • Temperature probes ST301 - ST302. -
Page 99: Version Summary
OPTIMUM 8 - OPTIMUM 1931 E - Version summary Version summary 1 - Version summary OPTIMUM 8 - STANDARDS WIRING DIAGRAM HYDRAULIC DIAGRAM OPTIMUM 1931E Standard version All countries 4000311260 4000349350 2 - List of schematics See end of manual... - Page 100 OPTIMUM 8 - OPTIMUM 1931 E - Version summary Notes USA / EN 4000595920 E 05.17...
- Page 136 OPTIMUM 8 - OPTIMUM 1931 E - Version summary Notes 4000595920 E 05.17 USA / GB...
Need help?
Do you have a question about the OPTIMUM 8 and is the answer not in the manual?
Questions and answers