Table of Contents
Advertisement
Advertisement
Table of Contents

Related Manuals for Hach HQ11d


Summary of Contents for Hach HQ11d
- Page 1 DOC022.53.80017 HQd Portable Meter 10/2017, Edition 6 User Manual...
-
Page 3: Table Of Contents
Table of Contents Specifications ....................................5 General information ..................................5 Safety information ....................................5 Use of hazard information .................................. 6 Precautionary labels ..................................6 Product overview ....................................6 Product components ..................................6 Installation ......................................7 Install the batteries ..................................... 7 Connect to AC power .................................. - Page 4 Table of Contents Print stored data ....................................14 Change the report options ................................ 15 Send data to a USB storage device ..............................15 Open data files on a PC ................................... 16 Data file description ..................................16 Remove column headers ................................. 18 Send data directly to a computer ..............................
- Page 5 Table of Contents Replacement parts and accessories ..........................26 Examples of printed reports ..............................28...
- Page 6 Table of Contents...
-
Page 7: Specifications
Specifications Specification Details Specifications are subject to change without notice. Connections Integrated USB type A (for USB flash memory device, printer, keyboard) and Integrated USB type B (for PC) Specification Details Dimensions 19.7 x 9.5 cm (7.75 x 3.75 in.) Temperature correction Off, automatic and manual (parameter dependent) Measurement display lock... -
Page 8: Use Of Hazard Information
The HQd series meters are available in 4 models: Indicates a potentially or imminently hazardous situation which, if not avoided, could result in death or serious injury. • HQ11d—pH/mV/ORP • HQ14d—conductivity, salinity, total dissolved solids (TDS), resistivity C A U T I O N •... -
Page 9: Installation
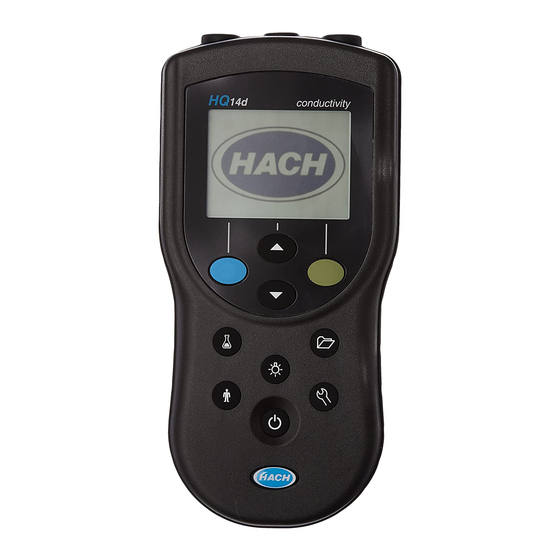
2300 mAH NiMH batteries will achieve 90% of instrument operation lifetime (before recharge) versus new alkaline batteries. Figure 2 Meter components (HQ11d, HQ14d and HQ30d models) N O T I C E To avoid potential damage to the meter from battery leakage, remove the meter batteries prior to extended periods of non-use. -
Page 10: Connect To Ac Power
1. Pull the release tab on the battery cover and the remove the cover. Connect to AC power 2. Install 4 AA alkaline or 4 AA nickel metal hydride (NiMH) batteries. D A N G E R Make sure that the batteries are installed in the correct polarity. Electrocution Hazard. -
Page 11: User Interface And Navigation
User interface and navigation Figure 4 AC power connection User interface Figure 5 Keypad description 1 USB storage device/printer/Qwerty 4 AC-DC power supply keyboard connection (USB 1 ON/OFF: turn on or turn off the 6 UP and DOWN key: scroll through peripheral) meter menus, enter numbers and letters... - Page 12 Figure 6 Single screen display Figure 7 Single-screen display—big-screen mode 1 Calibration status indicator 9 Time 1 Calibration status indicator 5 Main measurement unit 2 Main measurement value and unit 10 Date 2 IntelliCAL probe type and port 6 Display size icon 3 IntelliCAL probe type and port 11 Read (OK, Select) indicator...
-
Page 13: Navigation
Startup Figure 8 Dual-screen display Turn the meter on and off Push the key to turn on or turn off the meter. If the meter does not turn on, make sure that the batteries are properly installed or that the AC power supply is properly connected to an electrical outlet. -
Page 14: Connect A Probe
1. Push the key and select Date & Time. Figure 9 Probe connection 2. Update the time and date information: Option Description Format Select one of the formats below for the date and time. Use the keys to select from the format options. dd-mm-yyyy 24h dd-mm-yyyy 12h mm/dd/yyyy 24h... -
Page 15: About Sample Measurements
• the calibration is out of range Use an operator ID • the calibration results are outside acceptance criteria settings The operator ID tag associates measurements with an individual operator. All stored data will include the operator ID. About sample measurements 1. -
Page 16: View Stored Data
View stored data Print stored data The data log contains sample, calibration and check standard data. The The meter must connect to AC power to start the USB connection. Make most recent data point in the data log is tagged as Data Point 001. sure that the connection to AC power is made before the meter is powered on. -
Page 17: Change The Report Options
Change the report options Figure 10 Connection to the printer Printed reports for sample data can contain 1, 2 or 3 lines of information. Refer to Examples of printed reports on page 28 for further information. 1. Push the key. Select Report Options. 2. -
Page 18: Open Data Files On A Pc
Open data files on a PC Table 1 Spreadsheet column descriptions (continued) Column header name Data description and example values Data that has been downloaded to a USB storage device can be transferred to a computer. The data is sent in a text (.txt) file format. Probe Model Model number of probe, for example pHC101, CDC401, LDO101... - Page 19 Table 1 Spreadsheet column descriptions (continued) Table 1 Spreadsheet column descriptions (continued) Column header name Data description and example values Column header name Data description and example values Check Std Value Value of the check standard that was used to verify Cal Number of Std’s Number of standards used during calibration, for accuracy, for example: 7.00 pH–25 ºC (pH, temp-...
-
Page 20: Remove Column Headers
Advanced operation Remove column headers When transferred data is viewed in a spreadsheet program, the first row Security options of data contains headings to identify the type of data in each column. If an application or post-processing method is used that is incompatible The Security Options menu is used to protect the meter setup and with the headers, the column headers can be omitted. -
Page 21: Full Access Options Menu
1. Push the key and select Security Options. Table 2 Full Access Options (continued) 2. Change the settings as needed to allow or prevent menu access. Option Description Option Description Security options ON or OFF Security When Security Options is on, and a password has been Set password Options specified, the password is required to enable the Full... -
Page 22: Set The Display Options
Table 3 Operator access options Option Description Option Description Auto- To maximize battery life, set a time period after which the shutoff meter will automatically power off if no key is pushed (1, 2, 5, (Probe model) settings Only methods (if methods exist) can be selected. Refer 10, 30 min, 1 h, 2 h or never). -
Page 23: Set The Probe Calibration Reminder
3. Select one of the measurement modes. Set the probe calibration reminder Make sure that a probe is connected to the meter. Option Description Press to Read The sample is measured only when the GREEN/RIGHT key 1. Push the key and select the probe settings. under Read is pushed. -
Page 24: Prevent Data Log Overflow In Interval Mode
Interval measurements are suspended for calibrations, check standard View instrument information measurements or when the key is pushed. Interval measurements The instrument information menu shows specific information such as the resume when returning to the measurement screen. serial number for the meter or IntelliCAL (R) probe(s). 1. -
Page 25: Download Software Updates
4. Insert the USB storage device that contains the software update files 3. Plug the USB storage device into the USB/DC adapter before the into the USB/DC adapter. meter is powered on. 5. Turn on the meter. 4. Turn on the meter. The update process starts. -
Page 26: About Meter Configuration
turning off the meter and sending the entire measurement (including 17. Click Finish to complete the Found New Hardware Wizard for: HQd calibrations) to the PC or other information management system. Meter - Virtual Serial Port. 18. To make sure that the installation succeeded, go to Computer About meter configuration Management>Device Manager>Ports. -
Page 27: Troubleshooting
1. Pull the release tab on the battery cover and the remove the cover. Error/Warning Description Solution 2. Remove the batteries. Connect a Probe Probe disconnected Tighten the locking nut on the 3. Install 4 AA alkaline or 4 AA nickel metal hydride (NiMH) batteries. or connected probe connector. -
Page 28: Replacement Parts And Accessories
Error/Warning Description Solution Error/Warning Description Solution 0 days remaining LDO or LBOD Replace the LDO or LBOD Meter will not power Batteries are not Examine battery orientation to ® message (For LDO sensor cap used for sensor cap and iButton on or powers on installed correctly make sure the batteries follow... - Page 29 Replacement parts (continued) Description Item no. Battery Contact, dual spring 5188800 Cable, USB 6 ft (1.8 m), Type A male, Type B male 5924000 Field Kit (includes Protective Glove Kit for meter and five 5825800 120-mL sample cups) Field Case for 2 probes with up to 5 m cables (10 m total). Includes empty case, insert for meter and probe storage, 8505500 4 containers for sample collection.
- Page 30 Examples of printed reports Printed reports contain a report header and all stored data for samples, check standards and calibrations. Report header The first line of a report shows the report header (Figure 12). Figure 12 Report header 1 Meter serial number 3 Date and time, 24 h (YYMMDDhhmm) 2 Report label 4 File type extension...
- Page 31 Figure 13 Basic report for sample data—1 line 1 Data type (RD=reading) 6 Units 2 Parameter (pH, LDO, etc.) 7 Sample ID: user-defined; shows “SAMPLE ID” if undefined 3 Time (hh:mm:ss in 24 h or user-defined format) 8 Sample ID counter 4 Date (DD-MM-YY or user-defined format) 9 Operator ID: user-defined;...
- Page 32 Figure 15 Total report for sample data—3 lines 1 Method name for probe settings 4 Calibration slope/ratio/constant 2 Time of calibration, prefaced by “CAL” and displayed as hh:mm in 24 h (or user- 5 Offset—contents vary depending on type of parameter and user settings. May defined) format be blank.
- Page 33 Figure 17 Calibration report 1 Report type (CL = calibration, IC = current calibration) 7 Probe serial number (a “<“ or “>” on the HQ440d meter indicates the probe position) 2 Parameter (pH, LDO, etc.) 8 Calibration slope/ratio/constant 3 Method name for probe settings 9 Offset—contents vary depending on type of parameter and user settings.
- Page 34 Figure 18 Calibration history report 1 Report type (CH=calibration history) 5 Date of calibration (DD-MM-YY or user-defined format) 2 Parameter (pH, LDO, etc.) 6 Probe serial number (a “<“ or “>” on the HQ40d meter indicates the probe position). 3 Time of calibration, prefaced by “CAL” and displayed as hh:mm in 24 h (or user- 7 Calibration slope/ratio/constant defined) format 4 Probe model...
- Page 36 Tel. +49 (0) 2 11 52 88-320 SWITZERLAND Fax (970) 669-2932 Fax +49 (0) 2 11 52 88-210 Tel. +41 22 594 6400 orders@hach.com info-de@hach.com Fax +41 22 594 6499 www.hach.com www.de.hach.com © Hach Company/Hach Lange GmbH, 2010, 2013, 2017. All rights reserved. *DOC022.53.80017*...
Need help?
Do you have a question about the HQ11d and is the answer not in the manual?
Questions and answers