Table of Contents
Advertisement
Advertisement
Table of Contents

Related Manuals for Hach H160G


Summary of Contents for Hach H160G
- Page 1 DOC022.53.80057 H-Series Meters 10/2013, Edition 2 User Manual...
-
Page 3: Table Of Contents
Table of Contents Specifications ......................3 General information ....................5 Safety information ......................5 Use of hazard information ..................5 Precautionary labels .....................5 Certification ......................6 Product overview ......................6 Product components ....................8 Installation ........................9 Electrical installation ....................9 Connect to AC power ...................9 Install the batteries .....................10 Probe and connection types ................11 User interface and navigation ................11... - Page 4 Table of Contents Calibrate with a known concentration method ..........24 Calibrate with an air-saturated method ............25 Maintenance .......................25 Replace the batteries ....................25 Clean the instrument ....................25 ISFET pH probe maintenance ...................26 Prepare the probe for storage ................26 Calibrate the ISFET probe ..................27 Clean the ISFET probe ..................27 Repair the ISFET probes ..................27...
-
Page 5: Specifications
Specifications Specifications are subject to change without notice. Specification Details Dimensions (W x D x H) Handheld meters: 9 x 20 x 5 cm (3.5 x 8 x 2 in.) Benchtop meters: 20 x 13 x 8 cm (5 x 8 x 3 in.) Weight Handheld meters: 1300 g (3.0 lb.) Benchtop meters: 900 g (2.0 lb.) - Page 6 Specification Details Resolution Autoranging, 0.1 and 1 Range Autoranging, ±199.9 mV to ±1999 mV Temperature Calibration None Accuracy ±0.5 °C Resolution 0.1 °C (0.1 °F) Range -5 to 105 °C (23 to 221 °F) Calibration Up to five points Accuracy Probe dependent Resolution 0.1 ppm–0.1 ppt...
-
Page 7: General Information
Specification Details Barometric pressure Calibration Factory calibration Accuracy ±1.5 hPa (10 to 40 °C or 50 to 104 °F) Resolution 1 mm Hg or 1 hPa 0.01 in Hg± Range 225 to 900 mm Hg or 300 to 1200 hPa (8.86 to 35.43 in. Hg) General information In no event will the manufacturer be liable for direct, indirect, special, incidental or consequential damages resulting from any defect or omission in this manual. -
Page 8: Certification
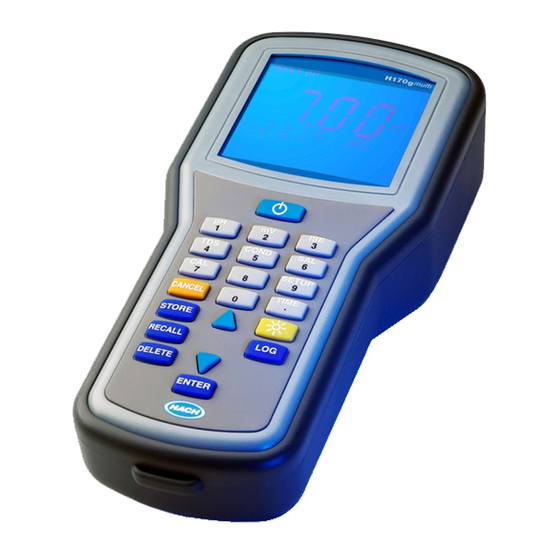
This is the safety alert symbol. Obey all safety messages that follow this symbol to avoid potential injury. If on the instrument, refer to the instruction manual for operation or safety information. This symbol indicates that a risk of electrical shock and/or electrocution exists. Electrical equipment marked with this symbol may not be disposed of in European public disposal systems after 12 August of 2005. - Page 9 The H-Series meters are available in eight models: ™ • Waterproof handheld meters with Bluetooth technology. Refer to Figure • H160G—pH and ORP • H170G—pH, ORP, conductivity, TDS and salinity • Benchtop meters with a USB output. Refer to Figure • H260G—pH and ORP •...
-
Page 10: Product Components
Figure 2 Benchtop meter 1 Power button 6 ISFET pH probe connector 2 Conductivity probe connector (12-pin, H270G and 7 AC power connector H280G only) 3 USB connector 8 External reference connector 4 3.5 phono jack for glass pH electrode, ORP, ISE or 9 LCD display DO temperature sensors 5 BNC connector for glass pH electrode, ISE, ORP or... -
Page 11: Installation
Figure 3 Handheld and benchtop meter components 1 Waterproof handheld meter 4 Benchtop meter 2 SmartLogger II software 5 USB cable 3 AA Alkaline batteries (4x) 6 AC-DC power supply kit (power supply and three plugs: US, EU, UK) Installation C A U T I O N Multiple hazards. -
Page 12: Install The Batteries
W A R N I N G Fire hazard. Use only the power supply that is specified for this instrument. The benchtop meters use AC power with an AC power adapter kit. Refer to Product components on page 8. The kit includes an AC-DC power supply, USB/DC adapter and AC power cord. Refer to Figure 4 for AC power connections. -
Page 13: Probe And Connection Types
Figure 5 Battery installation Probe and connection types N O T I C E Make sure that all the rubber plugs are fully installed before the handheld meter is put in water or the interior of the 3.5 mm phono jack will fill with water. The interior of the handheld meter will stay sealed. If water gets into the 3.5 mm phono jack, immediately invert the meter to let water come out of the phono jack. - Page 14 Figure 6 Keypad description Table 1 Keypad functions Action H160G H170G H280G H260G H270G H280GB H260GB H270GB ON/OFF: Set the meter power to on or to off. pH mode mV mode ISE mode TDS mode Conductivity mode Salinity mode Calibration mode...
-
Page 15: Display Description
Table 1 Keypad functions (continued) Action H160G H170G H280G H260G H270G H280GB H260GB H270GB Time and date display Store a reading Recall a stored reading. Delete a stored reading. Scroll through values, setup screens and options. Set the backlight to on. After 2 minutes without a keystroke, the backlight is set to off. -
Page 16: Startup
Figure 7 Display 1 Data log indicator 10 Data storage memory location 2 Temperature and data values 11 Automatic temperature compensation (ATC) value (pH, conductivity, TDS or salinity) 3 Measured value 12 Calibration mode indicator 4 Stabilization lock 13 Temperature unit 5 Hold indicator 14 Low battery indicator ™... -
Page 17: Operation
Option Function Description date Date format Sets the date to mm/dd/yy or dd/mm/yy format. m/d date Month and day Use the number keys to set the correct month and day. time Time Sets the correct time in a 24-hour format. Use the number keys to set the correct time. -
Page 18: Send Data To A Pc
Send data to a PC Transmit data in storage to a PC and see real-time measurement values from a remote location on a PC. Refer to the SmartLogger II PC software guide for operation instructions for the PC to USB connection. -
Page 19: Set The Data Log
Set the data log Note: The data log procedure stops during calibration and setup. Calibration alarms are not active during the data log procedure. 1. When the meter is in read mode, push LOG to record data. The "LOGGING" icon flashes and the digits in the lower right corner shows the number of collected data points. -
Page 20: Recall A Calibration
Table 2 Calibration and instrument data Calibration data Calibration number Cal 1 value Cal 1 mV value Cal 1 temperature Cal 2 value Cal 2 mV value Cal 2 temperature Cal 3 value Cal 4 value Cal 4 mV value Cal 5 mV value Cal 5 temperature Slope cal 1 to cal 2... -
Page 21: Change A Passcode
Change a passcode To change a set passcode, first make sure that the passcode is set. Refer to Set a passcode on page 18. 1. Push SETUP to put the meter in setup mode. 2. Use the arrow keys to enter the four-digit passcode. 3. -
Page 22: Set The Manual Temperature Compensation
Set the manual temperature compensation Glass pH electrodes are automatically temperature compensated if a temperature probe is sensed in the 3.5 mm phono jack. If no probe is sensed, the meter defaults to the manual temperature compensation at 25.0 ºC. Manual temperature compensation is always in ºC. Refer to Set the manual temperature compensation for glass electrodes. -
Page 23: Set The Ise Operations
9. Push ENTER, if OK or use the arrow keys to change the value. Push the pH to accept a 1-point calibration and to go back to the pH measurement mode. If ENTER is selected, then the buffer value flashes until calibration is complete. 10. -
Page 24: Set The Conductivity Options
Set the conductivity options Set the calibration alarm, the conductivity temperature compensation, the 2, 3, 4 or 5-point conductivity calibration, the conductivity temperature and the cell constant. 1. Set the power to on. 2. Push SETUP, then COND to put the meter in conductivity setup mode. 3. -
Page 25: Calibrate For Conductivity And Tds Measurement
4. Push ENTER to keep the changes and go back to setup mode. Note: To exit and not keep the changes, push CANCEL. Calibrate for conductivity and TDS measurement Calibrate the meter with up to five calibration points with conductivity or TDS standards. If the calibration point is 20% larger than a calibration point in storage, both conductivity points are kept. -
Page 26: Set The Barometric Pressure Compensation Units
Operation Function 1 or 2-point • The default calibration point is set to one at 100% saturation. calibrations • Use the arrow keys to set the calibration point to 1 or 2. • After this data is kept or cancelled, the display shows the current number of calibration points. -
Page 27: Calibrate With An Air-Saturated Method
Note: Put the probe into an oxygen-scavenging solution (e.g., a 2% sodium sulfite for 5 minutes) to get a near-zero DO solution. 1. Set the meter power to on. 2. Use the arrow keys to select the DO standard concentration. 3. -
Page 28: Isfet Ph Probe Maintenance
ISFET pH probe maintenance C A U T I O N Multiple hazards. Only qualified personnel must conduct the tasks described in this section of the document. C A U T I O N Chemical exposure hazard. Obey laboratory safety procedures and wear all of the personal protective equipment appropriate to the chemicals that are handled. -
Page 29: Calibrate The Isfet Probe
5. Put the rubber dust cap back on. 6. Keep the probe in dry storage when not in use. Calibrate the ISFET probe Refer to Prepare the probe for storage on page 26 before calibration. N O T I C E Do not use the probe for applications that cycle between hot and room temperature samples. -
Page 30: Bnc Electrode Maintenance
BNC electrode maintenance Prevent unstable readings: • Keep the probe in an electrode storage solution. • Start measurements with at least a 2-point calibration. Update often with 1, 2 or 3-point calibrations. • Use new buffers and new deionized rinse solution. •... -
Page 31: Error Codes
Problem Possible cause Solution The meter continually The ISFET probe is not sensed Set the meter power to off. If the shows –2.00 or 19.99 with an by the meter or the probe. "ISFET" icon does not show, replace electrode attached. The "ISFET" icon the ISFET probe. -
Page 32: Replacement Parts And Accessories
Table 3 Error code descriptions (continued) Error Description Solution Code Too long to calibrate. Signal is not Clean the probe. Disconnect stirrers and other AC power stable during calibration. sources. Make sure that the calibration solution temperature is constant. Replace the probe if the error continues. The ISFET pH probe temperature Replace the probe. - Page 33 Accessories Description Quantity Item no. ISFET pH probes for the handheld meters General purpose round tip pH probe PHW77-SS Micro pH probe PHW17-SS Piercing tip micro pH probe PHW37-SS pH probe for NMR tubes PHW47-SS Heavy duty piercing tip micro pH probe PHW57-SS ISFET pH probes for the benchtop meters General purpose round tip pH probe...
- Page 34 Consumables (continued) Description Quantity Item no. Conductivity standard solution, 10,000 μS/cm 100 mL 2972242 Easy-to-thread-on cap with a pre-installed membrane DO50-CAP DO50-KIT, includes: DO50-CAP, electrolyte and syringe DO50-KIT 32 English...
- Page 36 Tel. +49 (0) 2 11 52 88-320 SWITZERLAND Fax (970) 669-2932 Fax +49 (0) 2 11 52 88-210 Tel. +41 22 594 6400 orders@hach.com info@hach-lange.de Fax +41 22 594 6499 www.hach.com www.hach-lange.de © Hach Company/Hach Lange GmbH, 2013. All rights reserved. Printed in U.S.A.
Need help?
Do you have a question about the H160G and is the answer not in the manual?
Questions and answers