Table of Contents
Advertisement
Quick Links
P7
PoE-Touch Fingerprint and RFID Access Control
User Manual
(V1.0)
© 2001-2015 Anviz Technology Co., Ltd.
Advertisement
Table of Contents

Related Manuals for Anviz P7


Summary of Contents for Anviz P7
- Page 1 PoE-Touch Fingerprint and RFID Access Control User Manual (V1.0) © 2001-2015 Anviz Technology Co., Ltd.
-
Page 2: Preface
PREFACE Honorable customers: Thank you for choosing products from Anviz Technology Co.,Ltd. Our products contain world cutting edge technologies like Fingerprint/Iris/card Recognition and other biometric recognitions, Surveillance, Computer Communication, as well as Microelectronics. With the combination of three technologies: Electronics, Optics, and Computer Communication; Anviz Technology Co.,Ltd. - Page 3 User Manual Software Operation Flowchart This software includes: Attendance parameter, Department settings, Administrator management, Device management, Leave class, Holiday List and Attendance report etc. Then how to use this system in a right way? It is far from enough to understand only the function of each module but to know the connections between them and the system operation flowchart.
- Page 4 User Manual 5. After the shift setting is completed, it will work until shift is allocated to Employee. Each Employee can only have one shift. Please note the starting date of the shift. After the allocation of the shift, the arranged working date and time can be seen clearly for each Employee. 6.
-
Page 5: Table Of Contents
User Manual Contents PREFACE ..................................1 ................................. 7 OTICE Security Considerations ............................ 7 Illustration for Pressing Fingerprint ........................7 ................................9 NTRODUCTION Menu List ................................9 Features ................................9 Technical Parameters ............................10 ..............................12 PERATION UIDE Keypad Instruction ............................12 Time Attendance Status .......................... - Page 6 User Manual .................................. 89 PPENDIX Communication And Power Interface ......................89 Access Wiring Diagram ........................... 89...
- Page 7 User Manual Chapter1 Notice For User It‘s a comprehensive manual. Some specific functions are subject to actual device.
-
Page 8: Notice For User
User Manual Notice For User Security Considerations Please read carefully before using the manual: 1. Please read it carefully first of all; 2. Don‗t install the terminal under direct light, humid, dusty or sooty environment; 3. Don‗t install the terminal near the magnetic field; 4. - Page 9 User Manual Chapter2 Introduction The main theme of this chapter is the feature of this T&A product, as well as the function introduction.
-
Page 10: I Ntroduction
User Manual Introduction Menu List Press [M] key to enter system management menu. (This requires the administrator authorization if there is admin registered in the system.) Menu List: Features High Precision OLED Display Touch Keypad&Sensor Optical fingerprint scanner, wear-resistant, against spoiling long life ... -
Page 11: Technical Parameters
User Manual Support Low-frequency card : EM Card and other compatible card(125kHz) Support TCP/IP, RS485, Mini USB Slave, Wiegand Out & In Can be connected with the SC011 access controller system to achieve split security Registration capacity: 3000 Fingerprints and 50000 Records Technical Parameters Item Description... - Page 12 User Manual Chapter3 Operation Guide This section explains terminal appearance, and operation. (Including how to add and remove users and how to set system parameters, etc.)
-
Page 13: Operation Guide
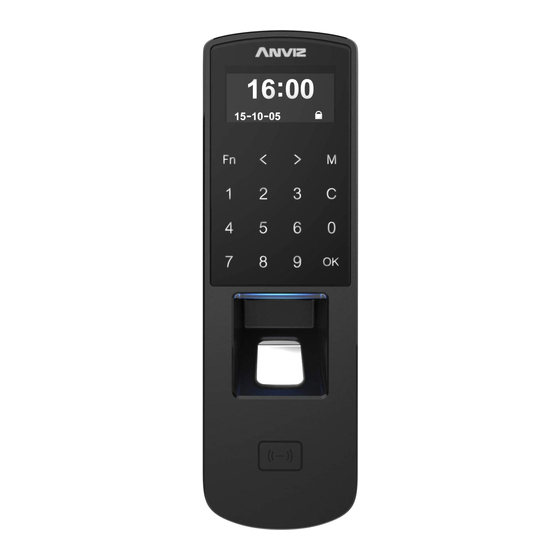
User Manual Operation Guide Keypad Instruction Keypad Funciton Keypad Funciton Work Code Exit/Cancel Key < State Key(Clock In)/Up Num. Keys > State Key(Clock Out)/Down Confirm Key/Power Key Menu Time Attendance Status Standby status we can run: time attendance, status setting, entering management mode and power off operation. - Page 14 User Manual Fingerprint registration: Press [<] or [>] key to select 1 or 2, 1 is to register the 1st FP, 2 is for 2nd FP. Press [OK] to continue. Place the finger on sensor scanner. Please follow the screen prompts to register the fingerprint.
- Page 15 User Manual Press [OK] to save password. Press [C] to cancel and exit back to user registration interface. Card registration: Press [<] or [>] key to [Card] option. Press [OK] to continue. Swipe the ID card on card reader area. The terminal will get card number and enter save interface.
- Page 16 User Manual 3.3.3 Verify Mode Setting verify mode of the employee, there are four modes: SEPT, RF+PW, PW+FP, and RF+FP. In [User] menu, press [<] or [>] key to select [Verify Mode] option: Press [OK] key to enter setting interface: Press [<] or [>] key to select employee‗s ID or press [OK] to input user ID: After input user ID, press [OK] to enter setting interface.
- Page 17 User Manual Press [<] or [>] key to select user ID or press [OK] to input user ID manually. After input user ID, press [OK] to enter group interface. Group number can be input through [<] or [>] key or number key. (Max group number is 16 ). Press [OK] key to confirm and enter save interface.
- Page 18 User Manual Press [OK] key again to confirm saving. After adding completed, exit to admin setup interface. You can press [OK] key to continuously add other admin, and press [C] to exit as well. After adding admin, it needs the verification of the administrator‗s fingerprint to enter Menu.
-
Page 19: Setup
User Manual Setup [Setup] menu mainly includes [System], [Log Setup] and [Hardware Test]. Enter management menu, press [<] or [>] key to select [Setup] option. Press [OK] key to enter [Setup] sub-menu. Press [<] or [>] key to shift menu. 3.4.1 System Setup 3.4.1.1 Device ID... - Page 20 User Manual Press [OK] key to save system time. Press [C] key to cancel and exit to upper menu. 3.4.1.3 Calibration In [System], press [<] or [>] key to select [Calibration] option. Press [OK] key to enter the time setting (Time unit: second). You can press [<] or [>] key to get the calibration time you need.
- Page 21 User Manual Press [OK] key to enter work code scope interface. When you finish setting, press [C] key enter save interface. Press [OK] to confirm and save. 3.4.1.6 Daylight Saving Automatically switch daylight saving time base on week or date. In [System], press [<] or [>] key to select [Daylight Saving] option.
- Page 22 User Manual Press [OK] key to enter net parameter interface. Mode: There are two modes for networking. Press [<] or [>] key to select [Server] or [Client]. Server: Normal net mode; Client: Only communication with the PC which has server IP. IP Address Press [<] or [>] key to select [IP address] option: Press [OK] key to enter IP address setting interface:...
- Page 23 User Manual Press [<] or [>] key or number key to input subnet mask. Press [OK] key to shift between the 4 segments. After set is completed, press [C] key to enter subnet mask save interface. Press [OK] key to save the modification. Press [C] key to cancel. MAC Address Press [<] or [>] key to select [MAC Address] option.
- Page 24 ‗in‘ reader, there be a corresponding use at the ‘out‘ reader before the card can be used at the ‗in‘ reader again. P7 must work with T5s to realize anti-back function. Via [<] or [>] select [Anti-Back] option:...
- Page 25 User Manual Press [OK] to confirm enter ‗Anti Pass Back‘ menu. Enable: Enable or Disable anti-back function. Native: Setting device always as ‗In‘ or ‗Out‘ states. Empty User: Clear all the stranded user records which have been accessed in. Press [<] or [>] key to setting the anti-back function and press[OK]to confirm, then press[C]save and exit.
- Page 26 User Manual Press [OK] key to enter delay time setting interface. Press [<] or [>] key or number key to input delay time. Press [OK] key to confirm. Then press [C] to save the setting. 3.4.1.12 Door Alert Door alert use for monitor lock whether door was closed after user access. If lock does not close the device will alarm out.
- Page 27 User Manual 3.4.1.14 Auto Update Update the fingerprint template intelligently: During fingerprint sensor identification process, the senor replaces the lowest-quality data with new, higher-quality data that it acquired in the matching process. This enables the sensor to maintain high quality data at all times, saving the user from repeated authentication attempts.
- Page 28 User Manual Press [<] or [>] key to select [Log Alert] option. Press [OK] key to enter log alert setting interface. Press [<] or [>] key or number key to input log warning number. Press [OK] key to confirm. Then press [C] to save the setting. 3.4.3 Re-Verify Time The Re-verify time is the time interval in which you make continuous records with the same finger (1-250 minutes), and then the device will only save the first record.
-
Page 29: System Info
User Manual key to select [Keyboard] option, and press [OK] to enter keyboard testing interface. Then press any key to start keys testing (i.e. press key 3, if interface shows current key as 3, it indicates the key 3 works.) Press ‗C‘... -
Page 30: Shut Down
User Manual User: Registered user number in device. FP: registered fingerprints number. Select it and press [OK] key and you can check the password and card number. Log:The number of the attendance record stored in the device. Serial: The unique identifier of the device and cannot be modified. FirmVer: the firmware version of program which write in EROM or EPROM (Programmable read only memory). - Page 31 User Manual Chapter4 T&A software Installation and uninstallation This chapter discusses the installation and un-installation of T&A software as well as the hardware and operation system requirement.
-
Page 32: S Oftware I Nstallation And U Ninstallation
User Manual Software Installation and Uninstallation First we should install background management software on the computer. Please refer to the following steps: Operation Environment Hardware requirement: Pentium Ⅳ 1.5GHz above 1G Memory and above, Minimum 1GB hardware space COM (USB Port) CD-ROM (CD-ROM needed in installation) VGA support 1024*768 resolution and above Operation system: Microsoft Windows 2000(recommended)/Microsoft Windows XP/Win7... - Page 33 User Manual 4、Click “Browse” to select a local path as a software installation directory, if the software default path, click “Next”. 5、Click “Install” 6、Installation is in progress, please be patient, depending on the computer configuration takes about 1-5 minutes.
-
Page 34: Uninstall Software
1、Enter into the ―Start‖ menu, expand the ―All Programs‖ list, find ―Anviz‖ directory, enter ―CrossChex Standard‖ directory, locate the ―Uninstall‖ to uninstall the program and run (or you can enter the software installation directory to find the Uninstall uninstaller) 2、Confirm whether to uninstall this software, click ―Yes‖... - Page 35 User Manual Chapter5 Communication The chapter is mainly about how to add, delete and set communication between PC and terminal. Software features are different according to device.
-
Page 36: C Ommunication
4.1.1 Add Unit Go to Device tab Search and Add the P7 to management software CrossChex: CrossChex software has developed its own device discovery protocol defined between the software and the device, it can remove the trouble from the device deployment configuration, realize A key installation for device configuration. - Page 37 User Manual LAN(Client): Device-side clients need to select the network mode, and set the server IP COM: Serial communication port RS485:By default, COM1 port connection After editing is complete, click [Save] button to save the terminal information 5.1.2 Modify Unit Select Modify terminal (tick ‗√‘...
- Page 38 User Manual synchronization time. 5.1.5 Unit Parameter Click 【Device Parameter】 button open the 【Terminal parameter settings】 window: [Sleep time]: Attendance from unattended to go to sleep interval, 0 means not hibernate, maximum sleep time was 250 minutes [Volume]: Attendance voice prompt volume level, 0 represents the mute, the maximum volume of 5 [Date format]: Attendance in the date format, there are about several formats: yy-mm-dd(year-month-day), mm/dd/yy(month -day-year), dd/mm/yy(day-month-year)
- Page 39 [Ring function]: It is disabled by default, according to the actual needs of their own settings (This feature applies to support a bell function of the model). [Wiegand Mode]: There are two modes: Encrypted Anviz wiegand, wiegand 26, fixed wiegand area code and card number mode wiegand. Default Wiegand 26 (for supported Wiegand outputs of attendance).
- Page 40 User Manual 0-NC Group: All the staff in this group could not be accessed anytime. 1-NO Group: All the staff in this group could be accessed anytime. The Administrator could define the other group information: Group name: Input name Time zone: Choose according number Press 【Apply】...
-
Page 41: Record Management
User Manual Click on [Yes] button to start reading the record; click [No] button to abandon the operation. 5.1.9 Backup User Backup employee refers to staff information and fingerprint information stored in attendance download and save to your local computer for backup. Click [Backup User] button message box pops up: Click on [Yes] button to confirm and start downloading personnel data, click [No] button to abandon the operation. - Page 42 User Manual 5.2.1 Search Record Records Search is the records that meet the search criteria is retrieved. Drop-down button to set the record you want to check the start date and end date, you can click the input box after selecting date After setting the record date Click [Record Search] button, verify records that meet the criteria will appear in the record list: 5.2.2...
-
Page 43: User Management
User Manual Symbol interval: Delimiter between fields and field. Space symbol length: Space symbol digits. Set up an export conditions, click [Export Record] button, open the ―Save As‖ dialog. Choose to save the file, enter the file name, as shown below: Click [Save] button to save the file, you will be prompted to save the completed information system: User Management... - Page 44 User Manual In the upper left corner of the user management menu, you can search user by clicking 【Search User】 button through entering user number and name. And you can click the other menus to modify, delete, upload, download and other operations for the user you selected. 5.3.1 Add user Click menu 【Add】...
- Page 45 5、 Group number: Refers to the access control group. We can set the employees which access group they belong to. 6、 User type: you can choose normal user or administrator. 7、 Identification: Anviz intelligent attendance devices support multiple identification verification.
- Page 46 User Manual After Set is finished, firstly click the [Cut Down] button and then click [Save] button to save the employee photo and return to the [Add / Modify User Info] window. 2, Take photos. Click 【 】 button to open[Take Photo] window, as the picture shows below: Adjust the image, Click [Take Pic.] button to take photos for employees.
- Page 47 User Manual Click 【 】 button to delete employee photo. Attendance statistics related: new employee attendance rules set up directly. Default work schedule of the new employee: set the default work schedule of the new employee 5.3.2 Modify user Modify user is to modify user information in the data sheet. Select the record that need to modify from the list of user information, click the button [Modify] or simply double-click the user records can open [Add / Modify User Info] window to modify user information .
- Page 48 User Manual Select the path to export excel file. After operation is finished click [close] to complete the export. 5.3.5 Import user Through the prescribed format of EXCEL To import the user information Click [Import] button, pops up EXCEL file path select dialog box :...
- Page 49 User Manual select the Excel file you need, click [Open] button the following dialog box pops up: Click [Yes] to confirm [No] to give up. After Import is finished click [Close] to complete the import. 5.3.6 Transfer Dept When HR adjustment come, need to replace the employee department, [Transfer Dept] function: can transfer users between different departments from the list of users you can select the user whom need to transfer department by using shift or ctrl button.
- Page 50 User Manual Select the department click [Ok] button to save the information, click [Cancel] button to give up this operation. 5.3.7 Employee Separation This operation will put user to the separating user column not to delete information directly and the information will be saved and backup for HR department or management department select the user who is going to separate from the list of users, click [Disabled], pops up the following window: Select ‗Delete users from the selected device‘...
- Page 51 User Manual Tick what you need, click [OK] button to save the privilege. Look at the staff list [Unit No] and you can see selected employee machine number has been updated to the selected number. 5.3.9 Copy Privilege Copy privilege is to copy the storage privilege and administrative privileges of employees, and then copy to the other employees, they will be unified set with storage and management authority.
- Page 52 User Manual after viewing the employee‘s settings Click [No] button return to the [Copy Function and Privilege] window, click [Yes] button pops up the confirmation dialog box: Click [Yes] button to confirm and start copying the employee privilege click [No] button to cancel this operation.
- Page 53 User Manual confirmation dialog box: After download template is finished, you can see the column of download template fill color. That means the fingerprint has been downloaded. 5.3.12 Upload template Upload template mainly refers to upload the fingerprint information that was saved in the database to corresponding Attendance device, this function mainly used for sharing user information between two devices.
- Page 54 User Manual button click [Delete from Unit] button The following dialog box pops up: To delete the user information in attendance machine.
- Page 55 User Manual Chapter6 Background Management The main theme of this chapter is how to collect attendance records from different terminals with management software and generate different reports. The background software can manage staff information, set rules of attendance, etc.
-
Page 56: B Ackground M Anagement
―CrossChex Standard‖ from menu Double-click desk icon directory ―Start‖- ―All‖ –―Anviz‖- ―CrossChex Standard‖. Once loading over, it will show a window below: Default User name: ADMIN. Empty password. Press ―confirm‖ to entry. Press ―Cancel‖ to close. - Page 57 User Manual Picture Name Function Home Click on the icon, the software will be returned directly to the main page interface. Skin System supply 3 skin color: bule, black and silver. Language Click on the icon can switch software language 2) System Function Name Funciton...
-
Page 58: System Settings
6.2.1 Database Setting Anviz Biometric management software, with default Access database, SQL Server data supported. Can be optional changed by the admin. Access Database:... - Page 59 Server IP: Please entering the Server IP address of MS-SQL Server database. User name: Setting when MS-SQL Server database installation. Password: Setting when MS-SQL Server database installation. Database name: Default as ―Att2012‖ Press ―Apply‖. Anviz Biometric management software will generate related database in MS-SQL Server database. 6. 2.2 Base Parameter Base Parameter include 4 parts, ―Employee field content editing‖, ―Custom field setting‖,...
- Page 60 Press ‗Add field‘ to add the field into the page ‗User‘- ‗Add‘ For example, entering the field ―Marital status‖ into the list. Then it will be shown in the ‗User‘- ‗Add‘. Communication parameters: Set up communication between ANVIZ biometric management software and device parameters.
- Page 61 Press ‗Apply‘. The setting will be kept and applied. Timing Downloading Record: Anviz biometric management software supports five times Point Timing download attendance records, and can be exported to a text file. Facilitate customer attendance record will be imported into ERP and other third-party software.
- Page 62 User Manual Downloading record: 5 downloading time supported. Auto-download attendance record. Remark: Anviz biometric management software cannot be closed when downloading working. Once downloaded automatically exported to a text file: for the convenience of customers attendance records into the ERP and other third-party software, select ―After the download is completed automatically exported to a text file,‖...
- Page 63 User Manual Stat. Rule: Setup the role of attendance statistics A work day count as: This value will be used as a constant value of late / early to leave / free overtime / statistical project which calculate work hours of constant value. The Parameter range:60-1200 min(default 480 min) The shortest working time: In the statistical report, the minimum effective time intervals for constantly punch card records , lower than this time interval will be ignored for participating...
- Page 64 User Manual Parameter range: 0-480 min(default 30 min) Deduct the off duty X minutes later: Deduct the above recorded time as the over work time. Weekend: setup the fixed weekend, default is Saturday and Sunday. Shift over two days: When the time over 00:00 AM, choose this record for the 1st day or 2nd day. Overtime calculation: Setup the overtime rate for normal, weekend and festival Hit ‘Apply‘...
- Page 65 2、if there has staff at deleted dept., the would be added to headquarter automatically. 6.2.5 Status Setting The fingerprint devices provided by Anviz Global support 16 attendance status, and all the client could customized setup the attendance status. Status value: Value for 16 different modes。...
- Page 66 6.2.7 Work Code Anviz global provide fingerprint devices which supports multiple types of settings. An employee may work in a different identity attendance, for easy to calculate attendance statistics with appropriate time and payroll. Click page [Leave class], following shows Work code information: Number: Input number.e.g.:9527...
- Page 67 User Manual Holiday information Name: Input name Start date: Choose start date Dates: Add dates Press 【ADD】 to add the name and color into holiday list Choose item in ‗holiday list‘, hit 【Modify】 to save changes Choose item in ‗holiday list‘, hit 【DEL】...
- Page 68 User Manual [Late error allowance] e.g.:5, then the record before 9:05 would not be treated as late. [Early error allowance] e.g.:5, record after 16:55 would not be treated as early [Count As Work Day] statistics unit for the report. e.g. [Count As Work Time] e.g.: 480 (Work time is auto setup by time table) choose[Must C-In] and [Must C-Out],hit 【Save】...
- Page 69 User Manual Circle: Setup range:1-100,default value: 1 Circle unit: day, week, month Add timetable: Hit add timetable: choose timetable name and date to confirm. Go back to [Shift setting]. Hit 【Add】 to add Delete timetable: Choose the timetable, hit 【Del timetable】 to delete. Clear timetable: Clear all timetable in this shift.
- Page 70 User Manual of department at the left side, all the info will show at right blank of this list. Notice: Left staff could not be chosen. Use mouse or shift or ctrl key to choose multi staff, hit 【select all】 or 【select none】 to fix the staff.
- Page 71 User Manual Choose timetables from ‗timetable name‘, hit 【add】, the timetable will show at ‘The current timetable‘ then to realize the current record. Temporary: when a staff need to add a temporary, then hit ―add temporary‖ Hit 【yes】, then hit 【Add】 to open [Add a temporary timetable...
- Page 72 User Manual Choose ‗Select timetable to add‘, and confirm ‗select the dates‘ Press 【OK】 and press 【Save】 to finish. Press 【Cancel】 to delete. Press 【Clear】 to clear all timetable chosen. Del Temporary: Delete Temporary list 6.2.10 User setting Allocate rights for administrator and users Function module for system authorized management Two parts in User management: User group list: could device multi groups, realize multilevel management.
- Page 73 User Manual There are two default group in user management, ‗Admin‘ group and ‗User‘ group, Admin has the operation right for the system. And user could be setup by request. Suggest to have one administrator to operate all rights. Press 【Add】 to input new group(First input name, and hit add), and choose User rights at right side.
-
Page 74: Attendance Management
User Manual 6.2.12 Lock Manager Hit this button, the screen would be locked and need user name and password to restart. 6.2.13 Log out Hit this button, the screen would be locked and need user name and password to restart. 6.2.14 Exit system Close the system safely. - Page 75 User Manual Click 【Yes】 button to continue the operation; Click 【No】 button to discontinue the operation. 6.3.3 Record Management Click [Record Management], the following window pops up: Select the appropriate conditions are shown on the right. 6.3.4 Scheduling Record Analysis Click [Scheduling Record Analysis], the following window pops up:...
- Page 76 User Manual Select the appropriate conditions are shown on the right. 6.3.5 Analysis of Away/Leave Click [Analysis of Away/Leave], the following window pops up: Select the appropriate conditions are shown on the right. 6.3.6 Attendance Statistics Click [Attendance Statistics] menu, the following window pops up:...
-
Page 77: Data Management
User Manual Select the appropriate conditions are shown on the right. 6.3.7 Report Preview Click [Report Preview] menu, the following window pops up: Select the report you need accordingly. Data Management 6.4.1 Away On Business/Leave Click [Away On Business/Leave] in [Data] menu, the following window pops up:... - Page 78 User Manual Select Department, Employee, Leave Class, Reason and Time accordingly to complete setting. 6.4.2 Append Record Click [Append Record] in [Data] menu, the following window pops up: 6.4.3 Group Late/Early Click [Group Late/Early] in [Data] menu, the following window pops up: Select the appropriate condition, and click [OK].
- Page 79 User Manual Choose export conditions, click export, select the path, the following window pops up, click ‗Save‘ : 6.4.5 Import Record Click [Import Record] in [Data Management] menu, the following window pops up: Select the relative import attendance record file according to the prompts, click [Open] button to start importing.
- Page 80 User Manual Number + Tab key+ Attendance Status + Tab key+ Work Code + Tab key+ Verification Mode 6.4.6 Export Employee Click [Export] in [Data] menu, the following window pops up: Select ―Export EXCEL file‖ export path. After a successful export, click 【Close】 to complete the export. 6.4.7 Import Employee To import employee information to the system according to EXCEL prescribed format.
- Page 81 User Manual Select the EXCEL file you want to import, click [Open] to popup a dialogue box: Click 【Yes】 to confirm, 【No】 to quite. After a successful import, click 【Close】 to complete the export. 6.4.8 Backup Database For ensuring the safety of data and recoverability, we advise to back up the database regularly. Click [Backup Database] in [Data] menu, then select the relative route to back up the database, click [Save]: 6.4.9...
- Page 82 User Manual Select the path to the database you want to restore, click [Open], the following window pops up: Click 【Confirm】 to restart the software. 6.4.10 Clear Obsolete Date Click [Clear Obsolete Date] in [Data] menu, the following window pops up: Select the deadline of relative Obsolete Date, click 【Clear】...
-
Page 83: Help
Anviz management software supports online software upgrades. Click 【Upgrades】 button. The system will automatically run, ‗Update.exe‘. The application will automatically connect to the software server of Anviz Biometric Technology Co., Ltd., find the latest software upgrade in the server, and download the software upgrade package to install, as below:... -
Page 84: Feedback
BUG encountered in the process of using software timely, our R&D and technical team will give you the best service. Click 【Feedback】 requires the customer‘s computer must be connected to the Internet , and having been registered as a member of Shanghai Anviz Technology Co., Ltd. is required before submit questions. -
Page 85: About The Software
User Manual About the Software Click 【About】 button, the dialog box of software version information will pops up. The software version name, company name and the official website, and software copy rights will be displayed. Help Documentation Click the 【Help】 in the software, the system will call System Help Manual; it will be more convenient for the customers to familiar with the software operation and use. - Page 86 User Manual Chapter7 FAQ Frequently asked questions and answers.
-
Page 87: My Fingerprint Has Been Enrolled But Often Failed In Identification
User Manual My fingerprint has been enrolled but often failed in identification. Reason Solution Enroll the finger again. Please refer to illustration of 1. The fingerprint was not captured properly pressing finger. 2. Direct sun light or too bright light Avoid direct sun light or other bright light 3. -
Page 88: Staffer Can't Pass Although Used The User Id+Fp Mode
【Frequently Asked Questions】 button in the software. Click the button when your computer is with installed system connecting to the Interne. Software also will automatically connect to the technical support page on Shanghai Anviz Technology Co.,Ltd. official website. - Page 89 User Manual Chapter 8 Appendix The main theme of this chapter is the additional information of this T&A including access control and cable connection.
-
Page 90: Appendix
User Manual Appendix Communication And Power Interface Access Wiring Diagram 1.POE Supply connecting E-Lock 2.Connecting E-Lock with Access Control Power... - Page 91 User Manual 3.Connecting E-Lock with Switching Power Use the following wiring is recommended to prevent damage to the access control when load is large. 4.Connecting Wiegand Output to External Controller 5.Wiegand Card Reader Connection...
- Page 92 User Manual 6.Connect P7 With SC011 of Anviz...
Need help?
Do you have a question about the P7 and is the answer not in the manual?
Questions and answers