
Related Manuals for Dalsa Piranha3


Summary of Contents for Dalsa Piranha3
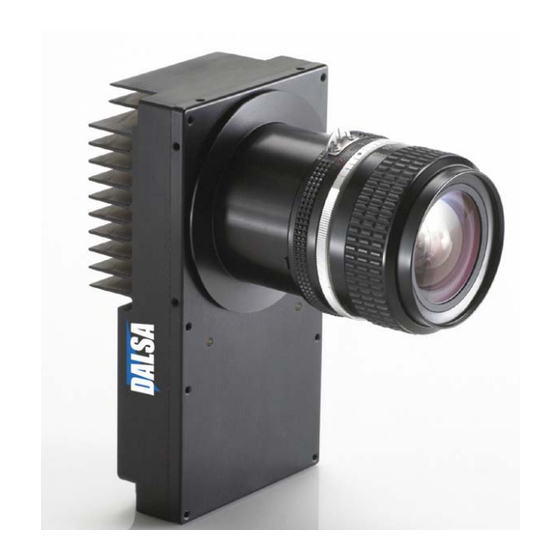
- Page 1 Piranha3 Camera User’s Manual P3-80-xxk40-R P3-87-xxK40-R P3-87-xxK40-01-R 29-Jan-07 03-032-10216-02 www.dalsa.com...
- Page 2 Piranha 3 User Manual © 2007 DALSA. All information provided in this manual is believed to be accurate and reliable. No responsibility is assumed by DALSA for its use. DALSA reserves the right to make changes to this information without notice. Reproduction of this manual in whole or in part, by any means, is prohibited without prior permission having been obtained from DALSA.
-
Page 3: Table Of Contents
Piranha 3 User Manual Contents Introduction to the Piranha3 Camera _________________________________________ 7 1.1 Camera Highlights...............................7 Features ................................7 Key Specifications............................7 Programmability.............................8 Description..............................8 Applications..............................8 Models................................8 1.2 Camera Performance Specifications ..........................9 1.3 Image Sensor................................12 1.4 Responsivity.................................13 Camera Hardware Interface________________________________________________ 15 2.1 Installation Overview..............................15 2.2 Input/Output Connectors and LED..........................15... - Page 4 Dark Patches..............................69 5.4 Product Support................................70 Camera Link™ Reference, Timing, and Configuration Table __________________________ 71 LVDS Technical Description ..........................71 Camera Signal Requirements .........................71 Video Data ..............................72 Camera Control Signals ..........................72 Communication...............................72 Power................................73 Error Handling and Command List ___________________________________________ 75 03-032-10216-02 DALSA...
- Page 5 Piranha 3 User Manual B1 Error Handling ................................75 B2 All Available Commands ..............................76 EMC Declaration of Conformity______________________________________________ 85 Revision History ________________________________________________________ 87 Index _______________________________________________________________ 89 DALSA 03-032-10216-02...
- Page 6 Piranha 3 User Manual 03-032-10216-02 DALSA...
-
Page 7: Introduction To The Piranha3 Camera
Piranha 3 User Manual Introduction to the Piranha3 Camera 1.1 Camera Highlights Features • 8k or 12k resolution • Up to 33.7 kHz line rates • Selectable 8 or 12 bit output • 320MHz throughput (8x40 MHz) • 100x antiblooming •... -
Page 8: Programmability
The next generation of Piranha line scan cameras has arrived with more power, more speed and more resolution than ever before. The Piranha3 camera family takes imaging to a new level with eight outputs running at 40MHz and either 8k or 12k resolutions. The... -
Page 9: Camera Performance Specifications
Piranha 3 User Manual 1.2 Camera Performance Specifications Table 2: Piranha3 Camera Performance Specifications Feature / Units Notes Specification Sensor Features Imager Format line scan line scan CCD Resolution pixels 8192 12288 Pixel Fill Factor Pixel Size µm Output Format (# of taps) - Page 10 (No Flat Field Correction) Specification Unit -10 dB 0 dB +10 dB Broadband DN/nJ/cm 43.6 Responsivity Random Noise 10.5 Dynamic Range ratio 1000 1242 (12 bit) DC Offset FPN ECD FPN ECE FPN Corrected PRNU ECD PRNU ECE 03-032-10216-02 DALSA...
- Page 11 5. PRNU corrected is measured at 35% saturation using FPN coefficients calculated at 0% saturation and PRNU coefficients calculated at 70% saturation. 6. The FPN/PRNU calibration conditions (gain, ECE, ECD, line rated, light) are set before calibration. The residual error is confirmed to be lass than the maximum specified. DALSA 03-032-10216-02...
-
Page 12: Image Sensor
Piranha 3 User Manual 1.3 Image Sensor Sensitivity is maximized through DALSA’s newest IT-P9 and IT-PB sensors that were designed using our state-of-the-art CCD design process. Figure 1: P3-80-xxk40 Sensor Block Diagram Storage Well with Exposure Control, Reset, and Shift Register Structures Up to12288 Photoelements (12k: 5µm x 5µm or 6k, 8k: 7µm x 7µm) -
Page 13: Responsivity
Piranha 3 User Manual 8191-6141 (odd pixels) 8192-6142 (even pixels) 1.4 Responsivity Figure 2: Responsivity Graphs DALSA 03-032-10216-02... - Page 14 Piranha 3 User Manual 03-032-10216-02 DALSA...
-
Page 15: Camera Hardware Interface
6-pin Hirose connector for power. Refer to section 2.2.2 Power Connector for details. • High-density 26-pin MDR26 connector for Camera Link control signals, data signals, and serial communications. Refer to section 2.2.3 Camera Link Data Connector for details. DALSA 03-032-10216-02... -
Page 16: Led Status Indicator
Piranha 3 User Manual Figure 3: Piranha3 Input and Output Connectors Diagnostic LED Camera Link (Medium or Full Configuration) Camera Link (Medium or Full Configuration) +12V to +15V and Ground WARNING: It is extremely important that you apply the appropriate voltages to your camera. -
Page 17: Power Connector
Incorrect voltages will damage the camera. Protect the camera with a fast-blow fuse between power supply and camera. DALSA offers a power supply with attached 6’ power cable that meets the Piranha3 camera’s requirements, but it should not be considered the only choice. Many high quality supplies are available from other vendors. - Page 18 Piranha 3 User Manual The Camera Link interface is implemented as a Medium or Full Configuration in the Piranha3 cameras. Refer to section 3.3.1 Setting the Camera Link Mode for details on setting the Camera Link configuration. Table 7: Camera Link Hardware Configuration Summary...
-
Page 19: Input Signals, Camera Link
These signals indicate when data is valid, allowing you to clock the data from the camera to your acquisition system. These signals are part of the Camera Link configuration and you should refer to the DALSA Camera Link Implementation Road Map, available at http://vfm.dalsa.com/, for the standard location of these signals. - Page 20 Piranha 3 User Manual Figure 7: Piranha3 Fixed (Programmed) Integration Timing with External EXSYNC Table 10: Piranha3 Input and Output Symbol Definition Min (ns) twSYNC The minimum low width of the EXSYNC pulse when not in SMART EXSYNC mode. twSYNC...
-
Page 21: Symbol Definition
+/- values. The user should command times greater than these to ensure proper charge transfer from the photosites. Failure to meet this requirement may result in blooming in the Horizontal Shift Register. DALSA 03-032-10216-02... - Page 22 Piranha 3 User Manual 03-032-10216-02 DALSA...
-
Page 23: Software Interface: How To Control The Camera
Piranha 3 User Manual Software Interface: How to Control the Camera All Piranha3 camera features can be controlled through the serial interface. The camera can also be used without the serial interface after it has been set up correctly. Functions available include: •... -
Page 24: Setting Baud Rate
If this occurs, values are clipped and the camera returns a warning message. Some commands may not be available in your current operating mode. The help screen displays NA in this case. 03-032-10216-02 DALSA... - Page 25 0-16 set subtract background 0-8:0-4095 set sync frequency 300-23619 set system gain 0-8:0-65535 set upper threshold 0-4095 set video mode update gain reference verify temperature verify voltage write FPN coefficients write PRNU coefficients write user settings DALSA 03-032-10216-02...
-
Page 26: Command Categories
Calculate FPN ( Set Digital Offset ( Calculate PRNU ( Enable Pixel Coefficients ( Set PRNU Coefficient ( Set FPN Coefficient ( Set PRNU Range ( Set FPN Range ( Set Background Subtract ( Set Digital System Gain ( 03-032-10216-02 DALSA... -
Page 27: Sensor Output Format
Syntax Elements: Exposure mode to use. Factory setting is 7. • Notes: Refer to Table 11: Piranha3 Exposure Modes for a quick list of available modes or to the following sections for a more detailed explanation. • To obtain the current value of the exposure mode, use the command sem. -
Page 28: Exposure Modes In Detail
Example 2: Line Rate is set by External Trigger Pulses. Line Period Line Period Readout Readout Exposure Time Exposure Time EXSYNC Falling Edge Falling Edge Ignored During Ignored During Readout Readout 03-032-10216-02 DALSA... - Page 29 Mode 6: External Line Rate and Internally Programmable Exposure Time Figure 10: EXSYNC controls Line Period with Internally controlled Exposure Time Line Period Line Period Readout Readout Programmable Period Programmable Period Using command Using Command EXSYNC CR=Charge Reset DALSA 03-032-10216-02...
-
Page 30: Setting The Line Rate
Desired line rate in Hz. Allowable values are: 12k: 300-23619Hz 8k: 300-33855Hz • Notes: To read the current line frequency, use the command ssf. • If you enter an invalid line rate frequency, an error message is returned. Related Commands: sem, Example: ssf 10000 03-032-10216-02 DALSA... -
Page 31: Setting The Exposure Time
21: Full configuration, 8 taps, 8 bit output Notes: • To obtain the current data mode, use the command clm. • The bit patterns are defined by the DALSA Camera Link Roadmap and the Camera Link Standard. Example: clm 15 DALSA 03-032-10216-02... - Page 32 Purpose: In DALSA cameras, the sot command works in conjunction with the clm command (see above) and determines the throughput of the camera. The Piranha3 currently only supports a throughput of 320. This may change in future cameras. Syntax: sot m Syntax Elements: Output throughput.
-
Page 33: Data Processing
Pixel start number. Must be less than the pixel end number in a range from 1 to sensor resolution. Column start number. Since the Piranha3 is a line scan camera, this value must be 1. Pixel end number. Must be greater than or equal to the pixel start number in a range from 2 to sensor resolution. -
Page 34: Digital Processing
Fixed pattern noise (FPN) calibration (calculated using the command) is used to subtract away individual pixel dark current. The digital offset ( command) enables the subtraction of the “artificial” A/D offset (the analog offset) so that application of the PRNU coefficient doesn’t result in 03-032-10216-02 DALSA... -
Page 35: Calibrating The Camera To Remove Non-Uniformity (Flat Field Correction)
The white light calibration is performed next to determine the multiplication factors required to bring each pixel to the required value (target) for flat, white output. Video output is set slightly above the brightest pixel (depending on offset subtracted). DALSA 03-032-10216-02... - Page 36 When 6.25% of pixels from a single row within the region of interest are clipped, flat field correction results may be inaccurate. • Correction results are valid only for the current analog gain and offset values. If you change these values, it is recommended that you recalculate your coefficients. 03-032-10216-02 DALSA...
- Page 37 . You should see close to zero output. Perform PRNU calculation next to determine the multiplication factors required to bring each pixel to the required value (balance target) for Perform PRNU calculation flat, white output. 1. Place a white reference in front of the camera. 2. Verify that the output signal level is within range by issuing the command or . If the signal level is too low, increase your light level, adjust the analog gain ( ) or use the automated algorithm ccg i 0 i DALSA recommends a target value of about 80% of saturation. If you change the gain, FPN coefficients should be recalculated. 3. Issue the command . The camera will respond with OK>( if no error occurs). 4. After the calculation is complete, you can save these settings to non‐volatile memory so they will be remembered after power‐down and direction change. To do so, issue the commands and wus. . Enable the coefficients using the command, epc 1 1 . Note: All commands listed above are described in detail in the following sections in the order that they should be performed.
-
Page 38: Analog Signal Processing: Setting Analog Gain And Offset
Tap selection. Use 0 for all taps or 1 to 8 for individual tap selection. Gain value in a range from –10 to +10dB in steps of .035 (typical). • Notes: To return the current analog gain setting, use the command sag. Example: sag 0 5.2 Related Commands: 03-032-10216-02 DALSA... - Page 39 0 0, and 0 0, 0 0, 0 4096 Example: ccg 2 0 3040 Related Commands: sag, DALSA 03-032-10216-02...
- Page 40 Purpose: Sets the analog offset. The analog offset should be set so that it is at least 3 times the rms noise value at the current gain. DALSA configures the analog offset for the noise at the maximum specified gain and as a result you should not need to adjust the analog offset.
- Page 41 Figure 14: Calibrating Analog Gain for a Tap outside of the Region of Interest ccg 1 4 2800 Since tap 4 is within the region of interest, tap 4 gain is adjusted so that the peak value is set to 2800. Gain values for all other taps are left unchanged. 4095 Region of Interest Tap 4(even) 2800 Video Tap 3(odd) Tap 1(odd) Tap 5(odd) Tap 7(odd) Tap 2(even) Tap 6(even) Tap 8(even) 4000 12288 9700 After analog gain calibration Before analog gain calibration DALSA 03-032-10216-02...
- Page 42 Figure 15: Calibrating Analog Gain for a Tap inside the Region of Interest ccg 1 2 2800 Since tap 2 is completely outside the region of interest, an error message is returned and analog gain calibation does not occur. 4095 Region of Interest 2800 Video Tap 1(odd) Tap 3(odd) Tap 5(odd) Tap 7(odd) Tap 2(even) Tap 4(even) Tap 6(even) Tap 8(even) 4000 12288 9700 After analog gain calibration Before analog gain calibration 03-032-10216-02 DALSA...
- Page 43 To update the analog gain reference: Purpose: Sets the current analog gain setting to be the 0dB point. This is useful after tap gain matching allowing you to change the gain on all taps by the same amount. Syntax: DALSA 03-032-10216-02...
-
Page 44: Digital Signal Processing
Purpose: Sets an individual pixel’s FPN coefficient. Syntax sfc x i Syntax Elements: The pixel number from 1 to sensor pixel count. Coefficient value in a range from 0 to 2048 (12 bit LSB). Example: sfc 10 50 03-032-10216-02 DALSA... - Page 45 Ensure camera is operating at its expected analog gain, integration time, and temperature. • Refer to Calibrating the Camera to Remove Non- Uniformity (Flat Field Correction)on page 35 for a procedural overview on performing flat field correction. Related Commands: DALSA 03-032-10216-02...
- Page 46 You can then adjust the digital offset ( command) to remove some of the FPN. • Note: Refer to Calibrating the Camera to Remove Non- Uniformity (Flat Field Correction)on page 35 for a procedural 03-032-10216-02 DALSA...
- Page 47 You should try to make your darkest pixel in the scene equal to zero. Syntax: ssb t i Syntax Elements: Tap selection. Allowable range is 1 to 8, or 0 for all taps. Subtracted value in a range in DN from 0 to 4095. DALSA 03-032-10216-02...
- Page 48 Gain setting. The gain ranges are 0 to 65535. The digital video values are multiplied by this value where: D igital G ain= 4096 Use this command in conjunction with the command. Related Commands: Example: ssg 1 15 03-032-10216-02 DALSA...
-
Page 49: Returning Calibration Results And Errors
The first pixel number of the range. The last pixel number of the range. Coefficient value in a range from 0-2048. • Notes: The first pixel of the range must be less than the last. Example: sfr 1 100 80 DALSA 03-032-10216-02... - Page 50 LVAL is not high during the end-of-line statistics. Notes: Example: els 1 Table 13: End-of-Line Sequence Description Location Value Description A’s By ensuring these values consistently toggle between "aa" and "55", you can 5’s verify cabling (i.e. no stuck bits) 03-032-10216-02 DALSA...
-
Page 51: Setting Thresholds
Sets the lower threshold limit to report in the end-of-line sequence. Syntax: slt i Syntax Elements: Upper threshold limit in range from 0 to 4095. • LVAL is not high during the end-of-line statistics. Notes: • Related Commands: Example: slt 1024 DALSA 03-032-10216-02... -
Page 52: Piranha 3 User Manual
• To restore saved pixel coefficients, use the command lpc i Current Session Settings These are the current operating settings of your camera. To save these settings to non- volatile memory, use the command 03-032-10216-02 DALSA... - Page 53 2 = Coefficient set two 3 = Coefficient set three 4 = Coefficient set four Example: lpc 0 Resetting the Current Pixel Coefficients Purpose: Resets the current pixel coefficients to zero. This command does not reset saved coefficients. Syntax: DALSA 03-032-10216-02...
-
Page 54: Diagnostics
3.4.1 Setting a Region of Interest (ROI)). Use the gl command, or the following command, to ensure the proper video input range into the processing chain before executing any pixel calibration commands. Syntax: gl x1 x2 Syntax Elements: 03-032-10216-02 DALSA... -
Page 55: Returning Averaged Lines Of Video
Analog gain, analog offset, digital offset, background subtract, and digital system gain are applied to the data. FPN and PRNU coefficients are not included in the data. • Values returned are in 12 bit DN. Related Commands: css, Example: gla 10 20 DALSA 03-032-10216-02... - Page 56 3.6.5 Camera Frequency Measurement Purpose: Returns the frequency for the requested Camera Link control signal Syntax: gsf i Syntax Elements: Camera Link control signal to measure: 1: CC1 (EXSYNC) 2: CC2 (PRIN) 3: CC3 (Spare) 4: CC4 (Spare) Example: gsf 1 03-032-10216-02 DALSA...
-
Page 57: Returning All Camera Settings With The Camera Parameter Screen
Value is set with command. See section 3.2.1 Exposure Mode, Line Rate and Exposure Time for details. Current video mode value Video Mode: video set with the command. See section 3.6.1 Generating a Test Pattern for details. DALSA 03-032-10216-02... - Page 58 See section 3.4.3 End-of- line Sequence for details. Camera Link mode set Camera Link Mode: 21, Full, 8 taps, 8 with the command. bits, no time MUX See section 3.3.1 Setting the Camera Link Mode for details. 03-032-10216-02 DALSA...
- Page 59 Camera throughput value Output Throughput: set with the command. Throughput is set to 320 and is not configurable in the Piranha3 camera. See section 3.3.2 Setting the Camera Throughput for details. Pretrigger set with the spt Pretrigger command. See section 3.3.3 Setting a Pretrigger.
-
Page 60: Returning Camera Settings With Get Commands
Returns pixel values for the pixel range specified. get gl x1 x2 Returns the average of the pixel range indicated. get gla x1 x2 Returns the frequency of the Camera Link control signal get gsf indicated, either 1, 2, 3, or 4. 03-032-10216-02 DALSA... - Page 61 Returns the current line/frame rate in Hz. get ssf Returns the current digital gain setting. get ssg t = tap selection, either 1 to 8, or 0 for all taps Returns the current uppder threshold value. get sut DALSA 03-032-10216-02...
- Page 62 Returns whether PRNU coefficients have been saved. get wpc 0 = No PRNU coefficients saved 1 = Pixel coefficients have been saved Returns whether user settings have been saved. get wus 0 = No user settings saved 1 = User settings have been saved 03-032-10216-02 DALSA...
-
Page 63: Optical And Mechanical Considerations
Piranha 3 User Manual Optical and Mechanical Considerations 4.1Mechanical Interface Figure 18: Piranha3 Mechanical Drawing 6.56±0.25 IMAGE PLANE CCD OPTICAL IMAGING DISTANCE (FROM TOP //1.0 ~ WITH RESPECT 25.00±0.05 15.0 OF CCD TO DATUM A) (80.0) TO DATUM A. IMAGING (12.0) - Page 64 DISTANCE (FROM TOP OF 6.0 (2X) CCD TO DATUM A) 12.5 M3x0.5 55.0 x 6.0 DEEP (2X) Figure 20:: Piranha3 square with heat sink Mechanical Drawing 80.0 M3x0.5 73.0 (2X) x 6.0 DEEP (72.5) (4X) 6.0 (4X) 42.50±0.05 15.0 (2X) IMAGING 36.5...
-
Page 65: Lens Mounts
Factors include the nature, speed, and spectral characteristics of objects being imaged, exposure times, light source characteristics, environmental and acquisition system specifics, and more. DALSA’s Web site, http://vfm.dalsa.com/, provides an introduction to this potentially complicated issue. See “Radiometry and Photo Responsivity”... -
Page 66: Lens Modeling
45mm, and requires that 100μm in the object space correspond to each pixel in the image sensor. Using the preceding equation, the object distance must be 450mm (0.450m). μ 0 450 μ 03-032-10216-02 DALSA... -
Page 67: Troubleshooting
Data Clocking/Output Signals To validate cable integrity, have the camera send out a test pattern and verify it is being properly received. Refer to section 3.6.1 Generating a Test Pattern for further information on running test patterns. DALSA 03-032-10216-02... -
Page 68: Troubleshooting Using The Serial Interface
Do not attach wires to unused pins. Verify that the camera is not receiving spurious inputs (e.g. EXSYNC, if camera is using an internal signal for synchronization). Line Dropout, Bright Lines, or Incorrect Line rate Verify that the frequency of the internal sync is set correctly. 03-032-10216-02 DALSA... -
Page 69: Noisy Output
If you have verified that your exposure time is consistent and patterns of low frequency intensity variations still occur, ensure that you are using a DC or high frequency light source and that no ambient light is affecting your system. DALSA 03-032-10216-02... -
Page 70: Product Support
Detailed description of problem please attach description with as much detail as appropriate encountered. In addition to your local DALSA representative, you may need to call DALSA Technical Sales Support: North America Europe Asia Voice:... -
Page 71: Camera Link™ Reference, Timing, And Configuration Table
DALSA Camera Link Implementation Road Map (available at http://vfm.dalsa.com/support/appnotes/00450-00_03- 32_DALSA_Camera_Link_Road_Map.pdf) details how DALSA standardizes its use of the Camera Link interface. LVDS Technical Description Low Voltage Differential Signaling (LVDS) is a high-speed, low-power general purpose interface standard. -
Page 72: Video Data
• Camera Control 1 (CC1) • Camera Control 2 (CC2) • Camera Control 3 (CC3) • Camera Control 4 (CC4) The Piranha3 uses the following camera control signals: Table 15: DALSA Camera Control Configuration EXSYNC, negative edge active PRIN Not Used... -
Page 73: Power
Piranha 3 User Manual send or receive a character string. See Appendix B in the Official Camera Link specification on the http://vfm.dalsa.com Web site. Power Power will not be provided on the Camera Link connector. The camera will receive power through a separate cable. Camera manufacturers will define their own power connector, current, and voltage requirements. - Page 74 Piranha 3 User Manual 03-032-10216-02 DALSA...
-
Page 75: Error Handling And Command List
A FPN/PRNU has been calculated to be greater than the maximum than 1% of allowable 511 (8). coefficients have been clipped Message Description Error 01: Internal Output only in “diagnostic mode” or self check at power or reset error xx> camera. Where xx is a code. DALSA 03-032-10216-02... -
Page 76: B2 All Available Commands
Refer to Analog Signal Processing: y2 = vertical pixel end Setting Analog Gain and Offset for number details. correction calibrate fpn Start FPN coefficient calibration. Refer to section 3.4.2 Analog and Digital Signal Processing Chain for details. 03-032-10216-02 DALSA... - Page 77 15 : Medium configuration, 4 taps, 8 bit output 16 : Medium configuration, 4 taps, 12 bit output 21 : Full configuration, 8 taps, 8 bit output Refer to section 3.3.1 Setting the Camera Link Mode for details. DALSA 03-032-10216-02...
- Page 78 1024 to 4055 DN. correction set sample Set number of line samples averaged for pixel coefficient calculations or for output of command. Values: 256 , 512 , 1024 . Refer to Returning Averaged Lines of Video on page 55 for details. 03-032-10216-02 DALSA...
- Page 79 = Pixel start number x2 = Pixel end number in a range from 1 to sensor pixel count. Refer to Returning a Single Line of Video on page 54 for details. DALSA 03-032-10216-02...
- Page 80 Reset the pixel coefficients to 0. Refer to Resetting the Current Pixel Coefficients on page 53 for details. restore user settings Restore the camera's last saved user settings and FPN and PRNU coefficients. Refer to section 3.5 Saving and Restoring Settings for details. 03-032-10216-02 DALSA...
- Page 81 Factory setting. 8 = Internal SYNC, internal PRIN, programmable exposure time. Maximum line rate for exposure time. set exposure time Sets the exposure time. Refer to the camera help screen ( h command) for allowable range. DALSA 03-032-10216-02...
- Page 82 320 = 4 taps at 80MHz or 8 taps at 40MHz This command is currently not configurable in the Piranha3 camera. set prnu coeff Set the PRNU coefficient. x =pixel number within the range 1 to sensor pixel count .
- Page 83 EEROM where i is: 1 = PRNU coefficient set one 2 = PRNU coefficient set two 3 = PRNU coefficient set three 4 = PRNU coefficient set four Refer to section 3.5.1 Saving and Restoring PRNU and FPN Coefficients for details. DALSA 03-032-10216-02...
- Page 84 Piranha 3 User Manual write user settings Write all of the user settings to EEROM. Refer to section 3.5 Saving and Restoring Settings for details. 03-032-10216-02 DALSA...
-
Page 85: Emc Declaration Of Conformity
This product complies with the requirements of the Low Voltage Directive 73/23/EEC and the EMC Directive 89/336/EEC and carries the CE mark accordingly. Place of Issue Waterloo, ON, CANADA Date of Issue April 2005 Name and Signature Hank Helmond of authorized person Quality Manager, DALSA Corp. DALSA 03-032-10216-02... - Page 86 Piranha 3 User Manual This Declaration corresponds to EN 45 014. 03-032-10216-02 DALSA...
-
Page 87: Revision History
47, 49, and 83. Tooling hole dimensions added to mechanical drawing, section 4.1 page 63. Piranha3 square option added to mechanicals section, section 4.1 page 63. Also added to the Models table, page 8, and to the EMC declaration, page 85. - Page 88 Piranha 3 User Manual 03-032-10216-02 DALSA...
-
Page 89: Index
50 restrictions, 36 command results, 49 format, 23 FPN, 35 list, 76 coefficient, 44 parameters, 24 correction, 44 commands, 26 FVAL, 72 connectors, 15–19 Camera Link, 17 Hirose, 17 power, 17 gain, 23, 39, 41, 43 analog, 38 DALSA 03-032-10216-02... - Page 90 66 coefficients, 53 MDR26. See Camera Link user settings, 52 connector sensor, 12 mechanical readout, 12 drawing, 63 specifications, 9 specifications, 9 serial interface, 23 models, 8 settings modes restoring, 52 default, 29 returning, 57, 60 03-032-10216-02 DALSA...
- Page 91 68 subtracting background, 47 serial interface, 68 sync frequency, 56 video data, 55, 72 tap matching, 39 voltage Technical Sales Support, 70 measurement, 56 temperature measurement, 56 test patterns, 54 threshold warning messages, 75 lower, 51 upper, 51 DALSA 03-032-10216-02...
Need help?
Do you have a question about the Piranha3 and is the answer not in the manual?
Questions and answers