Table of Contents
Advertisement
Advertisement
Table of Contents

Related Manuals for BFT ALTAIR


Summary of Contents for BFT ALTAIR
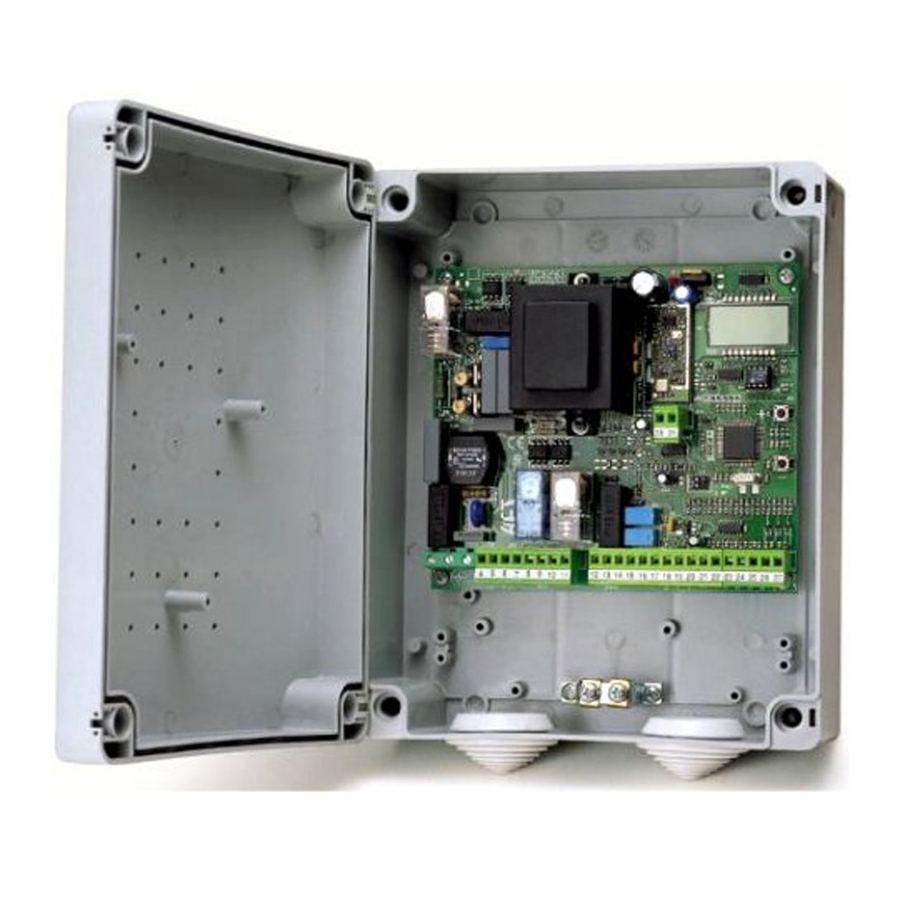
- Page 1 ALTAIR D811321 05-05-02 Vers. 04 CONTROL UNIT...
- Page 2 15-16 Output (N.O. contact (24V /0.5A max)) for gate-open warning The ALTAIR control panel is suitable for swing gates. It is supplied by the light or, alternatively, 2nd radio channel (see paragraph 6 manufacturer with standard functional settings. Any alteration must be set “configuration”)
- Page 3 Connect the UNIPRO programmer to the control unit by means of the connections. UNIDA accessory (see fig. 4). The Altair control unit does not supply the To go back and exit the programming function, simultaneously press the up/ UNIPRO programmer, which therefore needs an appropriate supply unit.
- Page 4 The Clonix 64 receiver is programmed by connecting UNIRADIO to the with the key label) refer to the instructions on the UNIRADIO device, or ALTAIR control panel, using the UNIFLAT and UNIDA accessories, as observe the following simplified procedure: 1) Switch UNIRADIO on and wait for the welcome message.
- Page 5 5) Configure the receiver following the instructions displayed on the Connect the UNIPRO programmer to the control unit by means of the screen: UNIDA accessory (see fig.4). The Altair control unit does not supply the list definition: enter 64 UNIPRO programmer, which therefore needs an appropriate supply unit.
- Page 6 11.2) Programming of centralised installation through display The display programmer available in the board allows you to set all the ALTAIR control panel functions. Make reference to fig. A and B. Set the zone number in the PARAMETERS menu, and set the closed loop/open loop and master/no master values in the LOGICS menu.
- Page 7 The modifications made are only confirmed if the OK key is subsequently pressed. Preset value Control unit software version ALTAIR-MA1. 0 OK! message (confirms modification made) Parameter increment/reduction No. total manoeuvres /OFF 0000...
- Page 8 ALTAIR ALTAIR Fig. B FIG. 1A FIG. 2A T2 T1 PRECEDING MENUS FIG. A TRC 4 TRC 1-2 MITTO 2-4 TRC 4 TRC 1-2 RADIO Press P1 (pushbutton) on radio t1 start t2 2ch hidden button release control device Ð see Fig. 1A...
- Page 9 ALTAIR ALTAIR Fig. 1 Fig. 2 8888 0,1 AT 13 14 15 16 17 18 19 21 21 10 11 8888 8888 ALTAIR 13 14 15 16 17 18 19 21 21 10 11 12 Fig. 3 13 14 15 II¡...
- Page 10 ALTAIR ALTAIR Fig. 4 TRC 1-2 MITTO 2-4 ALTAIR UNIPRO/UNIRADIO UNIFLAT UNIDA Contatti Contacts Contacts UNIFLAT Kontakte Contactos Contatos UNIFLAT Contatti Contacts UNIFLAT UNITRC Contacts Kontakte Contactos Contatos TRC4 UNITRC UNIMITTO TRC1-2 Contatti Contacts MITTO 2-4 Contacts Contatti Contacts Kontakte...
- Page 11 ALTAIR ALTAIR Fig. 5 - 0 3 - 2 2 - 0 2 - 2 2 - 0 1 - 2 2 - 0 0 - 2 2 Fig. 6 Fig. 7 UNIRADIO ALTAIR ALTAIR/SCS1 ALTAIR/SCS2 ALTAIR/SCS3 Max. 250m CONTROL UNITS...
Need help?
Do you have a question about the ALTAIR and is the answer not in the manual?
Questions and answers