
Related Manuals for Aim Solo 2 DL


Summary of Contents for Aim Solo 2 DL
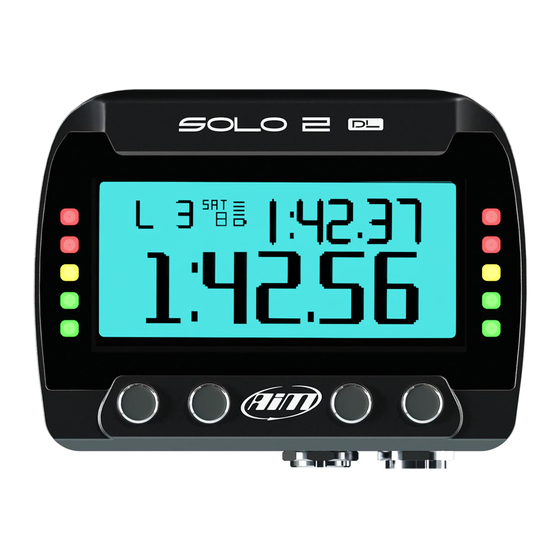
- Page 1 Solo 2 DL GPS Lap Timer USER GUIDE 1.00 Made in Italy www.aim-sportline.com...
-
Page 2: Table Of Contents
7.2.7 SmartyCam stream setting 6.2.1 Creating a track with Solo 2 7.3 Transmitting multiple configurations 6.3 Backlight 7.4 Managing a track on Solo 2 DL with Race Studio 3 6.4 Wi Fi 7.5 ECU Driver builder 6.5 System settings 7.6 The device window 6.5.1 Configurations... -
Page 3: Solo 2 Dl In A Few Words
CHAPTER 1 SOLO 2 DL 1. Solo 2 DL in a few words What is Solo 2 DL? What about ECU connection? Solo 2 DL is the new AiM GPS Solo 2 DL manages all the hardware log-timer (laptimer with internal data... -
Page 4: What Is In The Kit
CAN/RS232 external power cable RPM/External power cable (if your vehicle has no ECU) 3 - Solo 2 DL battery charger, available in four versions with Australian, UK, USA and European adaptor 4 - Solo 2 DL mounting bracket with screws... -
Page 5: Installation, Powering And Accessories
Solo 2 DL can be installed on almost any kind of motorsport vehicle. need in each situation. This is also very helpful for a team manager, that can customize Solo 2 DL is powered by the vehicle battery and its switches off with the vehicle engine. the configuration(s) for each racer. - Page 6 CHAPTER 3 SOLO 2 DL Solo 2 DL Wide display Integrated GPS Magnets Power and battery charge RGB predictive lights Nylon body...
-
Page 8: At Power On
6. What you can do via keyboard When switched on Solo 2 DL shows satellite page. Solo 2 DL is mainly configurable using Race Studio 3 software but some functions are settable via keyboard as explained here below. Press “MENU” and this page shows up. -
Page 9: Type Of Racing
SOLO 2 DL 6.1 Type of racing “Memo trigger” ” option allows you to decide when your Solo 2 DL starts recording. Solo 2 DL features two different type of races, each of them with different options: Available options are:... -
Page 10: Track Management
6.2.1 Creating a track with Solo 2 DL Solo 2 DL built in GPS receiver is used for: If you are running in a track NOT included in Solo 2 DL database the device switches n Lap time calculation to “learning” mode and behave this way:... -
Page 11: Backlight
6.3 Backlight 6.5 System settings You can set Solo 2 DL backlight as “ON” (default setting) or “OFF” as well as choose Selecting this icon you enter this page: among eight different colours: white, purple, red, green, yellow, blue, magenta and cyan. -
Page 12: Unit Of Measure
6.5.3 Date Time 6.5.5 System info Here you can set the time zone of your Solo 2 DL as well as enable/disable “Daylight This page shows serial number as well as firmware and boot version of your Solo 2 DL. -
Page 13: Solo 2 Dl And The Pc
1 – As an Access Point (AP – default) This is the ideal configuration if you have one only device and one only computer. In this situation your Solo 2 DL creates a Wi-Fi network and works as an Access Point 7.1 Connection to the PC you can connect your PC to. -
Page 14: Configuring Solo 2 Dl As An Access Point Ap
This is Solo 2 DL default configuration and is the easiest and most direct connection mode, ideal if you want to communicate with one Solo 2 DL using one PC. It is free flexible and powerful because allows you to communicate with more than one device and so completely accessible by anyone. - Page 15 If, for example you add the driver’s name, Tom Wolf, the network name (SSID) becomes: ”AiM-Solo2DL-00103-TomWolf” Once all parameters set click“Transmit”. Solo 2 DL reboots and is configured with the new parameters. If Solo 2 DL is protected by a password, as recommended, Race Studio 3 will ask that password to authenticate.
-
Page 16: Adding Solo 2 Dl To An Existing Network
This situation is ideal for a team with multiple drivers and staff members and is desired to communicate with one or more AiM devices using the same PC network. Each Solo 2 DL can have its password that adds another security and privacy level to the network. -
Page 17: Wi Fi Network Settings
It means that the WLAN network name is“network_1. ” A PC has to be authenticated in this network to interact with any AiM device of this network. In this chapter you find a short description of how to configure a WLAN including n Gateway address: 192.168.0.1... -
Page 18: The Internet Connectivity
Parallels. 7.1.6 Connection issues It can occur that Solo 2 DL is correctly connected to Race Studio 3 via Wi-Fi but the user interface does not show it. This may be because Wi-Fi port setting is set with a static IP. To switch it to dynamic (DHCP): n open “Network and sharing centre”... - Page 19 CHAPTER 7 SOLO 2 DL To ensure that the communication To enable Race Studio 3 correctly working on a Mac with virtualized Windows works select n press Wi-Fi icon “Open Network preferences” menu. n select “Wi-Fi Settings” icon Verify that the status in the window that shows up is “Connected”...
-
Page 20: Connected Device Visualization Issues
2-DL”and press“OK”. and configurations page appears This router work as an Access Point allowing more external devices to connect to its network. Solo 2 DL Wi-Fi configuration is to be set on Existing Network as explained before. -
Page 21: Channels Configuration
Solo 2 DL can be connected to your vehicle ECU. When possible, documents explai- Solo 2 DL channels. ning how to connect your Solo 2 DL to your vehicle ECU are published on our website www.aim-sportline.com. As explained, Solo 2 DL can communicate with your ECU using all currently available communication lines: CAN, RS232, K-Line. -
Page 22: Lcu One Can Setting
Solo 2 DL can be connected to AiM LCU One CAN lambda controller plugging the 5 Parameters page is divided in two parts. pins male Binder connector of LCU one in the female one bottom left of Solo 2 DL. n on top GPS Lap detection parameters; mousing over the question marks a pop-up Once the expansion connected you need to set it: n enter “LCU-One CAN”... -
Page 23: Led Bars Setting
LED. Assuming you fill in “0.1” and your lap time is case you need to fill in max gear number and set LEDs colours and threshold improving of 0.3 sec toward the reference lap your, Solo 2 DL will switch on 3 LEDs values for each gear. -
Page 24: Display Settings
SOLO 2 7.2.6 Display settings Solo 2 DL can have up to eight pages to be set via software. Each page can have from When the page has been selected two setting panels appears bottom of the page: 1 to 4 fields and can be set as you prefer. -
Page 25: Smartycam Stream Setting
Solo 2 DL selecting them and pressing transmit or in “drag and drop” mode. The software shows that you are transmitting multiple configurations. Solo 2 DL can be connected to AiM SmartyCam to show the data you wish on SmartyCam video. To set each channel:... - Page 26 SOLO 2 DL 7.4 Managing a track on Solo 2 DL with RS3 When your Solo 2 DL is connected it is shown on the left bottom part of the page as said before. With Track Manager function of Race Studio 3 you can create, delete and modify Clicking on it all the tracks it contains are shown in the right column of the page.
- Page 27 The keyboard you find above the central column allows you to: As said before, if your Solo 2 DL detects if the track it is racing on is not included in its database, it starts recording in “learning” mode. At the end of the session you can connect it to the PC to add the track map to your PC database.
-
Page 28: Ecu Driver Builder
You can add a new ECU Manufacturer and/or a new ECU model. Please note: this Race Studio function is for expert users only and a CAN Driver builder user manual can be freely downloaded from AiM website at www.aim-sportline.com, documentation area software/firmware section. -
Page 29: The Device Window
“TRACK” button. When you start the engine of your car it goes If you click your Solo 2 DL you enter the device window and have these options: away automatically. It shows: n Live Measures: to check all Solo 2 DL channels;... -
Page 30: Other
Data recall is different according to the race type you set on Solo 2 DL. Use “NEXT” button to scroll them. Laptime page is shown no matter which type of race you set your Solo 2 DL on. It shows the lap time. -
Page 31: Data Recall "Performance" Mode
CHAPTER 10 SOLO 2 DL 9.2 Data Recall “Performance” mode 10. Data download Once Solo 2 DL-PC connection is established activate “Download” tab to download If you set “Type of Race – Performance” sampled data. data recall shows these pages. -
Page 32: Data Analysis
CHAPTER 11 SOLO 2 DL 11. Data Analysis When data have been downloaded press Analysis icon and Race Studio Analysis software Select your file double clicking on it and start analysing it. A lot of pages, graphs and will open showing this page. -
Page 33: New Firmware Upgrade
13.1 RPM from ECU Click it and freely download the new applications. To get the RPM from the ECU you only need to connect your Solo 2 DL to the ECU and it will automatically sample that value. 13.2 RPM via a 5-50V square wave or coil... - Page 34 CHAPTER 13 SOLO 2 DL In case the vehicle ignition system has no output you need to connect Solo 2 DL to Once Solo 2 DL connected to RPM signal you can set its parameters in channels layer the low voltage of the coil as shown in the following images.
-
Page 35: Connection With Smartycam And Lcu One
To connect Solo 2 DL to SmartyCam GP HD use SmartyCam CAN cable and connect One CAN as shown in the images below. 5 pins Binder connector placed bottom left of Solo 2 DL to 7 pins central Binder con- nector of SmartyCam HD as shown here below. -
Page 36: Technical Specifications And Drawings
CHAPTER 15 SOLO 2 DL 15. Technical specification and drawings Pinout Solo 2 DL n Display Graphical n Display resolution 238 x 99 pixels n Display pages Up to 8 freely configurable n Backlight 7 configurable RGB colour n ShiftLights/alarms LEDs... - Page 37 CHAPTER 15 SOLO 2 DL CAN+RS232+External Power cable – 2m length CAN+K-Line+ power cable with OBDII connector – 2m length...
- Page 38 CHAPTER 15 SOLO 2 DL RPM+Power cable – 2m length Our web site, www.aim-sportline.com is constantly updated. Please refer to it to download the last release of our documentation...
Need help?
Do you have a question about the Solo 2 DL and is the answer not in the manual?
Questions and answers