Table of Contents

Subscribe to Our Youtube Channel
Related Manuals for AERMEC Omnia HL L


Summary of Contents for AERMEC Omnia HL L
- Page 1 VENTILCONVETTORI FAN COIL VENTILO-CONVECTEURS GEBLÄSEKONVEKTOREN Omnia HL L HL LM ISO 9001 - Cert. n° 0128/4 IHLLLX 0711 Sostituisce il - Replace - Remplace le n° - Ersetzt: 68872.52_05 68872.52_04 / 0404...
-
Page 3: Table Of Contents
Operation • Packaging • Installation Electrical connections •Coil rotation Dipswitch configuration Autotest function Important maintenance information Description de l’unité Omnia HL L - HL LM Emploi • Visualisation Caracteristiques de fonctionnement • Emballage • Installation de l’unité Connexions electriques • Rotation batterie Configuration Dip... -
Page 4: Dichiarazione Di Conformit
Omnia HL + ZUBEHÖR Il est interdit de faire fonctionner l'appareil avec des acces- Falls das Gerät mit Zubehörteilen ausgerüstet wird, die nicht soires qui ne sont pas fournis de Aermec. von Aermec geliefert werden, ist dessen Inbetriebnahme solange untersagt. -
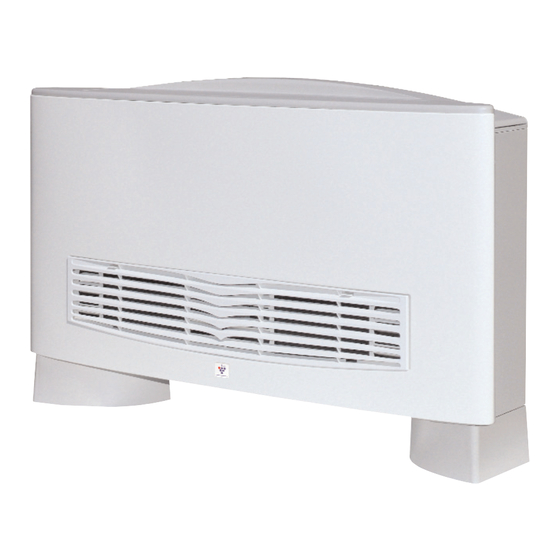
Page 5: Descrizione Di Omnia Hl L - Hl Lm
Facilità di installazione che può essere sia orizzontale sia in tutto il locale; OMNIA HL L - LM genera calore se inseri- to in un impianto termico con caldaia o pompa di calore ma verticale, anche in nicchia, con attacchi idraulici reversibili può... - Page 6 17°C 12°C posizione centrale sono +8°C e -8°C Cambio stagione Il ventilconvettore OMNIA HL L - HL LM imposta automati- camente il funzionamento a Caldo o a Freddo in funzione delle temperature dell’acqua nell’impianto. VISUALIZZAZIONI LUMINOSE Il led (C) cambia di colore per indicare il modo di funziona-...
- Page 7 CARATTERISTICHE DI FUNZIONAMENTO a) se il termostato è in modo Freddo e la richiesta del ter- I ventilconvettori OMNIA HL L - HL LM sono forniti pronti a mostato è di 5°C inferiore al set impostato, allora automati- funzionare in configurazione standard, ma consentono camente il termostato richiede il modo Caldo.
-
Page 8: Collegamenti Elettrici • Rotazione Batteria
COLLEGAMENTI ELETTRICI ROTAZIONE DELLA BATTERIA ATTENZIONE: prima di effettuare qualsiasi intervento, Se per motivi di allacciamenti idraulici, si dovesse ruotare la batteria, dopo aver tolto il mobile, procedere come segue: assicurarsi che l’alimentazione elettrica sia disinserita. a) staccare i collegamenti elettrici dalla morsettiera; In particolare per i collegamenti elettrici si richiedono le b) togliere la sonda dalla batteria;... -
Page 9: Configurazione Dip
CONFIGURAZIONE DIP Pretarato in fabbrica Pretarato in fabbrica Pretarato in fabbrica Pretarato in fabbrica Sw 1 Sw 2 Pretarato in fabbrica Pretarato in fabbrica Pretarato in fabbrica Pretarato in fabbrica = Impostazioni di fabbrica Sw Scheda Driver IMPOSTAZIONI DIP-SWITCH Togliere tensione all’unità. Da eseguire in fase di installazione solo da personale specializzato. -
Page 10: Autotest
AUTOTEST É disponibile la funzione Autotest per accertare il funzionamento del ventilconvettore. La sequenza di Autotest è la seguente: 1) Selettore (B) in posizione centrale. 2) Selettore (A) in posizione OFF. 3) Agendo sul selettore (A), eseguire velocemente la sequenza: AUTO →... -
Page 11: Informazioni Importanti E Manutenzione
INFORMAZIONI IMPORTANTI E MANUTENZIONE Il ventilconvettore è collegato alla rete elettrica ed al circuito idraulico, un intervento da parte di personale non provvisto di specifica competenza tecnica può causare danni allo stesso operatore, all’apparecchio ed all’ambiente circostante. ALIMENTARE IL VENTILCONVETTORE SOLO CON TENSIONE 230 VOLT MONOFASE Utilizzando alimentazioni elettriche diverse il ventilconvettore può... - Page 12 OMNIA HL L - LM is provided with an internal control crowding or in those with special hygiene requirements. panel which can be used to control a step motor that will...
- Page 13 The maximum temperature deviations from the central posi- tion are +8°C and -8°C . Season change The OMNIA HL L - HL LM automatically sets to Heating or Cooling mode according to the temperature of the water cir- culating through the unit.
-
Page 14: Operation • Packaging • Installation
- water probe SW fault: the thermostat sets to "Season chan- OPERATION geover" mode. OMNIA HL L - HL LM fancoils are delivered ready to opera- - ventilation is constantly enabled. te in standard configuration, though can be adjusted by the... -
Page 15: Electrical Connections •Coil Rotation
ELECTRICAL CONNECTIONS COIL ROTATION WARNING: always check that the electricity supply to the If the water connection layout makes it necessary to turn the coil unit has been disconnected before carrying out any opera- around, first remove the cabinet and then proceed as follows. tions. -
Page 16: Dipswitch Configuration
DIPSWITCH CONFIGURATION Sw 1 Sw 2 = Factory settings Sw Driver board SETTING OF THE CONTROL PANEL DIP-SWITCH Configuration of dipswitches must only be carried out by qualified personnel during unit installation. Always disconnect the power supply before performing this operation. Adjust the dipswitches inside the thermostat for the following functions: Dipswitch 1 (Default OFF) Sw 2... -
Page 17: Autotest Function
AUTOTEST FUNCTION This function is designed to check the operation of the fancoil. To run the Autotest function, proceed as follows: 1) Selector switch D in central position. 2) Selector switch A in OFF position. 3) Adjust the selector switch A rapidly to obtain the following sequence: AUTO →... -
Page 18: Important Maintenance Information
IMPORTANT MAINTENANCE INFORMATION The fancoil is connected to the power supply and a water circuit. Operations performed by persons without the required technical skills can lead to personal injury to the operator or damage to the unit and surrounding objects. POWER THE FANCOIL WITH SINGLE-PHASE 230 V ONLY Use of other power supplies could cause permanent damage to the fancoil. -
Page 19: Description De L'unité Omnia Hl L - Hl Lm
également, une condition nécessaire pour les installations OMNIA HL L - LM est muni d'un panneau de commandes dans des locaux très fréquentés ou qui exigent un standard interne qui permet de mettre en fonction un petit moteur. -
Page 20: Emploi • Visualisation
à la position centrale sont de +8° C et de -8° C. Changement de saison Le ventilo-convecteur OMNIA HL L - HL LM programme automatiquement le fonctionnement à chaud ou à froid en fonction de la température de l'eau dans le circuit. -
Page 21: Caracteristiques De Fonctionnement • Emballage • Installation De L'unité
CARACTERISTIQUES DE FONCTIONNEMENT thermostat est supérieure de 5° C au set programmé, le ther- Les ventilo-convecteurs OMNIA HL L - HL LM sont livrés prêts mostat demande alors automatiquement le mode Froid. à fonctionner dans une configuration standard, mais ils permet- tent, en fait, à... -
Page 22: Connexions Electriques • Rotation Batterie
CONNEXIONS ELECTRIQUES ROTATION DE LA BATTERIE ATTENTION ! s'assurer, avant d'effectuer une quelconque Si pour des motifs de raccordement hydraulique on devait tourner intervention, que l'alimentation électrique est bien désactivée. la batterie, après avoir retiré le meuble, procéder comme suit: En particulier pour les branchements électriques les con- a) débrancher les raccordements électriques du bornier;... -
Page 23: Configuration Dip
CONFIGURATION DIP Sw 2 Sw 1 Sw PLATINE PILOTE = Configurations de l’usine PROGRAMMATIONS DIP-SWITCH Couper la tension sur l'Unité. A effectuer au cours de l'installation uniquement par un personnel spécialisé. En intervenant sur les Dip-Switch à l'intérieur du thermostat nous obtiendrons les fonctionnalités suivantes: Sw 1 Sw 2 Dip 1 (Default OFF) -
Page 24: Autotest
AUTOTEST La présence de la fonction d'Autotest permet de s'assurer du fonctionnement du ventilo-convecteur. La séquence d'Autotest est la suivante : 1) Sélecteur (D) sur la position centrale. 2) Sélecteur (A) sur la position OFF. 3) En intervenant sur le sélecteur (A), effectuer rapidement la séquence : AUTO →... -
Page 25: Informations Importantes Sur La Maintenance
INFORMATIONS IMPORTANTES SUR LA MAINTENANCE Le ventilo-convecteur est connecté au réseau électrique et au circuit hydraulique : l'intervention d'un personnel sans compétence technique spécifique peut entraîner des blessures pour l'opérateur ou endommager l'appareil ou le milieu inté- ressé. ALIMENTER LE VENTILO-CONVECTEUR EXCLUSIVEMENT AVEC UNE TENSION DE 230 VOLTS MONOPHASE Si l'on utilise des alimentations électriques différentes, le ventilo-convecteur peut être irrémédiablement endommagé. -
Page 26: Beschreibung Des Gerätes Omnia Hl L - Hl Lm
(eine Arbeit, die nur von Personal mit spezifischer Klimagerät für jeden Raum machen. Fachkenntnis ausgeführt werden darf), ermöglicht die OMNIA HL L - LM ist mit einer internen Bedienungstafel sorgfältige Reinigung aller Innenteile, eine unerlässliche für die Steuerung eines Schrittmotors ausgestattet, der für Voraussetzung für Installationen in stark frequentierten... -
Page 27: Anwendung • Leuchtanzeigen
28°C 12°C von der Mittelstellung sind +8°C und -8°C Umstellung Sommer-/Winterbetrieb Der Gebläsevektor OMNIA HL L - HL LM schaltet entspre- chend der Wassertemperatur der Anlage automatisch auf Heiz- oder Kühlbetrieb um. LEUCHTANZEIGEN Die LED (C) zeigt die aktuelle Betriebsart durch Die LED (D) zeigt eine Lüftungsanforderung seitens des elek-... -
Page 28: Funktionseigenschaften • Verpackung • Installation Der Einheit
Modus "Sommer-Winter-Umschaltung nach FUNKTIONSEIGENSCHAFTEN Sollwert". Die Gebläsekonvektoren OMNIA HL L - HL LM werden Die Lüftung ist ständig aktiviert. betriebsbereit mit Standardkonfiguration geliefert, lassen Die saisonbedingte Umschaltung erfolgt nach folgenden dem Installateur jedoch genügend Spielraum, um die Geräte Vorgaben: mithilfe von Sonderzubehör spezifischen anlagentechni-... -
Page 29: Elektrischer Anschluss • Umdrehen Des Wärmetauschers
ELEKTRISCHER ANSCHLUSS UMDREHEN DES WÄRMETAUSCHERS ACHTUNG: Vergewissern sich, dass Falls es für den Wasseranschluss erforderlich sein sollte, den Stromversorgung des Gerätes unterbrochen ist, bevor Sie Wärmetauscher zu drehen, gehen Sie nach Abnahme der Eingriffe an demselben vornehmen. Verkeidung, wie folgt, vor: Die elektrischen Anschlüsse sind ganz besonders folgenden a)die elektrischen Anschlüsse von der Klemmenleiste abklem- Prüfungen zu unterziehen:... -
Page 30: Konfiguration Der Dip-Schalter
KONFIGURATION DER DIP - SCHALTER Sw 1 Sw 2 Sw 2 = Werkseinstellung EINSTELLUNGEN DIP-SCHALTER DER BEDIENUNGSTAFEL Das Gerät spannungslos schalten. Die Arbeiten sind während der Installation von nachweislich dazu befähigten Fachkräften auszuführen. Durch Einstellung der DIP - Schalter im Inneren des Thermostats können folgende Funktionsweisen erzielt werden: Sw 2 Sw 2 DIP 1 (Default OFF) -
Page 31: Autotest
AUTOTEST Die verfügbare Funktion Autotest dient zur Funktionskontrolle des Gebläsekonvektors. Die Autotest - Abfolge ist die folgende: 1) Wahlschalter (D) in die mittlere Position drehen. 2) Wahlschalter (A) auf Position OFF stellen. 3) Mit dem Schalter (A) schnell hintereinander die folgende Sequenz eingeben: AUTO →... -
Page 32: Wichtige Hinweise Und Wartung
WICHTIGE HINWEISE UND WARTUNG Der Gebläsekonvektor ist sowohl an das Stromnetz wie auch an die Wasserversorgung angeschlossen; Eingriffe durch Personen ohne spezifische technische Fachkenntnisse können zu Personenverletzungen und zu Maschinen- und Umweltschäden führen. DER GEBLÄSEKONVEKTOR DARF NUR MIT WECHSELSPANNUNG 230 VOLT BETRIEBEN WERDEN Jede andere Netzspannung kann zu nicht wiedergutzumachenden Schäden des Gebläsekonvektors führen. -
Page 33: Dati Dimensionali • Dimensions • Dimensions • Abmessungen
DATI DIMENSIONALI • DIMENSIONS • DIMENSIONS • ABMESSUNGEN [mm] Accessorio ZH ZH Accessory Accessorie ZH Zubehör ZH Mod Omnia HL 11 HL 16 HL 26 HL 36 Larghezza • Width • Largeur • Breite 1200 Altezza • Height • Hauter • Höhe Profondità... - Page 34 DATI DIMENSIONALI • DIMENSIONS • DIMENSIONS • ABMESSUNGEN [mm] Mod. HL 11 HL 16 HL 26 HL 36 1200 360,5 470,5 701,5 921,5...
-
Page 35: Schemi Di Montaggio • Installation Diagrams • Schémas De Montage • Einbaupläne
SCHEMI DI MONTAGGIO • INSTALLATION DIAGRAMS • SCHÉMAS DE MONTAGE • EINBAUPLÄNE OMNIA HL L - HL LM... -
Page 36: Schema Elettrico • Wiring Diagram • Schemas Electriques • Schaltplane
SCHEMI ELETTRICI • WIRING DIAGRAMS • SCHEMAS ELECTRIQUES • SCHALTPLÄNE LEGENDA • READING KEY • LEGENDE • LEGENDE = Connettore • Connector = Sonda temperatura acqua Connecteur • Schütz Water temperature sensor DRV = Scheda driver • Driver board Sonde eau Platine pilote •... -
Page 37: Trasporto • Carriage • Transport • Transport
TRASPORTO • CARRIAGE • TRANSPORT • TRANSPORT NON bagnare • Do NOT wet NON calpestare • Do NOT trample CRAINT l’humidité • Vor Nässe schützen NE PAS marcher sur cet emballage • Nicht betreten Sovrapponibilità: controllare sull’imballo la posizione della freccia per conoscere il numero di macchine impilabili Stacking: control the packing for the arrow position to know the number of machines that can be stacked... -
Page 38: Solution • Abhilfe
PROBLEMA • PROBLEM PROBABILE CAUSA • PROBABLE CAUSE SOLUZIONE • REMEDY PROBLEME • PROBLEM CAUSE PROBABLE • MÖGLICHE URSACHE SOLUTION • ABHILFE Poca aria in uscita Errata impostazione della velocità sul pannello comandi Scegliere la velocità corretta sul pannello comandi Select the speed on the control panel Feeble air discharge Wrong speed setting on the control panel... -
Page 39: Servizio Assistenza Tecnica Italia
MUREDDU L. di Mureddu Pasquale - Via Garigliano, 13 33050 Fraforeano (UD) - Tel. 0432 699 810 - ceit.srl@libero.it MACERATA - ASCOLI PICENO 09122 Cagliari - Tel. 070 284 652 - aermec@tiscalinet.it CAST s.n.c. di Antinori-Cardinali & R. - Via D. Alighieri, 68 VENETO... - Page 40 – guasti conseguenti ad azioni volontarie o accidentali che non derivino da difetti originari dei materiali di fabbricazione. AERMEC Spa effettuerà la riparazione o la sostituzione gratuita, a sua scelta, delle parti di apparecchiatura che dovessero presentare difetti dei materiali o di fabbricazione tali da impedirne il normale funzionamento. Gli eventuali interventi di riparazione o sostituzione di parti dell’apparecchio, non modificano la data di decorrenza e la durata del periodo di garanzia.
Need help?
Do you have a question about the Omnia HL L and is the answer not in the manual?
Questions and answers