AERMEC FCL 32 Technical Manual
Cassette-type fan coil 230v 50hz, variable multi flow
Hide thumbs
Also See for FCL 32:
- Installation manual (89 pages) ,
- Technical manual (85 pages) ,
- Service – technical manual (64 pages)
Table of Contents
Advertisement
TECHNICAL MANUAL
IT
FCL 32
(600x600)
FCL 36
(600x600)
FCL 42
(600x600)
FCL 62
(600x600)
FCL 72
(600x600)
FCL 34
(600x600)
FCL 38
(600x600)
FCL 44
(600x600)
CASSETTE-type fan coil
EN
FR
FCL 64
(600x600)
FCL 82
(840x840)
FCL 102
(840x840)
FCL 122
(840x840)
FCL 84
(840x840)
FCL 104
(840x840)
FCL 124
(840x840)
230V ~ 50Hz
DE
ES
IFCLTI 1904 - 4528511_07
Advertisement
Table of Contents

Related Manuals for AERMEC FCL 32


Summary of Contents for AERMEC FCL 32
- Page 1 TECHNICAL MANUAL FCL 32 FCL 64 (600x600) (600x600) FCL 36 FCL 82 (600x600) (840x840) FCL 42 FCL 102 (600x600) (840x840) FCL 62 FCL 122 (600x600) (840x840) FCL 72 FCL 84 (600x600) (840x840) FCL 34 FCL 104 (600x600) (840x840) FCL 38...
-
Page 2: Table Of Contents
“DANGER” or “WARNING” signals as failure to comply with AERMEC S.p.A. declines all responsibility for any damage them can cause damage to the machine and/or persons or whatsoever caused by improper use of the machine, and a partial objects. - Page 3 TRASPORTO • TRANSPORT • TRANSPORT • TRANSPORT • TRANSPORTE NO mojar. NE PAS mouiller. NICHT nass machen. NON bagnare. Tenere KEEP DRY. Keep out of Conservar Tenir à l’abri de la Vor Regen geschützt al riparo dalla pioggia. the rain. protegido de la pluie.
-
Page 4: Index
INDEX Important information • Maintenance • Packaging Functions Description • Versions • Functioning limits Main components • Component description Installation of the unit Connections Installation and replacement of the filter Dimensions Wiring diagrams IMPORTANT INFORMATION AND MAINTENANCE ATTENTION: the fan coil is connected to the fan coil. -
Page 5: Package
FUNCTIONING The same FCL unit can be coupled to -GLL10/GLF10/ GLL20 - GLL10M/GLF10M/GLL10R/GLL20R several grid accessories that determine If an electronic control panel is to be Check that the Dip Switch settings inside different functioning modes. installed, check that the Dip Switch the electric box correspond to system The particular information is supplied settings inside the panel correspond to... - Page 6 USE (MODULE 600) GLL10 GLF10 In heating functioning mode, a louvered fin opening of 20° is For maximum efficiency of the grill accessory both in heating and recommended, indicated with a raised line on the louvered fins (see cooling it is necessary the maximum opening of the fins With the flaps closed, ventilation is allowed..
-
Page 7: Description Of The Unit
The cassette fan coils in the FCL range are available in two fundamental dimensions that are called "Modules" For two-pipe systems For four-pipe systems 8 sizes 7 sizes FCL 32 FCL 72 FCL 34 FCL 84 (Module 600) (Module 600) -
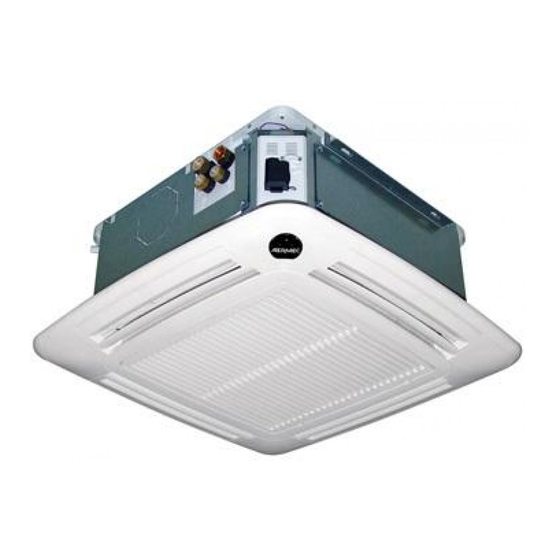
Page 8: Main Components
MAIN COMPONENTS 1 Grid with air filter 6 Base 11 Air vent valve 2 Receiver (GLL_M; GLL_R; GLF10) 7 Fixing brackets 12 Semi-sliced, fitting for air flow to an 3 Air flow deflector 8 Electric box adjacent room 4 Grid frame 9 Hydraulic attachments (for 4 pipes only) 13 Condensate drain 5 Tray... - Page 9 The electric motor with 3 speeds for small- nal control panel (see compatibility and series (mandatory accessory), which er sizes (FCL 32-34-36-38) and 4 speeds functions of the control panels). determine the functioning modes: for larger sizes, in order to choose the...
-
Page 10: Selection Criteria
SELECTION CRITERIA The main technical data of the FCL range The heating capacity in relation to the drawing and its compatibility. are summarised in the tables. water flow rate, and to the temperature The installation information is included difference between the incoming The tables show the sensible and total in the manuals supplied together water and the incoming air, is shown... -
Page 11: System Examples
SYSTEM EXAMPLES Key: Ambient probe; Water probe RXLE Heater Solenoid valve (Hot/Cold), VHL1/2/20/22 Hot valve FCL (Standard) FCL (V2) 2-pipe system 4-pipe system 2-pipe system 4-pipe system VHL1 VHL2 VHL20 VHL22 FCL (Standard) FCL (V2) with electric heater with electric heater 2-pipe system 4-pipe system 2-pipe system... -
Page 12: Technical Data
TECHNICAL DATA FCL 2-pipe versions Heating FCL 2-pipe versions Vel. 3 4000 6270 7340 10490 11320 11880 17730 21750 Heating capacity (70°C) (1) Vel. 2 2950 4500 4470 6370 7570 8120 11710 14730 Vel. 1 3420 3320 5190 5880 8300 10530 Vel. - Page 13 TECHNICAL DATA FCL 4-pipe versions Heating Vel. 3 2320 2320 2740 3190 7590 8930 11170 Heating capacity (60°C) (3) Vel. 2 1960 1960 2040 2510 5720 6530 8130 Vel. 1 1740 1740 1750 2210 4740 5270 6300 Vel. 3 Water flow rate (3) Vel.
-
Page 14: Cooling Capacity - Fcl32
COOLING CAPACITY - FCL32 Pc [W] Ps [W] Pc [W] Ps [W] Pc [W] Ps [W] Pc [W] Ps [W] Pc [W] Ps [W] Pc [W] Ps [W] Ta W.B. Tw [°C] ∆T [°C] [°C] 21°C Ta D.B. 23°C Ta D.B. 25°C Ta D.B. -
Page 15: Cooling Capacity - Fcl32
COOLING CAPACITY - FCL32 Pc [W] Ps [W] Pc [W] Ps [W] Pc [W] Ps [W] Pc [W] Ps [W] Pc [W] Ps [W] Pc [W] Ps [W] Ta W.B. Tw [°C] ∆T [°C] [°C] 21°C Ta D.B. 23°C Ta D.B. 25°C Ta D.B. -
Page 16: Cooling Capacity - Fcl36
COOLING CAPACITY - FCL36 Pc [W] Ps [W] Pc [W] Ps [W] Pc [W] Ps [W] Pc [W] Ps [W] Pc [W] Ps [W] Pc [W] Ps [W] Ta W.B. Tw [°C] ∆T [°C] [°C] 21°C Ta D.B. 23°C Ta D.B. 25°C Ta D.B. -
Page 17: Cooling Capacity - Fcl36
COOLING CAPACITY - FCL36 Pc [W] Ps [W] Pc [W] Ps [W] Pc [W] Ps [W] Pc [W] Ps [W] Pc [W] Ps [W] Pc [W] Ps [W] Ta W.B. Tw [°C] ∆T [°C] [°C] 21°C Ta D.B. 23°C Ta D.B. 25°C Ta D.B. -
Page 18: Cooling Capacity - Fcl42
COOLING CAPACITY - FCL42 Pc [W] Ps [W] Pc [W] Ps [W] Pc [W] Ps [W] Pc [W] Ps [W] Pc [W] Ps [W] Pc [W] Ps [W] Ta W.B. Tw [°C] ∆T [°C] [°C] 21°C Ta D.B. 23°C Ta D.B. 25°C Ta D.B. -
Page 19: Cooling Capacity - Fcl42
COOLING CAPACITY - FCL42 Pc [W] Ps [W] Pc [W] Ps [W] Pc [W] Ps [W] Pc [W] Ps [W] Pc [W] Ps [W] Pc [W] Ps [W] Ta W.B. Tw [°C] ∆T [°C] [°C] 21°C Ta D.B. 23°C Ta D.B. 25°C Ta D.B. -
Page 20: Cooling Capacity - Fcl62
COOLING CAPACITY - FCL62 Pc [W] Ps [W] Pc [W] Ps [W] Pc [W] Ps [W] Pc [W] Ps [W] Pc [W] Ps [W] Pc [W] Ps [W] Ta W.B. Tw [°C] ∆T [°C] [°C] 21°C Ta D.B. 23°C Ta D.B. 25°C Ta D.B. -
Page 21: Cooling Capacity - Fcl62
COOLING CAPACITY - FCL62 Pc [W] Ps [W] Pc [W] Ps [W] Pc [W] Ps [W] Pc [W] Ps [W] Pc [W] Ps [W] Pc [W] Ps [W] Ta W.B. Tw [°C] ∆T [°C] [°C] 21°C Ta D.B. 23°C Ta D.B. 25°C Ta D.B. -
Page 22: Cooling Capacity - Fcl72
COOLING CAPACITY - FCL72 Pc [W] Ps [W] Pc [W] Ps [W] Pc [W] Ps [W] Pc [W] Ps [W] Pc [W] Ps [W] Pc [W] Ps [W] Ta W.B. Tw [°C] ∆T [°C] [°C] 21°C Ta D.B. 23°C Ta D.B. 25°C Ta D.B. -
Page 23: Cooling Capacity - Fcl72
COOLING CAPACITY - FCL72 Pc [W] Ps [W] Pc [W] Ps [W] Pc [W] Ps [W] Pc [W] Ps [W] Pc [W] Ps [W] Pc [W] Ps [W] Ta W.B. Tw [°C] ∆T [°C] [°C] 21°C Ta D.B. 23°C Ta D.B. 25°C Ta D.B. -
Page 24: Cooling Capacity - Fcl82
COOLING CAPACITY - FCL82 Pc [W] Ps [W] Pc [W] Ps [W] Pc [W] Ps [W] Pc [W] Ps [W] Pc [W] Ps [W] Pc [W] Ps [W] Ta W.B. Tw [°C] ∆T [°C] [°C] 21°C Ta D.B. 23°C Ta D.B. 25°C Ta D.B. -
Page 25: Cooling Capacity - Fcl82
COOLING CAPACITY - FCL82 Pc [W] Ps [W] Pc [W] Ps [W] Pc [W] Ps [W] Pc [W] Ps [W] Pc [W] Ps [W] Pc [W] Ps [W] Ta W.B. Tw [°C] ∆T [°C] [°C] 21°C Ta D.B. 23°C Ta D.B. 25°C Ta D.B. -
Page 26: Cooling Capacity - Fcl102
COOLING CAPACITY - FCL102 Pc [W] Ps [W] Pc [W] Ps [W] Pc [W] Ps [W] Pc [W] Ps [W] Pc [W] Ps [W] Pc [W] Ps [W] Ta W.B. Tw [°C] ∆T [°C] [°C] 21°C Ta D.B. 23°C Ta D.B. 25°C Ta D.B. -
Page 27: Cooling Capacity - Fcl102
COOLING CAPACITY - FCL102 Pc [W] Ps [W] Pc [W] Ps [W] Pc [W] Ps [W] Pc [W] Ps [W] Pc [W] Ps [W] Pc [W] Ps [W] Ta W.B. Tw [°C] ∆T [°C] [°C] 21°C Ta D.B. 23°C Ta D.B. 25°C Ta D.B. -
Page 28: Cooling Capacity - Fcl122
COOLING CAPACITY - FCL122 Pc [W] Ps [W] Pc [W] Ps [W] Pc [W] Ps [W] Pc [W] Ps [W] Pc [W] Ps [W] Pc [W] Ps [W] Ta W.B. Tw [°C] ∆T [°C] [°C] 21°C Ta D.B. 23°C Ta D.B. 25°C Ta D.B. -
Page 29: Cooling Capacity - Fcl122
COOLING CAPACITY - FCL122 Pc [W] Ps [W] Pc [W] Ps [W] Pc [W] Ps [W] Pc [W] Ps [W] Pc [W] Ps [W] Pc [W] Ps [W] Ta W.B. Tw [°C] ∆T [°C] [°C] 21°C Ta D.B. 23°C Ta D.B. 25°C Ta D.B. -
Page 30: Cooling Capacity - Fcl34
COOLING CAPACITY - FCL34 Pc [W] Ps [W] Pc [W] Ps [W] Pc [W] Ps [W] Pc [W] Ps [W] Pc [W] Ps [W] Pc [W] Ps [W] Ta W.B. Tw [°C] ∆T [°C] [°C] 21°C Ta D.B. 23°C Ta D.B. 25°C Ta D.B. -
Page 31: Cooling Capacity - Fcl34
COOLING CAPACITY - FCL34 Pc [W] Ps [W] Pc [W] Ps [W] Pc [W] Ps [W] Pc [W] Ps [W] Pc [W] Ps [W] Pc [W] Ps [W] Ta W.B. Tw [°C] ∆T [°C] [°C] 21°C Ta D.B. 23°C Ta D.B. 25°C Ta D.B. -
Page 32: Cooling Capacity - Fcl38
COOLING CAPACITY - FCL38 Pc [W] Ps [W] Pc [W] Ps [W] Pc [W] Ps [W] Pc [W] Ps [W] Pc [W] Ps [W] Pc [W] Ps [W] Ta W.B. Tw [°C] ∆T [°C] [°C] 21°C Ta D.B. 23°C Ta D.B. 25°C Ta D.B. -
Page 33: Cooling Capacity - Fcl38
COOLING CAPACITY - FCL38 Pc [W] Ps [W] Pc [W] Ps [W] Pc [W] Ps [W] Pc [W] Ps [W] Pc [W] Ps [W] Pc [W] Ps [W] Ta W.B. Tw [°C] ∆T [°C] [°C] 21°C Ta D.B. 23°C Ta D.B. 25°C Ta D.B. -
Page 34: Cooling Capacity - Fcl44
COOLING CAPACITY - FCL44 Pc [W] Ps [W] Pc [W] Ps [W] Pc [W] Ps [W] Pc [W] Ps [W] Pc [W] Ps [W] Pc [W] Ps [W] Ta W.B. Tw [°C] ∆T [°C] [°C] 21°C Ta D.B. 23°C Ta D.B. 25°C Ta D.B. -
Page 35: Cooling Capacity - Fcl44
COOLING CAPACITY - FCL44 Pc [W] Ps [W] Pc [W] Ps [W] Pc [W] Ps [W] Pc [W] Ps [W] Pc [W] Ps [W] Pc [W] Ps [W] Ta W.B. Tw [°C] ∆T [°C] [°C] 21°C Ta D.B. 23°C Ta D.B. 25°C Ta D.B. -
Page 36: Cooling Capacity - Fcl64
COOLING CAPACITY - FCL64 Pc [W] Ps [W] Pc [W] Ps [W] Pc [W] Ps [W] Pc [W] Ps [W] Pc [W] Ps [W] Pc [W] Ps [W] Ta W.B. Tw [°C] ∆T [°C] [°C] 21°C Ta D.B. 23°C Ta D.B. 25°C Ta D.B. -
Page 37: Cooling Capacity - Fcl64
COOLING CAPACITY - FCL64 Pc [W] Ps [W] Pc [W] Ps [W] Pc [W] Ps [W] Pc [W] Ps [W] Pc [W] Ps [W] Pc [W] Ps [W] Ta W.B. Tw [°C] ∆T [°C] [°C] 21°C Ta D.B. 23°C Ta D.B. 25°C Ta D.B. -
Page 38: Cooling Capacity - Fcl84
COOLING CAPACITY - FCL84 Pc [W] Ps [W] Pc [W] Ps [W] Pc [W] Ps [W] Pc [W] Ps [W] Pc [W] Ps [W] Pc [W] Ps [W] Ta W.B. Tw [°C] ∆T [°C] [°C] 21°C Ta D.B. 23°C Ta D.B. 25°C Ta D.B. -
Page 39: Cooling Capacity - Fcl84
COOLING CAPACITY - FCL84 Pc [W] Ps [W] Pc [W] Ps [W] Pc [W] Ps [W] Pc [W] Ps [W] Pc [W] Ps [W] Pc [W] Ps [W] Ta W.B. Tw [°C] ∆T [°C] [°C] 21°C Ta D.B. 23°C Ta D.B. 25°C Ta D.B. -
Page 40: Cooling Capacity - Fcl104
COOLING CAPACITY - FCL104 Pc [W] Ps [W] Pc [W] Ps [W] Pc [W] Ps [W] Pc [W] Ps [W] Pc [W] Ps [W] Pc [W] Ps [W] Ta W.B. Tw [°C] ∆T [°C] [°C] 21°C Ta D.B. 23°C Ta D.B. 25°C Ta D.B. -
Page 41: Cooling Capacity - Fcl104
COOLING CAPACITY - FCL104 Pc [W] Ps [W] Pc [W] Ps [W] Pc [W] Ps [W] Pc [W] Ps [W] Pc [W] Ps [W] Pc [W] Ps [W] Ta W.B. Tw [°C] ∆T [°C] [°C] 21°C Ta D.B. 23°C Ta D.B. 25°C Ta D.B. -
Page 42: Cooling Capacity - Fcl124
COOLING CAPACITY - FCL124 Pc [W] Ps [W] Pc [W] Ps [W] Pc [W] Ps [W] Pc [W] Ps [W] Pc [W] Ps [W] Pc [W] Ps [W] Ta W.B. Tw [°C] ∆T [°C] [°C] 21°C Ta D.B. 23°C Ta D.B. 25°C Ta D.B. -
Page 43: Cooling Capacity - Fcl124
COOLING CAPACITY - FCL124 Pc [W] Ps [W] Pc [W] Ps [W] Pc [W] Ps [W] Pc [W] Ps [W] Pc [W] Ps [W] Pc [W] Ps [W] Ta W.B. Tw [°C] ∆T [°C] [°C] 21°C Ta D.B. 23°C Ta D.B. 25°C Ta D.B. -
Page 44: Heating Capacity [Kw]
HEATING CAPACITY [kW] FCL 34 FCL 32 T.w. [°C] Ta [°C] T.w. [°C] Ta [°C] Δt Δt BTU/h BTU/h BTU/h BTU/h BTU/h BTU/h BTU/h BTU/h BTU/h BTU/h 4485 15305 4291 14642 4100 13990 3911 13347 3726 12713 2911 9933 2785 9503 2661 9080 2539 8662 2418 8251... -
Page 45: Heating Capacity [Kw]
HEATING CAPACITY [KW] FCL 72 T.w. [°C] Ta [°C] Δt BTU/h BTU/h BTU/h BTU/h BTU/h 12694 43312 12144 41438 11603 39590 11070 37771 10544 35979 10 12403 42320 14374 49047 11320 38625 10787 36806 10253 34986 15 12063 41162 11514 39287 10973 37440 10431 35593 9906 33801 11490 11490 10948 10948 10415 10415 9882 9882 9365 9882 10 11183 11183 10649 10649 10116 10116 9583 9583 9058 9583 15 10819 10819 10278 10278 9736 9736 9203 9203 8678 9203... -
Page 46: Main Heating Coil Pressure Drop [Kpa] (Vl Version, Without Internal Valve) - Heating
VL version, without internal valve - HEATING 70°C FCL 72 FCL 62 FCL 122 FCL 82 FCL 102 FCL 42 FCL 36 FCL 32 1000 1500 2000 2500 3000 3500 Water flow rate [l/h] MAIN HEATING COIL PRESSURE DROP [kPa] VL version, without internal valve - HEATING 65°C... -
Page 47: Main Cooling Coil Pressure Drop [Kpa] (Vl Version, Without Internal Valve) - Cooling
FCL 72 FCL 36 FCL 104 FCL 124 FCL 102 FCL 82 FCL 38 FCL 44 FCL 64 FCL 32 FCL 34 1000 1500 2000 2500 3000 3500 Water flow rate [l/h] The pressure drops in the previous diagram relate to an average water temperature of 10 °C. The table below states the correction to apply to the pressure drops on variation of the average water temperature. -
Page 48: Correction Factors When Operating Using Glycol Water
CORRECTION FACTORS WHEN OPERATING USING GLYCOL WATER Key: Pressure drops Air flow rate Output COOLING FUNCTION MODE HEATING FUNCTION MODE GLYCOL WATER AT 10% 17 °C 90 °C Medium glycol water temperature Medium glycol water temperature GLYCOL WATER AT 20% 17 °C 90 °C Medium glycol water temperature... -
Page 49: Sound Power Level Expressed In Db
SOUND POWER LEVEL expressed in db Speed Central band frequency (Hz) Globale Mod. 1000 2000 4000 8000 dB(A) Speed 3 49,6 48,5 45,7 39,1 36,2 20,5 14,0 FCL32 Speed 2 38,2 40,2 38,7 31,0 23,9 22,4 18,9 FCL34 Speed 1 (Min) 35,2 37,2 35,7... -
Page 50: Accessories
Electrical heater coupling with the RXLE electrical resistance accessory, which can be controlled by an external thermostat, also not supplied by Aermec, • RXLE - RXLE20 : electric heater for heating, can be installed on the provided that the minimum number of revolutions required for correct single-fan FCL units. - Page 51 GLFI e GLLI and dedicated accessories COMPULSARY GLL ACCESSORIES, ESSENTIAL FOR UNIT OPERATION: GLF10 • • • • • • • • • GLF10EH • • • • • • • • • • • • • • RXLE GLF10M e GLF10N •...
- Page 52 INSTALLATION ATTENTION: before carrying out any inter- (cleaning the filter) and extraordinary main- Thanks to the special shapes of the louvered vention, make sure that the electric power tenance, as well as access to the air vent fins the machine can also function with the supply has been disconnected.
- Page 53 - The grill frame must be positioned AT TENTION: consult the accessory in a way that the AERMEC logo holder manuals. corresponds with the corner of the - Do not handle the unit using the hydraulic electric box.
- Page 54 INSTALLAZIONE "MODULO 600" GLL100 • INSTALLATION IN PROXIMITY OF A WALL If installed in proximity of a wall it is possible to close the corresponding flow inlet using the gasket supplied. GLF10...
- Page 55 - Open the cardboard package. - The grill frame must be positioned in - Overturn the FCL cassette fan coil box. a way that the AERMEC logo holder - Remove the box. corresponds with the corner of the - Remove the packaging shells used to electric box.
- Page 56 - Remove the lock screw on the corner - Carry out the necessary maintenance. If the electric box must be accessed for door with the Aermec logo. - Re-mount everything performing the maintenance, follow the indications - Remove the 2 lock screws from the elec- disassembly procedure in reverse order.
- Page 57 WATER CONNECTIONS The water connections are made with flat fittings complete with gaskets for connection to the The delivery and return pips must be equal, complete with seal gaskets (supplied). system. suitably scaled and insulated to avoid heat In the 4-pipe version of the unit, it is essential to Information for the correct installation of the dispersion and dripping during cold functioning.
- Page 58 CONDENSATE DRAIN CONNECTIONS During functioning in cooling mode the internal The electrical supply to the pump-float device SC1 = Condensate drain (male Ø 16mm) unit removes humidity from the air. The must never be interrupted. SC2 =Condensate drain with syphon (male Ø condensate water must be eliminated by linking In the case of alarm the lifting device, interrupts 16mm).
- Page 59 INSTALLAZIONE E SOSTITUZIONE DEL FILTRO "Modulo 600" INSTALLATION AND REPLACEMENT OF THE "Module 600" FILTER INSTALLATION ET REMPLACEMENT DU FILTRE "Module 600" INSTALLATION UND AUSTAUSCH DES FILTERS "Modul 600" INSTALACIÓN Y SUSTITUCIÓN DEL FILTRO "Módul 600" PERICOLO: Togliere tensione prima d’iniziare le operazioni di pulizia del filtro e/o dell’unità. DANGER: Switch off power supply before cleaning filter and/or unit.
- Page 60 INSTALLAZIONE E SOSTITUZIONE DEL FILTRO ARIA "GLF10" • INSTALLATION AND REPLACEMENT OF THE AIR FILTER "GLF10" • INSTALLATION ET REMPLACEMENT DU FILTRE A AIR "GLF10" • INSTALLATION UND AUSTAUCH DES LUFTFILTERS "GLF10" • INSTALACIÓN Y SUSTITUCIÓN DEL FILTRO DE AIRE "GLF10" PERICOLO: Togliere tensione prima d’iniziare le operazioni di pulizia del filtro e/o dell’unità.
- Page 61 INSTALLAZIONE E SOSTITUZIONE DEL FILTRO "Modulo 840" INSTALLATION AND REPLACEMENT OF THE "Module 840" FILTER INSTALLATION ET REMPLACEMENT DU FILTRE "Module 840" INSTALLATION UND AUSTAUSCH DES FILTERS "Modul 840" INSTALACIÓN Y SUSTITUCIÓN DEL FILTRO "Módul 840" PERICOLO: Togliere tensione prima d’iniziare le operazioni di pulizia del filtro e/o dell’unità. DANGER: Switch off power supply before cleaning filter and/or unit.
-
Page 62: Dati Dimensionali • Dimensions • Données Des Les Dimensions • Abmessungen • Datos Dimensionales [Mm]
DATI DIMENSIONALI • DIMENSIONS • DONNÉES DES LES DIMENSIONS • ABMESSUNGEN • DATOS DIMENSIONALES [mm] GLL 10 GLL 10 R GLL 10 M KFLD FCL_ 20,5 21,0 20,5 21,0 20,5 21,0 22,5 FCL_V2 20,5 21,0 20,5 21,0 20,5 22,5 FCL_VL 20,0 20,5 20,0... -
Page 63: Dati Dimensionali • Dimensions • Données Des Les Dimensions • Abmessungen • Datos
DATI DIMENSIONALI • DIMENSIONS • DONNÉES DES LES DIMENSIONS • ABMESSUNGEN • DATOS DIMENSIONALES [mm] GLF10... - Page 64 DATI DIMENSIONALI • DIMENSIONS • DONNÉES DES LES DIMENSIONS • ABMESSUNGEN • DATOS DIMENSIONALES [mm] GLL 20 GLL 20 R GLL20 KFLD20 GLL20R KFLD20 KFL20 FCL_ [kg] FCL_V2 [kg] FCL_VL [kg]...
- Page 65 SCHEMI ELETTRICI • WIRING DIAGRAMS • SCHEMAS ELECTRIQUES • SCHALTPLÄNE • ESQUEMAS ELÉCTRICOS LEGENDA • READING KEY • LEGENDE • LEGENDE • LEYENDA AL = Alimentatore PE = Collegamento a terra = Componenti non forniti Power supply GND Earth connection Components not supplied Alimentation electrique Mise à...
- Page 66 SCHEMI ELETTRICI • WIRING DIAGRAMS • SCHEMAS ELECTRIQUES • SCHALTPLÄNE • ESQUEMAS ELÉCTRICOS GLL10 / GLL20 + VHL1 / VHL2 + VHL20 / VHL22 VHL1 / VHL2 VHL20 / VHL22 VHL1 / VHL2 VHL20 / VHL22 Gli schemi elettrici sono soggetti ad un continuo aggiornamento, è obbligatorio quindi fare riferimento a quelli a bordo macchina. A l l w i r i n g d i a g r a m s...
-
Page 67: Schemi Elettrici • Wiring Diagrams • Schemas Electriques • Schaltpläne • Esquemas Eléctricos
SCHEMI ELETTRICI • WIRING DIAGRAMS • SCHEMAS ELECTRIQUES • SCHALTPLÄNE • ESQUEMAS ELÉCTRICOS FCL VL GLL10 / GLL20 + VHL1 / VHL2 + VHL20 / VHL22 VHL1 / VHL2 VHL20 / VHL22 VHL1 / VHL2 VHL20 / VHL22 Gli schemi elettrici sono soggetti ad un continuo aggiornamento, è obbligatorio quindi fare riferimento a quelli a bordo macchina. A l l w i r i n g d i a g r a m s... -
Page 68: Schemi Elettrici • Wiring Diagrams • Schemas Electriques • Schaltpläne • Esquemas Eléctricos
SCHEMI ELETTRICI • WIRING DIAGRAMS • SCHEMAS ELECTRIQUES • SCHALTPLÄNE • ESQUEMAS ELÉCTRICOS GLL10M + VHL1 / VHL2 + RXLE + SW 00-NC RXLE Gli schemi elettrici sono soggetti ad un continuo aggiornamento, è obbligatorio quindi fare riferimento a quelli a bordo macchina. A l l w i r i n g d i a g r a m s... -
Page 69: Schemi Elettrici • Wiring Diagrams • Schemas Electriques • Schaltpläne • Esquemas Eléctricos
SCHEMI ELETTRICI • WIRING DIAGRAMS • SCHEMAS ELECTRIQUES • SCHALTPLÄNE • ESQUEMAS ELÉCTRICOS GLL10R / GLL20R + VHL1 / VHL2 + RXLE + SW 00-NC RXLE Gli schemi elettrici sono soggetti ad un continuo aggiornamento, è obbligatorio quindi fare riferimento a quelli a bordo macchina. A l l w i r i n g d i a g r a m s... -
Page 70: Schemi Elettrici • Wiring Diagrams • Schemas Electriques • Schaltpläne • Esquemas Eléctricos
SCHEMI ELETTRICI • WIRING DIAGRAMS • SCHEMAS ELECTRIQUES • SCHALTPLÄNE • ESQUEMAS ELÉCTRICOS GLL10 / GLL20 WMT10 + VHL1 / VHL2 + VHL20 / VHL22 VHL1 VHL2 VHL20 VHL22 GLL10 / GLL20 PXAE + VHL1 / VHL2 + VHL20 / VHL22 + SW VHL1 VHL2... - Page 71 SCHEMI ELETTRICI • WIRING DIAGRAMS • SCHEMAS ELECTRIQUES • SCHALTPLÄNE • ESQUEMAS ELÉCTRICOS VHL1 VHL2 VHL20 VHL22 GLL10 /GLL20 FMT20AW + VHL1 / VHL2 + VHL20 / VHL22 VHL1 VHL2 VHL20 VHL22 Gli schemi elettrici sono soggetti ad un continuo aggiornamento, è obbligatorio quindi fare riferimento a quelli a bordo macchina. A l l w i r i n g d i a g r a m s...
- Page 72 TPF E FCL SCHEMI ELETTRICI • WIRING DIAGRAMS • SCHEMAS ELECTRIQUES • SCHALTPLÄNE • ESQUEMAS ELÉCTRICOS IMPIANTO 2 TUBI GLL10 / GLL20 FMT10 + VHL1 / VHL2 + VHL20 / VHL22 GLL10N / GLL20N SCHEMA DI COLLEGAMENTO +TPF-TPFW 230V 50Hz Gli schemi elettrici sono soggetti ad un continuo aggiornamento, è...
-
Page 73: Schemi Elettrici • Wiring Diagrams • Schemas Electriques • Schaltpläne • Esquemas Eléctricos
SCHEMI ELETTRICI • WIRING DIAGRAMS • SCHEMAS ELECTRIQUES • SCHALTPLÄNE • ESQUEMAS ELÉCTRICOS GLL10N / GLL20N 230V 50Hz + VHL1 / VHL2 + VHL20 / VHL22 + RXL WMF-SW1 TX/RX GND-TTL MODE TX/RX 1 2 3 4 1 2 3 4 VHL1 VHL20 VHL2... -
Page 74: Schemi Elettrici • Wiring Diagrams • Schemas Electriques • Schaltpläne • Esquemas Eléctricos
SCHEMI ELETTRICI • WIRING DIAGRAMS • SCHEMAS ELECTRIQUES • SCHALTPLÄNE • ESQUEMAS ELÉCTRICOS FCL _ VL GLL10N / GLL20N 230V 50Hz + VHL1 / VHL2 + VHL20 / VHL22 + RXL WMF-SW1 TX/RX GND-TTL MODE TX/RX 1 2 3 4 1 2 3 4 VHL1 VHL20... -
Page 75: Schemi Elettrici • Wiring Diagrams • Schemas Electriques • Schaltpläne • Esquemas Eléctricos
SCHEMI ELETTRICI • WIRING DIAGRAMS • SCHEMAS ELECTRIQUES • SCHALTPLÄNE • ESQUEMAS ELÉCTRICOS ATTENZIONE: Spostare il terminale del filo marrone singolo dal morsetto 5 al morsetto GLL10 WARNING: Move the end of the individual brown wire from clamp 5 to clamp 6 GLL20 ATTENTION: Déplacer l'extrémité... - Page 76 AERMEC S.p.A. si riserva la facoltà di apportare in qualsiasi momento tutte le modifiche ritenute necessarie per il miglioramento del prodotto. Les données mentionnées dans ce manuel ne constituent aucun engagement de notre part. Aermec S.p.A. se réserve le droit de modifier à tous moments les données considérées nécessaires à...
Need help?
Do you have a question about the FCL 32 and is the answer not in the manual?
Questions and answers