Table of Contents
Advertisement
Quick Links
Download this manual
See also:
Operating Manual
Advertisement
Table of Contents

Related Manuals for RCA IP120


Summary of Contents for RCA IP120
- Page 2 Equipment Approval Information Your telephone equipment is approved for connection to the Network and is in compliance with parts 15 FCC Rule. Notes *This equipment may not be used on coin service provided by the telephone company. *Party lines are subject to state tariffs, and therefor, you may not be able to use your own telephone equipment if you are on a party line.
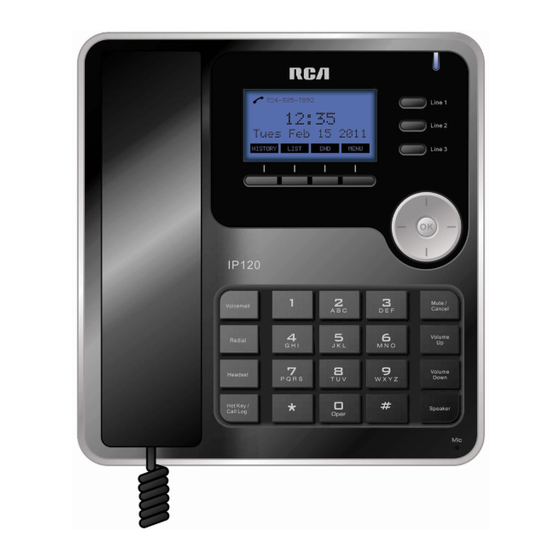
- Page 3 ’ The RCA IP120 phone is dedicated to business environment use. It is a full-featured and a flexible SIP solution. It is compatible with most IP PBX and VoIP providers. Please read through the administrator’s guide before installing your phone.
- Page 4 This is a class B device, in a domestic environment; this product may cause radio interference, in which case the user may be required to take adequate measures. To avoid the potential effects on the environment and human health as a result of the presence of hazardous substances in electrical and electronic equipment, end users of electrical and electronic equipment should understand the meaning of the crossed-out wheeled bin symbol.
-
Page 5: Table Of Contents
Assembling IP120 ..................8 Configuration and Registration..............9 Basic Configuration via Web Page ............10 Basic Configuration using phone keypad ..........13 Overview ............- 15 - Keypad ..................... - 15 - LEDs....................- 16 - ... - Page 6 Answering an incoming call............. - 33 - Rejecting an incoming call .............. - 33 - DND.................... - 33 - Call Forward ................. - 34 - Auto Answer................. - 35 - Call log ..................... - 36 - ...
- Page 7 Reboot ..................- 43 - Reset to Factory................- 43 - Firmware Update and Autoprovisioning..........- 44 - Decryption ................... - 45 - Keys configuration ................- 45 - Send Key configuration ..............- 45 - ...
-
Page 8: Assembling Ip120
IP120 Handset & Handset Cord AC Adaptor Ethernet Cable Quick Start Guide Assembling IP120 This section introduces how to assemble the phone with the components in the packing list: Connect Handset; Connect Network and Power. Connect Handset and Headset, as shown below: Note: headset is not provided. - Page 9 supplied) or to a PoE compliant switch or hub. Your system administrator will advise you on which one to use. Note: If inline power is provided, do not install AC adapter (not provided). Make sure the Ethernet cable and switch/hub are PoE compliant. The Internet Port can also be connected to Hub/Switch/IP PBX or other internet devices.
-
Page 10: Configuration And Registration
The phone’s web server can be accessed with any web browser. Press OK button of the phone to enter the status page and find out your IP120 IP address. Enter it (for example http://10.0.4.66) into the address bar of your web browser. - Page 11 Note: Using the wrong network parameters may result in inaccessibility of your phone and may also have an impact on your network performance. Please contact your network administrator. Account Settings The phone attempts to register to the SIP server using the account data provided by automatic or manual initialization.
- Page 12 Account Active You can choose to Enable/Disable the account respectively. Label The name shows on LCD Display Name The local phone name showing on the other phone when calling. Register Name Register name, provided by ISP. User Name User name, provided by ISP. User Password User password provided by ISP.
-
Page 13: Basic Configuration Using Phone Keypad
Basic Configuration using phone keypad You will need admin privilege to perform this and other configurations. By default the phone will be in user mode, so you will need to perform a simple procedure to switch to admin mode. Change phone to admin mode: Press MENU 7.User type. Press right navigation key until you see “admin”... - Page 14 Once you finish all admin related tasks you should change back to user mode with the same procedure. - 14 -...
-
Page 15: Overview
Overview Keypad - 15 -... -
Page 16: Leds
When network is not available or sip server failure orange in idle mode Icons IP120 displays different kinds of icons on its LCD, you can refer to the following table for their meanings: Icon Description Account registering Account registration succeeded... -
Page 17: User Interface
Call muted Missed calls Call in Call out Call forward Do not disturb function activated Auto answer activated Voicemail Call on hold Flashes when internet is disconnected User Interface There are two ways to customize specific options on your phone: Using keypad and display of the phone. - Page 18 --Forward √ √ --Call Waiting √ √ --Function Keys √ √ --Send Key √ √ --Hot Line √ √ --Anonym Call √ √ --DND √ √ --Logs Setting √ √ Basic Phone Functions --Language √ --Time & Date √ √ --Ring Tone √...
- Page 19 Note: 1) The above table only indicates most of phone functions rather than all of them. Please refer to next chapters for more details. 2) Some functions are password protected. In this case when you are prompted for a password make sure to introduce one in accordance with active User Type The default administrator password is admin.
-
Page 20: Customizing Your Phone
Customizing Your Phone General Settings Phone Status You can view the status of your phone using the Phone interface or the Web interface. This option allows you to review: Firmware Network: MAC, LAN, Netmask, Gateway, DNS, etc Phone: Model, Hardware, Firmware, Product ID and MAC Accounts: The 3 SIP accounts status To check the Phone Status via Phone interface: Press OK button to check the IP. -
Page 21: Language
Language The default Phone interface language is English. It also supports French, Spanish, Dutch, German, Italian, Portuguese, etc. You can change the language for the phone user interface. Please notice that language of the web user interface is independent of that of phone user interface. Note: All languages may not be available for selection. -
Page 22: Time And Date
Time and Date Time and date are displayed on IP120 idle screen. By default the date and time of the phone are configured manually, but you can set to obtain them from a preconfigured SNTP server, if needed. Please contact your system administrator if the time or date is incorrect. -
Page 23: Audio Settings
Note: By default date and time setting is set to “Manual”. Audio Settings Volume Handset, speaker, headset and ringer volumes can be adjusted independently. To adjust the volume in idle mode: Press menu soft key->3.Settings->1.Basic. Scroll to 4.Phone Volume, and press OK button. Select the item you wish to adjust Volume Volume Down... -
Page 24: Codec Selection
Press OK button to save the change or MENU to cancel. Codec Selection IP120 supports the following voice codecs: PCMU, PCMA, G.729, G.722, G.726, iLBC, iLBD-20 You can enable/disable the desired codecs via Web interface. Please contact your System Administrator for more details about the codecs. -
Page 25: Contact Management
Note: Codec Selection can only be done via Web interface. Contact Management Edit/Add/Delete Contacts IP120 features a 300 entries local phonebook and 10 additional speed dial keys. . With the local directory you can: - add, - edit, - delete, - dial, - search for a contact in this directory. - Page 26 To add a Group via Phone interface: Press soft -> 1.Directory Menu soft key ->6.Directory-> 1.Directory. Press the Group soft key to enter to the Add Group page. Enter the group name and choose associated ring tone. Press Save soft key to save. To configure the speed dial keys via Phone Interface: Press Menu soft key->2.
- Page 27 Make the desired changes, press Save soft key, or press Back soft key to return to previous menu. To move a contact to the Blacklist via Phone interface: If you add a contact to the blacklist your phone will automatically reject all calls from this contact.
-
Page 28: Basic Call Functions
Press Dir soft key -> 1.Directory Menu soft key ->6.Directory -> 1.Directory Press the Search soft key Enter the contact name to be searched and press OK soft key. Contact list will be searched for matching records. Basic Call Functions Outgoing calls Call Devices You can make a phone call via the following devices:... -
Page 29: Send Key Configuration
There are several ways to initiate a call: 1. Press an available line button and dial the number you want to call, or 2. Dial a number and select the audio device, or 3. Go to Directory, use the navigation keys to select the desired contact, or 4. -
Page 30: Hot Line
IP120 supports Permanent Caller ID restriction, meaning that while enabled all calls will request to be anonymous and you need to disable if you want your identity to be transmitted. - Page 31 2) Use left or right navigation keys to select the account to be anonymous, you can choose the Line ID. 3) Press down navigation key to display Anonym call, then press left or right navigation keys to enable/disable the anonymous call function. 4) If you want to perform this function locally, press OK to save your changes.
-
Page 32: Dial Plan
Dial Plan A dial plan establishes the expected number and pattern of digits for a telephone number. This includes country codes, access codes, area codes and all combinations of dialed digits. Dial plans can be used for least cost routing, dialing convenience or to prevent users from calling specific numbers or groups of numbers. -
Page 33: Incoming Calls
Hook Off tmo: Timeout for the unit to go back to standby mode after hook off Hook Off tmo Enable: To enable/disable the Hook Off tmo. Incoming calls Answering an incoming call 1) Lift the handset or press Speaker button to answer using the speakerphone, or press Headset button to answer using the headset. -
Page 34: Call Forward
codes to the server, and the server will turn on/off the DND function. In this case, any calls addressed to the phone’s extension will be rejected by the server automatically, and will not be included in the Call History. Note: When DND is locally enabled, the corresponding icon will be shown on the display Call Forward This feature allows you to divert an incoming call to another phone number e.g. -
Page 35: Auto Answer
2. You can quickly enable/disable Forward by pressing down key from idle mode. Forward type and target number will be the last ones configured using the menu. 3. Only admin/var can set the On/off codes. Make sure the right User Type is active. 4. -
Page 36: Call Log
Call log IP120 can store up to 100 calls in its Call log. There are 5 different lists: • All calls • Forwarded calls • Missed calls • Received calls • Dialed calls The call logs can be accessed through Web interface (Contact -> Phone Call Info). -
Page 37: Call List Items Management
Call list items management When you are in a call list, you can: 1) Dial current entry by pressing the Send soft key, or 2) Store it in Directory by pressing Option soft key and select “Add to Contacts”, or 3) Delete it pressing Delete soft key During an Active Call Mute... -
Page 38: Call Waiting Configuration
To configure Call Waiting via Web interface: Go to Phone -> Features (General Information) 3-way Conference Your IP120 is able to establish a three-party conference by locally mixing the audio signals of your two correspondents. To establish a conference via phone interface:... -
Page 39: Voicemail Settings
New voice messages can be indicated both acoustically and visually as described below: The idle screen will indicate the new voice messages. Voicemail button backlight will be on. The orange LED of the phone will be steady on. Voicemail settings To configure the Voicemail code via Phone interface: 1) Press Menu soft key->4.Messages->... -
Page 40: Advanced Functions
2. If you have more than one account set on the phone, when pressing the Voicemail key you will be calling the active account mailbox. Advanced Functions Account Setting Please refer to “Configuration and Registration” chapter for the basic account setting information. -
Page 41: Network Settings
VLAN is a group of hosts with a common set of requirements that communicate as if they were attached to the Broadcast domain, regardless of their physical location. IP120 supports 802.1p and q packet tagging. VLAN ID and Priority can be set via phone or web interface. -
Page 42: 802.1X
802.1X IEEE 802.1X is an IEEE Standard for port-based Network Access Control (PNAC). It is part of the IEEE 802.1 group of networking protocols. It provides an authentication mechanism to devices wishing to attach to a LAN, either establishing a point-to-point connection or preventing it if authentication fails. -
Page 43: Reboot
2) Press Menu soft key->3.Settings->2.Advanced 3) You are prompted to enter the required password. 4) Scroll to Set Password option, then press OK button. 5) You are prompted to enter the Current PWD, New PWD and Confirm PWD. 6) Press OK button to confirm the change, or Back soft key to return to previous menu. -
Page 44: Firmware Update And Autoprovisioning
It will take a few minutes to reset, please do not power off during resetting, or it will cause flash memory error. Note: If you perform factory reset, all current settings including contact list, call history, account settings, etc will be lost. Your phone will have to be configured manually or auto provisioning is used Firmware Update and Autoprovisioning The phone is delivered with pre-installed firmware. -
Page 45: Decryption
Administrator Mode. 2. The upgrade priority is DHCP options, preconfigured URL . Decryption Your IP120 supports configuration file encryption for provisioning. In case encryption is used, AES key needs to be configured on the phone. Set AES key via Web interface: Go to System ->... -
Page 46: Programmable Keys
Programmable keys The keys from 0-9 (memory keys) on the keypad are editable. Users can customize specific features for these keys according to their needs. (The keys are only available when the phone is in idle mode). This function can only be set via the Web interface: Phone ->... -
Page 47: Line
Redial Note: Many of those features require IP PBX or service provider support and hence must be configured in the server first in order to work on your phone. Contact your system administrator or Technical support for more details. In addition, please note that not all the servers support the just above mentioned features Line The most frequent usage for line keys is assigning them one of the two possible user... -
Page 48: Forward
Forward Two use cases can be considered for this function. If a key is configured as Forward key: • When you press this key during an incoming call, you will be able to divert this call directly. Depending on your configuration you will be prompted to enter target number, or stored value will be used. -
Page 49: Call Return
To assign DND to a key via web interface: Go to Phone -> Function Keys (Line Key) Call Return Call Return function dials out the last number from which you received a call. If there is already an active call, when pressing Call Return key the first call will be put on hold and a new one will be sent to the Call Return number To assign Call Return to a key via web interface: Go to Phone ->... -
Page 50: Prefix
Prefix When you press a key in which prefix function has been set up, the phone will automatically dial the prefix and you will only have to dial the rest of your correspondent number to call him out. Prefix can only be assigned to the line keys. To assign the key as Prefix via web interface: Go to Phone ->... - Page 51 I can’t get an IP address Make sure you have plugged the Ethernet cable into the WAN port. Make sure there is an available DHCP server on, and there are available IP addresses in the server. Try to set your WAN port to static IP client mode. During a call, I cannot hear any voice Make sure your handset is tightly connected with the phone.
- Page 52 will probably crash after the update. How to auto provision? Consult auto provision server address with your service provider. - 52 -...
- Page 53 - 53 -...
- Page 54 Causes of Poor Reception • Aluminum siding. • Foil backing on insulation. • Heating ducts and other metal construction that can shield radio signals. • You ’re too close to appliances such as microwaves, stoves, computers, etc. • Atmospheric conditions, such as strong storms. •...
- Page 55 - 55 -...
-
Page 56: Product Registration
• Products purchased or serviced outside the USA • Acts of nature, such as, but not limited to lightning damage Product Registration: It will • Please complete and mail the Product Registration Card packed with your unit. make it easier to contact you should it ever be neccessary. The return of the card is not required for warranty coverage. - Page 57 - 57 -...
Need help?
Do you have a question about the IP120 and is the answer not in the manual?
Questions and answers