
Subscribe to Our Youtube Channel
Related Manuals for Max Re-Bar-Tier RB397(CE)


Summary of Contents for Max Re-Bar-Tier RB397(CE)
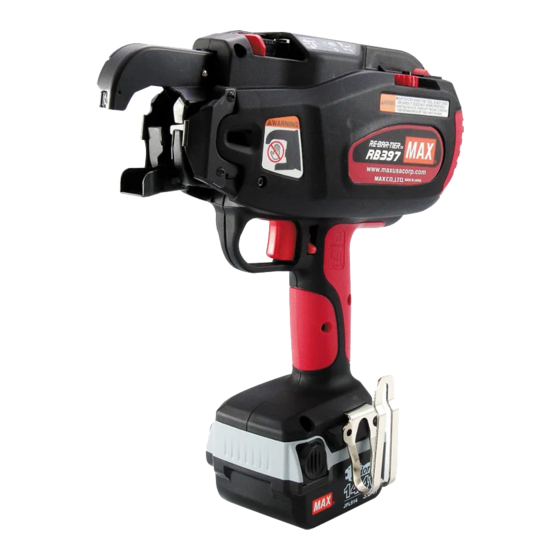
- Page 1 RB397 (CE) RE-BAR TYING TOOL OPERATING and MAINTENANCE MANUAL ENGLISH BEFORE USING THIS TOOL, STUDY THIS MANUAL TO ENSURE SAFETY WARNING AND INSTRUCTIONS. KEEP THESE INSTRUCTIONS WITH THE TOOL FOR FUTURE REFERENCE. WARNING...
-
Page 2: Table Of Contents
DEFINITIONS OF SIGNAL WORDS WARNING: Indicates a potentially hazardous situation which, if not avoided, could result in death or serious injury. CAUTION: Indicates a potentially hazardous situation which, if not avoided, may result in minor or moderate injury. NOTE: Emphasizes essential information. INDEX 1. - Page 3 If a part must be protection. replaced or repaired, purchase the re- placement part at an authorized MAX Co., Ltd. distributor. Use only genuine authorized replacement parts. 2. EAR PROTECTION MAY BE REQUIRED...
- Page 4 8. KEEP FINGERS AND BODY PARTS AWAY FROM THE TIE-WIRE REEL WHEN TOOL IS IN OPERATION Failure to do so may result in serious injury. 12. AFTER BATTERY INSTALLATION IF THE TOOL OPERATES WITHOUT THE TRIG- GER BEING PULLED OR THE OPERA- TOR NOTICES UNUSUAL HEAT, SMELL, OR SOUND, DISCONTINUE OPERATION 9.
- Page 5 JPL914 100~240V 15. USE ONLY THE AUTHORIZED BATTERY PACK Use only MAX JPL914 battery pack. If the 2 Charge the Battery from AC between tool is connected to a power supply other 100V and 240V wall sockets than the authorized pack, such as a re-...
- Page 6 11 Charge the Battery pack in a tem- 6 Do not touch the power cord or plug perature range of 5°C (41°F) to 40°C with a wet hand or glove (104°F) This may cause injury from electric shock. 12 Avoid continual use of the Battery charger 7 Do not put a cloth or any other cover Rest the Charger for 15 minutes between...
-
Page 7: Safety Features
ATING THE TOOL The finish tie has sharp edges. To avoid se- rious injures, be careful not to touch the Pull to the left slightly and upwards to UNLOCK. sharp edges. MAX recommends wearing safety gloves while operating the tool. - Page 8 Curl Guide Curl Guide When the Curl Guide is opened, it will emit a beeping sound and the tool does not operate.
-
Page 9: Specifications And Technical Data
Power cord of JC928(CE) is removable from the charger. 2. TOOL SPECIFICATIONS PRODUCT NO. RB397 <Battery charger> WEIGHT 2.4kg(Battery included) Product name MAX lithium ion battery charger HEIGHT 305mm (12") Product code JC928(CE) WIDTH 105mm (4-1/8") Input AC100-240V 50/60Hz 1.62-0.68A LENGTH 290mm (11-3/8") - Page 10 TIES PER COIL RB397 Approx. 120 ties/coil TIES PER CHARGE Approx. 1400 ties/charge BATTERY CHARGER: Use only an authorized Battery charger, MAX JC928. 4. TECHNICAL DATA NOISE A-weighted single-event ------ LWA, 1s, d 86 dB sound power level A-weighted single event ------ LpA, 1s, d 76 dB...
- Page 11 5. APPLICATIONS ∗ Precast plants ∗ Commercial buildings ∗ Foundations ∗ Road & bridge 6. APPLICABLE BAR SIZES Minimum Maximum D10 × D10 D16 × D19 RB397 7. ABOUT PRODUCTION YEAR This product bears production number in the body. The two digits of the number from left indicates the production year.
-
Page 12: Battery Instructions
4. BATTERY INSTRUCTIONS Battery pack 1. Charging Latch When charging the Battery pack, remove it by pushing on its latches from both sides while LOCK firmly holding the grip of the tool. Red charging lamp WARNING • Before removing the Battery pack from the tool, set the Main switch at OFF and lock the Trigger. - Page 13 When the Battery pack is at low tem- perature When the Battery pack is at low temperature, its charging is automatically suspended until its The green lamp blinks. temperature increases (higher than 5°C (41°F)), in order to protect it, even if it is set in the Charger.
- Page 14 CAUTION • When the battery pack is fully discharged, do not leave it for a long time without recharging. If the fully discharged battery pack is removed from the system and left for a long period of time, the battery pack may become damaged. Recharge the battery immediately when it has been discharged.
- Page 15 Indication of Quick Charger Lamps Charger LED lamp Buzzer sound Recharging status Red lamp blinks. The power cord is plugged into the receptacle. The charger is The charger power cord is plugged It blinks every second. powered. into a wall socket. Two short beeps (Pi, pi) Red lamp lights.
-
Page 16: Operating Instructions
Recycling a Li-ion Battery The MAX battery pack uses a Li-ion battery, it may be illegal to dispose of this battery into the municipal waste system. Check with your local solid waste officials for details in your area for recycling options or proper disposal. - Page 17 Therefore, be sure only to use the speci- Pipe fied MAX TW897A. Do not use binding wire that has become rusted, since the use of rusted wire will cause equipment breakdown. ∗ TW897 cannot be used for RB397.
- Page 18 If the window is dirty and the pipe position can not be confirmed Open the window and wipe off the dirt on the inside of the window with a soft cloth, etc. Close the window again after cleaning to ensure that foreign objects will not be able to enter the ma- chine.
- Page 19 2. How to remove the Tie-Wire Trigger Trigger lock LOCK Unlock the Trigger before using the tool. WARNING • Be sure to turn the Main switch OFF, lock the Trigger, and remove the Battery pack. Release Stopper Release Lever Press the release lever, and confirm that the release lever is caught in the release stop- per.
- Page 20 Remove the Tie-Wire from the wire guide. 3. Auto Power-off feature Tie-Wire Reel stopper Slide the Reel stopper to release the Reel holder and remove the Tie-Wire. Mount the new Tie-Wire. (Refer to the This Re-bar Tier have "Auto Power-off" fea- Tie-Wire mounting method explanation.) ture, which saves the power consumption of the Li-ion battery when the tool is not oper-...
- Page 21 Torque dial This dial allows you to adjust wire tension torque slightly. To increase the tension, turn it in the coun- WARNING terclockwise. To decrease the tension, turn it in the • When setting the main switch to ON, ab- clockwise.
- Page 22 5. For proper tightness 45° Cross tie. Bent the tail of the first tie before making the second tie. Tilt the tool 45° angle to the crossed re-bars. Re-bars When you need extra tightness, place re-bars at the top of the Arm part. Apply the tool perpendicularly to the surface of the crossed re-bars.
-
Page 23: Maintenance
6. MAINTENANCE 7. Cleaning Manual When the machine operates for long hours, dust Regularly inspect the tool and wire cuttings may adhere to the cutter sec- In order to maintain the performance of the tion. In such a case, disassemble and clean the tool, periodically clean up and inspect the machine according to the following procedure. - Page 24 Cutter Cutter plate unit Cutter Fixed cutter Reverse side Wire guide A of the cutter Integrated unit of the cutter and Wire guide A 3. Remove the cutter and the fixed cutter, 5. Fit the cutter and assemble wire guide A. and clean them.
-
Page 25: Storage
8. STORAGE Hexagon socket head bolt M3 × 6 (plated) Do not store the tool in a cold weather envi- ronment. Keep the tool in a warm area. When not in use, the tool should be stored in a warm and dry place. Keep out of reach of chil- dren. -
Page 26: Trouble Shooting/Repairs
9. TROUBLE SHOOTING/REPAIRS The troubleshooting and/or repairs shall be carried out only by the MAX CO., LTD. authorized dis- tributors or by other specialists. This tool alerts you to the following conditions by means of a warning sound and warning lamp. The warning lamp is illuminated or blinks, and is interlocked with the warning sound. - Page 27 (Pipipipi, Binding wire not of Confirm reel side face. Use MAX Tie-Wire pipipipi, ...) designated types TW897A. has been used. Three short Binding wire has Confirm reel winding Remove fray on reel.
- Page 28 • The content of this manual might be changed without notice for improvement. OSTSTRASSE 22, 40211 Camerastraat 19 DÜSSELDORF, GERMANY 1322 BB Almere The Netherlands TEL: +49-211-9365300 Phone: +31-36-546-9699 FAX: +49-211-93653017 FAX: +31-36-536-3985 www.max-ltd.co.jp/int/ (GLOBAL Site) www.max-europe.com (EUROPE Site) 4007940 090619-00/01 PRINTED IN JAPAN...
Need help?
Do you have a question about the Re-Bar-Tier RB397(CE) and is the answer not in the manual?
Questions and answers