Table of Contents
Advertisement
Quick Links
Advertisement
Table of Contents

Related Manuals for CD Automation Revo M 1PH


Summary of Contents for CD Automation Revo M 1PH
- Page 1 Revo USER’S MANUAL Rev. 9/2017 from 60A to 210A 00031 CD Automation S.r.l. Via Picasso 34/36 - 20025 – Legnano (MI) – ITALY Tel +39 0331 577479 – Fax +39 0331 579479 E-Mail: info@cdautomation.com - WEB: www.cdautomation.com CD-Eng-REVO-M-1PH-60-210A-Thyristors-Units...
- Page 2 CD-Eng-REVO-M-1PH-60-210A-Thyristors-Units...
-
Page 3: Table Of Contents
1 Declaration of conformity ..................... 5 2 Important warnings for safety ....................6 3 Note ............................7 4 Introduction .......................... 8 5 Advantages compared with analog thyristor unit ..............8 6 Software Configurator CDA Thyristor configurator software ..........9 7 Quick Start .......................... 10 8 Basic Connections and sizing .................... - Page 4 14.1 Digital Input 14.1.1 S M1) ......................... 32 TART ERMINAL 14.1.2 C M1) ...................... 32 ONFIGURABLE NPUT ERMINAL 14.2 Digital Output (terminal 9-10 of M1) 14.3 Analog Inputs 14.3.1 P M1) ....................33 RIMARY NPUT ERMINALS 14.3.2 P ......................33 RIMARY NPUT CALIBRATION PROCEDURE 15 Heater Break alarm and SCR short circuit (HB Option) ............
-
Page 5: Declaration Of Conformity
1 Declaration of conformity Declaration of conformity-Dichiarazione di Conformità PRODUCT MANUFACTURER/ PRODUTTORE: CD Automation S.R.L. Controllers, Drives & Automation Via Picasso, 34/36 - 20025 Legnano (MI)- Italia P.I. 08925720156 -Tel. (0331) 577479 - Fax (0331) 579479 Internet : www.cdautomation.com - E-MAIL: info@cdautomation.com... -
Page 6: Important Warnings For Safety
2 Important warnings for safety This chapter contains important information for the safety. The not observance of these instructions may result in serious personal injury or death and can cause serious damages to the Thyristor unit and to the components system included. The installation should be performed by qualified persons. -
Page 7: Note
Caution: This icon is present in all the operational procedures where the Improper operation can cause damage for the Thyristor unit. CD Automation reserves the right to modify the own products and this manual without any advise. CD-Eng-REVO-M-1PH-60-210A-Thyristors-Units... -
Page 8: Introduction
4 Introduction A thyristor unit is semiconductor device which acts as a switch formed by two thyristors in ant parallel. To switch on the alternating current the input signal will be on and the thyristor will switch off at first Zero Crossing voltage with no input signal. -
Page 9: Software Configurator Cda Thyristor Configurator Software
6 Software Configurator CDA Thyristor configurator software CDA Thyristor configurator software is free and is possible download it from our site: www.cdautomation.com If the Order Code is in line with requirement, then REVO M has been already configured in Factory and it's ready to use. You need the software only to modify the ordered configuration. -
Page 10: Quick Start
If your REVO M code is in line with what you really need, then the main configuration is already done by CD Automation and you just need to do the following steps: 1. Verify REVO M’s current sizing. Be sure that: ... -
Page 11: Basic Connections And Sizing
8 Basic Connections and sizing Single phase wiring with resistive load (with REVO M-1PH) I V = Nominal voltage of the load I = Nominal current of the load P = Nominal power of the load Single phase wiring with inductive load (with REVO M-1PH) I ... -
Page 12: Identification And Order Code
9 Identification and Order Code 9.1 Identification of the unit Caution: Before to install, make sure that the Thyristor unit have not damages. If the product has a fault, please contact the dealer from which you purchased the product. The identification's label give all the information regarding the factory settings of the Thyristor unit, this label is on the unit, like represented in figure. - Page 13 CD-Eng-REVO-M-1PH-60-210A-Thyristors-Units...
-
Page 14: Technical Specifications
10 Technical Specifications 10.1 General features: Cover and Socket material: PolymericV2 Utilization Category AC-51 AC-55b AC-56A IP Code Method of Connecting Single Phase Load (8 VA Max) 90:130V (8 VA Max) 170:265V (8 VA Max) 230:345V Auxiliary voltage: (8 VA Max) 300:530V (8 VA Max) 510:690V... -
Page 15: Installation
11 Installation Before to install, make sure that the Thyristor unit have not damages. If the product has a fault, please contact the dealer from which you purchased the product. Verify that the product is the same thing as ordered. The Thyristor unit must be always mounted in vertical position to improve air cooling on heat- sink. -
Page 16: Dimensions And Weight
11.3 Dimensions and Weight REVO M 1PH Size W(mm) D(mm) H(mm) Weight (kg) 1PH (60A no Fan) 1PH (90-210A with Fan) 11.4 Fixing holes REVO M 1PH 1PH (60A no Fan) 1PH (90-210A with Fan) CD-Eng-REVO-M-1PH-60-210A-Thyristors-Units... -
Page 17: Wiring Instructions
12 Wiring instructions The Thyristor unit could be susceptible to interferences lost by near equipments or by the power supply, for this reason in accord to the fundamental practices rules is opportune take some precautions: The coil contactor, the relays and other inductive loads must be equipped with opportune RC filter. ... -
Page 18: Power Terminals
Warning: Before connecting or disconnecting the unit check that power and control cables are isolated from voltage sources. 12.5 Power Terminals Terminal Description Line Input Phase 1 Load Output Phase 1 12.6 Control Terminals Warning: Before connecting or disconnecting the unit check that power and control cables are isolated from voltage sources. -
Page 19: Schematic
12.7 Schematic NOTE: The user installation must be protecting by electromagnetic circuit breaker or by fuse isolator. The semiconductor I2t should be 20% less than power controller I2t. Semiconductor fuses are classified for UL as supplemetar protection for semiconductor. They are note approved for branch circuit protection. -
Page 20: Connection Diagram For Single-Phase
12.8 Connection Diagram for Single-phase Caution: this procedure must be performed only by qualified persons. *1 A suitable device must ensure that the unit can be electrically isolated from the supply, this allows the qualified people to work in safety. *2 See par. -
Page 21: Control Panel
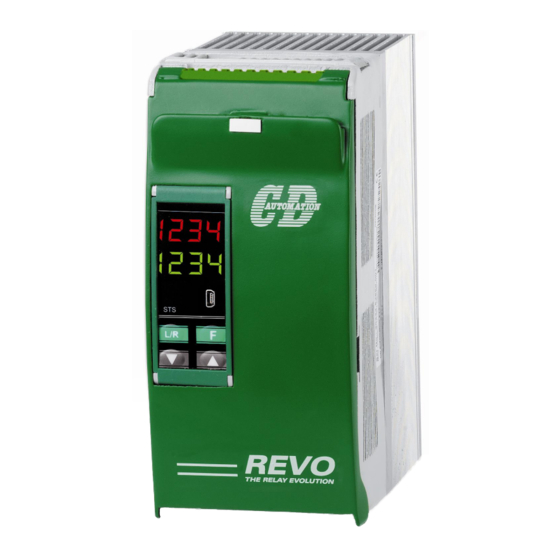
13 Control Panel The Control Panel is placed on the front of the thyristor unit, on his display you can visualize the alarms, the input and output signals and all the configuration parameters . The function keys are the following: ... -
Page 22: Scroll The Parameters
13.1 Scroll the parameters CD-Eng-REVO-M-1PH-60-210A-Thyristors-Units... -
Page 23: Operator Menu
13.2 Operator Menu Push simultaneously L/R and F for few seconds to access to the menu ( flashing). Select by arrows then press F. UP and DOWN : Select by arrows then press F. UP and DOWN : as password ... - Page 24 Operative Load Voltage: This parameter is used to set in volt the operative voltage of the load. Default Parameter Parameter Par. Contents Value Value Value Value Value Display Name Type Operative 1023 R/W V_oP 1023 Load Voltage Load nominal Current: This parameter is used to set the Load nominal Current.
- Page 25 Default Parameter Parameter Par. Contents Value Value Value Value Value Display Name Type Analog/Digital R/W A__d Digital Selection Sample Values and Note A__d = Digital A__d = Analog. Unit Enable Selection: Default Parameter Parameter Par. Contents Value Value Value Value Value...
-
Page 26: Setup Menu
13.3 Setup Menu Push simultaneously L/R and F for few seconds to access to the menu ( flashing). Select by arrows then press F. UP and DOWN : Select by arrows then press F. UP and DOWN : as password ... - Page 27 Set HB Delay: This parameter set a delay to have HB alarm active Default Parameter Parameter Par. Contents Value Value Value Value Value Display Name Type R/W Hb_S HB delay Set FeedBack type: This parameter selects the Feed-back type. Default Parameter Parameter...
- Page 28 Set Soft Start Cycle: In Burst Firing is possible to have a soft start ramp. With this parameter you can define how much cycles are necessary to reach the complete wave form. Default Parameter Parameter Par. Contents Value Value Value Value Value...
-
Page 29: Hardware Menu
13.4 Hardware Menu Push simultaneously L/R and F for few seconds to access to the menu ( flashing). Select by arrows then press F. UP and DOWN : Select by arrows then press F. UP and DOWN : as password ... - Page 30 Digital input 1 configuration : This parameter selects the function of digital input. Default Parameter Parameter Par. Contents Value Value Value Value Value Display Name Type Digital input 1 R/W CDi1 configuration Sample Values and Note 0 = Enable ...
-
Page 31: Control Panel Led
Serial port Address : This parameter selects the Address on the serial port for the thyristor unit. Default Parameter Parameter Par. Contents Value Value Value Value Value Display Name Type R/W Addr Address Add. 13.5 Control Panel Led 13.6 Displayed Alarms Alarm on Description... -
Page 32: Input Output Signal
14 Input output signal 14.1 Digital Input The REVO M thyristor unit has 2 digital inputs opto-isolated to 24Vdc 5 mA. You can activate the inputs with the internal supply or with an external source for example the PLC. 14.1.1 Start/Stop (Terminal 3 of M1) This is the start command (Enable) of the REVO M. -
Page 33: Analog Inputs
14.3 Analog Inputs 14.3.1 Primary Input (Terminals 5 and 6 of M1) The REVO M thyristor unit has 1 analog inputs for the analog setpoint. The primary input is already configured in line with customer requirements that are defined in the Order Code. -
Page 34: Heater Break Alarm And Scr Short Circuit (Hb Option)
15 Heater Break alarm and SCR short circuit (HB Option) Caution: to work properly the load must be powered at least about 160msec. The Heater Break circuit read the load resistance with an Internal voltage transducer and Internal current transformer (C.T.) , to calculate the resistance (V/I). Minimum current is 10% of the current transformer size. -
Page 35: Firing Type
16 Firing type Choose an correct firing type allows to optimize the thyristor unit for the installed load. The firing type has already configured in line with customer requirements that are defined in the Order Code. The Order Code is written on the identification label. However, if you wish to change the firing type you can use the software configurator or the Control Panel parameter on... -
Page 36: Burst Firing (Bf )
16.3 Burst Firing (BF The Burst Firing is similar to the Single Cycle, but consecutive cycles ON are selectable between 2 and 255, with input signal equal at 50%. Burst Firing is a method zero crossing that it reduces the electromagnetic interferences because the thyristor switches at zero voltage crossing. -
Page 37: Phase Angle (Pa )
16.5 Phase Angle (PA The Phase Angle firing allow the control of the power on the load, for this firing the thyristor can be in conduction only for a part of the voltage cycle. This part of the voltage cycle is adjustable in function of the input signal from 0 at 100%. The PA firing is normally used for control the inductive loads, and is also possible control a primary of transformer coupled with the cold resistances like: Superkanthal, Molybdenum, Platinum, Tungsten or Quartz Lamp. -
Page 38: Delay Triggering With Burst Firing (Dt+Bf )
16.6 Delay Triggering with Burst Firing (DT+BF The Delay Triggering firing is used the control a primary of transformer coupled with the normal resistances on the secondary (N.B. don't connect cold resistances on the secondary like: Superkanthal, Molybdenum, Platinum, Tungsten, Quartz Lamp). For an inductive load (ex transformer), switching the thyristors at zero crossing can generates transient over currents that can blow the fuses, to avoid this problem you must use the Delay Triggering. -
Page 39: Feed-Back Type
17 Feed-back type The Feed-back type has already configured in line with customer requirements that are defined in the Order Code. The Order Code is written on the identification label. However, if you wish to change the Feed-back type you can use the software configurator or the Control Panel. -
Page 40: Rs485 Serial Port
18 RS485 Serial Port The serial communication port RS485 is available on the Command Terminals. On this port may be done a network up to 127 REVO M. Terminal M1 Description RS485 A RS485 B 19 PG Connector The PG Connector is used to configure the thyristor unit with the configuration software and with the programming cable. -
Page 41: Internal Fuse
20 Internal Fuse The thyristor unit have internal fuse extrarapid at low I²t for the thyristor protection of against the short-circuits. The Fuses must have I²t 20% less than thyristor's I²t. The warranty of thyristor is null if no proper fuses are used. FUSE I2T value FUSE I2T value Fuse Code... -
Page 42: Fuses Replacement
20.1 Fuses Replacement Open the cover and remove the screws CD-Eng-REVO-M-1PH-60-210A-Thyristors-Units... -
Page 43: Maintenance
Warranty does not include products with serial numbers deleted. The faulty product should be shipped to CD Automation at customer’s cost and our Service will evaluate if product is under warranty terms. Substituted parts remain of CD Automation property. - Page 44 CD-Eng-REVO-M-1PH-60-210A-Thyristors-Units...
Need help?
Do you have a question about the Revo M 1PH and is the answer not in the manual?
Questions and answers