
Related Manuals for Acson A4LC 10 B


Summary of Contents for Acson A4LC 10 B
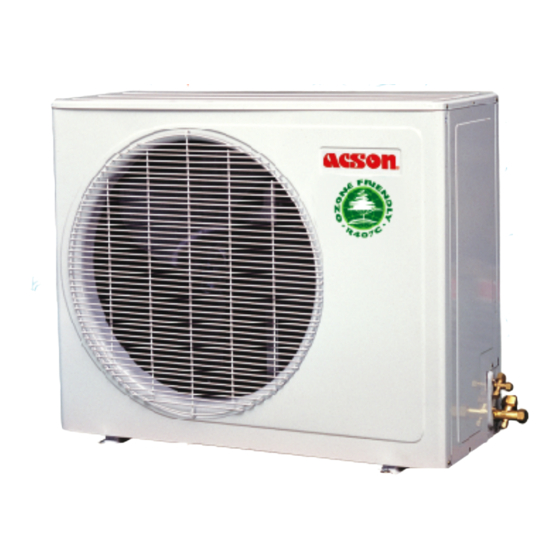
- Page 1 Models: A4LC 10 B/BR A4LC 15 B/BR A4LC 20 B/BR A4LC 25 B/BR A4LC 30 C/CR A4LC 40 C/CR A4LC 50 C/CR R407C Air-Cooled Split Systems Manual No: TMA-A4LC-CR-1250...
-
Page 2: Table Of Contents
CONTENTS PAGE 1. INTRODUCTION TO REFRIGERANT R407C 2. SPECIFICATIONS 3. OUTLINES AND DIMENSIONS 3 - 4 4. WIRING DIAGRAMS 5 - 8 5. SPECIAL PRECAUTIONS 9 – 10 6. INSTALLATION 11 – 15 7. SERVICING AND MAINTENANCE 16 – 17 8. -
Page 3: Introduction To Refrigerant R407C
1. INTRODUCTION TO REFRIGERANT R407C ENVIRONMENTAL FRIENDLY The Montreal Protocol regulation calls for the phase-out of HCFCs by the year 2030 to prevent the ozone layer from further depletion. R407C is an environment friendly refrigerant to replace R22. The operating characteristics of R407C system bears close similarity to that of R22. -
Page 4: Specifications
2. SPECIFICATIONS COOLING ONLY MODEL OUTDOOR UNIT A4LC10B A4LC15B A4LC 20B A4LC 25B A4LC30C A4LC40C A4LC50C NOMINAL kcal/h 2,268 2,772 4,612 5,292 7,560 9,576 12,600 COOLING 2,637 3,223 5,363 6,155 8,792 11,134 14,650 CAPACITY Btu/h 9,000 11,000 18,300 21,000 30,000 38,000 50,000 R407C / CAPILLARY TUBE (OUTDOOR) -
Page 5: Outlines And Dimensions
3. OUTLINES AND DIMENSIONS MODEL : A4LC 10B / 15B, 10BR / 15BR All dimensions in mm MODEL : A4LC 20B / 25B, 20BR / 25BR All dimensions in mm... - Page 6 MODEL : A4LC 30/40/50C, A4LC 30/40/50CR All dimensions in mm Sharp edges and coil surfaces may cause injury. Wear protective Caution gloves when handling the unit.
-
Page 7: Wiring Diagrams
4. WIRING DIAGRAMS MODEL : A4LC 10/15B MODEL : A4LC 10/15BR... - Page 8 MODEL : A4LC 20/25B MODEL : A4LC 20/25BR...
- Page 9 MODEL :A4LC 30C MODEL : A4LC 30CR...
- Page 10 MODEL : A4LC 40/50C MODEL : A4LC 40/50CR...
-
Page 11: Special Precautions
5. SPECIAL PRECAUTIONS WHEN DEALING WITH REFRIGERRANT R407C UNIT What is new refrigerant R407C? R407C is a zeotropic refrigerant mixture which has zero ozone depletion potential and thus conformed to the Montreal Protocol regulation. It requires Polyol ester oil (POE) oil for its compressor's lubricant. - Page 12 Ensure that the compressor is not expose to open air for more than the recommended time specified by its manufacturer (typically less than 10 minutes). Removed the seal-plugs only when the compressor is about to be brazed. The system should be thoroughly vacuumed to 1.0 Pa (-700mmHg) or lower. This vacuuming level is more stringent than R22 system so as to ensure no incompressible gas and moisture in the system.
-
Page 13: Installation
6. INSTALLATION Caution Sharp edges and coil surface are potential injury hazard. Avoid from contact with them. (1) INSTALLATION OF INDOOR UNIT For installation of indoor unit, please refer to the indoor unit technical manual. (2) INSTALLATION OF OUTDOOR UNIT As condensing temperature rises, evaporating temperature rises and cooling capacity drops. - Page 14 INSTALLATION CLEARANCE • Outdoor units must be installed such that there is no short circuit of the hot discharge air or obstruction to smooth air flow. Select the coolest possible place where intake air should not be hotter than the outside temperature (max. 45°C) Minimum Distance Series I 150 mm...
-
Page 15: Electrical Connections
(4) WIRING ELECTRICAL CONNECTIONS • Wiring regulations on wire diameters differ from country to country. Please refer to your LOCAL ELECTRICAL CODES for field wiring rules. Be sure that installation comply with such rules and regulations. GENERAL PRECAUTIONS • Ensure that the rated voltage of the unit corresponds to the name plate before carrying out proper wiring according to the wiring diagram. - Page 16 Caution R407C must be charged as liquid. Usually R407C cylinder is equipped with a dip-pipe for liquid withdrawal. If there is no dip-pipe, the cylinder should be inverted so as to withdraw liquid R407C from the valve. Caution Do not top-up when servicing leak, as this will reduce the unit performance. Vacuum the unit thoroughly and then charge the unit with fresh R407C according to the amount recommended in the specification.
- Page 17 Caution Avoid prolong exposure of an opened compressor, or the internal part of refrigerant piping to moist air. The POE oil in the compressor and piping can absorb moisture from air. (7) OVERALL CHECKING • Ensure the following, in particular : 1) The unit is mounted solidly and rigid in position.
-
Page 18: Servicing And Maintenance
7. SERVICING AND MAINTENANCE Caution Disconnect from Main Supply before Servicing the air conditioner The unit is designed to give a long life operation with minimum maintenance required. However, it should be regularly checked and the following items should be given due attention. Components Maintenance Procedure Recommended Schedule... - Page 19 PRE-START UP MAINTENANCE (AFTER EXTENDED SHUTDOWN) Inspect thoroughly and clean indoor and outdoor units. Clean or replace air filters. Clean condensate drain line. Clean clogged indoor and outdoor coils. Check fan imbalance before operation. Tighten all wiring connections and panels. Check for refrigerant leakage The design of the outdoor series allows servicing to be carried out readily and easily.
-
Page 20: Troubleshooting
8. TROUBLESHOOTING When any air-conditioner malfunction is noted, immediately switch off the power supply to the unit, and contact the local dealer, if necessary. Some simple troubleshooting tips are given below : FAULT CAUSE • Protection against the frequent starting. Wait 3 or 1. - Page 21 FOR COOLING ONLY MODELS OR HEAT PUMP MODELS (COOLING CYCLE) DIAGNOSIS BY FLOW CHART The following chart are efficient checking procedures for troubleshooting when these fan-coil units, are coupled with the condensing units using standard wiring. For dual circuited models, perform the procedures for each circuit.
-
Page 22: Insufficient Cooling
INSUFFICIENT COOLING Insufficient Cooling Cycling On Compressor Cycling High Discharge Pressure or Low See "High Discharge Pressure" or Tripping Suction Pressure "Low Suction Pressure" Dual Pressure Switch Clogged Capillary or Pressure Repair Clogging and Replace Switch The Switch If Required Switch Faulty Repair or Change If Necessary Running... -
Page 23: Low Suction Pressure
HIGH SUCTION PRESSURE High Suction Pressure Evaporator Reduce The Fresh Air Intake Air Inlet Excessive Fresh Air Intake Temperature Insufficient Duct Insulation Reinforce The Duct Insulation Defective Compressor Valve Change Or Repair The Compressor Overcharged Refrigerant Purge The Refrigerant LOW SUCTION PRESSURE Low Suction Pressure Evaporator Restricted... - Page 24 For Heat Pump Models BY MEANS OF PRESSURE READINGS : PRESSURE PROBABLE CAUSE Data Circuit 1. Overcharged with refrigerant. High Side 2. Non-condensable gases in refrigerant circuit (e.g. oil). Low Side 3. Obstructed air-intake/discharge. 4. Short circuiting of hot air outdoor unit. 1.
- Page 25 The most common causes of air conditioner failure to “start" are:- a) Voltage not within ±10% of rated voltage. b) Power supply interrupted. c) Control settings improper. d) Air conditioner is disconnected from main power source. e) Fuse blown or circuit breaker off. II) DIAGNOSIS OF REFRIGERANT CIRCUIT / APPLICATION There might be some cases where the unit starts running but does not perform satisfactory, i.e.
-
Page 26: Parts List
9. PARTS LIST MODEL : A4LC 10/15/20/25B 1. BACK PANEL 16. ROTARY COMPRESSOR 2. TOP PANEL 17. RUBBER GROMMET 3. CONDENSER COIL ASSY. 18. COMPRESSOR NUT 4. FAN MOTOR BRACKET 19. BASE PAN ASSY. 5. FAN MOTOR 20. CAPILLARY TUBE ASSY. 6. - Page 27 MODEL : A4LC 10/15/20/25BR 1. BACK PANEL 16. ROTARY COMPRESSOR 2. TOP PANEL 17. RUBBER GROMMET 3. CONDENSER COIL ASSY. 18. COMPRESSOR NUT 4. FAN MOTOR BRACKET 19. BASE PAN ASSY. 5. FAN MOTOR 20. CAPILLARY TUBE ASSY. 6. FLINGER 21.
- Page 28 MODEL : A4LC 30/40/50C 1. ASSY. BASE PAN 10. BACK RIGHT PANEL 2. SUCTION VALVE 11. TOP PANEL 3. LIQUID VALVE 12. CONDENSER COIL ASSY. 4. PARTITION PANEL 13. MOTOR BRACKET 5. CRANKCASE HEATER 14. SIDE LEFT PANEL 6. COMPRESSOR ASSY. 15.
- Page 29 MODEL : A4LC 30/40/50CR 1. ASSY. BASE PAN 11. 4 WAY VALVE ASSY. 2. SUCTION VALVE 12. BACK RIGHT PANEL 3. LIQUID VALVE 13. DEFROST SENSOR AND CLIP 4. PARTITION PANEL 14. TOP PANEL 5. CRANKCASE HEATER 15. CONDENSER COIL ASSY. 6.
- Page 30 DOP: 072000 While upmost care is taken in ensuring that all details in the publication are correct at time of going to press, we are constantly striving for improvement and therefore reserve the rights to alter model specifications and equipment without prior notice. Details of specifications and equipment are also subject to change to suit local conditions and equirements and not all models are available in every market.
Need help?
Do you have a question about the A4LC 10 B and is the answer not in the manual?
Questions and answers