Acson AWM301 Installation Manual
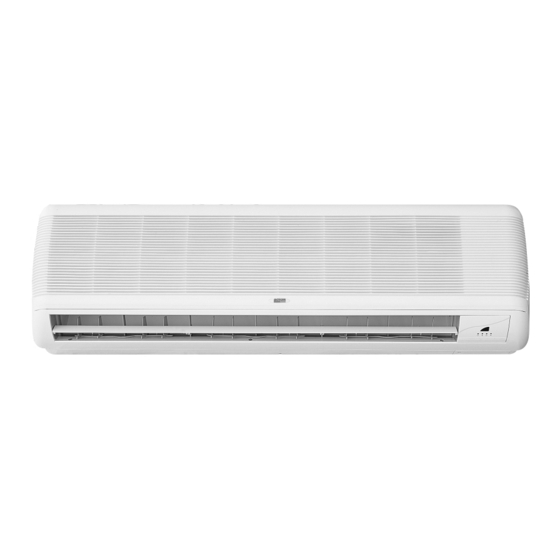
Wall mounted
split type air conditioner
Hide thumbs
Also See for AWM301:
- User manual (165 pages) ,
- User manual (108 pages) ,
- Technical manual (167 pages)

Related Manuals for Acson AWM301


Summary of Contents for Acson AWM301
- Page 1 INSTALLATION MANUAL Model: IM-WM1-0302-ACSON WALL MOUNTED SPLIT TYPE AIR CONDITIONER WALL MOUNTED...
-
Page 2: Outline And Dimensions
OUTLINE AND DIMENSIONS Indoor Unit All dimensions are in mm / (in) TOP VIEW FRONT VIEW SIDE VIEW INSTALLATION PLATE Dimension WM071 / 101 / 151 / 1R 785,0 (30,9) 297,0 (11,7) 174,0 (6,85) 595,0 (23,4) 280,0 (11,0) WM201 / 201R 1050,0 (41,3) 320,0 (12,6) 190,0 (7,5) - Page 3 Outdoor Unit (SL30C) 141,5 (5,57) 141,5 (5,57) 1030 (40,55) 400 (15,75) 40 (1,57) 40 (1,57) 320 (12,60) 50 (1,97) 85 (3,35) ! Caution Sharp edges and coil surfaces are potential locations which may cause injury hazards. Avoid from being in contact with these places. ! Avertissement Les bords coupants et les surfaces du refroidisseur tuulaire présentent un risque de blessure.
-
Page 4: Installation Manual
Before using your air conditioner, please read this instruction manual carefully and keep it for future reference. WALL MOUNTED SPLIT TYPE AIR CONDITIONER MODEL COOLING UNIT (R22) HEAT PUMP UNIT (R22) Reference Model Model Reference Model Model WM301 AWM301 WM301R AWM301R SL30C ALC30C SL30CR ALC30CR SL30B ALC30B SL30BR... -
Page 5: Table Of Contents
CONTENTS - Outline and Dimensions page i-ii - Special Precautions When Dealing With R410A Unit page 10 - Safety Precautions page 2 - Vacuuming and Charging page 10 - Installation Diagram page 3 - Indicator Lights page 11 - Installation of the Outdoor Unit page 3 - Air Conditioner Unit Operation page 13... -
Page 6: Installation Diagram
INSTALLATION DIAGRAM Indoor Unit Air Filters Front Frame Back Housing Air Intake Grille On/Off Switch Drain Hose Indicator Lights Air Discharge Louver Signal Receiver Air Discharge Grille Air Intake Refrigerant Piping Air Intake Air Discharge Nozzle Outdoor Unit INSTALLATION OF THE OUTDOOR UNIT The outdoor unit must be installed in such a way, so as to prevent short circuit of the hot discharged air or obstruction to the smooth air flow. - Page 7 INSTALLATION OF ORIFICE PIPE Orifice Pipe Outdoor Unit Indoor Flare nut 3/8" (Female) Orifice Flare joint 3/8" (Male) Pipe, connecting Note: This installation is only for WM301 / SL30B & WM301 / SL30C ! Caution The orifice pipe must be installed in the correct direction as shown above. Improper direction may cause failure to the operating system.
- Page 8 B. Outdoor unit orifice pipe installation (where installation space is limited) Step 4 Orifice Pipe Step 3 Step 2 Step 1 If the orifice pipe cannot be connected directly to the liquid valve due to space constraint, it can be connected in between of the liquid pipe.
-
Page 9: Installation Of The Indoor Unit
INSTALLATION OF THE INDOOR UNIT The indoor unit must be installed in such a way so as to The refrigerant piping can be routed to the unit in a prevent short circuit of the cool discharged air with the hot number of ways (left or right from the back of the unit), by return air. -
Page 10: Refrigerant Piping
REFRIGERANT PIPING ! Caution An orifice is used as expansion device in WM301 cooling only unit. It is fixed in the liquid pipe in the indoor unit. Piping length and elevation Cutting copper tube If the pipe is too long, both the capacity and reliability of the unit will drop. -
Page 11: Electrical Wiring Connection
ELECTRICAL WIRING CONNECTION Cooling unit IMPORTANT : The figures shown in the table are for information purpose only. They should be checked and selected to comply with the local/national codes of regulations. This is also subject to the type of installation and conductors used. - Page 12 Heat pump unit IMPORTANT : The figures shown in the table are for information purpose only. They should be checked and selected to comply with the local/national codes of regulations. This is also subject to the type of installation and conductors used. ** The appropriate voltage range should be checked with label data on the unit.
-
Page 13: Special Precautions When Dealing With R410A Unit
SPECIAL PRECAUTIONS WHEN DEALING WITH R410A UNIT • R410A is a near azeotrope refrigerant blend of hydro fluorocarbon (HFC) which is environmental friendly. It has Zero Ozone Depletion Potential (ODP=0) and this conforms to Montreal Protocol regulations. It has no flame propagation and a low toxic refrigerant (rated as A1 by ARI). -
Page 14: Indicator Lights
Additional charge in gram (R22) • Open the gas cylinder and low pressure charging valve. • When the required refrigerant quantity is pumped into Model 10 m/32.8 ft 12 m/39.4 ft 15 m/49.2 ft the unit, close the low pressure side and the gas cylin- 071 / 101 / 151 der valve. - Page 15 LED Indicator Lights For Heat Pump Unit Heat pump unit The table shows the LED indicator lights for the air conditioner unit under normal operation and fault conditions. The LED indicator lights are located at the bottom right side of the air conditioner unit. The heat pump units are equipped with an “auto”...
-
Page 16: Air Conditioner Unit Operation
AIR CONDITIONER UNIT OPERATION Dry mode Frost prevention • When the air humidity is high, the unit can operate in dry • When the air filter is dirty, the evaporating temperature mode. Press <MODE> button and choose <DRY>. will decrease and eventually cause frosting. •... -
Page 17: Standard Operating Conditions
STANDARD OPERATING CONDITIONS Heat Pump Unit Cooling unit Ts °C/°F Th °C/°F Temperature Ts °C/°F Th °C/°F Temperature Minimum indoor Minimum indoor 19.4 / 66.9 13.9 / 57.0 10 / 50 temperature temperature Maximum indoor Maximum indoor 26.7 / 80.1 19.4 / 66.9 26.7 / 80.1 temperature... -
Page 18: Service And Maintenance
! Caution 1. The electrostatic air purifying and deodorizing filter 3. The filter is a consumable part which you can purchase should be replaced once every 6 months or when the from your air conditioner dealer. filter changes color to brownish, whichever is sooner. 4. -
Page 19: Troubleshooting
TROUBLESHOOTING If any malfunction of the air conditioner unit is noted, immediately switch off the power supply to the unit. Check the following fault conditions and causes for some simple troubleshooting tips. Fault Causes / Action 1. The compressor does not operate 3 minutes after the air - Protection against frequent starting. - Page 20 Avant d’installer et de faire fonctionner le climatiseur, lisez attentivement ce manuel et conservez le. CLIMATISEURS SPLIT SYSTEM MONTAGE MURAL MODÈLE FROID SEUL (R22) POMPE À CHALEUR (R22) Modèle de Référence Modèle Modèle de Référence Modèle WM301 AWM301 WM301R AWM301R SL30C ALC30C SL30CR ALC30CR SL30B ALC30B SL30BR...
- Page 21 SOMMAIRE - Contour et Dimensions page i-ii - Précautions Spéciales Pour Les Appareils au R410A page 10 - Précautions de Sécurité page 2 - Aspiration et Chargement page 10 - Diagramme D’installation page 3 - L’indicateur S’allume page 11 - Installation de L’unité Extérieure page 3 - Opération du Climatiseur page 13...
-
Page 22: Diagramme D'installation
DIAGRAMME D’INSTALLATION Unité Intérieure Filtre à air Cadre Avant Chassis Arriere Grilles de reprise d’air Interrupteur ON/OFF Tuyau D’evacuation Led de Visualisation Conduit de ventilation Récepteur de Signal Grilles de Ventilation Reprise Air Tuyauteries Frigorifiques Reprise Air Refoulement d’air Unité Extérieure INSTALLATION DE L’UNITÉ... -
Page 23: Installation Du Tuyau D'orifice
INSTALLATION DU TUYAU D’ORIFICE Tuyau d’orifice Unité Extérieure Intérieur Écrou évasé de 3/8 po (femelle) Orifice Assemblage par évasement de 3/8 po (mâle) Tuyau de raccord Remarque: Cette installation ne vaut que pour WM301 / SL30B et WM301 / SL30C ! Avertissement Le tuyau d’orifice doit être installé... - Page 24 B. Installation de l’orifice du tuyau de l’unité extérieure (où l’espace pour l’installation est limité) Étape 4 Tuyau d’orifice Étape 3 Étape 2 Étape 1 Si le tuyau d’orifice ne peut pas être connecté directement au robinet de liquide à cause d’un manque d’espace, on peut l’installer au milieu du tuyau de liquide.
-
Page 25: Installation De L'unité Intérieure
INSTALLATION DE L’UNITÉ INTÉRIEURE Installer l’unité intérieure de traitement d’air de façon à ce L’unité d’évacuations des condensats de l’unité interieure qu’il n’y ait aucun obstacle sur la circulation de l’air devra être, dans la mesure du possible, dirigé vers la sortie arrière des tuyauteries à... -
Page 26: Raccordements Des Tuyauteries
RACCORDEMENTS DES TUYAUTERIES ! Attention Dans l’unité de refroidissement WM301 on utilise un orifice, attaché à la tuyauterie d'eau de l’unité intérieure, comme dispositif d’expansion. Longueur des tuyauteries et différence de niveau Coupe des Tubes Cuivre Pour un bon fonctionnement des unités, il est impératif de respecter la longueur maximum des tuyauteries indiquée dans le tableau ci-dessours, de respecter le nombre de coudes maximum autorisé, et de ne pas dépasser la différence de... -
Page 27: Raccordement Électrique
RACCORDEMENT ÉLECTRIQUE Module refroidisseur IMPORTANT : Ces valeurs sont données à titre indicatif seulement; elles doivent être vérifiées et ajustées en fonction des normes et de la réglementations en vigueur. Elles dépendent aussi du type d’installation et du choix des conducteurs utilisés. Le voltage adéquat doit être vérifié... - Page 28 Module pompe à chaleur IMPORTANT : Ces valeurs sont données à titre indicatif seulement; elles doivent être vérifiées et ajustées en fonction des normes et de la réglementations en vigueur. Elles dépendent aussi du type d’installation et du choix des conducteurs utilisés. Le voltage adéquat doit être vérifié...
-
Page 29: Précautions Spéciales Pour Les Appareils Au R410A
PRÉCAUTIONS SPÉCIALES POUR LES APPAREILS AU R410A • Le R410A est un mélange quasi-azéotrope de frigorigène d’hydrofluorocarbure (HFC), sans danger pour l’environnement. Il a un potentiel d’appauvrissement de l’ozone de zéro (PAO=0), ce qui est conforme aux dispositions du Protocole de Montréal. -
Page 30: L'indicateur S'allume
• Ouvrir le cylindre de gaz et la valve de chargement de Tableau de complément de charge en grammes (R22) basse pression. Modèle 10 m/32,8 ft 12 m/39,4 ft 15 m/49,2 ft • Lorsqu’une quantité suffisante de réfrigérant est injectée 071 / 101 / 151 dans l’unité, fermer le côté... - Page 31 L’indicateur LED s’allume pour l’unité de pompe Module pompe à chaleur à chaleur Le tableau ci-dessous reprend en détail la visualisation par led, des conditions normales de fonctionnement, et conditions de défaut du climatiseur. Les led de visualisation apparaissent lorsque le climatseur est sous tension, dans la fenêtre de couleur bleu foncé...
-
Page 32: Opération Du Climatiseur
OPÉRATION DU CLIMATISEUR Déshumidification Prévention de givrage • Lorsque le taux d’humidité de l’air est élevé, le climatiseur • Quand le filtre à air est encrassé, le température peut fonctionner en mode de déshumidification. Appuyer d’évaporation diminue et finit par causer la formation de sur la touche <MODE>... -
Page 33: Conditions Standard De Fonctionnement
CONDITIONS STANDARD DE FONCTIONNEMENT Module pompe à chaleur Module refroidisseur Ts °C/°F Th °C/°F Ts °C/°F Th °C/°F Température Température Température Température – 19,4 / 66,9 13,9 / 57,0 10 / 50 intérieure minimum intérieure minimum Température Température – 26,7 / 80,1 19,4 / 66,9 26,7 / 80,1 intérieure maximum... -
Page 34: Entretien Et Maintenance
! Avertissement 1. Le filtre désodorisant et purificateur d’air électrostatique 3. Le filtre est une pièce de rechange que vous trouverez doit être remplacé tous les 6 mois ou quand la couleur chez votre détaillant d’unités d’air climatisé. du filtre devient marron, suivant ce qui se produit en 4. -
Page 35: Analyse Des Causes De Dysfonctionnement Du Climatiseur
ANALYSE DES CAUSES DE DYSFONCTIONNEMENT DU CLIMATISEUR En cas de dysfonctionnement du climatiseur, couper aussitôt l’alimentation électrique. Vérifier ensuite les points suivants pour détecter la nature et les causes de la panne. Defauts Causes / Action 1. Le compresseur ne démarre pas 3 minutes après la mise en - Protection contre les démarrages fréquents. - Page 36 Vor der Inbetriebnahme des Klimagerätes dieses Handbuch bitte aufmerksam zur Kenntnis nehmen und für künftigen Bedarf aufbewahren. DOPPELFUNKTIONS-KLIMAGERÄT, ANDMONTIERT MODELL KÜHLFUNKTION (R22) WÄRMEPUMPE (R22) Bezugsmodell Modell Bezugsmodell Modell WM301 AWM301 WM301R AWM301R SL30C ALC30C SL30CR ALC30CR SL30B ALC30B SL30BR ALC30BR KÜHLFUNKTION (R410A)
- Page 37 INHALT - Auslegung und Admessung seite i-ii - Besondere Vorsichtsmassnahmen, Beim R410A Einheit seite 10 - Vorsichtmassnahmen seite 2 - Vakuum und Aufladen seite 10 - Installationsdiagramm seite 3 - Betriebsleuchtanzeige seite 11 - Installation des Außengerätes seite 3 - Bedienung des Klimagerätes seite 13 - Installation der Öffnungsrohrleitung seite 4...
-
Page 38: Installationsdiagramm
INSTALLATIONSDIAGRAMM INNEN-GERÄT LUFTFILTER VORDERER RAHMEN RÜCKWÄRTIGES LUFTEINLASSGITTER GEHÄUSE EIN-/AUS- SCHALTER ABLAUFSCHLAUCH LEUCHTANZEIGE ABLUFTAUFSATZ IR-EMPFÄNGER ABLUFTGITTER LUFTEINLASS KÄLTEMITTELLEITUNG LUFTEINLASS LUFTAUSLASSDÜSE AUßEN-GERÄT INSTALLATION DES AUßENGERÄTES Die Außenmontage-Einheit ist so zu installieren, daß die Luftzirkulation an keiner Stelle beeinträchtigt oder durch ein Hindernis am Abströmen gehindert wird. Auf Einhaltung der nachstehend gezeigten Mindestabstände achten. - Page 39 INSTALLATION DER ÖFFNUNGSROHRLEITUNG Ablassrohr Außengerät Innenräume 3/8" - Schraubenmutter Ablassstück Verbindungsrohr 3/8" - Sechskanthohlschraube Anmerkung: Dieses Einbauverfahren bezieht sich nur auf die Modelle WM301 / SL30B & WM301 / SL30C ! Vorsicht Das Ablassrohr muss, wie oben erläutert, in die richtige Richtung eingebaut werden. Ein falscher Einbau kann Schäden im Betriebssystem verursachen.
-
Page 40: Installation Der Öffnungsrohrleitung
B. Öffnungsrohrleitung des Außengerätes (wo der installationsraum beschränkt ist) Schritt 4 Ablassrohr Schritt 3 Schritt 2 Schritt 1 Wenn das Ablassrohr aufgrund von Platzmangel nicht direkt mit dem Flüssigkeitsventil verbunden werden kann, kann es entlang des Flüssigkeitsrohres eingebaut werden. Schritte: 1. -
Page 41: Installation Des Innengerätes
INSTALLATION DES INNENGERÄTES Die Kühlmittel-Rohrleitung kann an die Einheit auf Innengeräte sind so zu installieren, daß keine Interferenz verschiedene Weise angeschlossen werden (auf der Rückseite zwischen dem Kühlluftaustritt und der zurückgeführten Luft links oder rechts der Einheit). Hierzu sind die Aussparungen besteht. -
Page 42: Kühlmittelleitung
KÜHLMITTELLEITUNG ! Vorsicht Nur im Kühlgerät WM 301 wird eine Öffnung als Ausdehnungsvorrichtung verwendet. Beim Innengerät ist diese im Flüssigkeitsrohr festgemacht. Leitungslänge und Höhenmaß Zuschneiden Des Kupferrohres Bei zu langer Rohrleitung führt dies zu mangelnder Kapazität und Zuverlässigkeit des Gerätes. Mit zunehmender Bögenanzahl steigt der Kältemittelstrom im System an, führt dadurch zu einer verminderten Kühlkapazität und verursacht u.U. -
Page 43: Kabelanschluß
KABELANSCHLUß Kühleinheit WICHTIG : Die angegeben Werte sind lediglich Richtwerte. Sie sind zu überprüfen und ggf. den örtlichen und/ oderlandesspezifischen Vorschriften und Bestimmungen anzugleichen. Des weiteren sind sie abhängig von der Installationsart und dem Adernquerschnitt. ** Der geeignete Spannungsbereich sollte den Etikettdaten auf der Einheit entnommen werden. ETL verzeichnete Daten gelten nur für einen 60Hz Netzanschluss. - Page 44 Wärmepumpe WICHTIG : Die angegeben Werte sind lediglich Richtwerte. Sie sind zu überprüfen und ggf. den örtlichen und/ oderlandesspezifischen Vorschriften und Bestimmungen anzugleichen. Des weiteren sind sie abhängig von der Installationsart und dem Adernquerschnitt. ** Der geeignete Spannungsbereich sollte den Etikettdaten auf der Einheit entnommen werden. ETL verzeichnete Daten gelten nur für einen 60Hz Netzanschluss.
-
Page 45: Besondere Vorsichtsmassnahmen, Beim R410A Einheit
BESONDERE VORSICHTSMASSNAHMEN, BEIM R410A EINHEIT • R410A ist ein nahezu azeotropes Kühlmittelgemisch aus Hydrofluorkohlenwasserstoff (HFC), welches umweltfreundlich ist. Es hat ein Ozonabbaupotential von 0 (ODP = 0) und entspricht dem Montreal-Protokoll. Es hat keine Flammenausbreitung und ein schwach toxisches Kühlmittel (von ARI als A1 eingestuft). R410A ist eine Mischung aus R32 (50%) und R125 (50%). -
Page 46: Betriebsleuchtanzeige
Zusatzfüllung in Gramm (R22) • Den Gaszylinder und das Niederdruck-Ladeventil öffnen. • Sobald die benötigte Kältemittelmenge in das Gerät Modell 10 m/32,8 ft 12 m/39,4 ft 15 m/49,2 ft eingepumpt ist, werden die Niederdrucköffnung des 071 / 101 / 151 Lademessers und der Gaszylinder geschlossen. - Page 47 Leuchtdiode für Wärmepumpe Wärmepumpe Nachstehende Tabelle enhält die einzelnen LED- Funktionsanzeigen für Normalbetrieb und die verschiedenen Störungsmeldungen. Die LED-Anzeigeleuchten befinden sich auf der rechten unteren Seite des Klimagerätes. Kühlmodus Entfeuchtungs- Wärme/Gebläse Schlafmodul Die Wärmepumpe kann auf automatischen Betrieb (“Auto”) Modul (rot/grün) Modus geschaltet werden, so daß...
-
Page 48: Bedienung Des Klimagerätes
BEDIENUNG DES KLIMAGERÄTES Entfeuchten Vorbeugen von Frostbildung • Bei hoher Luftfeuchtigkeit ist das Gerät zum Entfeuchten • Wenn der Luftfilter verschmutzt ist, sinkt die einsetzbar. Dazu die <MODE>-Taste betätigen und Verdunstungstemperatur und führt schließlich zu <DRY> anwählen. Frostbildung. • Liegt die Raumtemperatur um 2°C/35,6˚F höher als die •... -
Page 49: Standard-Betriebsbedingung
STANDARD-BETRIEBSBEDINGUNG Wärmepumpe Kühleinheit Ts °C/°F Th °C/°F Ts °C/°F Th °C/°F Temperatur Temperatur Mindest- Mindest- 10 / 50 19,4 / 66,9 13,9 / 57,0 Innentemperatur Innentemperatur Maximale- Maximale- 26,7 / 80,1 19,4 / 66,9 26,7 / 80,1 Innentemperatur Innentemperatur Mindest- Mindest- 19,4 / 66,9 13,9 / 57,0... -
Page 50: Instandhaltung Und Wartung
! Vorsicht 1. Der Filter für die Elektrostatikbehandlung und die 3. Der Filter ist ein Verbrauchsgegenstand, den Sie von ihrem Kimagerätehändler beziehen können. Luftreinigung sollte bei bräunlicher Verfärbung oder spätestens nach 6 Monaten gewechselt werden. 4. Verwenden Sie das neue Filtermaterial sofort nach Entnahme aus der versiegelten Verpackung. -
Page 51: Störungs-Behebung
STÖRUNGS-BEHEBUNG Im Falle einer Funktionsstörung ist das Gerät sofort auszuschalten. Nachfolgend einige Hinweise zur Behebung von einfachen Störungen. Störung Ursache / Maßnahme 1. Der Kompressor setzt sich 3 Minuten nach Einschalten des - Schutzeinrichtung gegen häufiges Anlassen. 3 bis 4 Minuten Klimagerätes nicht in Gang. - Page 52 Prima di utilizzare il condizionatore, leggere attentamente le presenti istruzioni. Conservarle per ogni evenienza futura. CONDIZIONATORE D'ARIA MURALE A FLUSSO RIPARTITO MODELLO KÜHLFUNKTION (R22) RISCALDAMENTO (R22) Modello di Riferimento Modello Modello di Riferimento Modello WM301 AWM301 WM301R AWM301R SL30C ALC30C SL30CR ALC30CR SL30B ALC30B SL30BR ALC30BR KÜHLFUNKTION (R410A)
- Page 53 SOMMARIO - Disegni e Dimensioni pag. i-ii - Speciali Precauzioni per le Unità con R410A pag. 10 - Norme di Sicurezza pag. 2 - Spurgo e Ricarica pag. 10 - Diagramma per L’installazione pag. 3 - Spie di Controllo pag. 11 - Installazione Dell’unità...
- Page 54 DIAGRAMMA PER L’INSTALLAZIONE Unità Interna Fitri Dell’aria Pannello Anteriore Pannello Posteriore Griglia Dell’entrata Dell’aria Interruttore Avvio/Arresto Tubo di drenaggio Spie Luminose Feritoria di Ventilazione Rejilla de aire de retorno Griglia D’ingresso Dell’aria Ingresso dell’aria Condotti Del Refrigerante Ingresso dell’aria Effusore Della Ventola di Aerazione Unità...
- Page 55 INSTALLAZIONE DEL TUBO DELL’ORIFIZIO Tubo dell’orifizio Unità Esterna Interno Dado svasato 3/8” (femmina) Orifizio Raccordo svasato 3/8” (maschio) Tubo di raccordo Nota: La presente installazione è valida soltanto per WM301 / SL30B & WM301 / SL30C ! Cautela Si deve installare il tubo dell’orifizio nella direzione corretta come indicato sopra. Una direzione inadeguata potrebbe danneggiare il sistema di funzionamento.
- Page 56 B. Installazione del tubo dell’orifizio dell’unità esterna (con spazio di installazione limitato) Passo 4 Tubo dell’orifizio Passo 3 Passo 2 Passo 1 Qualora non fosse possibile collegare il tubo dell’orifizio direttamente alla valvola liquido per motivi di spazio insufficiente, sarà possibile collegarlo al tubo entro la linea liquido. Passi: 1.
- Page 57 INSTALLAZIONE DELL’UNITÀ INTERNA I condotti del refrigerante possono essere collegati Il blocco interno deve essere installato in modo che la all’apparecchiatura in differenti modi (lato posteriore destro circolazione dell’aria fredda di scarico e dell’aria di ritorno o sinistro) utilizzando i fori predisposti sul rivestimento sia la più...
- Page 58 CONDOTTI DEL REFRIGERANTE ! Cautela Nell’unità di raffreddamento WM301 si utilizzata un’orifizio come congegno di dilatazione. Questo è montato nel tubo dell’acqua dell’ unità interna. Lunghezza e altezza delle condutture Taglio del tubo di rame Se la conduttura è troppo lunga, la capacità e l’affidabilità dell’apparecchio risultano entrambe compromesse.
- Page 59 ALLACCIAMENTI ELETTRICI Raffreddamento IMPORTANTE : I valori sopra indicati hanno solo un carattere indicativo. Devono quindi essere verificati e scelti in modo da rispondere alle leggi vigenti e ai regolamenti locali. Inoltre, dipendono pure dal tipo di impianto e dai conduttori utilizzati.
- Page 60 Riscaldamento IMPORTANTE : I valori sopra indicati hanno solo un carattere indicativo. Devono quindi essere verificati e scelti in modo da rispondere alle leggi vigenti e ai regolamenti locali. Inoltre, dipendono pure dal tipo di impianto e dai conduttori utilizzati. L’appropriato intervallo di tensione deve essere confrontato con i dati della targa dell’apparecchio.
- Page 61 SPECIALI PRECAUZIONI PER LE UNITÀ CON R410A • R410A è una miscela refrigerante quasi azeotropica di idrofluorocarburi (HFC) i quali sono ecologici. Ha un potenziale di impoverimento dell’ozono uguale a zero (ODP=0) rendendolo conforme alle norme del protocollo di Montreal. È privo di propagazione di fiamma ed ha un refrigerante a bassa tossicità...
- Page 62 • Aprire il cilindro del gas e la valvola del collettore a bassa Ricarica addizionale in grammi (R22) pressione. Modello 10 m/32,8 ft 12 m/39,4 ft 15 m/49,2 ft • Quando la quantità richiesta di refrigerante è stata 071 / 101 / 151 pompata nell’impianto, chiudere la valvola del collettore 251 / 301 a bassa pressione e la valvola del cilindro del gas.
- Page 63 Spie luminose “LED” dell’unità di riscaldamento. Riscaldamento La tabella che segue indica la funzione della diverse spie di controllo del condizionatore come pure gli interventi da effettuare in caso di guasto. Le spie di controllo sono a diodi a emissione luminosa (LED) e si trovano nella zona inferiore destra del condizionatore.
- Page 64 FUNZIONAMENTO DEL CONDIZIONATORE D’ARIA Modalità Secco Prevenzione brina • Quando c’e molta umidità si può attivare la modalità secco. • Quando il filtro è sporco, la temperatura di evaporazione Premere il pulsante <MODE> e scegliere <SECCO>. diminuisce e causa la formazione di brina. •...
- Page 65 CONDIZIONI DI FUNZIONAMENTO ESTANDAR Unità di riscaldamento Unità di raffreddamento Ts °C/°F Th °C/°F Temperatura Ts °C/°F Th °C/°F Temperatura Temperatura Temperatura 19,4 / 66,9 13,9 / 57,0 10 / 50 – interna minima interna minima Temperatura Temperatura 26,7 / 80,1 19,4 / 66,9 –...
- Page 66 ! Cautela 1. Il filtro deodorizzante e purificatore d’aria elettrostatico 3. Il filtro è un componente che può essere acquistato dal rivenditore di condizionatori d’aria autorizzato. deve essere cambiato ogni 6 mesi oppure quando diventa 4. Una volta tolto il filtro dal suo sacchetto ermetico, usarlo di colore brunastro.
- Page 67 GUASTI E RIPARAZIONI Non appena si nota che il condizionatore funziona male, spegnerlolo immediatamente. Qui di seguito, sono elencati alcuni guasti minori con le relative cause. Guasto Origine / Intervento 1. Il compressore nom si mette in funzione 3 minuti dopo aver - Protezione contro gli avvii riavvicinati.
- Page 68 Por favor, antes de usar su equipo de aire acondicionado, lea cuidadosamente este manual de instrucciones, y consérvelo para futuras consultas. EQUIPO DE AIRE ACONDICIONADO DE TIPO DIVIDIDO DE MONTAJE MURAL MODELO ENFRIAMIENTO (R22) CALENTADOR (R22) Modelo de Referencia Modelo Modelo de Referencia Modelo WM301 AWM301 WM301R AWM301R SL30C ALC30C SL30CR ALC30CR SL30B ALC30B SL30BR ALC30BR...
- Page 69 ÍNDICE - Esquema y Dimensiones página i-ii - Precauciones Especiales Para El R410A página 10 - Precautiones de Seguridad página 2 - Limpieza de la Tubería de Refrigerante página 10 - Diagramma de la Instalación página 3 - Luz Indicadora página 11 - Instalación de la Unidad Exterior página 3...
- Page 70 DIAGRAMMA DE LA INSTALACIÓN Unidad Interior Filtros Del Cubierta Delantera Aire Chásis Trasero Rejilla de Entrada de Aire Botón de Commutación ON/OFF (Apagado/ Encendido) Menguera de Desagüe Luces indicadoras Persiana de Descarga de Aire Receptor de señal Rejilla de Descarga de Aire Entrada de Aire Tubería de Refrigerante Entrada de Aire...
- Page 71 INSTALACIÓN DE TUBO DE ORIFICIO Tubo de orificio Unidad Exterior Interior Tuerca abocardada 3/8" (Hembra) Orificio Tubo, conectando Junta abocardada 3/8" (Macho) Nota: Esta instalación es sólo para WM301 / SL30B & WM301 / SL30C ! Cuidado El tubo de orificio debe instalarse en la dirección correcta, según se muestra en la figura anterior. En caso contrario, el sistema podría no funcionar correctamente.
- Page 72 B. Instalación del tubo de orificio de la unidad exterior (donde el espacio de instalación sea limitado) Paso 4 Tubo de orificio Paso 3 Paso 2 Paso 1 Si no se puede conectar directamente el tubo de orificio a la válvula de líquidos debido a limitaciones de espacio, se puede conectar en algún punto del tubo de líquido.
- Page 73 INSTALACIÓN DE LA UNIDAD INTERIOR La tubería de refrigerante se puede dirigir hasta la unidad de La unidad de interior debe estar instalada de modo que el varias maneras (izquierda o derecha detrás de la unidad), aire de descarga frío no entre en contacto con el aire de usando los agujeros recortados en la caja de la unidad (véase retorno caliente.
- Page 74 TUBERÍA DE REFRIGERANTE ! Cuidado En la unidad de resfriamiento WM301 se utiliza un orificio como dispositivo de dilatación. Eso està fijado a la cañería del aire de la unidad interior. Longitud y elevación de la tubería Corte del tubo de cobre Si la tubería es demasiado larga, tanto la capacidad como la fiabilidad de la unidad disminuirán.
- Page 75 CONEXIÓN DEL CABLEADO ELÉCTRICO Unidad de enfriamiento IMPORTANTE : Los valores mostrados arriba se dan a título informativo únicamente. Estos deben ser verificados y seleccionados a fin de que cumplan con los códi gos y reglamentos locales y/o nacionales. También están sujetos al tipo de instalación y al tamaño de los conductores.
- Page 76 Unidad de calentamiento IMPORTANTE : Los valores mostrados arriba se dan a título informativo únicamente. Estos deben ser verificados y seleccionados a fin de que cumplan con los códi gos y reglamentos locales y/o nacionales. También están sujetos al tipo de instalación y al tamaño de los conductores.
- Page 77 PRECAUCIONES ESPECIALES PARA EL R410A • R410A es un refrigerante casi azeotrópico de mezcla hidro fluorocarbonada (HFC) que respeta el medio ambiente. Tiene un ODP = 0 y cumple con las regulaciones del Protocolo de Montreal. No tiene propagación de llama y es un refrigerante de baja toxicidad (clasificado como A1 por ARI).
- Page 78 Carga adicional en gramos (R22) • Abrir la válvula del cilindro de gas y la de cierre de baja presión Modelo 10 m/32,8 ft 12 m/39,4 ft 15 m/49,2 ft 071 / 101 / 151 • Cuando se haya bombeado la unidad con la cantidad de refrigerante requerida, cerrar la válvula de baja presión y 251 / 301 del cilindro de gas.
- Page 79 Luces indicadoras LED de funcionamiento para la Unidad de calentamiento unidad de calentamiento La tabla que se muestra a continuación contiene las luces indicadoras LED para el funcionamiento normal y la condición de falla de la unidad de aire acondicionado. Las luces indicadoras LED están situadas en la parte inferior derecha de la unidad de aire acondicionado.
- Page 80 OPERACIÓN DE LA UNIDAD DE AIRE ACONDICIONADO Modo seco Prevención de congelamiento • Cuando la humedad del aire es alta, la unidad puede operar • Cuando el filtro de aire está sucio, la temperatura de en modo seco. Pulse el botón de modo de funcionamiento evaporación descenderá...
- Page 81 CONDICION DE FUNCIONAMIENTO ESTÁNDAR Unidad de calentamiento Unidad de enfriamiento Ts °C / °F Th °C / °F Ts °C / °F Th °C / °F Temperatura Temperatura Temperatura Temperatura 10 / 50 – 19,4 / 66,9 13,9 / 57,0 interior mínima interior mínima Temperatura...
- Page 82 ! Cuidado 1. Los filtros purificadores y desodorizadores de aire se 3. El filtro es una artículo consumible, que Ud. puede obtener deben cambiar cada seis meses o cuando el color del en cualquier agente de acondicionadores de aire. filtro cambie a amarronado, cualquiera de los casos que 4.
- Page 83 LOCALIZACIÓN DE AVERIAS Cuando detecte alguna anomalia en el funcionamiento de la unidad de aire acondicionado, desconéctela inmediatamente de la fuente de alimentación eléctrica. Como unas simples pistas para el mantenimiento y las reparaciones, compruebe los siguientes fallos y sus causas. Causa / Acción Falla - Protección contra los arranques frecuentes.
- Page 84 руководство по эксплуатации и сохраните его для обращения за справками в будущем. НАСТЕННЫЙ КОНДИЦОНЕР РАЗДЕЛЬНОГО ТИПА Модель ТОЛЬКО ОХЛАЖДЕНИЕ (R22) ОБОГРЕВАТЕЛЬНЫЙ НАСОС (R22) Справочная модель Модель Справочная модель Модель WM301 AWM301 WM301R AWM301R SL30C ALC30C SL30CR ALC30CR SL30B ALC30B SL30BR ALC30BR ТОЛЬКО...
- Page 85 СОДЕРЖАНИЕ - Схема и Размеры страница i-ii - Специальные меры предосторожности - Меры Предосторожности страница 2 при обращении с R410A страница 10 - Рисунок Установки страница 3 - Откачка Воздуха и Заправка страница 10 - Установка Комнатного Блока страница 3 - Показания...
- Page 86 РИСУНОК УСТАНОВКИ Наружный Блок Воздушный фильтр Передняя панель Решетка впуска Задняя панель воздуха Включатель ВКЛ/ВЫКЛ Показания Дренажный шланг Жалюзи выпуска индикаторов воздуха Датчик сигналов Решетка выпуска воздуха Впуск воздуха Трубопровод хладогента Впуск воздуха Отверстие выпуска воздуха Комнатный Блок УСТАНОВКА КОМНАТНОГО БЛОКА Внутренний...
- Page 87 МОНТАЖ ДРОССЕЛЬНОЙ ТРУБКИ Дроссельная трубка К наружному блоку В помещение Накидная гайка 3/8" (внутренняя резьба) Диафрагма Резьбовый патрубок 3/8" (наружная резьба) Трубка соединительная Примечание: Эта установка производится только для моделей WM301 / SL30B и WM301 / SL30C. ! Осторожно Дроссельной трубку необходимо устанавливать в правильном направлении, как показано выше. Установка...
- Page 88 B. Монтаж дроссельной трубки для наружного блока (при условии ограниченного пространства для выполнения установки) Шаг 4 Дроссельная трубка Шаг 3 Шаг 2 Шаг 1 Если дроссельную трубку невозможно присоединить непосредственно к жидкостному вентилю из-за тесноты, ее можно врезать в жидкостную трубу. Шаги: 3.
- Page 89 УСТАНОВКА НАРУЖНОГО БЛОКА Внутренний модуль должен быть установлен так, чтобы Прокладка трубопровода хладагента может быть предотвратить столкновение выпуска холодного воздуха осуществлена несколькими способами (слева или с возвращающимся потоком горячего воздуха. справа модуля), через выламывающиеся отверстия Пожалуйста, оставьте пространство для установки, как на...
- Page 90 ПРОВЕДЕНИЕ ТРУБОПРОВОДОВ ХЛАДАГЕНТА ! Осторожно Только в воздухоохладителе WM301 в качестве расширительного устройства используется сопло, которое закреплено на жидкостном трубопроводе во внутреннем блоке. Длина трубопроводов и подъем Резка Медных Труб Если трубопровод слишком длин, то мощность и надежность функционирования модуля упадет. С числом...
- Page 91 ЭЛЕКТРИЧЕСКАЯ СХЕМА СОЕДИНЕНИЙ Только Охлаждение ВАЖНО: Показатели, представленные в таблице, только для принятия во внимание. Они должны быть сравнены и выбраны для того, чтобы они отвечали местным положениям/государственным стандартам. Они также зависят от типа установки и сечения используемых проводников. Соответствующий диапазон напряжений следует сверять с данными, указанными на табличке, прикрепленной к корпусу аппарата.
- Page 92 Обогревательный Насос ВАЖНО: Показатели, представленные в таблице, только для принятия во внимание. Они должны быть сравнены и выбраны для того, чтобы они отвечали местным положениям/государственным стандартам. Они также зависят от типа установки и сечения используемых проводников. Соответствующий диапазон напряжений следует сверять с данными, указанными на табличке, прикрепленной к корпусу аппарата.
- Page 93 СПЕЦИАЛЬНЫЕ МЕРЫ ПРЕДОСТОРОЖНОСТИ ПРИ ОБРАЩЕНИИ С R410A R410A представляет собой почти азеотропную охлаждающую смесь гидрофторуглеродов (HFC), которая • является экологически безопасной. Этот хладагент обладает нулевым коэффициентом разрушения озона (ODP=0), что соответствует требованиям Монреальского протокола. Он содержит негорючий и низкотоксичный хладагент (A1 по классификации ARI). R410A является смесью R32 (50%) и R125 (50%). •...
- Page 94 • Откройте газовый цилиндр и заправочный клапан (R22) Дозаправка в гр. низкого давления. Модель 10 м/32,8 фут 12 м/39,4 фут 15 м/49,2 фут • Когда требуемое количество хладагента заправлено в 071 / 101 / 151 модуль, то закройте сторону низкого давления и клапан газового...
- Page 95 Показания индикаторов СИД для модуля Модуль обогревательного насоса обогревательного насоса В таблице представлены показания индикаторов СИД для модуля кондиционера при нормальных условиях функционирования и при сбое. Показания индикаторов СИД представлены на правой нижней стороне модуля кондиционера. Модуль обогревательного насоса оборудован датчиком Режим...
- Page 96 ОПЕРАЦИЯ МОДУЛЯ КОНДИЦИОНЕРА Режим осушения Предотвращение обледенения • При повышенной влажности воздуха, модуль • При загрязнении фильтра, температура испарения может работать в режиме осушения. Нажмите уменьшится и в конце концов это может вызвать кнопку <РЕЖИМ> и <СУШКА>. обледенении. • При комнатной температуре на 2°C/35,6°F выше •...
- Page 97 УСЛОВИЯ СТАНДАРТНОЙ РАБОТЫ Обогревательный насос Только охлаждение Ts °C/°F Th °C/°F Температура Ts °C/°F Th °C/°F Температура Минимальная комнатная Минимальная комнатная 19,4 / 66,9 13,9 / 57,0 10 / 50 температура температура Максимальная комнатная Максимальная комнатная 26,7/80,1 26,7 / 80,1 19,4 / 66,9 температура...
- Page 98 ! Осторожно 1. Электростатический и дезодорирующий 3. Фильтр имеется в продаже и его можно приобрести у дилера Вашего кондиционера. фильтры должны быть заменены либо раз в каждые 6 месяцев, либо при изменении цвета 4. Используйте новый фильтр сразу же после того, как фильтров...
- Page 99 МЕРЫ ПО УСТРАНЕНИЮ При обнаружении сбоев в работе кондиционера, немедленно выключите питание сети блока. Проверьте нижеследующие признаки неисправностей, причины и советы простейших мер по устранению. Причины/действия Неисправность 1. Компрессор не начинает функционирование по - Защита от частого включения. Подождите от 3 до 4 прошествии...
- Page 100 • In the event that there is any conflict in the interpretation of this manual and any translation of the same in any language, the English version of this manual shall prevail. • The manufacturer reserves the right to revise any of the specification and design contain herein at any time without prior notification.
- Page 101 VOÂd² « VO²Â IM-WM1-0302-ACSON : “«dÞ qBHM*« ŸuM « sÄ ¡«u¼ WHOJÄ —«b'« vKŽ XO³¦² «Ë —«b'« vKŽ oOKFð...
- Page 102 œUFÐ_«Ë wDOD ²Ã« rÝdë WOKš«bë …bŠuë ©!«® Ø 3 d²LOK*UÐ w¼ œUFÐ_« lOLł ÍuKFë dEM*« VOÂd²Ã« WŠuà wÄUÄ_« dEM*« s1 _« dEM* « œUFÐ_« WM071 / 101 / 151 / 1R 595.0 (23.4) 280.0 (11.0) 174.0 (6.85) 297.0 (11.7) 785.0 (30.9) 311.0 (12.2) 730.0 (28.7) 190.0 (7.5)
- Page 103 q K ð WOł—U)« …bŠuë (SL071 & 10/15 C/CR (1.2) ©!«® Ø 3 d²LOK*UÐ w¼ œUFÐ_« lOLł œUFÐ_« 22 (0.8) 17 (0.6) 97 (3.8) 101 (3.9) 398 (15.6) 55 (2.2) 83 (3.2) 81 (3.1) 93 (3.6) 35 (1.3) 177 (6.9) 418 (16.4) 245 (9.6) 475 (18.7)
- Page 104 “ d « Þ (R22) (R22) W¾ b² « a{ …bŠË b¹d³² « …bŠË “«dÞ lłd*« “«dÞ “«dÞ lłd*« “«dÞ AWM301R WM301R AWM301 WM301 ALC30CR SL30CR ALC30C SL30C ALC30BR SL30BR ALC30B SL30B (R410A) W¾ b² « a{ …bŠË (R410A) b¹d³² « …bŠË...
- Page 105 U¹u²;« i-ii R410A œUFÐ_«Ë wDOD ²Ã« rÝdë ±∞ …bŠuë lÄ qÄUF²Ã« bMŽ W Uš UÞUO²Š« ≤ ÊUÄ_« UÞUO²Š« ±∞ s×AÃ«Ë m¹dH²Ã« ≥ VOÂd²Ã« jD Ä ±± dýR*« ¡«u{« ≥ WOł—U)« …bŠuë VOÂdð ±≥ ¡«uNë WHOJÄ …bŠË qOGAð ¥ w¼uHë »u³½_« VOÂdð ±¥...
- Page 106 VOÂd² « jD Ä WOKš«b « …bŠu « ¡«uNë U×ýdÄ wÄUÄ_« —UÞô« wHK)« ·öGë ¡«uNë ‰Ušœ« WJO³ý ON/OFF ÕU²HÄ n¹dB²Ã« »u³½√ dýR*« ¡«u{« ¡«uNë m¹dHð oý …—Uýô« q³I² Ä ¡«uNë m¹dHð WJO³ý ¡«uNë qšbÄ b¹d³²Ã« …œUÄ VOÐU½√ ¡«uNë qšbÄ ¡«uNë m¹dHð W¼u WOł—U)«...
- Page 107 w¼uH « »u³½_« VOÂdð w¼u »u³½« WOł—U)« …bŠuë WOKš«bë ©W¦½RÄ® ≥Ø∏¢ lOÝuð WÃuL W¼u ©Íd–® ≥Ø∏¢ lOÝu²Ã« qBHÄ u𠨻u³½« WM301/SL30C Ë WM301/SL30B “«dDà jI VOÂd²Ã« ∫WEŠöÄ tO³Mð ÆÁöŽ« `{uÄ u¼ UL `O×Bë ÁU&ôUÐ w¼uHë »u³½ô« VOÂdð V−¹ ÆqOGA²Ã« ÂUE½ ¡«œ« w —uBÁ vë ¡wÞU)« ÁU&ô« Íœƒ ©VOÂd²K WO UÂ...
- Page 108 ©VOÂd²K …œËb×Ä WŠU Ä „UM¼ ÊuJ¹ UÄbMŽ® WOł—U)« …bŠu « »u³½« t¼u VOÂdð Æ ¥ …uD)« w¼u »u³½« ≥ …uD)« ≤ …uD)« ± …uD)« ÆqzU ë »u³½« 5Ð tKO uð sJLO ¨WŠU *« oO{ V³ Ð qzU ë ÂULBÐ dýU³Ä qJAÐ w¼uHë »u³½ô« qO uð...
- Page 109 WOKš«b « …bŠu « VOÂdð sÄ 5LOë Ë« —U Oë® ‚dÞ …bFÐ …bŠuë vë b¹d³²Ã« …œUÄ VOÐU½√ bÄ sJ1 ¡«uNKà …dz«bë dBÁ lM* WI¹dDë Ác¼ q¦0 WOKš«bë …bŠuë VOÂdð V−¹ ¡UDž vKŽ …œułu*« WŽuDI*« »uI¦Ã« «b ²ÝUÐ ¨©…bŠuKà WOHK)« WN'« Wž—UHë...
- Page 110 b¹d³² « VOÐU½√ tO³Mð WM301 ÆWOKš«bë …bŠuë w qzU ë »u³½« vKŽ W²³¦Ä w¼Ë ÆjI b¹d³²Ã« …bŠË w b¹b9 …«œQ W¼uHë qLF² ð VOÐU½_« ŸUHð—«Ë ‰uÞ V³ Ð Æ…bŠuë …—«błË WFÝ iH Mð ·uÝ ¨ «bł WK¹uÞ VOÐU½_« X½U «–≈ Î...
- Page 111 WOzUÐdNJ « „öÝô« qO uð b¹d³² « …bŠË ÂU¼ VBMë ŸuMà W{dŽ Î UC¹« Ác¼ ÆW uÃQ*« WOK;« «dHAë lÄ o «u²ð YO×Ð U¼—UO²š«Ë UNB× V−¹ ÆjI ŸöÞô« ÷dGà w¼ ‰Ëb'« w …œułu*« ÂUÁ—ô« Ê« Î ∫ ∫ ∫ ∫ ∫ Æ ö...
- Page 112 W¾ b² « a{ …bŠË ‰ULF²Ý«Ë VBMë ŸuMà W{dŽ Î UC¹« Ác¼ ÆW uÃQ*« WOK;« «dHAë lÄ o «u²ð YO×Ð U¼—UO²š«Ë UNB× V−¹ ÆjI ŸöÞô« ÷dGà w¼ ‰Ëb'« w …œułu*« ÂUÁ—ô« Ê« Î ∫ ÂU¼ ∫ ÂU¼ ∫ ÂU¼ ∫ ÂU¼ ∫...
- Page 113 R410A …bŠu « lÄ qÄUF² « bMŽ W Uš UÞUO²Š« • R410A sÄ «dH Î pKN² ð w²Ã« ÆW¾O³Kà WI¹b …œUÄ w¼Ë ÊuЗU—uK Ë—b¹U¼ …œUÄ ÃeÄ sÄ ÊuJ²¹ Ícë »Ëdðu¹“ sŽ …—U³Ž b¹d³²Ã« …œUÄ Ê« ODP=0 WCH MÄ b¹d³ð …œUÄ vKŽ Íu²%Ë —UA²½öà qÐUÁ VN²KÄ “Už vKŽ …œU*« Ác¼ Íu²% ôË Æ‰U¹d²½uÄ ‰uÂuðËdÐ 5½«uÁ lÄ o «u²ð Ác¼Ë Ê“Ë_«...
- Page 114 • Æs×AKà iH M*« jGCë ÂUL Ë “UGë W½«uDÝ« `² « (R22) «dG UÐ w U{ô« s×A « • jGCë ÂUL oKž« ¨…bŠuë vë WÐuKD*« b¹d³²Ã« …œUÄ WOL a{ bMŽ “ d « Þ 15 m/49.2 ft 12 m/39.4 ft 10 m/32.8 ft 071 / 101 / 151 Æ“UGë...
- Page 115 W¾ b² « a{ …bŠu dýRÄ ¡«u{« W¾ b² « a{ …bŠË qOGA²Ã« ôUŠ X% ¡«uNë WHOJÄ …bŠuà dýRÄ ¡«u{« ‰Ëb'« ÷dF¹ Æ¡wÞU)«Ë ÍœUFë Æ¡«uNë WHOJÄ …bŠË sÄ s1ô« V½U'« qHÝ« w dýRÄ ¡«u{« lIð …—«d(«ØWŠËd*« l{Ë ÂuMë l{Ë ·U'« l{uë b¹d³²Ã«...
- Page 116 ¡«uN « WHOJÄ …bŠË qOGAð ·U'« l{u « œUL$ô« lMÄ • Æ·U?'« l?{u?ÃU?Ð …b?Šu?ë q?O?G?A?ð s?J?1 ¨u'« w WOÃUŽ WÐuÞdë ÊuJð UÄbMŽ • d?Ä_« d?š¬ w? Ë dO ³²Ã« …—«dŠ Wł—œ qIð ·uÝ ¨ U? ? ²Ä `ýd*« ÊuJ¹ UÄbMŽ Î...
- Page 117 qOGA²K WOÝUOI « ôU(« W¾ b² « a{ …bŠË b¹d³² « …bŠË Th °C/°F Ts °C/°F Th °C/°F Ts °C/°F …—«d(« Wł—œ …—«d(« Wł—œ Wł—b v½œô« b(« Wł—b v½œô« b(« 13.9 / 57.0 19.4 / 66.9 10 / 50 WOKš«b « …—«d(« WOKš«b «...
- Page 118 tO³Mð Æ¡«uNë WHOJÄ qOÂË sÄ Á¡«dý sJ1 wÂöN²Ý« ¡eł `ýd*« Æ≥ W?×?z«d?ë W?ë“«Ë W?O?JOðU²Ýô« ¡UÐdNJë sÄ ¡«uNë WOIMð `ýdÄ ‰«b³²Ý« V−¹ Ʊ ·öž `²Hðô ÆœËb *« nOKG²Ã« sÄ tł«dš« bFÐ «—u b¹b'« `ýd*« qLF²Ý« Πƥ ¨dLÝô« ÊuKë vë `ýd*« Êuà dOG²¹ UÄbMŽ Ë« dNý« ∂ q …bŠ«Ë …dÄ WN¹dJë Æ»dÁ«...
- Page 119 tŠö «Ë qK)« sŽ Ídײ « qO œ Æ…bŠuK —UO² UÐ œËe² « nÁË« «—u ¨¡«uN « WHOJÄ …bŠË qLŽ w ‰ö²š« Í« XEŠô «–« Î ÆtŠö «Ë qK)« sŽ Ídײ « qO b …bOH*« U×OLK² « iF³ WO U² « »U³Ýô«Ë ôU(« h× « VOF «...
- Page 120 • Më ÊuJð ¨X½U WGà W¹QÐ UN H½ WLłd²Ã« w ·ö²š« Í«Ë VO²Jë «c¼ dO Hð w ÷—UFð Í« ÀbŠ «–« Æ…bzU ë w¼ W¹eOKJ½ô« • Æo³ Ä —UFý≈ ÊËœ sÄ XÁË Í« w UM¼ …œułuÄ UH «uÄ W¹«Ë rOLB²Ã« q¹bFð o×Ð lMB*« kH²×¹ OYL MANUFACTURING COMPANY SDN.
Need help?
Do you have a question about the AWM301 and is the answer not in the manual?
Questions and answers