
Related Manuals for Flightline B-24 LIBERATOR


Summary of Contents for Flightline B-24 LIBERATOR
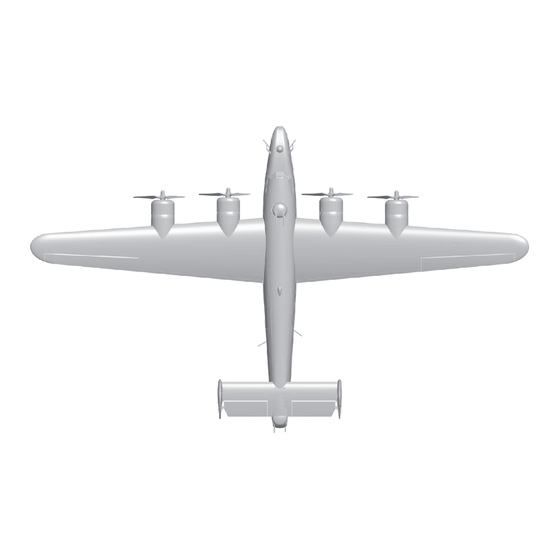
- Page 1 B-24 LIBERATOR USER MANUAL 1~11 WINGSPAN:2000MM(78.7in.) LENGTH:1230MM(48.4in.) 中 12~22 WEIGHT:2190G (W/O BATTERY)
- Page 2 The famed B-24 Liberator is one of the most recognizable WWII aircraft of all time. Serving in every theater of that global conflict, the B-24 fought to bring its brave crews home through unimaginable danger. With humility and reverence, FlightLineRC and Motion RC are proud to introduce the world’s first foam electric PNP B-24 Liberator, in remembrance of the crews who gave the ultimate sacrifice and those who carry on its memory.
-
Page 3: Basic Product Information
Horizontal tail Linkage Set electronic parts equipment servo Pre-installed all No electronic Pre-installed Vertical tail Glue & Non-slip mat electronic parts equipment servo Propeller & Spinner Carbon tube & Screw Manual & Decals Nose Turret & Nose B-24 LIBERATOR Iten No.:... - Page 4 Attach the propeller to the propeller shaft。 Make sure that the propellers are installed on the correct side. Refer to the photo above. Screw (PM2.5x6 4pcs) Spinner Screw nut Washer Propeller hub, front (A) Scale propeller Propeller B hub, front (B) Step B-24 LIBERATOR Iten No.:...
- Page 5 (PNP includes two optional forward nose sections for the B-24-D (”Greenhouse”) and B-24-J (”Emerson Turret”) Nose Turret A Nose Turret B Nose Turret Base B-24-J Variant Foam Nose Washer Tiller Screw (PA2.3x8) Lower Windshield Gun Barrels Nose Section -D Installation Greenhouse for -D Variant Antennas Gun Barrels B-24 LIBERATOR Iten No.:...
- Page 6 Aileron pushrod length Aileron pushrod mounting hole Pushrod diameter Ø1.2mm 41.5mm (1-5/8") Elevator pushrod length Elevator pushrod mounting hole Pushrod diameter Ø1.2mm 41.5mm (1-5/8") Rudder pushrod mounting hole Rudder pushrod length Pushrod diameter Ø1.2mm 53mm (2-1/16") B-24 LIBERATOR Iten No.:...
- Page 7 Connect to the Elevator channel in the receiver Connect to the Throttle channel in the receiver Receiver Connect to the Rudder channel in the receiver Connect to the landing Gear channel in the receiver Connect to the Flap channel in the receiver B-24 LIBERATOR Iten No.:...
- Page 8 - If you cannot obtain the recommended CG by moving the battery to a suitable location, you can also install a suitable counterweight to achieve correct CG. However, with the recommended battery size, a counterweight is not required. We recommend flying without unnecessary counterweight. 76mm (3") B-24 LIBERATOR Iten No.:...
- Page 9 Flap(R) 9g Digital-MG Positive 850mm Elevator(L) 9g Digital-MG Positive 850mm Elevator(R) 9g Digital-MG Positive 950mm Rudder(L) 9g Digital-MG Positive 950mm Rudder(R) 9g Digital-MG Positive Motor Specifications 51.5 41.5 M2.5 3530-860KV Units:mm 14.8 1350 3-Blade 9.5x7 860RPM/V B-24 LIBERATOR Iten No.:...
- Page 10 Screws (PA3x15 16pcs) Engine cowl Screws (PA2.3x6 12pcs) Engine Pod cover Screws (PA2.3x6 8pcs) Step Step Refer to the left diagrams 3 and 4 to install the dummy radial engines and engine pod covers. Step Step B-24 LIBERATOR Iten No.:...
- Page 11 After the build is complete but with the propellers removed, power up the radio and connect two fully charged batteries to the ESC's. Use the radio to ensure correct control direction. Aileron Stick Left Stick Right Elevator Stick Back Stick Forward Rudder Stick Left Stick Right Flaps Flaps down B-24 LIBERATOR Iten No.:...
- Page 12 2 - When flaps are deployed, do not advance the throttle very quickly. The B-24 is intended to be flown as a scale bomber, with moderate throttle advance. Add rudder input to flatten turns for more scale appearance. Elevator Neutral Position 1. Before your first flight, mechanically set the Elevator's Neutral Position to 1.5mm Up. B-24 LIBERATOR Iten No.:...
- Page 13 PNP 组装说明 中文版 中文版 舵 面 测 试 当您按前面的步骤组装好飞机后,在飞行前,我们需要用一块充饱电的电池,连接到电调。用遥控 器测试每个舵面的工作情况,检查是否正常! 副 翼 副翼摇杆 副翼摇杆 向左运动 向右运动 升降舵 升降摇杆 升降摇杆 向下运动 向上运动 方向舵 方向摇杆 方向摇杆 向左运动 向右运动 襟 翼 襟翼放下 B-24 LIBERATOR Iten No.:...
- Page 14 H1/H2 18mm/18mm H1/H2 15mm/15mm 小舵量 H1 13mm 舵量比率:85% 舵量比率:75% 舵量比率:80% H1/H2 22mm/22mm H1/H2 23mm/23mm H1/H2 19mm/19mm 大舵量 H1 29mm 舵量比率:100% 舵量比率:100% 舵量比率:100% 特别注意事项: 飞行 前检测: 第一次飞行此产品或者更换遥控器后,必须校准油门,这样才能保持4套动力产生的拉力一致,具体校正方法见 电调说明书。 飞行前设定: 1. 降落开襟翼飞机抬头比较明显,需要混控点降舵才能很好降落,小舵量襟翼需要1.5mm降舵,大舵量襟翼需 要3mm降舵 2. 升降舵调平飞机飞行会有比较明显的低头现象,这样需要1.5-2mm升舵飞机就能够很好的平飞; 3. 放下襟翼飞行时,我们需要较柔和的增加油门,不能瞬间加大油门量,否则会出现飞机突然向下飞行,容易 造成飞机坠毁事故. B-24 LIBERATOR Iten No.:...
- Page 15 Dongguan Freewing Electronic Technology Ltd HK Freewing Model International Limited Add.:FeiYi Building,face to Labor Bureau, Fumin Middle Road, Dalang Town, Dongguan City,Guangdong Province, China Web: http://www.sz-freewing.com Email:freewing@sz-freewing.com Tel: 86-769-82669669 Fax:86-769-82033233 东莞市飞翼电子科技有限公司 香 港 飞 翼 模 型 国 际 有 限 公 司 地址: 广东省东莞市大朗镇富民中路402-408号飞...
Need help?
Do you have a question about the B-24 LIBERATOR and is the answer not in the manual?
Questions and answers