Table of Contents
Advertisement
Advertisement
Table of Contents

Related Manuals for K-array KB1


Summary of Contents for K-array KB1
- Page 1 USER MANUAL english version...
-
Page 3: Table Of Contents
9. INPUT PANEL OVERVIEW 10. AUDIO CONNECTOR WIRING 11. CONFIGURATION OPTIONS AND SET UP 12. MIXER AND DSP 13. K-FRAMEWORK 13.1 System requirements 13.2 Installation and set up 13.3 Getting started 14. CUSTOMER SERVICE 15. KB1 Technical Details APPROVAL rev. C... -
Page 4: Symbols
SYMBOLS K-array declares that this device is in compliance with the applicable CE standards and regulations. Before putting the device into operation, please observe the respective country-specific regulations! WEEE Please dispose of this product at the end of its operational lifetime by bringing it to your local collection point or recycling centre for such equipment. - Page 5 rev. C...
-
Page 6: Introduction
(K-array) which is orientated towards the “professional” sector. Some of the features found on-board the KB1 are unique in the entire panorama of products on offer, and are the same as those used in stage set up during concerts (e.g. -
Page 7: Advantages For Musicians
PCs are becoming ever more part of the musician’s personal equipment and with a KB1 you become the true craftsman of your own sound. You can connect to your own amplification system while interacting directly with digital sound processors mounted on board. - Page 8 A 12” subwoofer for bass and eight 3” loudspeakers for medium-high frequencies guarantee elevated performance, preserving the timbre quality of the instruments and voices. Configuration using a central pole for the medium-highs makes the KB1 a true line-array from the point of view of sound emission. It projects sound pressure which remains constant even at distance, and which covers the listening area with great precision and uniformity.
-
Page 9: Unpacking
4. UNPACKING Each K-array device is built to the highest standard and thoroughly inspected before leaving the factory. Carefully inspect the shipping carton, then examine and test your new loudspeaker. If you find any damage immediately notify the shipping company. -
Page 10: Safety Instructions
6. SAFETY INSTRUCTIONS WARNING • It is important that loudspeaker systems are used in a safe manner. • Professional loudspeakers are capable of producing extremely high sound levels and should be used with care. Hearing loss is cumulative and can result from levels above 90 dB if people are exposed for an extended period. -
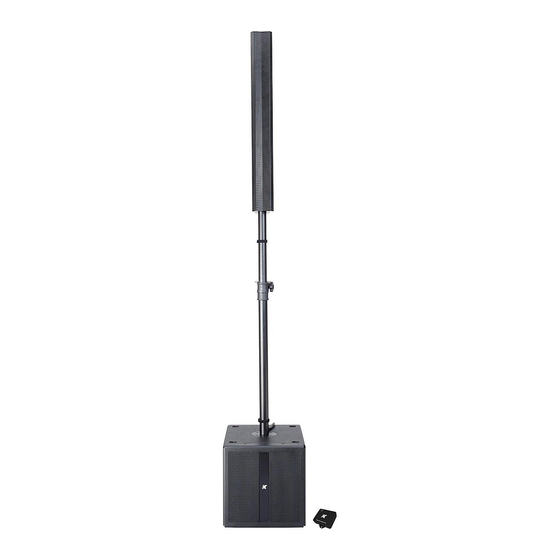
Page 11: Physical
7. PHYSICAL 178-220 cm (70”-86”) 32.5 cm 43.5 cm (12.8”) (17.13”) rev. C... -
Page 12: Power And Voltage Requirements
Before applying AC to any K-array self-powered speaker, be sure that the voltage potential difference between neutral and earth ground is less than 5 VAC. -
Page 13: Voltage Requirement
8.2 Voltage requirement KB1 operates safely and without audio discontinuity if the AC voltage stays within both 85-132 V and 170-264 V , at 50 or 60 Hz. Verify that your mains connection satisfies the power ratings of the device. -
Page 14: Input Panel Overview
9. INPUT PANEL OVERVIEW rev. C... - Page 15 Mixer Panel (see S) and the virtual Master Volume Fader (see and D18). N.B.: a KB1 in DIRECT IN Mode can only be used as the Right side of a stereo configuration system of 2 x KB1. We advise against connecting any signal to...
- Page 16 Main Level Knob which regulates the overall amplitude of the output signal. Power Plug. FX Presets Selector Knob selects one of the 16 available Effects: Slap-back Delay: Short Echo with almost no feedback. Stereo Delay: Long Echo with some feedback. Repetitions are alternated between Left and Right output.
-
Page 17: Audio Connector Wiring
10. AUDIO CONNECTOR WIRING The back panel of the KB1 has different types of audio connector for different types of entry cable. The following diagrams highlight the different characteristics of each entry: XLR wiring Speakon wiring INPUT PARALLEL OUTPUT ho t... - Page 18 Unbalanced Jack CH 1,2 Instrument INPUT CH 3,4 Line INPUT ground RCA wiring CH3,4 stereo line INPUT ground Sleeve Sleeve rev. C...
-
Page 19: Configuration Options And Set Up
11. CONFIGURATION OPTIONS AND SET UP rev. C... - Page 20 Amplified signal to the TOP AC Power INPUT rev. C...
- Page 21 rev. C...
- Page 22 rev. C...
- Page 23 rev. C...
-
Page 24: Mixer And Dsp
Advanced users can operate the system with the Advanced Mixer Tab where you have access to detailed EQ and Dynamic Processing, and using the Output Tab you can edit the EQ of the Main and Aux outputs, and vary the coverage angle of the KB1 Mid-High module. -
Page 25: K-Framework
13. K-FRAMEWORK 13.1 System requirements SYSTEM REQUIREMENTS: Operating System: Windows Xp / Vista / 7 CPU: Intel Pentium 2 GHz Memory: 1 Gb REQUIRED COMPONENTS: .NET Framework 4 http://www.microsoft.com/downloads/en/details.aspx?FamilyID=0a391abd-25c1- 4fc0-919f-b21f31ab88b7 Microsoft Visual C++ 2010 Redistributable Package (x86) http://www.microsoft.com/download/en/details.aspx?id=5555 Microsoft Visual C++ 2010 Redistributable Package (x64) http://www.microsoft.com/download/en/details.aspx?id=14632 13.2 Installation and set up To download your free K-Framework license, please go to the “Software Download”... - Page 26 Recall the “Manage” window from “Start Menu/My Computer”. Select “Device Manager” from the menu on the left and expand the “USB controllers” sub-menu. Right click on the upper “K-Array_Dsp01” object and select “Driver Update” to launch the “Hardware Update Wizard” When asked to allow the online search select the “Not now”...
- Page 27 “Include this location in the search” checkbox, then browse for the drivers’ containing folder. The path should read: C:\ProgramFiles\K-array\K-framework\drivers_rev02 Once you have inserted the right search path, click “Next”. When warned about a failed “Windows Logo” test, please ignore the content of the warning and click “Next”.
-
Page 28: Getting Started
13.3 Getting started WARNING Please verify that your KB1 is connected to your PC via USB before running K-Framework for the first time! At startup K-Framework will show the following window: img. A Connected Devices Indicator shows the quantity of detected connected devices. - Page 29 Click the Go Online Button to detect all presently connected devices. Once a connected device is detected by K-Framework it will appear in the K-Array Device List as shown in the following picture: img. B Connected Device Name. Device Menu Button shows and hides the device menu.
- Page 30 13.4 KB1 Editing Tabs: Mixer Tab img. C Channel Preset Name Display shows the name of the preset currently loaded on the channel. Channel Preset Selector opens and closes Channel Preset Window (see img. Filter Gain Knobs regulate the gain (negative or positive) of Filter 1, 2 and 3.
- Page 31 Channel Note displays an editable 8 character text. Headphones Volume Knob regulates the Headphones Master Volume. C10) FX Mute Button enables and disables the effects return. C11) Master Volume Fader regulates the Output Master Volume. C12) VU Meter displays overall amplitude of Master Output. N.B.: When one or more channels are in PFL mode, the Master VU Meter will show the amplitude of the signal entering the selected channel, bypassing both the EQ and Volume settings.
- Page 32 Mixer Advanced Tab D6 D7 img. D rev. C...
- Page 33 Channel Preset Name Display shows the name of the preset currently loaded on the channel. Channel Preset Selector opens and closes Channel Preset Window (see img. Compressor Window Button opens and closes the Channel Compressor Window (see img. EQ Window Button opens and closes the Channel EQ Window (see Filter Type Selectors select the type of filter from three options: Low Shelving, Peak/Notch and High Shelving.
- Page 34 the EQ and Volume settings. D20) Mono Switch Button switches between stereo and mono mode. In mono mode the same signal is sent to the unit’s speakers and to the Out R/D.I. Out XLR output on the Mixer Panel if Right OUT is selected in the Output Tab (if D.I.
- Page 35 EQ Pop Up Window This windows shows graph where the user can intuitively see the effect of the corresponding filter on the signal frequency spectrum. Channel Preset Pop Up Window img. F Channel Preset Name Indicator displays the name of the preset currently selected in the Channel Preset List.
- Page 36 New Channel Preset Popup Window img. G New Channel Preset Name Textbox can be edited to assign a name to a new preset. Current Fx Type Drop Down Menu displays all the currently available effect types. The one that is selected when the new preset is saved will show up in the Channel FX Type Indicator once the new preset is selected in the Preset List.
-
Page 37: Output Tab
Output Tab Generic 3-band parametric EQ strip as found in the OUTPUT TAB img. H Out R/D.I. Out Mode Selector assigns the Right Stereo channel or the pre-fader Direct Output of Channel 1 to the Out R/D.I. Out XLR output on the Mixer Panel. - Page 38 L/mono Filter Type Selectors select the type of filter on the Left Stereo Output from three options: Low Shelving, Peak/Notch and High Shelving. Filter Frequency Knobs set the central or corner frequency of the corresponding filter on the Left Stereo Output. H10) Filter Gain Knobs set the gain (positive or negative) of the corresponding filter on the Left Stereo Output.
- Page 39 Password Textbox can be edited to insert the system password to give the authorized user access administrator level access. N.B.: Only the staff of K-Array or official authorized services are allowed to login with Factory Privileges. i10) Password OK Button verifies that the text in the Password Textbox matches the required password to access the factory level.
- Page 40 Precise setting view Double Click on the knobs to open a small interface dedicated to the precise setting of the corresponding knob value. To close the Precise Setting View click on the OK Button (6). Increment Button A for Filter Frequencies = increment by hundreds, everything else = increment by units.
-
Page 41: Customer Service
14. CUSTOMER SERVICE To receive service: 1) Contact the official K-array distributor in your country. They will direct you to the service centre. 2) If you are calling for service, have the serial number(s) of the unit(s) to hand for reference. -
Page 42: Kb1 Technical Details
15. KB1 TECHNICAL DETAILS DISPERSION GRAPHS Acoustics Frequency range 30 Hz - 20 KHz. 8 KHz 4 KHz Maximum SPL 112 dB continuous - 118 dB peak Coverage Horizontal 90° Vertical 10° - 60° (digitally controlled) Crossover Type DSP controlled... -
Page 43: Approval
APPROVAL K-array declares that this device is in compliance with the applicable CE standards and regulations. Before putting the device into operation, please observe the respective country-specific regulations! WEEE Please dispose of this product at the end of its operational lifetime by bringing it to your local collection point or recycling centre for such equipment. - Page 44 UMC026AA01ENc K-array surl Via Paolina Romagnoli, 17 - 50037 San Piero a Sieve (Firenze) - Italy tel. +39 055 8487222 - fax. +39 0558487238 e-mail: info@kblueline.com www.k-array.com www.kblueline.com...
Need help?
Do you have a question about the KB1 and is the answer not in the manual?
Questions and answers