Table of Contents
Advertisement
Quick Links
Advertisement
Table of Contents

Related Manuals for X-Rite RapidMatch XI


Summary of Contents for X-Rite RapidMatch XI
- Page 1 Spectrophotometer User Guide Version 1.0...
- Page 2 ™ RapidMatch XI Spectrophotometer CE Declaration Hereby, X-Rite, Incorporated, declares that this device is in compliance with the essential requirements and other relevant provisions of Directive(s) R & TTE RoHS 2011/65/EU 1999/5/EC, LVD 2014/35/EU and Hereby X-Rite Incorporated declares that this device is in compliance with the technical regulations of the customs union according to declaration registration number: ТС...
-
Page 3: Certifications And Compliance
This symbol is used to inform you of any potential HAZARD or actions that may require your attention. se of this equipment in a manner other than that specified by X-Rite, Incorporated may compromise design integrity and become unsafe. To avoid discomfort, do not look directly into the measurement optics when the instrument is on. -
Page 4: Installing The Battery Pack
Use the rechargeable Li-ion batteries; other types may cause personal injury or damage to the device. Replacement batteries can be purchased from your authorized X-Rite representative or E-One Moli Energy Corp. NOTE: If the battery pack is ever dropped, check it for damage and... -
Page 5: Charging The Battery Pack
™ RapidMatch XI Spectrophotometer Carefully turn the instrument over and slide open the latch (1) that secures the battery pack access cover. Open the access cover. Slide the new battery pack (2) into the instrument with the battery contacts facing down until the battery is positioned below the holding latch (3). Close the access cover by pressing down until it locks into position. - Page 6 ™ RapidMatch XI Spectrophotometer Battery Lifespan Expectations • Lithium-ion batteries typically decay to 80% capacity after 700 charge cycles. A charge cycle can be defined as several partial charges equaling 100%. Partial charge and discharge cycles will help maintain the life of the battery. It is best to avoid full discharge and charge cycles.
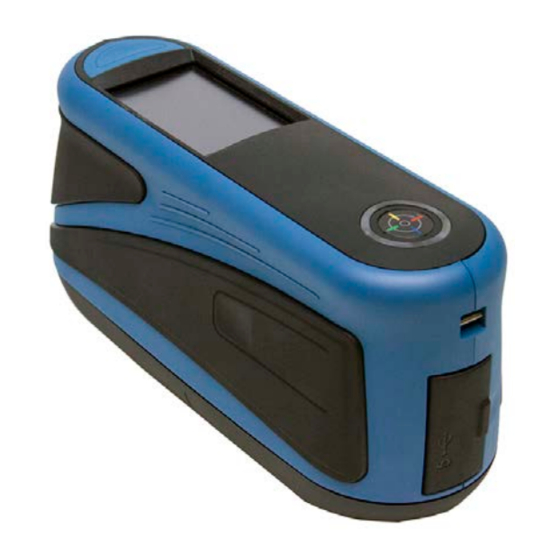
- Page 7 ™ RapidMatch XI Spectrophotometer Measure Buttons The instrument incorporates three measure buttons. One measure button (1) is located on the top of the instrument. This is the same button that is used to power on and off the instrument. The other two buttons are located on the left (2) and right (3) sides of the instrument.
-
Page 8: Main Screen
™ RapidMatch XI Spectrophotometer The Circular multi-color LED located on the top of instrument provides visual feedback on the status of a measurement and pressure sensors. • Green LED: Indicates all three pressure sensors are activated properly and a measurement can now be triggered. •... -
Page 9: Navigating The Screen
OFF. Once activated, the screen will show all available networks. RapidMatch XI supports Wi-Fi standards IEEE 802.11 b/g/n in the 2.4GHz Band. For maximum data transmission speed, channel bandwidth in the settings of the wireless Access Point (AP) should be set to 40MHz or auto. - Page 10 ™ RapidMatch XI Spectrophotometer Opening Settings and Jobs Settings and jobs are accessed by tapping the corresponding icon on the screen. For this example, the Settings icon was tapped to open the Settings screen. For setting controls that navigate from side to side, slide the dot icon to the right or left to change the parameter.
- Page 11 ™ RapidMatch XI Spectrophotometer a calibration must be performed. No measurements can be taken until the calibration is completed. NOTE: Make sure to use the calibration reference supplied with the instrument for calibrating. Do not substitute this reference with a reference from another instrument.
- Page 12 ™ RapidMatch XI Spectrophotometer When ready, press the Measure button or tap the Calibrate icon in the screen. Do not touch the instrument throughout the measurement sequence. After calibration is completed, remove the instrument from the white tile and position the measurement port over the effect tile (2) in the calibration reference.
-
Page 13: Light Seal Check And Replacement
™ RapidMatch XI Spectrophotometer Hold the instrument steady and press a Measure button or tap the screen to initiate a measurement. Continue to hold the instrument steady until “Calculating” (5) appears in the screen. Continue with the remaining area measurements to complete the job. Tap the check mark icon on the Summary screen to save the job and return to the main job screen. - Page 14 ™ RapidMatch XI Spectrophotometer Not Properly Installed Properly Installed Replacing the Light Seal Using your finger nail or a small flat blade screwdriver (1), lift out one edge of the light seal (2) from the recessed area and remove. Orientate the new light seal over the recessed area around the measurement port.
-
Page 15: Specifications
Contains internal overcurrent & overvoltage protection 18. Troubleshooting Prior to contacting X-Rite support department for instrument problems, try the applicable solution(s) described below. If the condition persists, contact us using one of the methods listed in the Service Information section. - Page 16 ™ RapidMatch XI Spectrophotometer Diagnostics>Systems Information screen. Measurement Material being Obtain new material. error or results measured is appear damaged (e.g. inaccurate. scratched) Instrument requires Refer to the Calibration calibration. procedure. Calibration Calibration reference Clean the reference per procedure fails. is dirty or damaged.
- Page 17 X-Rite, Incorporated has offices around the world. You can contact us using one of the following methods: •...
- Page 18 ™ RapidMatch XI Spectrophotometer...
- Page 19 X-Rite® is a registered trademark of X-Rite, Incorporated. All other logos, brand names, and product names mentioned are the properties of their respective holders. Bulls Eye Logo is a registered trademark and RapidMatch is a trademark of PPG Industries Ohio, Inc.
Need help?
Do you have a question about the RapidMatch XI and is the answer not in the manual?
Questions and answers
What is the ballpark price