Table of Contents
Advertisement
Quick Links
Advertisement
Table of Contents

Subscribe to Our Youtube Channel
Related Manuals for X-Rite Ci6X Series


Summary of Contents for X-Rite Ci6X Series
- Page 1 Ci6X Series Spectrophotometer (Models: Ci60, Ci62, Ci64, and Ci64UV) User Guide...
- Page 3 IATA, ICOA, IMDG & PHMSA. The battery contained in the Ci6X series device is 107g in weight, 7.4V, 2.4 Ah, and complies with the UN 38.3 tests in effect the year it was originally shipped.
- Page 4 C I 6 X S E R I E S S P E C T R O P H O T O M E T E R If your device is equipped with a Bluetooth wireless transmitter, it contains the following module.
- Page 5 X-Rite, Incorporated. Patents: www.xrite.com/ip “© 2019, X-Rite, Incorporated. All rights reserved” X-Rite® is a registered trademark of X-Rite, Incorporated. All other logos, brand names, and product names mentioned are the properties of their respective holders. Warranty Information X-Rite warrants this Product against defects in material and workmanship for a period of twelve (12) months from the date of shipment from X-Rite’s facility, unless mandatory law provides for...
- Page 6 WARRANTIES, EXPRESSED OR IMPLIED, INCLUDING BUT NOT LIMITED TO THE IMPLIED WARRANTIES OF MERCHANTABILITY, FITNESS FOR A PARTICULAR PURPOSE OR APPLICATION, AND NON-INFRINGEMENT. NO EMPLOYEE OR AGENT OF X-RITE, OTHER THAN AN OFFICER OF X-RITE, IS AUTHORIZED TO MAKE ANY WARRANTY IN ADDITION TO THE FOREGOING.
-
Page 7: Table Of Contents
C I 6 X S E R I E S S P E C T R O P H O T O M E T E R Table of Contents Introduction and Setup Packaging Attaching the Safety Strap Powering On and Off Locking the Navigation Control Power Save Modes Charging the Battery Pack... - Page 8 C I 6 X S E R I E S S P E C T R O P H O T O M E T E R UV Type (Ci64UV only) Whiteness Timeout (Ci64UV only) Language Instrument Orientation Default Tolerance Date Format Instrument Date/Time Delete All Samples or Standards...
- Page 9 C I 6 X S E R I E S S P E C T R O P H O T O M E T E R Opacity Mode Opacity Measurement Job Mode (Ci64/Ci64UV only) Job Mode Icons Accessing Job Mode Selecting and Running a Job Appendices Service Information...
-
Page 10: Introduction And Setup
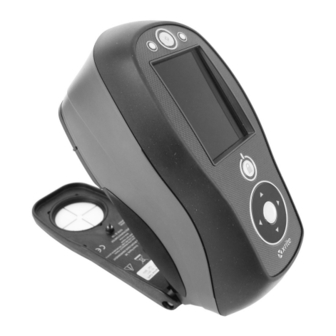
USB and AC adapter inputs Packaging Your instrument packaging should contain all the items listed below. If any of these items are missing or damaged, contact X-Rite or your Authorized Representative. Ci60, Ci62, Ci64, or Ci64UV instrument • Manuals CD •... -
Page 11: Attaching The Safety Strap
C I 6 X S E R I E S S P E C T R O P H O T O M E T E R Attaching the Safety Strap A safety strap is included with your instrument. The strap attaches to the back of the instrument and around your wrist. -
Page 12: Powering On And Off
C I 6 X S E R I E S S P E C T R O P H O T O M E T E R Powering On and Off The power button is used to initiate the instrument from a power off state. Simply press and hold the button for three seconds to turn on the instrument. -
Page 13: Power Save Modes
C I 6 X S E R I E S S P E C T R O P H O T O M E T E R Power Save Modes The instrument utilizes two power save modes to conserve battery life during nonuse times. The power save mode option is preset in the Configuration Mode. -
Page 14: Connecting The Ac Adapter
NOTE: The instrument can operate from the AC adapter only. The battery pack does not need to be installed. The AC adapter (X-Rite P/N SE30-277) overrides any charge condition of the battery pack in the instrument. Measurements can be taken even with a very low battery condition when using the AC adapter. -
Page 15: Changing The Aperture Setting (Ci64/Ci64Uv Only)
C I 6 X S E R I E S S P E C T R O P H O T O M E T E R Changing the Aperture Setting (Ci64/Ci64UV only) If available, the instrument can take measurements using either a 4 mm aperture or 8 mm aperture. -
Page 16: User Interface
C I 6 X S E R I E S S P E C T R O P H O T O M E T E R USER INTERFACE Instrument Controls The instrument controls are used to navigate the screen, select options, and perform measurements. -
Page 17: General Sample Measurement
C I 6 X S E R I E S S P E C T R O P H O T O M E T E R General Sample Measurement The instrument can take measures from just about any clean, dry surface that is reasonably flat. The instrument shoe should be able to rest flat and steady on the sample area. -
Page 18: Main Screen Menu
C I 6 X S E R I E S S P E C T R O P H O T O M E T E R Main Screen Menu When the instrument is powered-up, the main (top level) screen appears after the diagnostics test is complete. -
Page 19: Header Bar
C I 6 X S E R I E S S P E C T R O P H O T O M E T E R Header Bar The header bar at the top displays various icons showing the current instrument setup and condition. -
Page 20: Main Column
C I 6 X S E R I E S S P E C T R O P H O T O M E T E R Indicates that battery pack is removed and the instrument is operating from the AC adapter only. Main Column The main column is used to access the main instrument screen and configuration mode. -
Page 21: Configuration Mode
C I 6 X S E R I E S S P E C T R O P H O T O M E T E R CONFIGURATION MODE Configuration mode is used to adjust and view the instrument’s settings. You should set the configuration options before using the instrument for the first time. -
Page 22: Measurement Trigger
C I 6 X S E R I E S S P E C T R O P H O T O M E T E R Exiting Configuration Mode After configuring options, use the Left navigation button to move the highlight focus to the Main screen icon in the Main column and tap the Select button to exit. -
Page 23: Sample Deletion
C I 6 X S E R I E S S P E C T R O P H O T O M E T E R Sample Deletion This option is used to enable or disable (default) the ability to delete stored samples in the measure mode. -
Page 24: Power Management Scheme
C I 6 X S E R I E S S P E C T R O P H O T O M E T E R Power Management Scheme This option is used to set the power save method. The explanation for each setting is listed below. -
Page 25: Metamerism Illum/Obs Pairs
C I 6 X S E R I E S S P E C T R O P H O T O M E T E R Metamerism Illum/Obs Pairs These options are used to select the illuminant/observer combinations pairs that are used in calculating the metamerism index. -
Page 26: Uv Calibration Target Value (Ci64Uv Only)
C I 6 X S E R I E S S P E C T R O P H O T O M E T E R UV Calibration Target Value (Ci64UV only) This option is used to set the UV whiteness value of the UV calibration plaque. The value is initially set at the factory. -
Page 27: Instrument Date/Time
C I 6 X S E R I E S S P E C T R O P H O T O M E T E R Instrument Date/Time This option is used to set the instrument date and time. 1. -
Page 28: Calibration Mode
C I 6 X S E R I E S S P E C T R O P H O T O M E T E R CALIBRATION MODE The calibration consists of a ceramic plaque for white measurements and a trap opening for black measurements. - Page 29 C I 6 X S E R I E S S P E C T R O P H O T O M E T E R Exit icon Calibration mode icon Next icon Information that appears when calibration is not currently required 3.
-
Page 30: Uv Calibration Procedure (Ci64Uv Only)
C I 6 X S E R I E S S P E C T R O P H O T O M E T E R 9. Press the instrument firmly to the shoe and hold steady until the display indicates that the reading is complete. - Page 31 C I 6 X S E R I E S S P E C T R O P H O T O M E T E R 9. Position the instrument target window over the black trap opening of the calibration reference. 10.
-
Page 32: Measure Mode
C I 6 X S E R I E S S P E C T R O P H O T O M E T E R MEASURE MODE The measure mode is the main operation mode of the instrument used to select the measurement mode, analyze and collect sample data. -
Page 33: Selecting Measurement Mode
C I 6 X S E R I E S S P E C T R O P H O T O M E T E R Delete current measurement. Exits the averaging measurement sequence for the current sample. Pages through the list of color spaces allowed in the Configuration mode. Pages through the list of illuminant/observer combinations allowed in the Configuration mode. -
Page 34: Selecting Color Space
C I 6 X S E R I E S S P E C T R O P H O T O M E T E R Selecting Color Space The instrument has several colorimetric systems (absolute and difference) to choose from. Any color space can be selected after a measurement to view the measurement results under a different method. -
Page 35: Selecting Illuminant/Observer
C I 6 X S E R I E S S P E C T R O P H O T O M E T E R Selecting Illuminant/Observer The instrument has several illuminant/observer combinations to choose from. Any combination can be selected after a measurement to view the measurement results under various conditions. -
Page 36: Projects
C I 6 X S E R I E S S P E C T R O P H O T O M E T E R Projects The project icon lists available projects that contain grouped standards. Projects and standards are typically created and downloaded from a software application, such as Color iQC. -
Page 37: Adding Standards To A Project
C I 6 X S E R I E S S P E C T R O P H O T O M E T E R 4. Tap the Left navigation button to move the highlight to the Add Project screen. 5. -
Page 38: Deleting Projects, Standards, And Samples
C I 6 X S E R I E S S P E C T R O P H O T O M E T E R 3. Tap the Select button and then tap the Left navigation button to move the highlight to the select standards screen. -
Page 39: Standards
C I 6 X S E R I E S S P E C T R O P H O T O M E T E R 2. Highlight the Edit icon and tap the Select button to view the select option screen. and tap the Select button to view the Enter Project Name screen. -
Page 40: Manually Selecting Standard By Name
C I 6 X S E R I E S S P E C T R O P H O T O M E T E R Manually Selecting Standard by Name To select standard by name: 1. Select the project where the standard is located. 2. -
Page 41: Creating Standards
C I 6 X S E R I E S S P E C T R O P H O T O M E T E R 6. Tap the Select button to set the standard number. 7. Tap the Right navigation button and highlight the Checkmark icon in the Progress Column. - Page 42 C I 6 X S E R I E S S P E C T R O P H O T O M E T E R Measured Entry Method: and tap the Select button to view the Measure Standard screen. 1.
- Page 43 C I 6 X S E R I E S S P E C T R O P H O T O M E T E R 7. When finished, tap the Right navigation button and highlight the Checkmark icon in the Progress Column.
- Page 44 C I 6 X S E R I E S S P E C T R O P H O T O M E T E R 8. Tap the Select button to set the color space option/value. 9. Continue until all attributes for the color space are set. 10.
-
Page 45: Editing An Existing Manually Entered Standard
C I 6 X S E R I E S S P E C T R O P H O T O M E T E R The newly created standard can now be used for sample comparison. 16. Tap the Left navigation button to return to the View column. Editing an Existing Manually Entered Standard NOTE: Only standards that were measured or manually entered on the instrument can be edited. -
Page 46: Editing Standard Name
C I 6 X S E R I E S S P E C T R O P H O T O M E T E R 3. Highlight the Checkmark icon in the Progress Column on the confirm screen. 4. -
Page 47: Editing Standard Tolerances
C I 6 X S E R I E S S P E C T R O P H O T O M E T E R 10. Tap the Right navigation button and highlight the Checkmark icon in the Progress Column. -
Page 48: Editing 555 Shade Sort Values
C I 6 X S E R I E S S P E C T R O P H O T O M E T E R Selected tolerance type 4. Tap the Select button to access the option. 5. Use the Up or Down navigation buttons to page through the tolerance types. NOTE: For a 555 Shade Sort selection, refer to Editing 555 Shade Sort Values section that follows. - Page 49 C I 6 X S E R I E S S P E C T R O P H O T O M E T E R The shade sort range determines the range of the 555 shade tag boxes to be used and displayed. The range can be set from 1 to 9 in the three dimensional space.
-
Page 50: Basic Operation
C I 6 X S E R I E S S P E C T R O P H O T O M E T E R Basic Operation Measuring a Sample The measurement results displayed depend on how the instrument configuration is set, and color space and illuminant/observer selections. -
Page 51: Next Best Standard Selection
C I 6 X S E R I E S S P E C T R O P H O T O M E T E R Next Best Standard Selection The Next Best Standard Selection feature allows you to view and select the next closest standard to the measured sample. -
Page 52: Renaming A Sample
C I 6 X S E R I E S S P E C T R O P H O T O M E T E R Renaming a Sample The last measured sample can be renamed from the default time and date stamp if desired. To rename a sample: 1. -
Page 53: Viewing Stored Measurements
C I 6 X S E R I E S S P E C T R O P H O T O M E T E R 1. Select the project, standard (if required), measurement mode, illum/obs, and color space as previous explained. -
Page 54: Viewing Pass/Fail Data
C I 6 X S E R I E S S P E C T R O P H O T O M E T E R Content area highlighted Viewing Pass/Fail Data A red or green bar displays for a sample on the instrument screen, based on the tolerances assigned to the standard. -
Page 55: Graph View
C I 6 X S E R I E S S P E C T R O P H O T O M E T E R Yellow checkmark and green bar indicated at least one attribute has exceeded the warning limit. -
Page 56: Reflectance View
C I 6 X S E R I E S S P E C T R O P H O T O M E T E R 3. To exit the graph view, highlight the Graph View icon and tap Select. The screen returns back to the data display. -
Page 57: Verbal Difference View
C I 6 X S E R I E S S P E C T R O P H O T O M E T E R 5. After viewing is complete, tap the Select button to deactivate the selection mode (data point turns gray) allowing you to exit the Content area. - Page 58 C I 6 X S E R I E S S P E C T R O P H O T O M E T E R Shade Sort Out of Range Indication If an up arrow or a down arrow appears in the place of a shade sort number, this indicates that the number is out of range.
-
Page 59: Compare Mode
C I 6 X S E R I E S S P E C T R O P H O T O M E T E R COMPARE MODE The Compare mode is a quick method for comparing measurements without storing the data. After entering the mode, the first measurement is set as the standard and each measurement thereafter is compared to it. - Page 60 C I 6 X S E R I E S S P E C T R O P H O T O M E T E R Sample Data Difference Data Continue with additional sample measurements if required. To measure a different standard: 1.
-
Page 61: Strength Mode
C I 6 X S E R I E S S P E C T R O P H O T O M E T E R STRENGTH MODE The Strength mode calculates the color strength of the measured sample compared to the current standard. -
Page 62: Opacity Mode
C I 6 X S E R I E S S P E C T R O P H O T O M E T E R OPACITY MODE The Opacity mode is used for making multiple measurement calculations to determine Contrast Ratio or Percent Opacity. - Page 63 C I 6 X S E R I E S S P E C T R O P H O T O M E T E R 6. Measure the sample over the white portion of the opacity card. Release the instrument after data is displayed.
-
Page 64: Job Mode (Ci64/Ci64Uv Only)
C I 6 X S E R I E S S P E C T R O P H O T O M E T E R JOB MODE (Ci64/Ci64UV only) The Job mode is used to select and run a job downloaded from a software application, such as Color iQC. -
Page 65: Selecting And Running A Job
C I 6 X S E R I E S S P E C T R O P H O T O M E T E R Selecting and Running a Job The following sample job downloaded from Color iQC consists of three measurement steps. NOTE: If required, you can remeasure the sample before proceeding to the next step. - Page 66 C I 6 X S E R I E S S P E C T R O P H O T O M E T E R step image step instruction 6. Data for the second measurement appears on the display in the color space selected. Make sure the Next arrow icon is selected and tap the Select button.
-
Page 67: Appendices
For sales questions or to order cables and accessories, visit our web site ( ) or • www.xrite.com contact your nearest X-Rite dealer or service center. Problems and questions can also be faxed to your local X-Rite office listed on our web site. •... -
Page 68: Cleaning The Instrument
C I 6 X S E R I E S S P E C T R O P H O T O M E T E R Cleaning the Instrument Your instrument requires very little maintenance to achieve years of reliable operation. However, to protect your investment and maintain reading accuracy, a few simple-cleaning procedures should be performed from time to time. -
Page 69: Cleaning The Calibration Reference
C I 6 X S E R I E S S P E C T R O P H O T O M E T E R Cleaning the Calibration Reference The calibration reference consists of white and green ceramic plaques, and a black trap opening. The calibration reference should be cleaned periodically. - Page 70 C I 6 X S E R I E S S P E C T R O P H O T O M E T E R Black Trap Cleaning Procedure 1. Take apart the two sections by compressing the two locking tabs on both sides with your fingers and separating.
-
Page 71: Replacing The Battery Pack
S P E C T R O P H O T O M E T E R Replacing the Battery Pack Use the rechargeable Li-ion battery pack provided (X-Rite P/N SE15-40); other types may burst causing personal injury. 1. Carefully turn the instrument over and rotate the shoe back until it is completely open. -
Page 72: Troubleshooting
C I 6 X S E R I E S S P E C T R O P H O T O M E T E R Troubleshooting Prior to contacting the support department for instrument problems, try the applicable solution(s) described below. -
Page 73: Technical Specifications
C I 6 X S E R I E S S P E C T R O P H O T O M E T E R Technical Specifications Measurement Geometrics d/8°, DRS spectral engine, choice of optical aperture: 4 mm measurement area/6.5 mm target window 8 mm measurement area/14 mm target window 14 mm measurement area/20 mm target window Receiver... -
Page 74: Green Tile Color Check (Ci62/Ci64 Only)
C I 6 X S E R I E S S P E C T R O P H O T O M E T E R Green Tile Color Check (Ci62/Ci64 only) 1. Perform a calibration procedure if you have not already done so. Refer to the Calibrating section. 2. - Page 75 Switzerland Phone (+41) 44 842 24 00 Fax (+41) 44 842 22 22 Asia Pacific Headquarters X-Rite Asia Pacific Limited Suite 2801, 28th Floor, AXA Tower Landmark East, 100 How Ming Street Kwun Tong, Kowloon, Hong Kong Phone (852) 2568 6283...
Need help?
Do you have a question about the Ci6X Series and is the answer not in the manual?
Questions and answers