Table of Contents
Advertisement
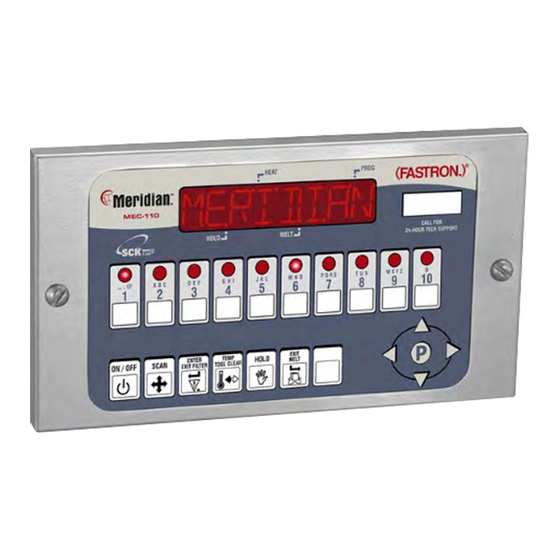
Operating Instructions
for the MEC-110 with ENHANCED SMS
10-Product Cooking Controller
Model 231-60210-02
This document contains confiden-
tial information. The dissemination,
publication, copying, or duplica-
tion of this document or the
software described herein without
prior written authorization is strict-
the time is right.
ly prohibited.
229-51339 Rev A
Printed in the USA
© 2007 FAST
Toll-Free Technical Support
24 Hours A Day, 365 Days A Year
(from the U.S., Canada and the Caribbean)
1-800-243-9271
$5.00 USD
Advertisement
Table of Contents

Subscribe to Our Youtube Channel
Related Manuals for FASTRON. Meridian MEC-110


Summary of Contents for FASTRON. Meridian MEC-110
- Page 1 Operating Instructions for the MEC-110 with ENHANCED SMS 10-Product Cooking Controller Model 231-60210-02 This document contains confiden- tial information. The dissemination, publication, copying, or duplica- tion of this document or the software described herein without prior written authorization is strict- the time is right.
-
Page 2: Cleaning The Controller
Operating Instructions Notices (FAST.) is not liable for any use of product not in accordance with (FAST.)’s installation and operating instructions. Before using this equipment, or for any questions on the operation of the appliance, consult and follow all instructions and safety warnings found in the appliance operator’s manu- al supplied from the manufacturer of the appliance. -
Page 3: Features
Installation Tools Required – Straight Screwdriver 1. Turn appliance power OFF. 2. Connect the wire harness to the controller. 3. Attach the 2 provided tinnerman nuts to the controller. Be sure to line up the holes. 4. Hold the controller against the front panel. 5. -
Page 4: Features Explained
Operating Instructions Programmable Action Alarms Features Up to three action alarms can be programmed for each product key. An action alarm Explained alerts the operator to perform some action at a pre-programmed time. Programmable Appliance Type A specific type of appliance; i.e., gas, electric or generic can be programmed into the controller. - Page 5 Features Programmable Hold Times Explained Product key hold times can be programmed to track product quality through a spec- ified holding period. Hold time countdown begins as soon as the cook cycle is CONTINUED complete. The controller will sound an alarm when the product's hold time has expired alerting the operator to discard the product.
-
Page 6: Operating The Controller
Operating Instructions Operating the Start a Cook Cycle Controller Press any product key to start a cook cycle. If the key is programmed, the correct cooking time will be displayed and will immediately start to count down in minutes and seconds. DONE will display when the cook cycle has ended. -
Page 7: Boil Mode
Operating the Boil Mode Controller CAUTION: THE USER MUST CONSULT AND FOLLOW THE APPLIANCE CONTINUED MANUFACTURER’S GUIDELINES FOR CLEANING AND BOILING OF THE FRY VATS. If your fryer manufacturer recommends this procedure, the boil function accurately maintains the fryer temperature at 190°F (88°C) to assist in the cleaning of fry vats. -
Page 8: Fill Mode
Operating Instructions Operating the Product Counts Controller To Check Product Counts: press and hold the P key for CONTINUED 3 seconds. COUNTS will be displayed. Press the P key. global will be displayed then the total number of cook counts will be shown. Press the P key. -
Page 9: Display Descriptions
Controller is in Operating Mode. Actual vat temperature Display is more than 10 degrees below the programmed vat Descriptions temperature. Controller is in Operating Mode. Actual vat temperature is within the proper cooking temperature range. The vat is ready to start a cook cycle. Controller is in Operating Mode. -
Page 10: Enter Programming Mode
Operating Instructions 18 button controllers have two displays that show a full line of information; Product Key Programming for example: RECIPE 1724 10 button controllers have a single, dual-purpose display that will alternate STORE EMPLOYEE information; for example: then ENTER PROGRAMMING Press the down arrow key. -
Page 11: Action Alarm
Product Key Programming CONTINUED SET COOK TEMPERA- SET COOK TIME. Actual TURE. set time will be displayed. To Actual set temperature change, press toggle clear to will be displayed. To change, SET TIMING MODE. change the time to zero. Type press toggle clear to change the left and/or right arrow keys in a new time using the prod-... -
Page 12: Filter Count
Operating Instructions Product Key Programming CONTINUED SET HOLD. SET WEIGHT. EXIT PROGRAMMING Hold time mode WEIGHT will will be displayed. To change, be displayed, then a number. To MODE. Press the up arrow use the left and right arrow change, press toggle clear to key. -
Page 13: Programming: (System) Store Manager Appliance Mode
ENTER SYSTEM PRO- System GRAMMING MODE. Programming Press the down arrow key. Press the P key. Press and hold the P key for 3 seconds. SYSTEM 3228 STORE MANAGER Type in 3 2 2 8 using the prod- Press the P key. uct keys. -
Page 14: Count Type
Operating Instructions System Programming CONTINUED PROGRAM SETBACK SET COUNT TYPE. SET GLOBAL FILTER Use the TEMPERATURE. left and/or right arrow keys to COUNT. Actual set Actual filter count choose PCS (PIECES) or LBS temperature will be displayed. will be shown (0-999), based (POUNDS). -
Page 15: Cook Unit
System Programming CONTINUED SET COOK UNIT. SET HOLD UNIT. SET INSTANT ON TIME. Use the Use the left and/or right arrow keys to left and/or right arrow keys to To change, press toggle clear to choose Minutes/Seconds or choose Minutes/Seconds or change the time to zero. -
Page 16: Enter Library Programming
Operating Instructions Offset Programming Use the product keys to enter a EXIT OFFSET PROGRAM- Press the P key. CONTINUED new offset temperature. to MING MODE. Press the change from negative to posi- down arrow key until EXIT tive, use the left and right appears. -
Page 17: Exit Library Programming
Programming IF YOU CHOOSE CANCEL: Custom Product and Action Alarm Press the P key to EXIT and can- EXIT LIBRARY PRO- cel the word. Names to the GRAMMING. Press the up Library TO CANCEL OR MODIFY or down arrow keys until dis- WORD play reads EXIT. -
Page 18: Parts & Accessories
Operating Instructions Troubleshooting PROBLEM CAUSE SOLUTION No Power Circuit breaker OFF Check and reset. Appliance not plugged in Plug in cord. Defective 24VAC trans- Replace transformer. former Replace controller. No Sound Inoperable speaker Replace controller. Button Problem Frozen key Unplug controller. Hold down the TOGGLE/CLEAR key as you plug controller back in. -
Page 19: Table Of Contents
Cleaning the Controller ............2 Index Controller Operating Environment . -
Page 20: Customer Service And Technical Assistance
(from the U.S., Canada and the Phone: +1-203-377-4414 Caribbean) when help is needed immediately. Sales: 1-800-FASTRON You can also send an instant email message to a FAST technician, Monday through Friday, 8am-5pm EST, by going to www.fastinc.com, Fax: +1-203-377-8187 selecting the ‘Support’...
Need help?
Do you have a question about the Meridian MEC-110 and is the answer not in the manual?
Questions and answers