
Related Manuals for Jensen JCR-210


Summary of Contents for Jensen JCR-210
- Page 1 AM/FM DUAL ALARM CLOCK RADIO WITH NATURE SOUNDS USER MANUAL JCR-210 Please read and follow this instruction manual carefully before using the unit and retain it for future reference...
-
Page 2: Important Safety Instructions
WARNING TO PREVENT FIRE OR SHOCK HAZARD, DO NOT USE THIS PLUG WITH AN EXTENSION CORD, RECEPTACLE OR OTHER OUTLET UNLESS THE BLADES CAN BE FULLY INSERTED TO PREVENT BLADE EXPOSURE. TO PREVENT FIRE OR SHOCK HAZARD, DO NOT EXPOSE THIS APPLIANCE TO RAIN OR MOISTURE. IMPORTANT SAFETY INSTRUCTIONS 1. - Page 3 13. Refer all servicing to qualified service personnel. Servicing is required when the apparatus has been damaged in any way, such as power-supply cord or plug is damaged, liquid has been spilled or objects have fallen into the apparatus, the apparatus has been exposed to rain or moisture, does not operate normally, has been dropped.
-
Page 4: Important Notes
Connect the equipment into an outlet on a circuit different from that to which the receiver is connected. Consult the dealer or an experienced radio/TV technician for help. CAUTION: Changes or modifications not expressly approved by the party responsible for compliance could void the user’s authority to operate the equipment. -
Page 5: Power Failure Indicator
If the unit is not to be used for an extended period of time, remove the batteries. Old or leaking batteries can cause damage to the unit and may void the warranty. Do not dispose of batteries in fire, batteries may explode or leak. Batteries shall not be exposed to excessive heat such as sunshine, fire or the like. -
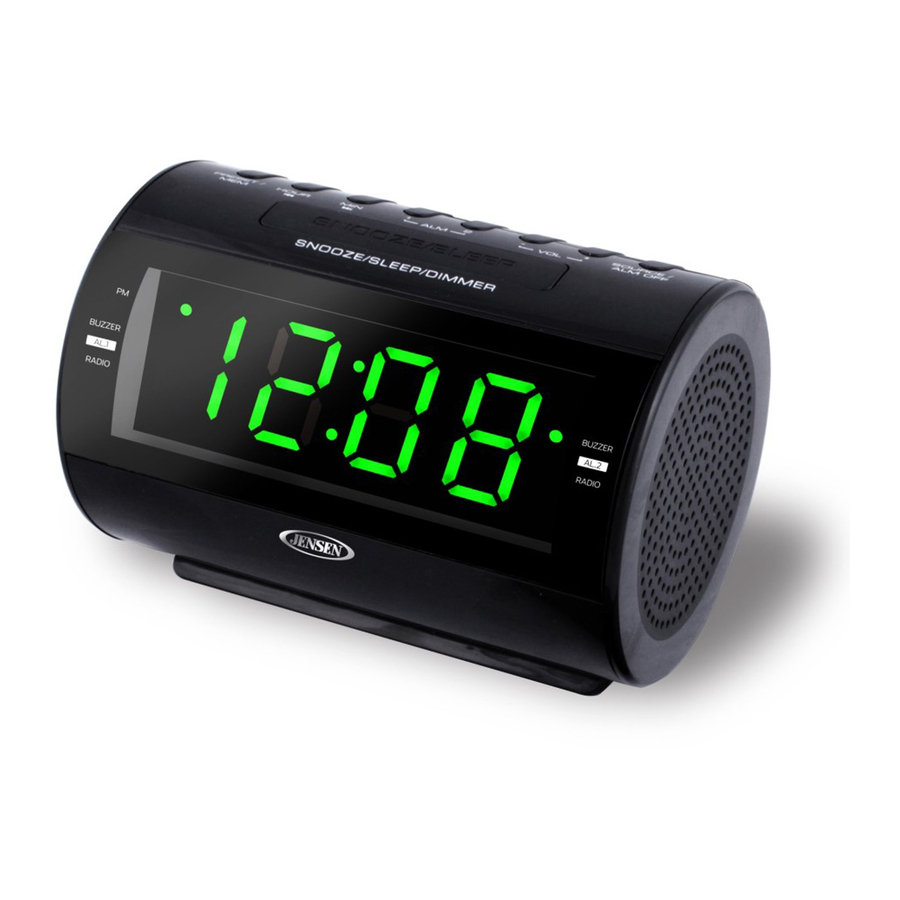
Page 6: Location Of Controls And Indicators
LOCATION OF CONTROLS AND INDICATORS 1. TIME SET/MEMORY/M+ BUTTON 12. MUSIC (RADIO) ALARM 1 INDICATOR 2. HOUR SET/ TUNE BUTTON 13. BEEPING ALARM 2 INDICATOR 3. MINUTE SET/ TUNE BUTTON 14. MUSIC (RADIO) ALARM 2 INDICATOR 4. NATURE SOUND REPEAT ALL BUTTON 15. -
Page 7: Setting The Clock
OPERATING INSTRUCTIONS SETTING THE CLOCK When you connect the radio to an AC outlet for the first time the clock display will begin flashing "12:00". The flashing will stop when you set the time. 1. If clock display is not flashing, press and hold the TIME SET button in unit standby mode, display will start flashing to enter clock set mode. - Page 8 If the automatic tuning does not stop on the exact frequency of the station, for example, it stops on 88.9 MHz instead of 88.8 MHz, use the manual tuning method to “fine tune” to the exact frequency of the desired station. TIPS FOR BEST RADIO RECEPTION AM - The AM antenna is built inside the radio.
-
Page 9: Alarm Operation
5. Tape the MODE button to change to other operation mode or press and hold the button to turn off the unit. ALARM OPERATION SETTING THE WAKE UP TIME 1. In unit standby mode, press and hold the ALARM 1 or ALARM 2 button, corresponding alarm clock display will start flashing. - Page 10 WAKE TO ALARM 1. In unit standby mode, tap the corresponding alarm repeatedly until associated beeping alarm indicator turns ON. 2. At the selected wake up time, the beeping alarm will sound and continue for about one hour and then shut off automatically. 3.
-
Page 11: Sleep Operation
SLEEP OPERATION The sleep timer allows you to turn the unit off after a designated time is reached. 1. To activate the sleep timer, turn the unit on and tap the MODE button to select AM, FM radio, nature sound or listening to music via AUX IN. 2. -
Page 12: Care And Maintenance
CARE AND MAINTENANCE If the cabinet becomes dusty, wipe the exterior with a soft dust cloth only. Never use dusting sprays or polishes on the cabinet. If the cabinet becomes dirty or smudged with fingerprints it may be wiped with a soft cloth that has been slightly dampened with a mild soap and water solution. - Page 13 You must pay all shipping charges required to ship the product to SPECTRA for warranty service. If the product is repaired or replaced under warranty, the return charges will be at SPECTRA’s expense. There are no other express warranties other than those stated herein. This warranty is valid only in accordance with the conditions set forth below: The warranty applies to the SPECTRA product only while: It remains in the possession of the original purchaser and proof of purchase is...
Need help?
Do you have a question about the JCR-210 and is the answer not in the manual?
Questions and answers
How do you turn off the alarm?
To turn off the alarm on the Jensen JCR-210, tap the ALARM OFF button once. This will stop the alarm, but it will remain set to turn on again at the same time the next day. If you do not want the alarm to turn on the following day, press the corresponding alarm button repeatedly until the alarm indicator disappears from the display.
This answer is automatically generated