
Related Manuals for Jensen JCR-206


Summary of Contents for Jensen JCR-206
- Page 1 Digital AM/FM Dual Alarm Clock Radio MODEL: JCR-206 USER MANUAL PLEASE READ THIS USER MANUAL COMPLETELY BEFORE OPERATING THIS UNIT AND RETAIN THIS BOOKLET FOR FUTURE REFERENCE...
-
Page 2: Important Safety Instructions
WARNING TO PREVENT FIRE OR SHOCK HAZARD, DO NOT USE THIS PLUG WITH AN EXTENSION CORD, RECEPTACLE OR OTHER OUTLET UNLESS THE BLADES CAN BE FULLY INSERTED TO PREVENT BLADE EXPOSURE. TO PREVENT FIRE OR SHOCK HAZARD, DO NOT EXPOSE THIS APPLIANCE TO RAIN OR MOISTURE. - Page 3 16. Use replacement part as specified by the manufacturer. 17. Upon completion of any service or repairs to this product, ask the service technician to perform safety checks. 18. Power Sources - This product should be operated only from the type of power source indicated on the marking label.
-
Page 4: Compliance With Fcc Regulations
COMPLIANCE WITH FCC REGULATIONS This device complies with Part 15 of the FCC Rules. Operation is subject to the following two conditions: (1) This device may not cause harmful interference, and (2) This device must accept any interference received, including interference that may cause undesired operation. - Page 5 The serial number of this product is found on its bottom. You should note the serial number of this unit in the space provided as a permanent record of your purchase to aid in identification in the event of theft of loss. Model Number: JCR-206 Serial Number:...
-
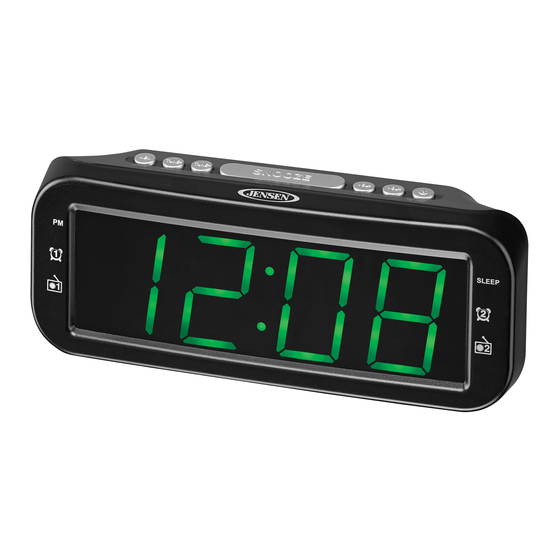
Page 6: Location Of Controls
LOCATION OF CONTROLS 1 SPEAKER 9 PM INDICATOR 2 MEMORY / CLOCK BUTTON 10 LED DISPLAY 3 TUNE - / BUTTION 11 AC IN JACK 4 TUNE + / BUTTON 12 BATTERY DOOR 5 SNOOZE / SLEEP / DIMMER BUTTON 13 AUX IN JACK 6 VOL - / ALARM 1 BUTTON 14 FM ANTENNA... - Page 7 POWER SOURCE (AC ADAPTOR ONLY) The JCR-206 is powered by an external 120V AC adaptor with an output of AC ~ 5V / 400mA. The unit is also equipped with a battery back-up system for the clock that is powered by 2 x ‘AAA’...
-
Page 8: Standby Mode
If the unit is not going to be used for an extended period of time, please remove the batteries. Using old, leaking or cheaply made batteries can cause damage to the unit and may void the warranty. Do not dispose of batteries in fire, batteries may explode or leak. Batteries shall not be exposed to excessive heat such as sunshine, fire or the like. -
Page 9: Alarm Operation
ALARM OPERATION The JCR-206 features a dual alarm clock. Setting the alarms: 1. In standby mode, press and hold the VOL - / ALARM 1 BUTTON (#6), the hour of the alarm time will flash. 2. Tap the TUNE - /... -
Page 10: Snooze Function
Wake to Radio (only for FM) - Turning the “wake to” Radio ON: The Radio will automatically turn on when the alarm time is reached. The corresponding RADIO 1 or RADIO 2 indicator will flash. The unit will start playing the last FM radio station you listened to when the alarm time is reached, so make sure the station is set to the one you want to wake up The volume level will start out low and gradually increase to maximum volume. -
Page 11: Radio Operation
RADIO OPERATION Listening to the radio: 1. Tap the STANDBY / SOURCE / ALARM OFF BUTTON (#8) to turn the unit on. 2. If you repeatedly tap the STANDBY / SOURCE / ALARM OFF BUTTON (#8), you will step through the different modes available: FM Radio ->... -
Page 12: Aux In Operation
“AUX” will show on the LED Display (#10). Turn on and start playing the external device you plugged into the AUX IN JACK (#13). 7. Slowly adjust both the volume controls of the JCR-206 and the external device until you reach a comfortable listening level. Notes: •... -
Page 13: Specifications
DIMMER OPERATION Press and hold the DIMMER BUTTON (#5) repeatedly to select the brightness settings of the display (Low or High). CARE AND MAINTENANCE • Clean the radio with a soft damp cloth and let all parts dry completely after cleaning. - Page 14 90 DAY LIMITED WARRANTY AND SERVICE VALID IN THE U.S.A. ONLY SPECTRA MERCHANDISING INTERNATIONAL, INC. warrants this unit to be free from defective materials or factory workmanship for a period of 90 days from the date of original customer purchase and provided the product is utilized within the U.S.A. This warranty is not assignable or transferable.
Need help?
Do you have a question about the JCR-206 and is the answer not in the manual?
Questions and answers