Table of Contents
Advertisement
Quick Links
Advertisement
Table of Contents

Summary of Contents for Jensen JCR-265
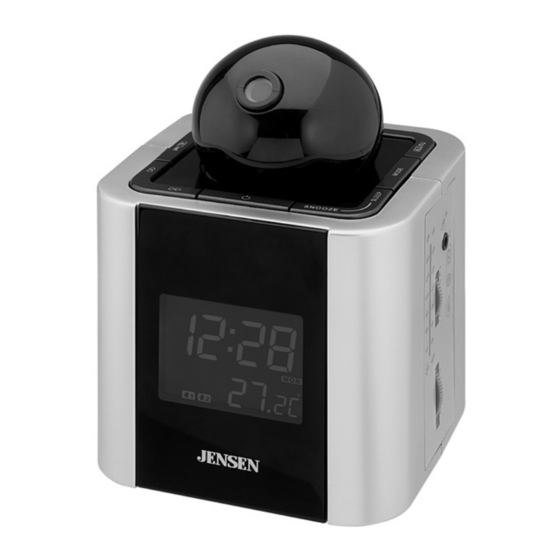
- Page 1 MODEL JCR-265 AM/FM PROJECTION CLOCK RADIO USER MANUAL Need technical help. Call 1800 686 079 ....Mon - Fri, 9 am to 5 pm PLEASE READ THIS OPERATING MANUAL COMPLETELY BEFORE OPERATING THIS UNIT AND RETAIN THIS BOOKLET FOR FUTURE REFERENCE.
-
Page 2: Important Safety Instructions
WARNING: To reduce the risk of fi re or electric shock, do not expose this appliance to rain or moisture. CAUTION: Use of controls or adjustments or performance other than those specifi ed may result in hazardous radiation exposure. CAUTION RISK OF ELECTRIC SHOCK DO NOT OPEN The lightning flash with... - Page 3 9. Protect the power cord from being walked on or pinched particularly at plugs, convenience receptacles, and the point where they exit from the apparatus. 10. Only use attachments / accessories specifi ed by the manufacturer. 11. Unplug this apparatus during lightning storms or when unused for long periods of time.
-
Page 4: Important Notes
IMPORTANT NOTES Avoid installing the unit in locations described below: • Places exposed to direct sunlight or close to heat radiating appliances such as electric heaters. • Places subject to constant vibration. • Dusty, humid or moist places. PROTECT YOUR FURNITURE!! This model is equipped with non-skid rubber ‘feet’... -
Page 5: Location Of Controls
LOCATION OF CONTROLS UNIT 8 9 10 1. MODE BUTTON 2. ALARM SET BUTTON AL. SET 3. ALARM 1 BEEPING/RADIO SELECT BUTTON AL.1 4. ALARM 2 BEEPING/RADIO SELECT BUTTON AL.2 5. ºC/ºF BUTTON 6. FOCUS ADJUSTMENT FOR PROJECTION UNIT BUTTON BUTTON 9. -
Page 6: Projection Unit
20. FM ANTENNA WIRE 21. RATING LABEL 22. BATTERY COMPARTMENT 23. SPEAKER 24. PROJECTION ON/OFF SWITCH 25. NIGHT LIGHT ON/OFF SWITCH PROJECTION UNIT 1. Twist the BALL counterclockwise until it loosens. 2. Pull the top half upwards. POWER SOURCE This unit is designed to operate on normal 240V~ 50Hz AC power only. Do not attempt to operate the unit from any other power source. -
Page 7: Battery Installation
BATTERY INSTALLATION 1. Unscrew and pull out the Battery Compartment Door on the bottom of the unit. 2. Follow the polarity diagram shown on the Battery Compartment Door, insert 3 pieces of CR2025 onto the Battery Compartment Door. 3. Replace and screw the Battery Compartment Door. IMPORTANT: Be sure that the batteries are installed correctly. - Page 8 SETTING THE CALENDAR AND TIME Note: The default display and settings are 0:00 , Monday, January 1, 2007. The clock is adjusted in the following sequence: Current time g Year g Month g Date g Hour Format Select g Hour g Minute g Current time.
- Page 9 4. Press the Buttons (#7 or #8) to select the DATE and press the MODE Button (#1) once to confi rm when the correct DATE (24) appears in the DISPLAY. The clock is now in the HOUR setting mode. Press the Buttons (#7 or #8) to toggle between 24 H or 12 H display formats.
- Page 10 6. While the Minute digit fl ashes, press the Buttons (#7 or #8) to select the minutes. Press the MODE Button once to enter when the correct Minutes (30) appears in the DISPLAY. The current time is then displayed. SETTING DST- Daylight Saving Time In current time mode, press and hold the Button (#8) for 3 seconds to toggle the DST function on and off.
-
Page 11: Temperature Display
5. Replace the top half of the ball and twist it clockwise to tighten. 6. To turn the projection off, set the Projection ON / OFF Switch (#24) to “OFF”. Note: Project the time image on the ceiling or wall of a darkened room. The maximum projection distance is 3 to 9 feet. -
Page 12: Aux In Operation
Jack (#13) to your external player’s audio out jack or headphone jack. 1. Plug one end of an audio cable (not included) into the LINE IN Jack (#13) on JCR-265 and the other end of the cable to the headphone jack of your digital audio player. - Page 13 2. Press the Buttons (#7 or #8) to select the Hour and press the AL.SET Button (#2) to confi rm when the correct hour (7) appears in the DISPLAY. The Minute digit will fl ash in the DISPLAY. Note: For 12 Hour format, there is a PM INDICATOR (PM) located in the upper left-hand side of the DISPLAY.
-
Page 14: Alarm Operation
5. Press the AL. SET Button (#2) to confi rm the desired weekday alarm. The Clock is now in the ALARM 2 setting mode. 6. Repeat step 2 to 5 above to complete ALARM 2 setting. ALARM OPERATION WAKE TO RADIO BY ALARM1 or ALARM 2 1. -
Page 15: Sleep Timer Operation
The alarm will beep at the preset “Alarm Time” and play for about 30 minutes before turning off automatically. 3. If you want to turn the BEEPING off, press the BUTTON (9) once. The ALARM will turn on again automatically at the preset alarm time(s) on the following days. -
Page 16: Care And Maintenance
ADJUSTING THE SLEEP PERIOD 1. With the unit In POWER ON mode, press the SLEEP Button (14) repeatedly to select the amount of sleep time as follows: Display SLEEP Timer Off Time 1st Press Shut off in 90 Minutes 2nd Press Shut off in 60 Minutes 3rd Press Shut off in 30 Minutes... - Page 17 SERVICE All necessary care is taken at the point of manufacture to ensure this unit will perform to Jensen’s high quality standards. However if this unit becomes faulty within the warranty period please return it to the point of purchase with your proof of purchase for a replacement.


Need help?
Do you have a question about the JCR-265 and is the answer not in the manual?
Questions and answers