Table of Contents
Advertisement
Quick Links
Advertisement
Table of Contents

Related Manuals for Philco PTB 1183


Summary of Contents for Philco PTB 1183
- Page 1 REFRIGERATOR USER’S MANUAL PTB 1183...
- Page 2 Dear customer, Thank you for buying a PHILCO brand product. So that your appliance serves you well, please read all the instructions in this user‘s manual.
-
Page 3: Table Of Contents
CONTENTS PART 1: SAFETY AND WARNING INFORMATION ..................2 PART 2: DESCRIPTION OF THE APPLIANCE ....................5 PART 3: CONTROL PANEL ..........................6 PART 4: FIRST USE AN INSTALLATION ......................7 PART 5: DAILY USE ............................9 PART 6: REVERSING THE DOOR ........................11 PART 7: INSTALLING THE DOOR HANDLE .................... -
Page 4: Part 1: Safety And Warning Information
PART 1: SAFETY AND WARNING INFORMATION This appliance is in accordance with the following EU guidelines: LVD 2014/35/EU and EMC 2014/30/ EU and 2009/125/EC and EC.643/2009 and 2002/96/EC For your safety and correct usage, before installing and fi rst using the appliance, read this user manual carefully, including its hints and warnings. -
Page 5: Electrical Safety
• WARNING — Do not use electrical appliances inside the food storage compartments of the appliance, unless they are of the type recommended by the manufacturer. • WARNING — The refrigerant and insulation blowing gas are fl ammable. When disposing of the appliance, do so only at an authorized waste disposal centre. Do not expose to fl ame. Refrigerant The refrigerant isobutene (R600a) is contained within the refrigerant circuit of the appliance, a natural gas with a high level of environmental compatibility, which is nevertheless fl ammable. -
Page 6: Copyright © 2016, Fast Čr, A. S
• Keep buring candles, lamps and other items with naked fl ames away from the appliance so that do not set the appliance on fi re. • The appliance is intended for keeping food stuff and/or beverages in normal household as explained in this instruction booklet. -
Page 7: Part 2: Description Of The Appliance
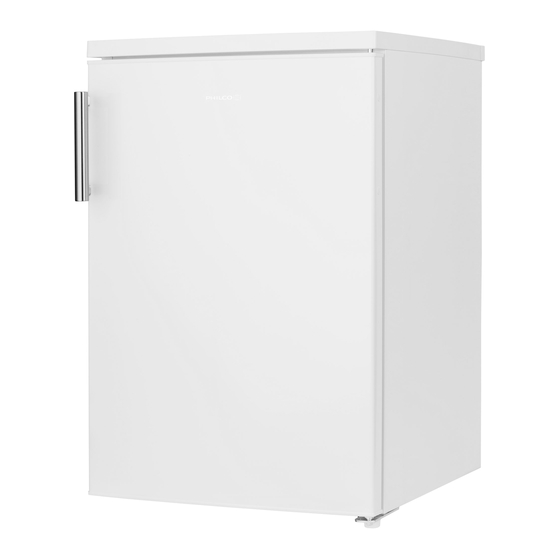
PART 2: DESCRIPTION OF THE APPLIANCE View of the appliance Freezer chamber Ice tray(in Freezer chamber) Egg tray Storage shelf Crisper cover Crisper Lower door rack Adjustable feet Bulb & temperature regulator 10. Door handle (some models have) 11. Upper door rack 12. -
Page 8: Part 3: Control Panel
PART 3: CONTROL PANEL Starting up and temperature regulation Insert the plug of the connection lead into the plug socket with a protective grounding contact. When the refrigerator compartment door is opened, the internal lighting is switched on. The temperature selector knob is located on the left side of the refrigerator compartment. Setting “0”... -
Page 9: Part 4: First Use An Installation
PART 4: FIRST USE AN INSTALLATION Cleaning before use • Before using the appliance for the fi rst time, wash the interior and all internal accessories with lukewarm water and meutral soap in order to remove the typical smell of a brand new product, then dry thoroughly. Installation Positioning WARNING! Before installing, read the instruction carefully for your safety and the correct operation of appliance. -
Page 10: Electrical Connection
Leveling • The appliance should be level in order to eliminate vibration. To make the appliance level, it should be upright and both adjusters should be in stable contact with the fl oor. You can also adjust the level by unscrewing the appropriate level adjustment in the front (use your fi ngers or a suitable spanner). -
Page 11: Part 5: Daily Use
PART 5: DAILY USE Accessories Movable shelves/trays • Various glass, plastic storage shelves or wire trays are included with your appliance diff erent models have diff erent combinations and diff erent models have diff erent features. • The walls of the refrigerator are equipped with a series of runner so that the shelves can be positioned as desired. -
Page 12: Ice Tray
Crisper • For storing fruit and vegetables. Ice tray • For making ice and storing ice-cubes. Refrigerator compartment • For storing the food that does not need to be frozen and diff erent sections suitable for diff erent kinds of food. -
Page 13: Part 6: Reversing The Door
PART 6: REVERSING THE DOOR The side in which the door opens can be changed from the right side (as supplied) to the left side, if the installation site allows for it. Tools you will need: 8mm socket driver Cross- sharped screwdriver Putty knife or thin-blade screwdriver Before you begin, place the fridge on it’s back in order to gain access to the base, you should rest it on soft foam packaging or similar material to avoid damaging the cooling popes at the rear of the fridge. - Page 14 Lift the door and place it on a padded surface to prevent scratching. Remove both adjustable feet and remove the bottom hinge bracket by unscrewing the bolts. Then transfer them to another side. NOTE: You need move hinge axis from hole 1 to 2 before transfer. Hinge axis Set the door into its new place making sure the pin enters the bushing at the lower frame section.
-
Page 15: Changing Over The Freezer Compartment Door
Changing over the freezer compartment door Keep the freezer compartment door closed. Using a screwdriver, remove the mount screw for the installation button, and take the installation button down. Open the freezer compartment door a little way. Pull down the freezer compartment door and the cap which covering on the up door bearing(1). - Page 16 Turn the freezer compartment door through 180°, cover the cap on the up door bearing, then fi t the door into the up door axle hole. Keep the freezer compartment door closed. Fix the installation button to the lower door bearing, Press the installation button to make it have no gap with the cavity, then fi x the screw.
-
Page 17: Part 7: Installing The Door Handle
PART 7: INSTALLING THE DOOR HANDLE If there is door handle separately provided in a plastic bag with your appliance, you can install it as follows. Remove the screw on the door. Keep or install the screw covers on the side which have hinge. Match the handle hole to the door , then fi x the screw which you removed from the door to make the handle fi xed fi rmly on the door. -
Page 18: Part 8: Helpful Hints And Tips
PART 8: HELPFUL HINTS AND TIPS Noises during operation Clicks - Whenever the compressor switches on of off , a click can be heard. Humming - As soon as the compressor is in operation, you can hear it humming. Bubbling - When refrigerant fl ows into thin tubes, you can hear bubbling or splashing noises. Splashing - Even after the compressor has been switched off , this noise can be heard for a short time. - Page 19 • Iced products, if consumed immediately after removal from the freezer compartment can possibly cause skin to become freezer burnt. • It is recommended to label and date each frozen package in order to keep track of the storage time. Hints for the storage of frozen food •...
-
Page 20: Part 9: Cleaning And Care
PART 9: CLEANING AND CARE Cleaning and care For hygienic reasons, the appliance interior, including interior accessories, should be cleaned regularly. The appliance should be cleaned and maintained at least every two months. WARNING! Danger of electrical shock! • The appliance should not be connected to the main power supply during cleaning. Before cleaning, switch the appliance off and remove the plug from the main power supply, switch off , or shut off the circuit breaker of fuse. -
Page 21: Taking The Appliance Out Of Service
• In order to speed up the process of defrosting, you may put a bowl of warm water (about 50°C) into the freezer chamber and scrape away the ice and frost with a defrosting spatula. After doing so, be sure to set the knob of the temperature regulator to the original position. -
Page 22: Part 10: What To Do If
PART 10: WHAT TO DO IF... WARNING! Before troubleshooting, disconnect the power supply. Only a qualifi ed electrician or other personnel must carry out the troubleshooting that is not in the manual. IMPORTANT! Repairs to the appliance may only be performed by competent service engineers. Improper repairs can give rise to signifi cant hazards for the user. -
Page 23: Part 11: Information Sheet
PART 11: INFORMATION SHEET INFORMATION SHEET: Philco Philco brand: Brand Philco Model identifi cation PTB 1183 Type of appliance 3) Energy effi ciency class A+++ (A... low electricity consumption to G high electricity consumption) Electricity consumption per 365 days 1) kWh... - Page 24 Changes to the text, design and technical specifi cations may occur without prior notice and we reserve the right to make these changes. Czech is the original version. Manufacturer address: PHILCO, Praha 10, Černokostelecká 2111, CZ-10000; CZECH REPUBLIC EN - 22 Copyright © 2016, Fast ČR, a. s.
Need help?
Do you have a question about the PTB 1183 and is the answer not in the manual?
Questions and answers