Sirona inLab MC XL Operating Instructions Manual
Hide thumbs
Also See for inLab MC XL:
- Supplement to the operating instructions (64 pages) ,
- Supplement to operating instruction (34 pages) ,
- Installation instructions manual (88 pages)
Table of Contents

Related Manuals for Sirona inLab MC XL


Summary of Contents for Sirona inLab MC XL
- Page 1 10.2017 New as of: inLab MC XL Operating Instructions (not valid for USA) English Operator Manual This product is covered by one or more of the following US patents: • US6454629 • US6702649 • US6394880 • US7522764 • US7178731 • US7163443...
- Page 2 Table of contents Dentsply Sirona Operating Instructions inLab MC XL Table of contents Dear Customer, ......................General data......................Identification of the danger levels..............Formats and symbols used ................General description ....................Certification ....................Intended use ....................Safety ........................Basic safety information ................
- Page 3 Dentsply Sirona Table of contents Operating Instructions inLab MC XL 5.4.9 Switching the unit ON and OFF............Repacking ....................Scope of supply.................... Storage......................Operation......................... Configuration (inLab MC XL)................ Calibrating the unit ..................Production process..................6.3.1 Process types.................. 6.3.1.1 Grinding ................
- Page 4 Table of contents Dentsply Sirona Operating Instructions inLab MC XL Removing water from the unit ............... 7.7.1 Procedure for all materials except for base metals ......7.7.2 Base metal operation or mixed operation with base metal and other materials Using the tank cap opener ................
-
Page 5: Dear Customer
1 Dear Customer, Operating Instructions inLab MC XL Dear Customer, ® Thank you for your purchase of this inLab MC XL unit from Dentsply Sirona. This device enables you to produce dental restorations, e.g. from ceramic material with a natural appearance (CEramic REConstruction). -
Page 6: General Data
2 General data Dentsply Sirona 2.1 Identification of the danger levels Operating Instructions inLab MC XL General data Please read this document completely and follow the instructions exactly. You should always keep it within reach. Original language of the present document: German. -
Page 7: Formats And Symbols Used
Dentsply Sirona 2 General data Operating Instructions inLab MC XL 2.2 Formats and symbols used Formats and symbols used The formats and symbols used in this document have the following meaning: Prerequisite Prompts you to do something. 1. First action step 2. Second action step ➢... -
Page 8: General Description
3 General description Dentsply Sirona 3.1 Certification Operating Instructions inLab MC XL General description Certification CE mark This product bears the CE mark in accordance with the provisions of Council Directive 2006/42/EC (machinery directive). As such, the following standards apply: DIN EN ISO 12100:2011-03, DIN EN 61010- 1:2011-07 and DIN EN 61326-1:2013-07. -
Page 9: Intended Use
Dentsply Sirona 3 General description Operating Instructions inLab MC XL 3.2 Intended use Intended use This unit produces computer-aided dental restorations, e.g. from natural- appearing ceramic material. This unit must not be used for any other purpose. If the unit is used for any purpose other than the one mentioned above, it may be damaged. -
Page 10: Safety
● The maintenance and repair of this unit may be performed only by Dentsply Sirona or by agencies authorized by Dentsply Sirona. ● Components which have failed and influence the safety of the unit must be replaced with original (OEM) spare parts. -
Page 11: Accessories
In order to ensure product safety, this device may be operated only with original Dentsply Sirona accessories or third-party accessories expressly approved by Dentsply Sirona. In particular, only the power cable also supplied or the corresponding original spare part may be used with the unit. -
Page 12: Installation And Startup
Operating Instructions inLab MC XL Installation and startup Transport and unpacking All products from Dentsply Sirona are carefully checked prior to shipment. Please perform an incoming inspection immediately after delivery. 1. Check the delivery note to ensure that the consignment is complete. -
Page 13: Installation Site
Dentsply Sirona 5 Installation and startup Operating Instructions inLab MC XL 5.3 Installation site Installation site CAUTION Install out of the reach of patients! Do not install or operate the milling and grinding unit in the vicinity of the patient (place it at least 1.5 m away from the patient). -
Page 14: Functional Elements
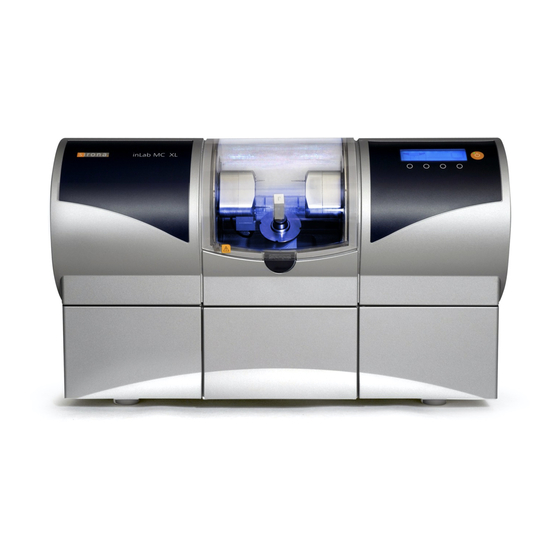
5 Installation and startup Dentsply Sirona 5.4 Commissioning Operating Instructions inLab MC XL 5.4.1 Functional elements Unit overview Overview of the grinding unit Grinding chamber ON/OFF switch Grinding chamber Drawer door catch Display Water tank Ports on the back side Connections Main switch... -
Page 15: Standard Accessories
Dentsply Sirona 5 Installation and startup Operating Instructions inLab MC XL 5.4 Commissioning Grinding chamber Grinding chamber Instrument set 1 Ceramic block Instrument set 2 Workpiece spindle Motor mount 5.4.2 Standard accessories Instruments 5.4.2.1 The following instruments are available for milling and grinding purposes. -
Page 16: Torque Wrench
5 Installation and startup Dentsply Sirona 5.4 Commissioning Operating Instructions inLab MC XL Torque wrench 5.4.2.3 To insert or replace the instruments or calibration pins, use the following torque wrench. Instrument Usage Torque wrench Clamping format of the force transmission Step Bur 12 S... -
Page 17: Display Description
Dentsply Sirona 5 Installation and startup Operating Instructions inLab MC XL 5.4 Commissioning 5.4.3 Display description These operating instructions describe how to operate the unit by executing and confirming commands via your PC. "Start" "Stop" "Cancel" You can also confirm commands such as "OK"... -
Page 18: Inserting The Grinding Chamber Sieve
5 Installation and startup Dentsply Sirona 5.4 Commissioning Operating Instructions inLab MC XL 5.4.5 Inserting the grinding chamber sieve CAUTION Risk of injury on instruments Be careful not to brush against the instruments with your hand. NOTICE Risk of blockage in the cooling circuit If chips enter into the cooling circuit of the machine, there is a risk that the cooling circuit will become blocked. -
Page 19: Connecting To The Pc Via Lan
Dentsply Sirona 5 Installation and startup Operating Instructions inLab MC XL 5.4 Commissioning 5.4.7 Installation 5.4.7.1 Connecting to the PC via LAN An Ethernet connection is located to the rear of the unit, which can be used to connect the PC to the milling and grinding unit. Use a network cable to do this (LAN connection). -
Page 20: Filling The Water Tank
5 Installation and startup Dentsply Sirona 5.4 Commissioning Operating Instructions inLab MC XL Unit removal ✔ If you no longer require a unit (e.g. a unit is replaced), you can remove ✔ The unit is operation. "Configuration" 1. Click the button in the system menu. -
Page 21: Switching The Unit On And Off
Dentsply Sirona 5 Installation and startup Operating Instructions inLab MC XL 5.4 Commissioning NOTICE Damage to surfaces! When undiluted, DENTATEC grinding additive etches plastic surfaces and can cause discoloration. ➢ Do not place DENTATEC on the unit. ➢ Do not spill DENTATEC. -
Page 22: Dentsply Sirona
5 Installation and startup Dentsply Sirona 5.4 Commissioning Operating Instructions inLab MC XL Switch on the unit ✔ The milling and grinding unit is connected to the power supply. 1. The main switch on the rear side of the unit is set to position I (ON). -
Page 23: Repacking
Dentsply Sirona 5 Installation and startup Operating Instructions inLab MC XL 5.5 Repacking Repacking NOTICE Repack only drained units! Drain the unit! See "Removing water from the unit [ → 51]“. ✔ The water tank is empty. ✔ The main switch on the back side of the unit is set to the 0 (OFF) position. -
Page 24: Operation
6 Operation Dentsply Sirona 6.1 Configuration (inLab MC XL) Operating Instructions inLab MC XL Operation CAUTION Risk of injury on calibration pins/instruments If you reach into the processing chamber (e.g.: when inserting/removing a ceramic block, changing instruments, or inserting/removing a calibration phantom), you may injure your hand on the calibration pins/ instruments. -
Page 25: Calibrating The Unit
Dentsply Sirona 6 Operation Operating Instructions inLab MC XL 6.2 Calibrating the unit Calibrating the unit NOTICE Use only the supplied calibration tools Use only the supplied calibration pins and the corresponding calibration phantom when calibrating the unit. Unit calibrated ex works The unit is calibrated at the factory. -
Page 26: Dentsply Sirona
6 Operation Dentsply Sirona 6.2 Calibrating the unit Operating Instructions inLab MC XL Inserting the calibration pins and phantom 1. Press the catch of the grinding chamber door and open the door. 2. Loosen the instruments with the torque wrench and remove them. -
Page 27: Production Process
Dentsply Sirona 6 Operation Operating Instructions inLab MC XL 6.3 Production process Inserting instruments 1. Open the grinding chamber door following calibration. 2. Loosen the calibration pins with the torque wrench and remove them. 3. Loosen the ball pressure screw. 4. Remove the calibration phantom by grasping it by its narrow surfaces (B). -
Page 28: Dentsply Sirona
6 Operation Dentsply Sirona 6.3 Production process Operating Instructions inLab MC XL 6.3.1.1 Grinding For grinding purposes, use the following instruments as well as the appropriate torque wrench: Instrument Torque wrench Clamping format of the force transmission Step Bur 12 S 6240167... -
Page 29: Dentsply Sirona
Dentsply Sirona 6 Operation Operating Instructions inLab MC XL 6.3 Production process Instruments and torque wrenches For milling purposes, use the following instruments as well as the appropriate torque wrenches: Instrument Torque wrench Clamping format of the force transmission Finisher 10 (dry and wet) -
Page 30: Dentsply Sirona
The "Milling models" option can only be used if you have one of the following machines: - inLab MC XL from serial number 120 000 - CEREC MC XL Premium Package For milling purposes, use the following instruments as well as the... -
Page 31: Starting The Machining Processes
Dentsply Sirona 6 Operation Operating Instructions inLab MC XL 6.3 Production process 6.3.2 Preparations ✔ Download or design a restoration (see operator's manual). ✔ When the milling option is activated, you can choose between the grinding and milling manufacturing processes for plastic and zirconium oxide materials in the material selection step. -
Page 32: Dentsply Sirona
6 Operation Dentsply Sirona 6.3 Production process Operating Instructions inLab MC XL 6.3.4 Ending the machining processes 1. When the machining process has been completed, open the processing chamber door. 2. Remove the restoration. WARNING Risk of injury on the remainder of the ceramic block The remaining portion of the ceramic block may have sharp edges (e.g. -
Page 33: Information On The Seal Of Approval
Dentsply Sirona 6 Operation Operating Instructions inLab MC XL 6.4 Entering the bar code 6.3.5 Information on the seal of approval Proper selection and processing of the material are decisive for the long- term clinical success of the restoration, especially in the case of zirconia. -
Page 34: Manual Block Clamp
6 Operation Dentsply Sirona 6.5 Manual block clamp Operating Instructions inLab MC XL Manual block clamp Store the block clamp tool in the corresponding holder. You can attach the holder to a suitable location with the adhesive pad. Clean and degrease the contact surface beforehand. -
Page 35: Dentsply Sirona
Dentsply Sirona 6 Operation Operating Instructions inLab MC XL 6.5 Manual block clamp Blocks with 6 mm diameter block holders NOTICE Fasten the block tightly If the block is not sufficiently tightened, it can lead to unsuitable results and ceramic breakages. ➢ Securely tighten the block with the block clamping tool with the torque wrench, until you can hear a clicking sound. -
Page 36: Service
NOTICE Do not confuse the block screw with the ball pressure screw When operating an inLab grinding unit and an inLab MC XL grinding unit in the same room, be careful not to confuse the block screw of the inLab with the ball pressure screw of the inLab MC XL. -
Page 37: Changing The Water
Dentsply Sirona 7 Service Operating Instructions inLab MC XL 7.1 Changing the water NOTICE Using the tank cap opener If you find the tank cap, tank drain or filter insert hard to open by hand, use the tank cap opener (see "Using the tank cap opener" [ → 52]). -
Page 38: Dentsply Sirona
7 Service Dentsply Sirona 7.1 Changing the water Operating Instructions inLab MC XL NOTICE Approved coolant additive Use only DENTATEC as a coolant additive. 7.1.2 Changing the water NOTICE Change the filter inserts regularly! Replace both filter inserts after every fourth water change. -
Page 39: Dentsply Sirona
Dentsply Sirona 7 Service Operating Instructions inLab MC XL 7.1 Changing the water NOTICE Foaming not permissible! If any cleaning agents are used, this will create foam, which is not permitted. Do not use any cleaning agents. 10. Add approx. 75 ml of DENTATEC to the tank. -
Page 40: Dentsply Sirona
7 Service Dentsply Sirona 7.1 Changing the water Operating Instructions inLab MC XL IMPORTANT Once the water has been changed, the collecting vessel will contain a mixture of base-metal slurry (in mixed operation, there will also be other materials) and water. The machining particles dispersed in the water will settle to the bottom of the collecting vessel within 24h, resulting in a clear separation between the water and the settled solid matter. -
Page 41: Dentsply Sirona
Dentsply Sirona 7 Service Operating Instructions inLab MC XL 7.1 Changing the water 4. Close the drain opening (D) using your thumbs and pan the tank vigorously 5x in circular movements again. 5. Empty approx. 1/3 of the contents of the tank into the collecting vessel provided. -
Page 42: Overview Of Materials/Instruments
7 Service Dentsply Sirona 7.2 Instruments Operating Instructions inLab MC XL Instruments 7.2.1 Overview of materials/instruments For an updated table of approved instrument combinations, please visit http://www.dentsplysirona.com/manuals. "Bur table" Select your product there and then open the document. 7.2.2 Changing instruments NOTICE... -
Page 43: Dentsply Sirona
Dentsply Sirona 7 Service Operating Instructions inLab MC XL 7.2 Instruments 8. Loosen the worn-out or defective instrument with the torque wrench and pull it out manually. 9. NOTICE! Do not grease instruments without chuck! Insert the new instrument into the motor mount by hand. Tighten the corresponding chuck with the torque wrench until a clicking sound can be heard. -
Page 44: Care, Cleaning Agents, And Disinfectants
7 Service Dentsply Sirona 7.3 Care, cleaning agents, and disinfectants Operating Instructions inLab MC XL Care, cleaning agents, and disinfectants NOTICE Approved care, cleaning, and disinfecting agents Use only care, cleaning, and disinfecting agents approved by Dentsply Sirona! A continuously updated list of approved media can be downloaded from the internet via the online portal for technical documents. -
Page 45: Replacing The Main Fuses
Dentsply Sirona 7 Service Operating Instructions inLab MC XL 7.5 Replacing the main fuses Replacing the main fuses WARNING Electric shock Disconnect the power plug at the unit end before replacing the fuses. NOTICE Fuse type Use only fuses of the same type in the fuse holder! -
Page 46: Changing The Filter
Replace both filter inserts once a week or after every fourth water change. If a message stating that the water pressure is too low appears, you must change the filter inserts. NOTICE Filter Only use filter inserts approved by Dentsply Sirona! Water tank Filter inserts Tank Tank cap Tank drain 7.6.1... -
Page 47: Base Metal Operation Or Mixed Operation With Base Metal And Other
Dentsply Sirona 7 Service Operating Instructions inLab MC XL 7.6 Changing the filter 7.6.2 Base metal operation or mixed operation with base metal and other materials NOTICE Observe the safety information from the material manufacturer Observe the safety instructions regarding occupational safety and disposal referred to in the material manufacturer's operating instructions. -
Page 48: Dentsply Sirona
7 Service Dentsply Sirona 7.6 Changing the filter Operating Instructions inLab MC XL 3. Open the clamping ring and lay it down. Disposing of filter cartridges and ceramic sludge 1. Release the filter cartridges by tilting them slightly. The springs remain attached. -
Page 49: Dentsply Sirona
Dentsply Sirona 7 Service Operating Instructions inLab MC XL 7.6 Changing the filter 3. Place the clamping ring onto the external water tank with the labeling (A) facing up. 4. Add approx. 400 ml of DENTATEC to the tank. 5. Fill the tank up to the filling level with water (approx. 16 liters). -
Page 50: Dentsply Sirona
7 Service Dentsply Sirona 7.6 Changing the filter Operating Instructions inLab MC XL 3. Close the clamping ring. Connecting the External Water Tank 1. Insert the suction connection up to the stop. 2. Insert the drain hose up to the stop. NOTICE Risk of overflowing Sagging of the drain hose may result in overflowing. -
Page 51: Removing Water From The Unit
Dentsply Sirona 7 Service Operating Instructions inLab MC XL 7.7 Removing water from the unit Removing water from the unit You must remove water from the unit if you will not be using it for a long period of time or wish to transport it. -
Page 52: Using The Tank Cap Opener
7 Service Dentsply Sirona 7.8 Using the tank cap opener Operating Instructions inLab MC XL Using the tank cap opener NOTICE Risk of damage to the tank Use the tank cap opener only for opening the tank cap, tank drain and filter insert. -
Page 53: Dentsply Sirona
Dentsply Sirona 7 Service Operating Instructions inLab MC XL 7.8 Using the tank cap opener Opening the tank drain ✔ The water tank has been pulled out. ➢ Place the tank cap opener on the filter drain as shown, and take off the filter drain by unscrewing it counter-clockwise. -
Page 54: Technical Description
8 Technical description Dentsply Sirona 8.1 System requirements Operating Instructions inLab MC XL Technical description System requirements The inLab SW software may be installed only on the 64-bit inLab PC. The hardware version of the inLab PC must be HQ PC Hardware with Windows 7 (64-bit) or higher. -
Page 55: Technical Data
Dentsply Sirona 8 Technical description Operating Instructions inLab MC XL 8.2 Grinding and milling unit 8.2.2 Technical data Type designation Milling and grinding unit inLab MC XL Rated line voltage 100 V - 230 V AC Rated power frequency 50/60 Hz Nominal current 1.5 - 3.5 A... -
Page 56: Disposal
9 Disposal Dentsply Sirona Operating Instructions inLab MC XL Disposal In accordance with Directive 2012/19/EU and national disposal regulations regarding old electrical and electronic devices, please be advised that such items must be disposed of in a special way within the European Union (EU). -
Page 57: Dentsply Sirona
Dentsply Sirona Index Operating Instructions inLab MC XL Index Application, 9 Filter change, 46 Order No., 46 Bar code reader, 14 footprint, 13 Building installation, 10 Fuse, 14 Fuse type, 45 Order No., 45 Calibration tools replacement, 45 Calibration phantom, 25... -
Page 58: Dentsply Sirona
Index Dentsply Sirona Operating Instructions inLab MC XL Operating mode, 55 Packaging, 12 Packing, 23 Power connection, 14 Product safety, 11 Protection class, 55 Rated line voltage, 55 Repair, 10 Safety instructions, 6 Scope of supply, 23 Temperature range, 55... - Page 60 We reserve the right to make any alterations which may be required due to technical improvements. © Sirona Dental Systems GmbH Sprache: englisch Printed in Germany D 3439.201.01.24.02 10.2017 Ä.-Nr.: 124 429 Sirona Dental Systems GmbH Contact in the USA: Sirona Dental, Inc.
Need help?
Do you have a question about the inLab MC XL and is the answer not in the manual?
Questions and answers