
Related Manuals for Bioneer Exicycler 96


Summary of Contents for Bioneer Exicycler 96
- Page 1 Exicycler™ 96 Real-Time Quantitative Thermal Block Installation and Calibration Guide Exicycler™ 96 Real-Time Quantitative Thermal Block...
- Page 2 All Bioneer products are tested under extensive Quality Control procedures. Bioneer guarantees the quality under the warranty period. Any problems should be reported immediately. Liability is conditional upon the customer providing full details of the problem to Bioneer. Once the problem occurrs, customers must report to Bioneer within 30 days. QC Testing Each lot of Bioneer‟s product is carefully tested by the quality control team.
- Page 3 Contents Before Starting ............................ 4 Safety Warnings and Cautions ......................9 Location Consideration and Installation ..............9 Operation and Maintenance ................. 10 European Safety and EMC Standards (CE) ............. 12 Introduction ............................15 System Components and Specifications ................... 19 System Components ................... 19 Specifications ....................
-
Page 4: Before Starting
Before Starting How to Use This Guide Who This Guide is Written for This guide is written for researchers and laboratory staff responsible for installing and maintaining the Exicycler™ 96 Real-Time Quantitative Thermal Block. General Requirements for Installation This guide assumes that you: ... - Page 5 Refer to this guide when installing or maintaining the Exicycler™ 96 Real-Time Quantitative Thermal Block. How to Obtain More Information For more information about Exicycler™ 96 , please visit us online at www.bioneer.co.kr or www.bioneer.com. How to Reach Customer Support To obtain prompt customer support, please call us at 1588-9788.
- Page 6 Exicycler™ 96 Real-Time Quantitative Thermal Block Safety Instructions...
-
Page 7: Safety Warnings And Cautions
™ Exicycler 96 Real-Time Quantitative Thermal Block Safety Warnings and Cautions Safety instructions in this guide book are to cover possible dangerous conditions and situations that may occur. It is your responsibility to read this guide thoroughly when installing, maintaining, or operating Exicycler™... -
Page 8: Operation And Maintenance
™ Exicycler 96 Real-Time Quantitative Thermal Block and system damage. A limited warranty does not cover unauthorized alterations or damage by abuse. Installation Safety 1) Place and install the Exicycler™ 96 away from direct sunlight. 2) It is recommended that you turn off the computer as well as unplug the power cable before connecting it to the Exicycler™... - Page 9 ™ Exicycler 96 Real-Time Quantitative Thermal Block 4) Do not place a piece of paper or a plastic cover under the Exicycler™ 96. It could cause fire. 5) Do not turn off the Exicycler™ 96 right after a Real-Time PCR run is done. Wait until the cooling fan stops running completely.
-
Page 10: European Safety And Emc Standards (Ce)
The Exicycler™ system is designed and sold for in vitro diagnostic (IVD) applications in combination with the diagnostic kits manufactured by Bioneer and labeled for diagnostic purposes. The Exicycler system can also be used for life science research and other laboratory purposes. -
Page 11: Introduction
Exicycler™ 96 Real-Time Quantitative Thermal Block Introduction... - Page 12 Bioneer‟s state-of-the-art technologies applied to the Exicycler™ 96 are to generate a uniform light surface over the thermal block, to detect multiple fluorescent signals emitted from various dyes through the light surface, and to separate the signals within a selective wavelength range of each dye.
-
Page 13: System Components And Specifications
Exicycler™ 96 Real-Time Quantitative Thermal Block System Components and Specifications... -
Page 14: Specifications
System Components and Specifications Exicycler™ 96 Quantitative Thermal Block is warranted by Bioneer against manufacturing defects in materials and workmanship for a limited warranty period of one year. Bioneer will charge for repairing products for the following conditions: Failures due to work by the customer himself/herself ... - Page 15 Exicycler™ 96 Real-Time Quantitative Thermal Block Specifications Physical specifications Dimension (㎜) 355(W) X 540(D) X 470(H) 30 ㎏ Weight (㎏) 96-well plate / 0.2 ㎖ micro tubes Sample capacity size 20~50 ㎕ Sample volume (50 ㎕ recommended) Input voltage 100 ~ 240 VAC 50 / 60 ㎐...
- Page 16 Exicycler™ 96 Real-Time Quantitative Thermal Block † Filter sets Position Excitation (㎚) Emission (㎚) Fluorescent dye Blank Blank FAM, SYBR Green I JOE, TET TAMRA, CY3 Texas Red, ROX, Red610 CY5, Red670 Warning: Chemical hazard: Such the florescent dyes may cause eye and skin irritation, and respiratory tract irritation. To treat them, read the MSDS before use and follow the instructions if swallowed or inhaled.
-
Page 17: System Views
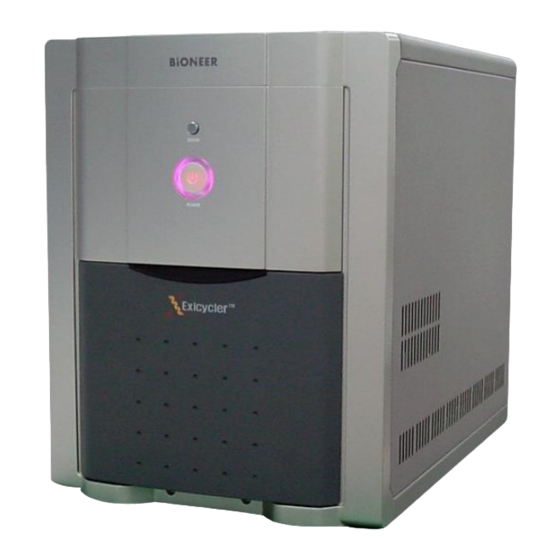
Exicycler™ 96 Real-Time Quantitative Thermal Block System Views Front view Rear view DOOR POWER and Status LED USB Communication cable On/Off Switch Ventilation hole Inside view 96-well thermal block... -
Page 18: Installation
Exicycler™ 96 Real-Time Quantitative Thermal Block Installation... -
Page 19: Setting Up The Computer
Exicycler™ 96 Real-Time Quantitative Thermal Block operates through a computer. Therefore, to install Exicycler™ 96, a computer or a laptop is necessary. The computer must meet the following computer requirements listed below. Please contact Bioneer Customer Service Center if you have any questions regarding installation. - Page 20 Exicycler™ 96 Real-Time Quantitative Thermal Block Connecting the Computer and Exicycler™ 96 There are a main power connector and a communication port connector (USB) in the rear of Exicycler™ 96. The computer should be turned off when connecting to the Exicycler™ 96 to prevent any damages to the communication port.
-
Page 21: Installing The Operation And Analysis Software
Exicycler™ 96 Real-Time Quantitative Thermal Block Installing the Operation and Analysis Software To run the Exicycler™ 96 Real-Time Quantitative Thermal Block, the operation software and the camera driver must be installed in the computer. When first installing the operation software and the camera driver, or re-installing these components, please see instructions below on how to install them yourself. - Page 22 Exicycler™ 96 Real-Time Quantitative Thermal Block 4) Once the installation starts, do not click „Cancel„. 5) When the installation is complete, click Finish to finish the Installation Shield Wizard. 6) Connect the Exicycler™ 96 to the computer when the installation is complete. Go to a folder „Exicycler3‟...
- Page 23 Exicycler™ 96 Real-Time Quantitative Thermal Block Two new icons are created on the desk top (Run Exicycler3 and Analysis Exicycler3). Check the USB cable connection between the Exicycler™ 96 and the computer. 10) Power on the Exicycler™ 96. A power buttonLED turns red when the power is supplied properly.
- Page 24 Exicycler™ 96 Real-Time Quantitative Thermal Block 13) Select „Install from a list or specific location (Advanced)‟, then click Next. 14) Select „Search for the best driver in these locations‟, then select „Include this location in the search‟ check box. And then browse „C:\Exicycler3\NcBulk„. Click Next to start installing the driver.
- Page 25 Exicycler™ 96 Real-Time Quantitative Thermal Block 16) When the driver completes the installation, click Finish. 17) Go to „Device Manager‟ and check that USB Test Devices (Netchip) is installed. „Netchip „Transfer Device‟ (XXX_XXXX_XXXX) using xxxxxx.SYS is shown when the driver installation is successfully completed. 18) Copy the calibration data to the computer by overwriting the Calibration folder in the install CD to C: \Exicycler3\Run.
-
Page 26: System Operation And Calibration Preparation
Exicycler™ 96 Real-Time Quantitative Thermal Block System Operation and Calibration Preparation... -
Page 27: Powering On And Self-Diagnosis
Exicycler™ 96 Real-Time Quantitative Thermal Block System Operation and Calibration Preparation Perform the calibration after verifying the installation of the Exicycler™ 96 and the computer. Powering On and Self-diagnosis Power on the Exicycler™ 96 by switching on a power supply button in the rear of the instrument. When power is supplied properly, a POWER button LED turns red. -
Page 28: Reagents And Consumable Products
Exicycler™ 96 Real-Time Quantitative Thermal Block Reagents and Consumable Products Various reagents and kits are required to perform a Real-Time PCR in the Exicycler™ 96 Real-Time Quantitative Thermal Block. Please refer to this section to obtain detailed information about the appropriate reagents and kits for your experiments. - Page 29 Exicycler™ 96 Real-Time Quantitative Thermal Block Warning: Chemical hazard AccuPower™ Greenstar™ PCR PreMix and AccuPower™ Dualstar™ PCR PreMix may cause eye and skin irritation, and respiratory tract irritation. To treat them, read the MSDS before use and follow the instructions if swallowed or inhaled.
-
Page 30: Calibration Using Exicfg
Exicycler™ 96 Real-Time Quantitative Thermal Block Calibration Using ExiCfg... -
Page 31: Before Starting Calibration With The Calibration Kit
Exicycler™ 96 Real-Time Quantitative Thermal Block Calibration Using ExiCfg Prepare to perform the calibration with a Calibration Kit (A-2060-1). The calibration kit is designed for the Exicycler™ 96 Real-Time Quantitative Thermal Block (Version 3.0) and is not applicable to other Real-Time instruments. - Page 32 Exicycler™ 96 Real-Time Quantitative Thermal Block Allow the pack to warm to room temperature for at least 10 minutes. Take out a calibration plate from its packaging. IMPORTANT: Pay particular attention to the calibration kit when handling. Wear disposable plastic gloves to help prevent contamination on the sealing tape covered the 96-well plate.
- Page 33 Exicycler™ 96 Real-Time Quantitative Thermal Block NOTE: During this step, it is important to spin down the calibration solution that remains on the side of the well and to remove air bubbles at the bottom of the well. Protect the calibration plate from direct sunlight after the centrifugation.
-
Page 34: Calibration Using Exicfg
Exicycler™ 96 Real-Time Quantitative Thermal Block Calibration using ExiCfg The calibration must be performed prior to operating the Exicycler™ 96 Real-Time Quantitative Thermal Block. You can either transfer proper calibration data associated with a serial number from the installation CD to the computer or perform the calibration yourself. Install the Operation and Analysis Software for the calibration data transfer to the computer. - Page 35 Exicycler™ 96 Real-Time Quantitative Thermal Block 3) Click Lamp warming to turn on the lamp. A progress bar of the Lamp warming will start right after „The lamp is turned on‟ message appears on the „History‟ box. Do not click any buttons until the progress bar finishes. IMPORTANT: It usually takes about 30 seconds for the message „The lamp is turned on‟...
- Page 36 Exicycler™ 96 Real-Time Quantitative Thermal Block IMPORTANT: It is important to load the calibration plate in the right position. A misplaced plate may cause damage or technical problems. 6) Press the DOOR button again to close the door. DOOR 7) Click Mask Calibration button. 8) Click Start button in the „Mask Calibration‟...
- Page 37 Exicycler™ 96 Real-Time Quantitative Thermal Block NOTE: The calibration time is approximately 10 minutes depending on the condition of the Exicycler™ 96 and the computer. 9) When the mask calibration is complete, click OK. NOTE: The door will open when the mask calibration is successfully complete. Put the plate back into its packaging and return it to the freezer.
- Page 38 Exicycler™ 96 Real-Time Quantitative Thermal Block The „Mask Calibration‟ frame will turn blue when the calibration is successfully complete.
-
Page 39: Background Calibration
Exicycler™ 96 Real-Time Quantitative Thermal Block Background Calibration Press the DOOR button to open the door. DOOR NOTE: This step is omissible when performing the background calibration followed by the mask calibration. Place the Background calibration plate with the A1 position at the top-left of the block. - Page 40 Exicycler™ 96 Real-Time Quantitative Thermal Block Click Start in the „Background Calibration‟ window. NOTE: The background calibration time is approximately 10 minutes depending on the condition of the Exicycler™ 96. When the background calibration is complete, click OK. NOTE: The door will open when the background calibration is successfully complete. Put the plate back into its packaging and return it to the freezer.
- Page 41 Exicycler™ 96 Real-Time Quantitative Thermal Block Click Close in the „Background Calibration‟ window. The „Background Calibration‟ frame will turn blue when the calibration is successfully complete.
-
Page 42: Multi-Channel Calibration
Multi-channel Calibration Press the DOOR button to open the door. DOOR NOTE: This step is omissible when performing the background calibration followed by the mask calibration. Click Multi-Channel Calibration button. Select fluorescence dyes in the „Multi-Channel Calibration‟ window for the calibration. NOTE: 9 dyes are available for calibration. - Page 43 Exicycler™ 96 Real-Time Quantitative Thermal Block NOTE: For a selective multi-channel calibration of your desirable dyes, select check boxes of the dyes. Click Start. Prepare the calibration plate with a dye X (i.e. “FAM”) when „Attach the plate named „X‟ (i.e. “FAM”) on the bath‟ message appears.
- Page 44 Exicycler™ 96 Real-Time Quantitative Thermal Block IMPORTANT: It is important to load the calibration plate in the right position. A misplaced plate may cause damage or technical problems. Click Yes in the „Confirm‟ window. NOTE: An approximate calibration time for each dye is 5 minutes. The door will open when the calibration is successfully complete.
- Page 45 Exicycler™ 96 Real-Time Quantitative Thermal Block Prepare the calibration plate with a dye X (i.e. “SYBR Green”) when „Attach the plate named „X‟ (i.e. “SYBR Green”) on the bath‟ message appears. 10) Click Start to repeat steps 4 through 8. 11) When the multi-channel calibration is complete, click OK.
- Page 46 Exicycler™ 96 Real-Time Quantitative Thermal Block 12) Click Close in the „Multi-Channel Calibration‟ window. 13) The „Multi-Channel Calibration‟ frame will turn blue when the calibration is successfully complete. 14) Go to Calibration>Test Function>Lamp Off from the top menu bar. 15) Wait for at least 5 minutes to switch off main power of the Exicycler™...
- Page 47 Exicycler™ 96 Real-Time Quantitative Thermal Block 16) Power off the Exicycler™ 96 by pressing the POWER button. 17) Turn off the Exicycler™ 96 using the main power switch located on the back of the Exicycler™ 96. On/Off Switch 18) Go to Information>Exit from the top menu bar to close ExiCfg program.
- Page 48 Exicycler™ 96 Real-Time Quantitative Thermal Block Running Real-Time PCR Using Exicycle™ 96 Software...
-
Page 49: Starting 'Run Exicycler' Software
Exicycler™ 96 Real-Time Quantitative Thermal Block Starting ‘Run Exicycler’ software 1) Ensure that the Exicycler™ 96 is in the “Standby” position. The POWER button must blink in green. Double click Run Exicycler3 icon on the desk top to start Run Exicycler3. 2) System Check window will pop up. - Page 50 Exicycler™ 96 Real-Time Quantitative Thermal Block 3) The following window will appear when System Check is complete. b. Experiemt Information a. Menu c. Protocol Information d. Well Information e. Temperature Profile Menu consists of File, Setup, Run, Window, and Help. Experiment Information displays a file name, a user name, and elapsed and estimated finish time.
- Page 51 Exicycler™ 96 Real-Time Quantitative Thermal Block Probe Information window will appear. Select one or click Add to add additional probe. Enter SYBR_AQ in the Name field. NOTE: In the Dye drop-down list of the Add Probe window, select SYBR_Green. Select None in the Quencher drop-down list. Select your desirable color for display and then click OK.
- Page 52 Exicycler™ 96 Real-Time Quantitative Thermal Block Go to File > Design Experiment to design the new experiment. Quick Start window will appear as follows: b. User Master, Protocol, Plate /Protocol/Plate c. Protocol Information d. Temperature Profile e. Protocol setting Master, Protocol, and Plate: You can create, save, or open a file. User: Select or create the user name for personal account management.
- Page 53 Exicycler™ 96 Real-Time Quantitative Thermal Block Incubate sets up a temperature and a time for the thermal block. Time Increment sets up time increment per second. Temperature Increment sets up temperature increment per second. Ramping Rate sets up a ramping rate. Scan measures fluorescence signals emitted from samples.
- Page 54 Exicycler™ 96 Real-Time Quantitative Thermal Block Hottop Check Box sets up a temperature for the heating lid within a range of 90°C to 110°C. The default temperature is 100°C. When the check box is unselected, the heating lid will not be heated. 11) Click Append to add the new step into the protocol.
- Page 55 Exicycler™ 96 Real-Time Quantitative Thermal Block 13) Click Scan tab and then Append. 14) Click Goto tab and select a starting step (i.e. “2”) in the Line drop-down list. Enter a number of cycles (i.e. “35”) in the Cycle field, and then click Append. 15) The protocol is created and saved.
- Page 56 Exicycler™ 96 Real-Time Quantitative Thermal Block 17) Click Append. 18) Click Store tab to set up a temperature for the 96-well block after cycling, and the click Append. NOTE: The door of the Exicycler™ 96 will open automatically when the Real-Time PCR has run by a protocol that does not include the Store step.
- Page 57 Exicycler™ 96 Real-Time Quantitative Thermal Block NOTE: Click button from the Quick Start to open the saved Master, Protocol and Plate files when needed. 20) Once the protocol is saved, click Plate tab to create a plate file. The Plate window will appear as follows: 96-well plate position b.
- Page 58 Exicycler™ 96 Real-Time Quantitative Thermal Block 22) Select appropriate probes, and then click OK. Probe Name Fluorescent Dye Quencher Probe Name: displays the name assigned by the user. Fluorescent Dye: displays a name of fluorescence dye assigned by the user. Quencher: displays a name of a quencher assigned by the user.
- Page 59 Exicycler™ 96 Real-Time Quantitative Thermal Block 25) Click the probe option cell and then select STD in the Type drop-down list. Select the check box of Probe Name and then click Assign. Sample IPC- Sample represents unknown samples. STD stands for a standard sample of a known concentration. Absolute Quantification NTC stands for No Template Control and is a sample without a template.
- Page 60 Exicycler™ 96 Real-Time Quantitative Thermal Block 28) Select cells D3 through E8 and enter a sample name in the Sample Name filed. Click Sample Name to save the sample name. Sample Name Field 29) Verify information on each well in the Name/Count/Probe window.
- Page 61 Exicycler™ 96 Real-Time Quantitative Thermal Block 32) Click OK at the top right to display the go back to the main window. 33) Ensure the POWER button in the front of the Power off Standby Exicycler™ 96 is blinking in green. 34) Press the DOOR button for a full second to open the door.
- Page 62 Exicycler™ 96 Real-Time Quantitative Thermal Block 35) Verify the master file and go to Run > Run from the top menu bar or click the Run button. 36) Enter a data name (i.e.Sample_AQ) in the Dataname window and click Ok. If you do not enter the data name, default name will be used.
- Page 63 Exicycler™ 96 Real-Time Quantitative Thermal Block The message will appear when checking if the lamp is on and initializaing the Exicycler™ 96. 38) The main window will appear when the progress bar finishes without any problems. Scan window displays a curve of amplification in real time during PCR. Melting windows displays a melting curve in real time when the melting step is included in the protocol file.
- Page 64 Exicycler™ 96 Real-Time Quantitative Thermal Block 39) Go to Run > Stop to stop the Exicycler™ 96 or click the Stop button. Click! 40) Go to Run > Pause to pause the Exicycler™ 96 or click the Pause button. Click! IMPORTANT: If the pop up window remains more than 5 minutes after running the Exicycler™...
- Page 65 Exicycler™ 96 Real-Time Quantitative Thermal Block Performing System Diagnosis using ExiCfg Power on the Exicycler™ 96 by pressing the POWER button. POWER Go to „C:\Exicycler3\Run‟ and double click ExiCfg.exe to start the program. Go to Information > Self Test. NOTE: „USB Communication is NOT initialized‟...
- Page 66 Exicycler™ 96 Real-Time Quantitative Thermal Block Click Start in the Self Test window. IMPORTANT: Make sure that there are no objects placed in front of the door while performing Self Test. All of the self-diagnosis tests pass completely without any problems, OK signs will show up in green. NOTE: The self-diagnosis is complete with two short beeps.
- Page 67 Exicycler™ 96 Real-Time Quantitative Thermal Block NOTE: Any problems caused during self-diagonsis are recorded in „Error log‟. Go to Information>Error Log from the top menu bar to see the problems.
-
Page 68: Troubleshooting
Exicycler™ 96 Real-Time Quantitative Thermal Block Troubleshooting... - Page 69 ™ Exicycler 96 Real-Time Quantitative Thermal Block Troubleshooting Please take recommend action for each observation. Contact Bioneer Customer Service Center if problem continues after the recommended action. Observation Recommended Action Make sure the power cable is firmly connected to the wall circuit, and then switch on the power supply button in the rear of the Exicycler™...
- Page 70 A small amount of evaporation is not critical. It is recommended that you use Bioneer kits and reagents to prevent PCR sample evaporation. Perform gel electrophoresis to determine the presence of amplification No PCR products are amplified.
- Page 71 ™ Exicycler 96 Real-Time Quantitative Thermal Block Observation Recommended Action Do you want to stop PCR? will appear if you click Stop button during the Multi-channel Calibration. Do you add plate on the bath? will appear to make sure that the calibration plate is loaded in the thermal block prior to PCR.
- Page 72 ™ Exicycler 96 Real-Time Quantitative Thermal Block Observation Recommended Action Can't Stop during Melting Protocol will display if you attempt to stop the Exicycler™ 96 software while the melting step is running. Communication between machine and S/W was not initialized will display if you click Run button when the Exicycler™...
-
Page 73: Ordering Information And Warranty
Exicycler™ 96 Real-Time Quantitative Thermal Block Ordering Information and Warranty... - Page 74 K-6200 Greenstar™ qPCR PreMix, Exicycler 8-well Strip, 12 strips / 96 tests, 50㎕ reaction AccuPower® K-6203 Greenstar™ qPCR PreMix, Exicycler 96-well Plate, 1 plate / 96 tests, 50㎕ reaction AccuPower® K-6110 DualStar™ qPCR PreMix, Exicycler 8-well Strip, 12 strips / 96 tests, 50㎕ reaction K-6113 AccuPower®...
- Page 75 For more details, please contact Bioneer Customer Service Center or your local distributor. You may call us at 1588-9788 for minor problems. The service request result will be notified to you within 7 business days and the system will be repaired or replaced within 14 business days.
- Page 76 Name Information Contact Phone: Fax: E - mail Headquarters Bioneer, Inc. Bioneer Co., Ltd. China Order 49-3, Munpyeong-dong, Daedeok- 1000 Atlantic Avenue, Alameda, 403 Room, Building 88, number 887, Korea: gu, Daejeon 306-220, Korea CA 94501 USA Zuchongzhi Road, Zhangjiang High order@bioneer.co.kr...
Need help?
Do you have a question about the Exicycler 96 and is the answer not in the manual?
Questions and answers