TP-Link TL-WR841HP Quick Installation Manual
300mbps high power wireless n router
Hide thumbs
Also See for TL-WR841HP:
- User manual (178 pages) ,
- Easy setup (3 pages) ,
- Features & specifications (3 pages)
Table of Contents
Advertisement
Quick Links
Advertisement
Table of Contents

Related Manuals for TP-Link TL-WR841HP


Summary of Contents for TP-Link TL-WR841HP
-
Page 1: User Guide
User Guide 300Mbps High Power Wireless N Router TL-WR841HP REV5.0.0 1910012102... - Page 2 Contents About This Guide ......................1 Chapter 1. Get to Know About Your Router ......2 1.
- Page 3 4. 6. 1. DHCP Settings ............37 4.
- Page 4 4. 16. 10. System Log ............71 4.
- Page 5 6. 4. 1. Connect to Network ..........99 6.
-
Page 6: About This Guide
The Quick Installation Guide can be found where you find this guide or inside the package of the router. Specifications can be found on the product page at http://www.tp-link.com. A Technical Support Forum is provided for you to discuss our products at http://forum.tp-link.com. -
Page 7: Chapter 1. Get To Know About Your Router
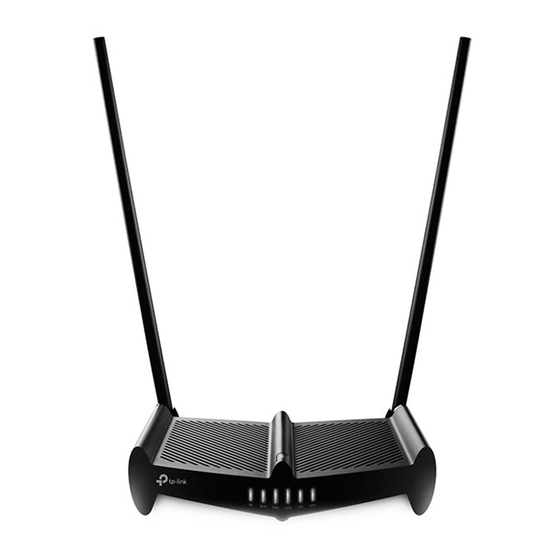
Chapter Get to Know About Your Router This chapter introduces what the router can do and shows its appearance. It contains the following sections: • Product Overview • Panel Layout... -
Page 8: Product Overview
Moreover, it is simple and convenient to set up and use the TP-Link router due to its intuitive web interface and the powerful Tether app. -
Page 9: Led Explanation
Chapter 1 Get to Know About Your Router The router’s LEDs (view from left to right) are located on the front panel. You can check the router’s working status by following the LED Explanation table. LED Explanation Name Status Indication The router is connecting to the host wireless network. -
Page 10: The Back Panel
Chapter 1 Get to Know About Your Router 1. 2. 2. The Back Panel The following parts (view from left to right) are located on the rear panel. Item Description Ethernet Ports (1/2/3/4) For connecting your PCs or other wired network devices to the router. If your devices, such as wireless adapters, that support Wi-Fi Protected Setup, then you can press this button to quickly establish a connection between the router and devices. -
Page 11: Chapter 2. Connect To The Internet
Chapter Connect to the Internet This chapter contains the following sections: • Position Your Router • Connect to the Internet... -
Page 12: Position Your Router
Chapter 2 Connect to the Internet 2. 1. Position Your Router • The product should not be located in a place where it will be exposed to moisture or excessive heat. • Place the router in a location where it can be connected to multiple devices as well as to a power source. - Page 13 Chapter 2 Connect to the Internet 1. Follow the steps below to connect your router. If your internet connection is through an Ethernet cable from the wall instead of through a DSL / Cable / Satellite modem, connect the Ethernet cable directly to the router’s WAN port, and then follow Step 4 and 5 to complete the hardware connection.
- Page 14 Chapter 2 Connect to the Internet 2 ) Click the network icon of your computer or go to Wi-Fi Settings of your smart device, and then select the SSID to join the network. Computer Smart Device < Settings Wi-Fi Connections are available Wireless Network Connection Wi-Fi CHOOSE A NETWORK...
-
Page 15: Repeater/Bridge Mode
Chapter 2 Connect to the Internet Note: If the login page does not appear, please refer to the section. 4. After successful login, click Next to start the Quick Setup. Select Wireless Router follow the step-by-step instructions to complete the initial configuration. Enjoy! For wireless devices, you may have to reconnect to the wireless network if you have customized the SSID (network name) and password during the configuration. - Page 16 Chapter 2 Connect to the Internet Step 1: Configure Tips: Using WPS Button is an easy way to extend your host network. We recommend you to use this way if your host router has the WPS button. The button might look like these: •...
-
Page 17: Access Point Mode
Chapter 2 Connect to the Internet Note: If the login page does not appear, please refer to the FAQ section. 3 ) After successful login, click Next to start the Quick Setup. Select Repeater/ Bridge and follow the step-by-step instructions to complete the initial configuration. - Page 18 Chapter 2 Connect to the Internet 3. Enter http://tplinkwifi.net in the address bar of a web browser. Select the language you want to use and then use admin for both username and password. Then click Note: If the login page does not appear, please refer to the section.
-
Page 19: Chapter 3. Log In To Your Router
Chapter Log In to Your Router This chapter shows how to log in to the web management page of router. - Page 20 Chapter 3 Log In to Your Router With the web-based utility, it is easy to configure and manage the router. The web- based utility can be used on any Windows, Macintosh or UNIX OS with a Web browser, such as Microsoft the Internet Explorer, Mozilla Firefox or Apple Safari. Follow the steps below to log in to your router.
-
Page 21: Chapter 4. Configure The Router As A Standard Wireless Router
Chapter Configure the Router as a Standard Wireless Router This chapter presents how to configure the various features of the router working as a standard wireless router. It contains the following sections: • Status • Access Control • Operation Mode •... -
Page 22: Status
Chapter 4 Configure the Router as a Standard Wireless Router 4. 1. Status 1. Visit http://tplinkwifi.net, and log in with the username and password you set for the router. 2. Go to Status. You can view the current status information of the router. •... -
Page 23: Operation Mode
Chapter 4 Configure the Router as a Standard Wireless Router • Name (SSID) - The wireless network name of the router. • Mode - The current wireless working mode. • Channel - The current wireless channel. • Channel Width - The current wireless channel width. •... -
Page 24: Network
Chapter 4 Configure the Router as a Standard Wireless Router 4. 3. Network 4. 3. 1. 1. Visit http://tplinkwifi.net, and log in with the username and password you set for the router. 2. Go to Network > WAN. 3. Configure the IP parameters of the WAN and click Save. Dynamic IP If your ISP provides the DHCP service, please select Dynamic... - Page 25 Chapter 4 Configure the Router as a Standard Wireless Router • Get IP with Unicast DHCP - A few ISPs’ DHCP servers do not support the broadcast applications. If you cannot get the IP address normally, you can choose this option. (It is rarely required.) Static IP If your ISP provides a static or fixed IP address, subnet mask, default gateway and DNS...
- Page 26 Chapter 4 Configure the Router as a Standard Wireless Router • User Name/Password - Enter the user name and password provided by your ISP. These fields are case-sensitive. • Confirm Password - Enter the Password provided by your ISP again to ensure the password you entered is correct.
-
Page 27: Bigpond Cable
Chapter 4 Configure the Router as a Standard Wireless Router Note: • Only when you have configured the system time on the System Tools > Time Settings page, will the time- based connecting functions take effect. • Sometimes the connection cannot be terminated although you have specified the Max Idle Time because some applications are visiting the internet continually in the background. - Page 28 Chapter 4 Configure the Router as a Standard Wireless Router • User Name/Password - Enter the user name and password provided by your ISP. These fields are case-sensitive. • Auth Server - Enter the authenticating server IP address or host name. •...
- Page 29 Chapter 4 Configure the Router as a Standard Wireless Router L2TP If your ISP provides L2TP connection, please select L2TP. • User Name/Password - Enter the user name and password provided by your ISP. These fields are case-sensitive. • Confirm Password - Enter the Password provided by your ISP again to ensure the password you entered is correct.
- Page 30 Chapter 4 Configure the Router as a Standard Wireless Router field. Otherwise, enter the number of minutes you want to have elapsed before your internet access disconnects. • Connect Automatically - The connection can be re-established automatically when it is down. •...
- Page 31 Chapter 4 Configure the Router as a Standard Wireless Router • Connect/Disconnect - Click this button to connect or disconnect immediately. • Dynamic IP/ Static IP - Select either as required by your ISP. If Static IP is selected, please enter the IP address, subnet marsk, gateway and DNS also provided by your ISP.
-
Page 32: Iptv
Chapter 4 Configure the Router as a Standard Wireless Router • Subnet Mask - An address code that determines the size of the network. Normally 255.255.255.0 is used as the subnet mask. Note: • If you have changed the IP address, you must use the new IP address to log in. •... -
Page 33: Wireless
Chapter 4 Configure the Router as a Standard Wireless Router 2. Go to Network > Clone. 3. Configure the WAN MAC address and click Save. • WAN MAC Address - This field displays the current MAC address of the WAN port. If your ISP requires you to register the MAC address, please enter the correct MAC address in this field. - Page 34 Chapter 4 Configure the Router as a Standard Wireless Router • Wireless - Enable or disable wireless function as needed. • Wireless Network Name - Enter a string of up to 32 characters. The default SSID is TP-Link_XXXX (XXXX indicates the last unique four numbers of each router’s MAC address).
- Page 35 Chapter 4 Configure the Router as a Standard Wireless Router 4. 4. 2. WPS (Wi-Fi Protected Setup) can help you to quickly and securely connect to a wireless network. This section will guide you to add a new wireless device to your router’s network via WPS.
-
Page 36: Wireless Security
Chapter 4 Configure the Router as a Standard Wireless Router 2. Select Enter the new device’s PIN, enter your client device’s current PIN in the filed and click Connect. 3. A success message will appear on the WPS page if the client device has been successfully added to the router’s network. - Page 37 Chapter 4 Configure the Router as a Standard Wireless Router • Disable Security - The wireless security function can be enabled or disabled. If disabled, wireless clients can connect to the router without a password. It’s strongly recommended to choose one of the following modes to enable security. •...
-
Page 38: Wireless Mac Filtering
Chapter 4 Configure the Router as a Standard Wireless Router • Group Key Update Period - Specify the group key update interval in seconds. The value should be 30 or above. Enter 0 to disable the update. • - It is based on the IEEE 802.11 standard. •... -
Page 39: Wireless Advanced
Chapter 4 Configure the Router as a Standard Wireless Router 4. Select Allow the stations specified by any enabled entries in the list to access as the filtering rule. 5. Delete or disable all entries if there are any entries already. 6. - Page 40 Chapter 4 Configure the Router as a Standard Wireless Router • Transmit Power - Select High, Middle which you would like to specify for the router. High is the default setting and recommended. • Beacon Interval - Enter a value between 40-1000 milliseconds for Beacon Interval here.
-
Page 41: Wireless Statistics
Chapter 4 Configure the Router as a Standard Wireless Router 4. 4. 6. Wireless Statistics 1. Visit http://tplinkwifi.net, and log in with the username and password you set for the router. 2. Go to Wireless > Wireless Statistics to check the data packets sent and received by each client device connected to the router. -
Page 42: Dhcp
Chapter 4 Configure the Router as a Standard Wireless Router • Allow Guest To Access My Local Network - If enabled, guests can access the local network and manage it. • Guest Network Isolation - If enabled, guests are isolated from each other. •... -
Page 43: Dhcp Clients List
Chapter 4 Configure the Router as a Standard Wireless Router 3. Specify DHCP server settings and click Save. • DHCP Server - Enable or disable the DHCP server. If disabled, you must have another DHCP server within your network or else you must configure the computer manually. •... -
Page 44: Address Reservation
Chapter 4 Configure the Router as a Standard Wireless Router • Client Name - The name of the DHCP client. • MAC Address - The MAC address of the DHCP client. • Assigned IP - The IP address that the outer has allocated to the DHCP client. •... -
Page 45: Forwarding
LAN and realize some specific functions. The TP-Link router includes four forwarding rules. If two or more rules are set, the priority of implementation from high to low is Virtual Servers, Port Triggering, UPNP and DMZ. -
Page 46: Port Triggering
Chapter 4 Configure the Router as a Standard Wireless Router 4. Click New. Select HTTP from the Common Service Port list. The service port, internal port and protocol will be automatically filled in. Enter the PC’s IP address 192.168.0.100 in the IP Address field. - Page 47 Chapter 4 Configure the Router as a Standard Wireless Router 3. Click New. Select the desired application from the Common Applications list. The trigger port amd incoming ports will be automatically filled in. The following picture takes application MSN Gaming Zone as an example.
-
Page 48: Upnp
Chapter 4 Configure the Router as a Standard Wireless Router 2. Visit http://tplinkwifi.net, and log in with the username and password you set for the router. 3. Go to Forwarding > DMZ. 4. Select Enable and enter the IP address 192.168.0.100 in the DMZ Host IP Address filed. -
Page 49: Security
Chapter 4 Configure the Router as a Standard Wireless Router Tips: • UPnP is enabled by default in this router. • Only the application supporting UPnP protocol can use this feature. • UPnP feature needs the support of operating system (e.g. Windows Vista/ Windows 7/ Windows 8, etc. Some of operating system need to install the UPnP components). - Page 50 Chapter 4 Configure the Router as a Standard Wireless Router • Firewall - A firewall protects your network from internet attacks. • SPI Firewall - SPI (Stateful Packet Inspection, also known as dynamic packet filtering) helps to prevent cyber attacks by tracking more state per session. It validates that the traffic passing through the session conforms to the protocol.
-
Page 51: Advanced Security
Chapter 4 Configure the Router as a Standard Wireless Router • FTP ALG - To allow FTP clients and servers to transfer data across NAT, keep the default Enable. • TFTP ALG - To allow TFTP clients and servers to transfer data across NAT, keep the default Enable. -
Page 52: Local Management
Chapter 4 Configure the Router as a Standard Wireless Router • ICMP-FLOOD Packets Threshold (5~3600) - The default value is 50. Enter a value between 5 ~ 3600. When the number of the current ICMP-FLOOD packets is beyond the set value, the router will startup the blocking function immediately. •... -
Page 53: Remote Management
Chapter 4 Configure the Router as a Standard Wireless Router 1 ) Select Only the PCs listed can browse the built-in web pages to perform Administrator tasks. 2 ) Enter the MAC address of each PC separately. The format of the MAC address is XX-XX-XX-XX-XX-XX (X is any hexadecimal digit). -
Page 54: Parental Controls
For example, you want the children’s PC with the MAC address 00-11-22-33-44-AA can access www.tp-link.com on Saturday only while the parent PC with the MAC address 00-11-22-33-44-BB is without any restriction. -
Page 55: Access Control
(e.g. target_1) for the target in the Target Description field and enter the domain name, either the full name or the keywords (for example TP-Link) in the Add URL Address field. Note: Any URL address with keywords in it (e.g. www.tp-link.com) will be blocked or allowed. - Page 56 Chapter 4 Configure the Router as a Standard Wireless Router 3 ) Click Save. 4. Go to Access Control > Schedule and configure the schedule settings: 1 ) Click New. 2 ) Create a unique description (e.g. schedule_1) for the schedule in the Schedule Description field and set the...
-
Page 57: Advanced Routing
Chapter 4 Configure the Router as a Standard Wireless Router 3 ) Leave the status as Enabled as click Save. 6. Select Enable Internet Access Control to enable Access Control function. 7. Select Allow the packets specified by any enabled access control policy to pass through the Router as the default filter policy and click Save. -
Page 58: System Routing Table
Chapter 4 Configure the Router as a Standard Wireless Router ¾ To add static routing entries: 1. Click New. 2. Enter the following information. • Destination IP Address - The Destination Network is the address of the network or host that you want to assign to a static route. •... -
Page 59: Bandwidth Control
Chapter 4 Configure the Router as a Standard Wireless Router • Destination Network - The Destination Network is the address of the network or host to which the static route is assigned. • Subnet Mask - The Subnet Mask determines which portion of an IP address is the network portion, and which portion is the host portion. -
Page 60: Rule List
Chapter 4 Configure the Router as a Standard Wireless Router 4. 12. 2. Rule List 1. Visit http://tplinkwifi.net, and log in with the username and password you set for the router. 2. Go to Bandwidth Control and you can view and configure the Bandwidth Control rules. •... -
Page 61: Binding Settings
Chapter 4 Configure the Router as a Standard Wireless Router 4. 13. 1. Binding Settings 1. Visit http://tplinkwifi.net, and log in with the username and password you set for the router. 2. Go to IP & MAC Binding > Binding Settings. -
Page 62: Dynamic Dns
Chapter 4 Configure the Router as a Standard Wireless Router • MAC Address - The MAC address of the listed computer on the LAN. • IP Address - The assigned IP address of the listed computer on the LAN. • Status - Indicates whether or not the MAC and IP addresses are bound. - Page 63 Chapter 4 Configure the Router as a Standard Wireless Router To set up for DDNS, follow these instructions: 1. Enter the Domain Name you received from dynamic DNS service provider here. 2. Enter the Username for your DDNS account. 3. Enter the Password for your DDNS account.
-
Page 64: Comexe Ddns
Chapter 4 Configure the Router as a Standard Wireless Router 1. Enter the Domain Name you received from dynamic DNS service provider. 2. Enter the User Name for your DDNS account. 3. Enter the Password for your DDNS account. 4. Click Login. 5. -
Page 65: Ipv6 Status
Chapter 4 Configure the Router as a Standard Wireless Router 4. 15. IPv6 This function allows you to enable IPv6 function and set up the parameters of the router’s Wide Area Network (WAN) and Local Area Network (LAN). 4. 15. 1. IPv6 Status 1. - Page 66 Chapter 4 Configure the Router as a Standard Wireless Router 3. Select the WAN Connection Type according to your ISP network topolopy: • Dynamic IPv6 - Connections which use dynamic IPv6 address assignment. • Static IPv6 - Connections which use static IPv6 address assignment. •...
-
Page 67: Static Ipv6
Chapter 4 Configure the Router as a Standard Wireless Router MTU. But this is rarely required, and should not be done unless you are sure it is necessary for your ISP connection. If your ISP gives you one or two DNS IPv6 addresses, select Set IPv6 DNS Server manually and enter the IPv6 DNS Server and Secondary IPv6 DNS Server into the correct fields. - Page 68 Chapter 4 Configure the Router as a Standard Wireless Router PPPoEv6 • PPP Username/Password - Enter the User Name and Password provided by your ISP. These fields are case-sensitive. • Authentication Type – Choose one authentication type from AUTO-AUTH, PAP, CHAP and MS-CHAP.
-
Page 69: Ipv6 Lan
Chapter 4 Configure the Router as a Standard Wireless Router Tunnel 6to4 • WAN Connection - Display the available WAN connection. 4. Click Save. 4. 15. 3. IPv6 LAN 1. Visit http://tplinkwifi.net, and log in with the username and password you set for the router. -
Page 70: System Tools
Chapter 4 Configure the Router as a Standard Wireless Router • Delegated - Get the IPv6 address prefix from the ISP automatically, and the device will delegate it to the LAN. • Static - Configure the Site Prefix Site Prefix Length manually. -
Page 71: Diagnostic
Chapter 4 Configure the Router as a Standard Wireless Router ¾ To set time manually: 1. Select your local Time Zone. 2. Enter the Date in Month/Day/Year format. 3. Enter the Time in Hour/Minute/Second format. 4. Click Save. ¾ To set time automatically: 1. - Page 72 In this case, ensure that the domain name you are specifying can be resolved by using Domain Name System (DNS) queries. • IP Address/Domain Name - Enter the destination IP address (such as 192.168.0.1) or Domain name (such as www.tp-link.com). • Pings Count - The number of Ping packets for a Ping connection. •...
-
Page 73: Firmware Upgrade
4. 16. 4. Firmware Upgrade TP-Link is dedicated to improving and richening the product features, giving users a better network experience. We will release the latest firmware at TP-Link official website. You can download the latest firmware file from the... -
Page 74: Backup & Restore
Chapter 4 Configure the Router as a Standard Wireless Router • The default Username: admin • The default Password: admin • The default Address: 192.168.0.1 • The default Subnet Mask: 255.255.255.0 4. 16. 6. Backup & Restore The configuration settings are stored as a configuration file in the router. You can backup the configuration file in your computer for future use and restore the router to the previous settings from the backup file when needed. -
Page 75: Password
Chapter 4 Configure the Router as a Standard Wireless Router Some settings of the router will take effect only after rebooting, including: • Change the LAN IP Address (system will reboot automatically). • Change the DHCP Settings. • Change the Working Modes. •... -
Page 76: System Log
Chapter 4 Configure the Router as a Standard Wireless Router 4. 16. 10. System Log 1. Visit http://tplinkwifi.net, and log in with the username and password you set for the router. 2. Go to System Tools > System Log, and you can view the logs of the router. •... -
Page 77: Chapter 5. Configure The Router As An Access Point
Chapter Configure the Router as an Access Point This chapter presents how to configure the various features of the router working as an Access Point. It contains the following sections: • Status • Operation Mode • Network • Wireless • DHCP •... -
Page 78: Status
Chapter 5 Configure the Router as an Access Point 5. 1. Status 1. Visit http://tplinkwifi.net, and log in with the username and password you set for the router. 2. Go to Status. You can view the current status information of the router in Access Point Mode. -
Page 79: Operation Mode
Chapter 5 Configure the Router as an Access Point • Name(SSID) - The wireless network name of the router. • Mode - The current wireless mode which the router works on. • Channel - The current wireless channel. • Channel Width - The current wireless channel width. -
Page 80: Wireless
Chapter 5 Configure the Router as an Access Point • Type - Either select Smart IP(DHCP) to get IP address from DHCP server, or Static IP to configure IP address manually. • MAC Address - The physical address of the LAN ports. The value can not be changed. •... - Page 81 Chapter 5 Configure the Router as an Access Point • Wireless - Enable or disable wireless function as needed. • Wireless Network Name - Enter a string of up to 32 characters. The default SSID is TP-Link_XXXX (XXXX indicates the last unique four numbers of each router’s MAC address).
- Page 82 Chapter 5 Configure the Router as an Access Point 5. 4. 2. WPS (Wi-Fi Protected Setup) can help you to quickly and securely connect to a wireless network. This section will guide you to add a new wireless device to your router’s network quickly via WPS.
-
Page 83: Wireless Security
Chapter 5 Configure the Router as an Access Point 2. Select Enter the new device PIN, enter your client device’s current PIN in the filed and click Connect. 3. A success message will appear on the WPS page if the client device has been successfully added to the router’s network. - Page 84 Chapter 5 Configure the Router as an Access Point • Disable Wireless Security - The wireless security function can be enabled or disabled. If disabled, wireless clients can connect to the router without a password. It’s strongly recommended to choose one of the following modes to enable security. •...
-
Page 85: Wireless Mac Filtering
Chapter 5 Configure the Router as an Access Point • Group Key Update Period - Specify the group key update interval in seconds. The value should be 30 or above. Enter 0 to disable the update. • - It is based on the IEEE 802.11 standard. •... -
Page 86: Wireless Advanced
Chapter 5 Configure the Router as an Access Point 4. Select Allow the stations specified by any enabled entries in the list to access as the filtering rule. 5. Delete all or disable all entries if there are any entries already. 6. - Page 87 Chapter 5 Configure the Router as an Access Point • Transmit Power - Select High, Middle which you would like to specify for the router. High is the default setting and recommended. • Beacon Interval - Enter a value between 40-1000 milliseconds for Beacon Interval here.
-
Page 88: Wireless Statistics
Chapter 5 Configure the Router as an Access Point 5. 4. 6. Wireless Statistics 1. Visit http://tplinkwifi.net, and log in with the username and password you set for the router. 2. Go to Wireless > Wireless Statistics to check the data packets sent and received by each client device connected to the router. -
Page 89: Dhcp
Chapter 5 Configure the Router as an Access Point • Rate - The unit for the Throughput. • Run Time - How long the Throughput Monitor runs. • Transmit - Wireless transmit rate information. • Receive - Wireless receive rate information. Click Start Stop... - Page 90 Chapter 5 Configure the Router as an Access Point • DHCP Server - Enable or disable the DHCP server. If disabled, you must have another DHCP server within your network or else you must configure the computer manually. • Start IP Address - Specify an IP address for the DHCP Server to start with when assigning IP addresses.
-
Page 91: Dhcp Clients List
Chapter 5 Configure the Router as an Access Point 5. 5. 2. DHCP Clients List 1. Visit http://tplinkwifi.net, and log in with the username and password you set for the router. 2. Go to DHCP > DHCP Clients List to view the information of the clients connected to the router. -
Page 92: System Tools
Chapter 5 Configure the Router as an Access Point 2. Go to DHCP > Address Reservation. 3. Click Add New and fill in the blank. 1 ) Enter the MAC address (in XX-XX-XX-XX-XX-XX format.) of the client for which you want to reserve an IP address. 2 ) Enter the IP address (in dotted-decimal notation) which you want to reserve for the client. - Page 93 Chapter 5 Configure the Router as an Access Point 1. Visit http://tplinkwifi.net, and log in with the username and password you set for the router. 2. Go to System Tools > Time Settings. ¾ To set time manually: 1. Select your local Time Zone.
-
Page 94: Diagnostic
In this case, ensure that the domain name you are specifying can be resolved by using Domain Name System (DNS) queries. • IP Address/Domain Name - Enter the destination IP address (such as 192.168.0.1) or Domain name (such as www.tp-link.com). • Pings Count - The number of Ping packets for a Ping connection. •... -
Page 95: Firmware Upgrade
5. 6. 4. Firmware Upgrade TP-Link is dedicated to improving and richening the product features, giving users a better network experience. We will release the latest firmware at TP-Link official website. You can download the latest firmware file from the Support page of our website www.tp-link.com... -
Page 96: Backup & Restore
Chapter 5 Configure the Router as an Access Point • The default Username: admin • The default Password: admin • The default Address: 192.168.0.1 • The default Subnet Mask: 255.255.255.0 5. 6. 6. Backup & Restore The configuration settings are stored as a configuration file in the router. You can backup the configuration file in your computer for future use and restore the router to the previous settings from the backup file when needed. -
Page 97: Password
Chapter 5 Configure the Router as an Access Point Some settings of the router will take effect only after rebooting, including: • Change the LAN IP address (the system will reboot automatically). • Change the DHCP settings. • Change the Working Modes. •... -
Page 98: System Log
Chapter 5 Configure the Router as an Access Point 5. 6. 10. System Log 1. Visit http://tplinkwifi.net, and log in with the username and password you set for the router. 2. Go to System Tools > System Log, and you can view the logs of the router. •... - Page 99 Chapter 5 Configure the Router as an Access Point • From - Your mail box address. The router will connect it to send logs. • - Recipient’s mail address. The destination mailbox which will receive logs. • SMTP Server - Your smtp server. It corresponds with the mailbox filled in the From field.
- Page 100 Chapter 5 Configure the Router as an Access Point • Mail Log - Click to send an email of current logs manually according to the address and validation information set in Mail Settings. • Clear Log - All the logs will be deleted from the router permanently, not just from the page.
-
Page 101: Chapter 6. Configure The Router As A Repeater
Chapter Configure the Router as a Repeater This chapter presents how to configure the various features of the router working as a Repeater. It contains the following sections: • Status • Operation Mode • Network • Wireless • DHCP • System Tools •... -
Page 102: Status
Chapter 6 Configure the Router as a Repeater 6. 1. Status 1. Visit http://tplinkwifi.net, and log in with the username and password you set for the router. 2. Go to Status. You can view the current status information of the router in Repeater Mode. -
Page 103: Operation Mode
Chapter 6 Configure the Router as a Repeater • Channel - The current wireless channel. • Channel Width - The current wireless channel width. • MAC Address - The physical address of the router. • WDS Status - The status of the WDS connection is displayed. •... -
Page 104: Wireless
Chapter 6 Configure the Router as a Repeater • Type - Either select Smart IP(DHCP) to get IP address from DHCP server, or Static IP to configure IP address manually. • MAC Address - The physical address of the LAN ports. The value can not be changed. •... -
Page 105: Extended Network
Chapter 6 Configure the Router as a Repeater 4. The SSID and MAC Address of the network will be filled automatically in the corresponding fields. Enter its password if any and click Save. 6. 4. 2. Extended Network 1. Visit http://tplinkwifi.net, and log in with the username and password you set for the router. -
Page 106: Wireless Mac Filtering
Chapter 6 Configure the Router as a Repeater • Extended SSID - Either use the Copy Host SSID button to automatically copy the main router/AP’s SSID or enter a new one (up to 32 characters long). This field is case- sensitive. -
Page 107: Wireless Advanced
Chapter 6 Configure the Router as a Repeater 5. Delete all or disable all entries if there are any entries already. 6. Click Add New and fill in the blank. 1 ) Enter the MAC address 00-0A-EB-B0-00-0B/00-0A-EB- 00-07-5F in the MAC Address field. 2 ) Enter wireless client A/B in the Description field. - Page 108 Chapter 6 Configure the Router as a Repeater • Transmit Power - Select High, Middle which you would like to specify for the router. High is the default setting and recommended. • Beacon Interval - Enter a value between 40-1000 milliseconds for Beacon Interval here.
-
Page 109: Wireless Statistics
Chapter 6 Configure the Router as a Repeater 6. 4. 5. Wireless Statistics 1. Visit http://tplinkwifi.net, and log in with the username and password you set for the router. 2. Go to Wireless > Wireless Statistics to check the data packets sent and received by each client device connected to the router. -
Page 110: Dhcp Clients List
Chapter 6 Configure the Router as a Repeater • DHCP Server - Enable or disable the DHCP server. If disabled, you must have another DHCP server within your network or else you must configure the computer manually. • Start IP Address - Specify an IP address for the DHCP Server to start with when assigning IP addresses. -
Page 111: System Tools
Chapter 6 Configure the Router as a Repeater • Client Name - The name of the DHCP client. • MAC Address - The MAC address of the DHCP client. • Assigned IP - The IP address that the router has allocated to the DHCP client. •... - Page 112 Chapter 6 Configure the Router as a Repeater 1. Visit http://tplinkwifi.net, and log in with the username and password you set for the router. 2. Go to System Tools > Time Settings. ¾ To set time manually: 1. Select your local Time Zone.
-
Page 113: Diagnostic
In this case, ensure that the domain name you are specifying can be resolved by using Domain Name System (DNS) queries. • IP Address/Domain Name - Enter the destination IP address (such as 192.168.0.1) or Domain name (such as www.tp-link.com). • Pings Count - The number of Ping packets for a Ping connection. •... -
Page 114: Firmware Upgrade
6. 6. 4. Firmware Upgrade TP-Link is dedicated to improving and richening the product features, giving users a better network experience. We will release the latest firmware at TP-Link official website. You can download the latest firmware file from the Support page of our website www.tp-link.com... -
Page 115: Backup & Restore
Chapter 6 Configure the Router as a Repeater • The default Username: admin • The default Password: admin • The default Address: 192.168.0.1 • The default Subnet Mask: 255.255.255.0 6. 6. 6. Backup & Restore The configuration settings are stored as a configuration file in the router. You can backup the configuration file in your computer for future use and restore the router to the previous settings from the backup file when needed. -
Page 116: Password
Chapter 6 Configure the Router as a Repeater Some settings of the router will take effect only after rebooting, including: • Change the LAN IP Address (system will reboot automatically). • Change the DHCP Settings. • Change the Working Modes. •... -
Page 117: System Log
Chapter 6 Configure the Router as a Repeater 6. 6. 10. System Log 1. Visit http://tplinkwifi.net, and log in with the username and password you set for the router. 2. Go to System Tools > System Log, and you can view the logs of the router. •... - Page 118 Chapter 6 Configure the Router as a Repeater • From - Your mail box address. The router will connect it to send logs. • - Recipient’s mail address. The destination mailbox which will receive logs. • SMTP Server - Your smtp server. It corresponds with the mailbox filled in the From field.
- Page 119 Chapter 6 Configure the Router as a Repeater • Mail Log - Click to send an email of current logs manually according to the address and validation information set in Mail Settings. • Clear Log - All the logs will be deleted from the router permanently, not just from the page.
- Page 120 Chapter 6 Configure the Router as a Repeater...
- Page 121 Q1. What should I do if I forget my wireless password? The default wireless password is printed on the label of the router. If the password has been altered, please connect your computer to the router using an Ethernet cable and follow the steps below: 1.
- Page 122 3 ) Click LAN settings and deselect the following three options, and click OK. 4 ) Go to Advanced > Restore advanced settings, and click to save the settings.
- Page 123 • Use another web browser or computer to log in again. • Reset the router to its factory default settings and try again. • If the login still fails, please contact the technical support. Q4. How do I use the WDS Bridging function to extend my wireless network? example, my house covers a large area.
- Page 124 3. Survey the SSID to be bridged: 1 ) Go to Wireless > Wireless Settings and click Enable WDS Bridging. 2 ) Click Survey, locate the host router’s SSID and click Choose. 3 ) If the host router is set with a wireless password, you should enter its wireless password.
- Page 125 If the IP address is a valid one, please try the following: • Your computer might not recognize any DNS server addresses. Please manually configure DNS server. 1 ) Go to DHCP. 2 ) Enter 8.8.8.8 as Primary DNS, and click Save. Tips: 8.8.8.8 is a safe and public DNS server operated by Google.
- Page 126 • Modify the LAN IP address of the router. Note: Most TP-Link routers use 192.168.0.1/192.168.1.1 as their default LAN IP address, which may conflict with the IP range of your existent ADSL modem/router. If so, the router is not able to communicate with your modem and cause you can’t access the internet.
- Page 127 4 ) Select your WAN Connection Type and fill in other parameters. 5 ) Click Save. 6 ) Restart the modem and the router. • Please upgrade the firmware of the router. If you’ve tried every method above but still cannot access the internet, please contact the technical support.
- Page 128 Windows configuration utility is disabled or you are running another wireless configuration tool to connect the wireless network. 2 ) Exit the wireless configuration tool (the TP-Link Utility, for example). 3 ) Select and right click...
- Page 129 • Windows unable to connect to XXXX / Can not join this network / Taking longer than usual to connect to this network: • Check the wireless signal strength of your network. It is weak (1~3 bars), please move the router closer and try again. •...
- Page 130 Specifications are subject to change without notice. is a registered trademark of TP-Link Technologies Co., Ltd. Other brands and product names are trademarks or registered trademarks of their respective holders. No part of the specifications may be reproduced in any form or by any means or used to make any derivative such as translation, transformation, or adaptation without permission from TP-Link Technologies Co., Ltd.
- Page 131 FCC STATEMENT This equipment has been tested and found to comply with the limits for a Class B digital device, pursuant to part 15 of the FCC Rules. These limits are designed to provide reasonable protection against harmful interference in a residential installation. This equipment generates, uses and can radiate radio frequency energy and, if not installed and used in accordance with the instructions, may cause harmful interference to radio communications.
-
Page 132: Ce Mark Warning
CE Mark Warning This is a class B product. In a domestic environment, this product may cause radio interference, in which case the user may be required to take adequate measures. RF Exposure Information This device meets the EU requirements (1999/5/EC Article 3.1a) on the limitation of exposure of the general public to electromagnetic fields by way of health protection. -
Page 133: Safety Information
NCC Notice & BSMI Notice: 注意! 依據 低功率電波輻射性電機管理辦法 第十二條 經型式認證合格之低功率射頻電機,非經許可,公司、商號或使用者均不得擅 自變更頻率、加大功率或變更原設計之特性或功能。 第十四條 低功率射頻電機之使用不得影響飛航安全及干擾合法通信;經發現有干擾現象 時,應立即停用,並改善至無干擾時方得繼續使用。前項合法通信,指依電信規定作業 之無線電信。低功率射頻電機需忍受合法通信或工業、科學以及醫療用電波輻射性電機 設備之干擾。 安全諮詢及注意事項 • 請使用原裝電源供應器或只能按照本產品注明的電源類型使用本產品。 • 清潔本產品之前請先拔掉電源線。請勿使用液體、噴霧清潔劑或濕布進行清潔。 • 注意防潮,請勿將水或其他液體潑灑到本產品上。 • 插槽與開口供通風使用,以確保本產品的操作可靠並防止過熱,請勿堵塞或覆蓋 開口。 • 請勿將本產品置放於靠近熱源的地方。除非有正常的通風,否則不可放在密閉位 置中。 • 請不要私自打開機殼,不要嘗試自行維修本產品,請由授權的專業人士進行此項 工作。 Продукт сертифіковано згідно с правилами системи УкрСЕПРО на відповідність вимогам... - Page 134 • The plug considered as disconnect device of adapter. • Use only power supplies which are provided by manufacturer and in the original packing of this product. If you have any questions, please don’t hesitate to contact us. Explanations of the symbols on the product label Symbol Explanation DC voltage...