Table of Contents
Advertisement
Quick Links
Installation Instructions
Sunrider
www.Bestop.com
- We're here to help! Visit our web site and click on
INSTALLATION TIME
3 Hours
TOOLS
#2
®
US Patents 5979968, 5765903
SKILL LEVEL
3 - Moderately Diffi cult
T30
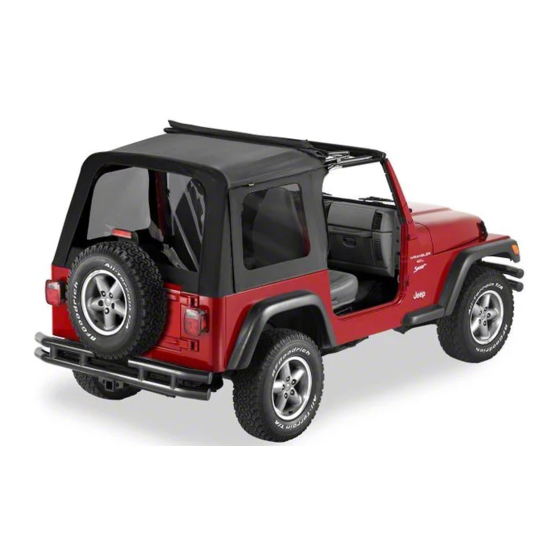
Vehicle Application
• Jeep TJ
2003 – 2006
Part Number: 51719
"Ask a
Question". Click here for more
Jeep Accessories by Bestop.
Advertisement
Table of Contents

Related Manuals for Bestop Sunrider


Summary of Contents for Bestop Sunrider
-
Page 1: Installation Instructions
US Patents 5979968, 5765903 www.Bestop.com - We’re here to help! Visit our web site and click on “Ask a Question”. Click here for more Jeep Accessories by Bestop. INSTALLATION TIME SKILL LEVEL 3 Hours 3 - Moderately Diffi cult TOOLS... - Page 2 Sunrider ® – Installation Instructions Parts List and Hardware Identifi cation Top Fabric Qty - 1 Quarter Window, Right Qty - 1 Quarter Window, Left Qty - 1 Rear Window Qty - 1 Windshield Header Trim Qty - 1 Outboard Rear Bow...
- Page 3 Sunrider ® – Installation Instructions 10-32 Shoulder Bolt, Qty - 6, #8 x 1/2" Pan Head Washer Sun Roof Links, Qty - 2, Part Number 316.54 Screw - Black, Qty - 4, Part Part Number 315.59 Number 200.48 J-Clip Strap, Qty - 1, 10-32 x 1.25 Screw, Qty - 2,...
- Page 4 Sunrider ® – Installation Instructions When reinstalling Speak- Install Rear Bow Brackets er Pods, be careful not to pinch the wires between Locate the parts of the Right and Left Rear Bow the edge of the Speaker Pod and the Sport Bar.
- Page 5 Sunrider ® – Installation Instructions Assemble Door Surrounds Install Door Surround and Front and Rear Door Assemblies Surround Brackets Orient the Left and Right Door Surround Assem- Locate the Left and Right Door Surrounds, the Front blies on the vehicle with the brackets toward the Door Surround Brackets and the Left and Right Rear inside.
- Page 6 Sunrider ® – Installation Instructions Install Door Surround Install Side Bows Assemblies Secure the bottom of the Door Surround to the ve- Locate the Left and Right Side Bows in the parts hicle using a 5/16-18 x 1 Phillips Head Bolt, a 5/16"...
- Page 7 Sunrider ® – Installation Instructions Assemble Windshield Install Windshield Header Header Linkage Locate the Windshield Header Assembly, the Orient the Windshield Header Assembly on the Sleeves and the Sun Roof Links in the parts vehicle and lay it along the top edge of the wind- kit.
- Page 8 Sunrider ® – Installation Instructions Install Tailgate Retainer Mounts Install Center Bow Locate the left and right Tailgate Retainer Mounts. Locate the Center Bow and the Plastic Bushings in Place the mounts fl ush with the edge of the tailgate the parts kit.
-
Page 9: Top Fabric
Sunrider ® – Installation Instructions Snap Top Fabric to Rear Bow Secure Top Fabric to Belt Rail Insert the plastic strips at the rear corners of the top Drape the fabric, inside out, over the tailgate, align- into the corners of the belt rails that are built into the ing the snap fl... - Page 10 Sunrider ® – Installation Instructions Secure Side Bows to Rear Snap Top Fabric to Center Bow Door Surround Brackets Reach inside the vehicle and snap the 8 snaps in To secure the Side Bows to the Rear Door Surround the middle of the top to the Center Bow.
-
Page 11: Rear Window
Sunrider ® – Installation Instructions Install Quarter Windows Install Rear Window Find the Left and Right Quarter Windows and orient Open the tailgate. Orient the Tailgate Bar with the rubber bulb facing down, in order to form a seal them with the zipper toward the inside. Start the zip- per at the front corner and close it half way. -
Page 12: Sleeves,
Sunrider ® – Installation Instructions When operating the vehicle without the Quarter Never Attempt to Open the Sun Roof While Driving Windows, the Rear Window should be removed for proper ventilation. Operating the Sun Roof Adjusting the Top The J-Clip Strap in the parts kit is to secure the fabric when the Sun roof is open. - Page 13 Sunrider ® – Installation Instructions Never Attempt to Open the Sun Roof While Driving Operating the Sun Roof Option A Option B To open the Sun Roof, slide the Sleeves on the Windshield Header Assembly To open the Sun Roof, slide the Sleeves on the Windshield Header Assembly forward to release the Sun Roof Links.
-
Page 14: Part Number
Care and Maintenance of your Bestop Product Your Bestop product is made of the fi nest materials available. To keep it looking new and for the maximum possible wear, it will need periodic cleaning and maintenance. Washing: The fabric should be washed often using soap, warm water and a soft bristle brush. Rinse with clear water to remove all traces of soap or use Bestop- recommended Bestop Cleaner and Bestop Protectant.
Need help?
Do you have a question about the Sunrider and is the answer not in the manual?
Questions and answers