Table of Contents
Advertisement
Quick Links
Advertisement
Table of Contents

Related Manuals for Philco PLD 14840


Summary of Contents for Philco PLD 14840
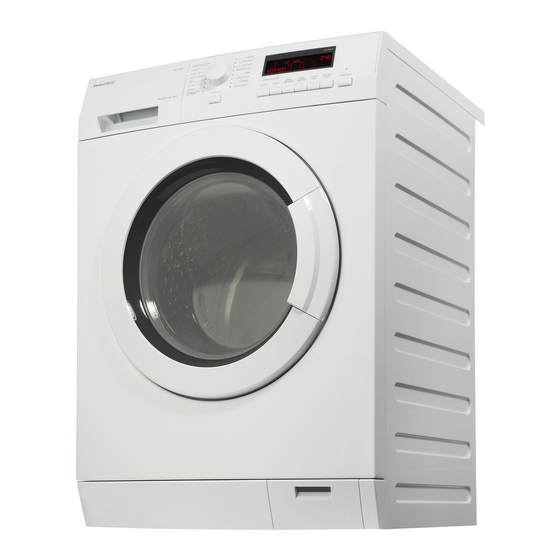
- Page 1 User manual Washing Ma- chine PLD 14840...
- Page 2 CONTENTS Safety information Before first use Safety instructions Using the appliance Technical information Helpful hints and tips Product description Care and cleaning Control panel Troubleshooting Programmes Installation Consumption values Subject to change without notice. SAFETY INFORMATION Before the installation and use of the appliance, carefully read the supplied instructions.
-
Page 3: Safety Instructions
• Obey the maximum load volume of 8 kg (refer to the “Pro- gramme chart” chapter). • If the supply cord is damaged, it must be replaced by the manufacturer, its service agent or similarly qualified persons in order to avoid a hazard. •... -
Page 4: Technical Information
• Before you connect the appliance to new • Before maintenance, deactivate the ap- pipes or pipes not used for a long time, pliance and disconnect the mains plug let the water flow until it is clean. from the mains socket. •... -
Page 5: Product Description
PRODUCT DESCRIPTION Worktop Feet for the appliance level Detergent dispenser Water drain hose Control panel Water inlet valve Door handle Mains cable Rating plate Transit bolts Drain pump Feet for the appliance level Child safety device When you activate this device, you cannot close the door. -
Page 6: Control Panel
CONTROL PANEL BAVLNA ECO BAVLNA SUPER ECO EXTRA TICHÝ SYNTETICKÉ 20 MIN - 3 KG SNADNÉ ŽEHLENĺ RYCHLÝ INTENZIVNĺ JEMNÉ D Žĺ NY ZÁCLONY VLNA/HEDVÁBĺ MÁCHÁNĺ ODSTŘED’OVÁNĺ/ ANTI-ALERGICKÝ VYPOUSTENĺ AUTO OFF On/Off button (Auto Off) The AUTO OFF function automatically de- activates the appliance to stop the energy Programme knob consumption when:... - Page 7 The display shows: The temperature of the set programme Cold water The spin speed of the set programme No Spin symbol Rinse Hold symbol 1) Only available for Spin/Drain programme. Prewash phase Washing phase Rinses phase Spin phase The phase symbols •...
- Page 8 • When the programme is completed. The child safety lock symbol comes on when this device is activated. Graphic bars The empty indicator bar appears only if the related function is available for the set programme. The indicator bar fills accordingly to the set functions. If you make a wrong selection the message Err indicates that the selection is not possible.
-
Page 9: Programmes
function increases the programme dura- • The appliance has a malfunction. tion. To deactivate/activate the acoustic sig- nals, press button and button at the This function is not available with a same time for 6 seconds. temperature lower than 40° C. If you deactivate the acoustic signals, PREWASH they continue operate only when you... - Page 10 Programme Type of load Cycle descrip- Functions Temperature Max. weight of load tion Extra Tichý White and coloured Wash PREWASH 95° - Cold cotton with normal soil. Stop with water EXTRA RINSE max. load 8 kg in the drum STAINS Rinses TIME SAVING Syntetické...
- Page 11 Programme Type of load Cycle descrip- Functions Temperature Max. weight of load tion Máchání All fabrics. One rinse with SPIN REDUCTION max. load 8 kg additives. RINSE HOLD Spin phase EXTRA RINSE Záclony Set this programme to Wash SPIN REDUCTION 60°...
-
Page 12: Consumption Values
Set this programme to have a good washing results and decrease the energy consumption. The time of the washing programme is extended. The washing temperature of the washing phase may differ from the temperature declared for the selected pro- gramme. CONSUMPTION VALUES At programme start the display shows the duration programme for the maximum load capacity. -
Page 13: Using The Appliance
USING THE APPLIANCE 1. Open the water tap. Loading the laundry 2. Connect the mains plug to the mains 1. Open the appliance door. socket. 2. Put the laundry in the drum, one item at 3. Press button to activate the appli- a time. - Page 14 Flap for powder or liquid detergent Turn it (up or down) in the correct position to use powder or liquid detergent. Always obey the instructions that you find on the packaging of the detergent products. Check the position of the flap 1.
-
Page 15: Setting And Starting A Programme
6. Press button 1. Press button to start the pro- . The indicator flashes. 2. Change the function set. gramme. The indicator of button Set the delay start The drain pump can operate for a short 1. Press button again and again until time when the appliance fills water. -
Page 16: Helpful Hints And Tips
• Press button – The door stays locked. to deactivate the appli- – You must drain the water to open the ance. After five minutes from the end of door. the programme, the energy saving func- tion automatically deactivates the appli- To drain the water: ance. -
Page 17: Care And Cleaning
areas where the water hardness is soft it is • German degrees (°dH). not necessary to use a water softener. • French degrees (°TH). To know the water hardness in your area, • mmol/l (millimol for each litre - interna- contact your local water authority. -
Page 18: Detergent Dispenser
• Start a short programme for cotton at the maximum temperature with a small quan- tity of detergent. Detergent dispenser To clean the dispenser: 1. Press the lever. 2. Pull the dispenser out. 3. Remove the top part of the liquid addi- tive compartment. - Page 19 To clean the drain pump: 1. Open the drain pump door. 2. Pull the flap out to remove it. 3. Put a container below the recess of the drain pump to collect the water that flows out. 4. Press the two levers and pull forward the drainage duct to let the water flow out.
-
Page 20: Emergency Drain
9. Clean the filter under the water tap and put it back in the pump into the special guides. 10. Make sure that you tighten correctly the filter to prevent leakages. 11. Put the flap back and close the drain pump door. -
Page 21: Troubleshooting
Put the drainage duct back and close the 2. Close the water tap. drain pump flap. 3. Remove the water inlet hose When you drain the water with the emer- 4. Put the two ends of the inlet hose in a gency drain procedure, you must activate container and let the water flow out of again the drain system:... - Page 22 Problem Possible cause Possible solution A washing programme without Set the drain programme. the drain phase is set. The function Rinse & Hold is Set the drain programme. The appliance door is Close the door correctly. open or not closed correctly.
-
Page 23: Installation
Problem Possible cause Possible solution Incorrect temperature was set. Make sure that you set the correct tem- perature. Too much laundry load. Decrease the laundry load. After the check, activate the appliance. The If the display shows other alarm codes, programme continues from the point of in- contact the service centre. - Page 24 5. Open the door. Remove the polystyr- ene piece from the door seal and all the items from the drum. 6. Put one of the polystyrene packaging elements on the floor behind the appli- ance. Carefully put down the appliance with the rear side on it.
-
Page 25: Positioning And Levelling
10. Remove the three bolts. Use the key supplied with the appliance. 11. Pull out the plastic spacers. 12. Put the plastic caps in the holes. You can find these caps in the user manual bag. Warning! Remove all the packaging We recommend that you keep the packaging and the transit bolts for and the transit bolts before you install... - Page 26 • The appliance must be level and stable. Caution! Do not put cardboard, wood or equivalent materials below the appliance feet to adjust the level. The inlet hose • Connect the hose to the appliance. Turn the inlet hose only left or right. Loose the ring nut to set it in the correct position.
-
Page 27: Water Drainage
Water-stop device The inlet hose has a water stop device. This device prevents water leaks in the hose because of its natural ageing. The red sector in the window «A» shows this fault . If this occur, close the water tap and con- tact the service centre to replace the hose. - Page 28 Without the plastic hose guide. • To a sink spigot. Refer to the illustration. Put the drain hose in the spigot and tighten it with a clip. Make sure that the drain hose makes a loop to prevent that remaining particles go in the appliance from the sink.
- Page 32 132916840-A-092013...
Need help?
Do you have a question about the PLD 14840 and is the answer not in the manual?
Questions and answers