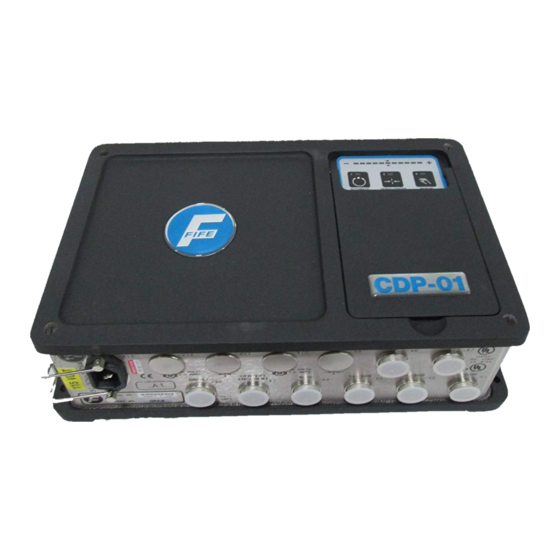
Fife CDP-01 Additional Instruction Manual
For armless recoiler application (variable ratio)
programs: 100068-02x, 100070-02x, 100094-02x and 100118-02x
Hide thumbs
Also See for CDP-01:
- Additional instruction manual (24 pages) ,
- Additional instruction manual (14 pages) ,
- Additional instruction manual (18 pages)
Summary of Contents for Fife CDP-01
- Page 1 CDP-01 Additional Instruction Manual For Armless Recoiler Application (Variable Ratio) (Programs: 100068-02X, 100070-02X, 100094-02X and 100118-02X) CDP-01 04-09-02 Figure Sheet 1-834-A...
- Page 2 CDP-01 04-09-02 Figure Sheet 1-834-A...
- Page 3 These additional instructions explain the special features of the system delivered to the customer. They are intended for being used in conjunction with the CDP-01 Reference Manual. The CDP-01 Reference Manual applies except as noted to the contrary in these instructions.
- Page 4 CDP-01 04-09-02 Figure Sheet 1-834-A...
- Page 5 START UP / SENSOR POSITIONER TO MANDREL RATIO CALIBRATION ...... 2-8 START UP / GUIDING SENSOR CALIBRATION..............2-9 START UP / SENSOR DRIVE POLARITY................2-10 START UP / MANDREL DRIVE POLARITY ................2-11 TROUBLESHOOTING FAULT DIAGNOSIS - FAULT RECTIFICATION..............3-1 CDP-01 04-09-02 Figure Sheet 1-834-A...
- Page 6 CDP-01 04-09-02 Figure Sheet 1-834-A...
-
Page 7: Application Description
A CDP-01-MH or CDP-01-MHH is used for this application. If a CDP-01-MH is used, the sensor positioner is connected to drive 1 and the mandrel is connected to drive 2. If a CDP-01-MHH is used, drive 1 is not used, the mandrel is connected to drive 2, and the sensor positioner is connected to drive 3. -
Page 8: Connecting The System Components
SUPPLEMENTARY OPERATING MANUAL Connecting the system components The system components are to be connected according to the Cable Connection Diagram contained in the documentation. CDP-01 04-09-02 Figure Sheet 1-834-A... - Page 9 SUPPLEMENTARY OPERATING MANUAL CDP-01 04-09-02 Figure Sheet 1-834-A...
-
Page 10: Operator Control Options
OVERVIEW OF FUNCTION Operator control options The CDP-01 signal amplifier can be operated by way of the CDP-01 control panel (internal operation) for setup purposes only. For normal operational control, the parallel port must be used. Control is to be supplied from a remote control panel or programmable logic controller. -
Page 11: Input Matrix - External Control
SUPPLEMENTARY OPERATING MANUAL Input Matrix - External control Programs : 100068-02X, 100070-02X and 100094-02X Inputs CDP-01 Modes External Lock (both drives) Automatic (seek, then guide) Auto Permissive (seek only) Manual (both drives) Retract Sensor / Center Mandrel Center Mandrel Only... - Page 12 Check: LED (3) lit. Setup functions can be performed and sensor modes selected, if desired. ‘Left’ Press the - or + key to set ‘Left’ or ‘Right’ to manually alter the position of the drive. ‘Right’ CDP-01 04-09-02 Figure Sheet 1-834-A...
- Page 13 AUTOMATIC Select ‘Automatic’ via external control. ’Automatic’ The panel is set to drive 1 if a CDP-01-MH is used The panel is set to drive 3 if a CDP-01-MHH is used. The sensor mode is set to Edge Right. The sensor positioner drive is switched to Automatic.
- Page 14 JOG MANDREL LEFT / RIGHT Select ‘Jog Mandrel Left’ or ‘Jog Mandrel Right’ via external control to manually alter the position of the mandrel. Note: Jogs are not allowed in Automatic mode JOG SENSOR OUT / IN CDP-01 04-09-02 Figure Sheet 1-834-A...
- Page 15 SUPPLEMENTARY OPERATING MANUAL Select ‘Jog Sensor Out’ or ‘Jog Sensor In’ via external control to manually alter the position of the sensor. Note: Jogs are not allowed in Automatic mode CDP-01 04-09-02 Figure Sheet 1-834-A...
- Page 16 Start-up / Sensor Position Transducer Calibration The following procedure must be performed while in Manual mode with all parallel inputs low. If using a CDP-01-MH, select Drive 1 by pressing key 20, If using a CDP-01-MHH, select Drive 3 by pressing key Press the Sensor key repeatedly until LED 12 is lit.
- Page 17 The LED bar graph indicates contrast. If the contrast is too low an error message is displayed (left and right outer LEDs flash). Press the Automatic key to store the settings. Press the Manual key to abort the procedure. CDP-01 04-09-02 Figure Sheet 1-834-A...
- Page 18 Start-up / Sensor Positioner To Mandrel Ratio Calibration The following procedure must be performed while in Manual mode with all parallel inputs low. If using a CDP-01-MH, select Drive 1 by pressing key If using a CDP-01-MHH, select Drive 3 by pressing key...
- Page 19 Start-up / Guiding Sensor Calibration The following procedure must be performed while in Manual mode with all parallel inputs low. If using a CDP-01-MH, select Drive 1 by pressing key If using a CDP-01-MHH, select Drive 3 by pressing key Press the Sensor key repeatedly until LED 10 is lit.
- Page 20 Start-up / Sensor Drive Polaritiy The following procedure must be performed with all parallel inputs low or the cable disconnected. If using a CDP-01-MH, select Drive 1 by pressing key If using a CDP-01-MHH, select Drive 3 by pressing key Press the Servo Center key.
- Page 21 If the mandrel moves to either end, press the Manual key and change the Servo Center polarity. Reference: CDP-01 Reference Manual, section “Servo Center Polarity”. Connect the parallel cable and select ‘Automatic’ via external control.
- Page 22 SUPPLEMENTARY OPERATING MANUAL CDP-01 04-09-02 Figure Sheet 1-834-A...
-
Page 23: Fault Diagnosis - Fault Rectification
Remedy: Select ‘Manual’ mode and change the polarity (guide direction) in EdgeR sensor mode (LED 10 lit) for drive 1 if using a CDP-01-MH or for drive 3 if using a CDP-01-MHH. Reference: CDP-01 Reference Manual, section: “Changing The Guide Direction”... - Page 24 SUPPLEMENTARY OPERATING MANUAL CDP-01 04-09-02 Figure Sheet 1-834-A...


Need help?
Do you have a question about the CDP-01 and is the answer not in the manual?
Questions and answers