Download Print this page
FIBARO FGDW-002 Operating Manual
Hide thumbs Also See for FGDW-002:

Advertisement

Quick Links

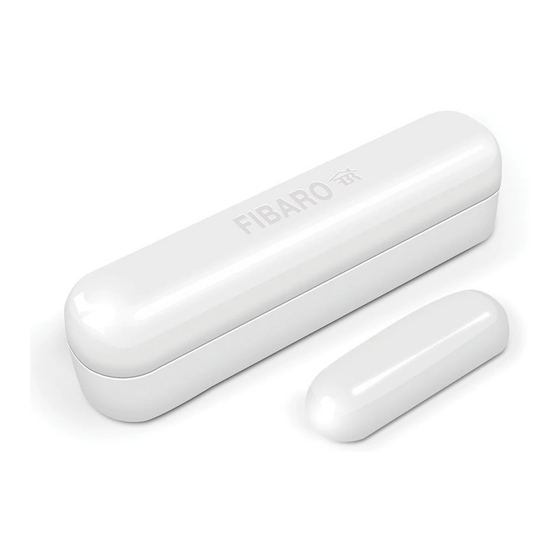
FIBARO DOOR/WINDOW SENSOR 2
CONTENTS
#1: Description and features
#2: Basic activation
#3: Adding/removing the device
#4: Physical installation
#5: Operating the device
O P E R A T I N G
M A N U A L
FGDW-002
3
#6: Association
4
#7: Advanced parameters
5
#8: Specifications
6
#9: Regulations
7
EN
v1.0
9
10
14
15

Advertisement

loading
Need help?

Need help?

Do you have a question about the FGDW-002 and is the answer not in the manual?

Questions and answers

Subscribe to Our Youtube Channel

Summary of Contents for FIBARO FGDW-002

  • Page 1 O P E R A T I N G M A N U A L FIBARO DOOR/WINDOW SENSOR 2 FGDW-002 CONTENTS v1.0 #1: Description and features #6: Association #2: Basic activation #7: Advanced parameters #3: Adding/removing the device #8: Specifications...
  • Page 2: Important Safety Information

    Compliance with safety standards: The device is designed to be used in Z-wave home automation sys- tems (e.g. FIBARO) and is complaint with IEC/UL/CSA 60950-1. In case of the integration with another system, e.g. alarm system, it is re- quired to verify the compliance with additional standards.
  • Page 3 #1: Description and features FIBARO Door/Window Sensor 2 is a wireless, battery powered Hall effect contact sensor, compatible with the Z-Wave Plus standard. Changing the device’s status will automatically send signal to the Z-Wave controller and associated devices. Sensor can be used to trigger scenes and wherever there is a need for information about opening or closing of doors, windows, garage doors, etc.
  • Page 4 #2: Basic activation 1. Take off the cover. 2. Remove the battery blocker. 3. Close the cover. 4. Add the device (see “Adding/removing the device” on page 5). 5. Install the device (see “Physical installation” on page 6). BASIC ACTIVATIOn...
  • Page 5 #3: Adding/removing the device Adding (Inclusion) - Z-Wave device learning mode, allowing to add NOTE the device to existing Z-Wave network. Adding Security To add the device to the Z-Wave network: Mode must be per- 1. Close the cover. formed up to 2 meters from the controller.
  • Page 6 #4: Physical installation To install the Door/Window Sensor: 1. Peel off the protective layer from the sticker on the device. 2. Stick the device onto the door/window frame. 3. Peel off the protective layer from the sticker on the magnet. 4.
  • Page 7 Controlling the Door/Window Sensor 2 with FIBARO Home Center controller: After adding the Sensor to the FIBARO System, it will be represented by two or three icons in Home Center interface. First icon informs about the status of magnetic sensor (open/close), second icon displays temperature measured by the built-in sensor.
  • Page 8 Replacing the battery: described in “Adding/ removing the device” In FIBARO Home Center controller current battery level is displayed on page 5. in the interface. If a battery icon turns red, it means the battery needs replacement.
  • Page 9 #6: Association Association (linking devices) - direct control of other devices within NOTE the Z-Wave system network e.g. Dimmer, Relay Switch, Roller Shutter or scene (may be controlled only through a Z-Wave controller). Association allows transfer control commands between devices without par- The Door/Window Sensor 2 provides the association of three ticipation of the main controller.
  • Page 10 #7: Advanced parameters The Door/Window Sensor 2 allows to customize its operation to user’s NOTE needs. Settings are available in the FIBARO interface as simple op- tions that may be chosen by selecting the appropriate box. Entering invalid value of parameter will re-...
  • Page 11 3. Associations in Z-Wave network Security Mode This parameter defines how commands are sent in specified associa- tion groups: as secure or non-secure. Parameter is active only in Z-Wave network Security Mode. It does not apply to 1st group “Lifeline”. Available settings: 0 - none of the groups sent as secure 1 - 2nd group ”On/Off”...
  • Page 12 15. Association for closing - time delay Time that must elapse from closing to send the command frame to devices in 2nd association group. Available settings: 0-32400 - time in seconds 2 [bytes] Default setting: Parameter size: 30. Tamper - alarm cancellation delay Time period after which a tamper alarm will be cancelled.
  • Page 13 53. Temperature offset The value to be added to the actual temperature, measured by the sen- sor (temperature compensation). Available settings: -1000–1000 (-100–100°C, 0.1°C step) 0 (0°C ) 2 [bytes] Default setting: Parameter size: 54. Temperature alarm reports Temperature alarms reported to the Z-Wave controller. Thresholds are set in parameters 55 and 56.
  • Page 14 #8: Specifications Power supply: 3.6V DC battery CAUTION Using batteries other Battery type: ER14250 ½ AA than specified may result in explosion. Battery life: est. 2 years (default settings) Dispose of properly, observing environ- EU directives compliance: R&TTE 1999/5/EC mental protection RoHS 2011/65/EU rules.
  • Page 15 All information, including, but not limited to, information regarding the features, functionality, and/or other product specification are subject to change without notice. Fibaro reserves all rights to revise or upda- te its products, software, or documentation without any obligation to notify any individual or entity.
  • Page 16 第十二條 經型式認證合格之低功率射頻電機,非經許可,公司、商號或使用 者均不得擅自變更頻率、加大功率或變更原設計之特性及功能。 第十四條 低功率射頻電機之使用不得影響飛航安全及干擾合法通信;經發現 有干擾現象時,應立即停用,並改善至無干擾時方得繼續使用。 前項合法通信,指依電信法規定作業之無線電通信。 低功率射頻電機須忍受合法通信或工業、科學及醫療用電波輻射性 電機設備之干擾。 Declaration of conformity Hereby, Fibar Group S.A. declares that FIBARO Door/Window Sensor 2 is in compliance with the essential requirements and other relevant provisions of Directive 1999/5/EC. REGULATIOnS...

This manual is also suitable for:

Door/window sensor 2