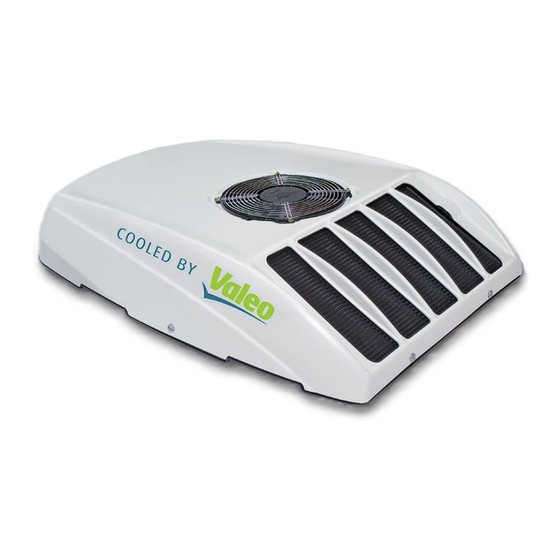
Valeo Citysphere S Installation Instructions Manual
Hide thumbs
Also See for Citysphere S:
- Operating and service instructions (44 pages) ,
- Operating and service instructions (80 pages)
Summary of Contents for Valeo Citysphere S
- Page 1 AIR CONDITIONING CITYSPHERE S Standard Installation instructions Rev. 06/2014 Id.No. 11120621A...
-
Page 2: Table Of Contents
Content Citysphere S Content 1. Safety information and regulations ........3 1.1. General safety regulations ..........3 1.2. Safety instructions for maintenance ........ 3 2. Preparation for installation ............ 5 2.1. Safety instructions ............5 2.2. Conditions for assembly ..........5 2.3. -
Page 3: Safety Information And Regulations
• Never heat refrigerant cylinders with a naked flame. • If the Citysphere S is retrofitted, the empty weight and possibly • Liquid refrigerant must never be allowed to come into contact with the height of the vehicle are changed. Then, within the scope of body parts. - Page 4 Safety information and regulations Citysphere S • Before performing any work allow the system to cool down completely. Risk of injury due to burns on the condenser, compressor and refrigerant hoses. • Installation, maintenance and repair work must be carried out by duly qualified personnel.
-
Page 5: Preparation For Installation
Citysphere S Preparation for installation 2. Preparation for installation 2.3. Preparations on vehicle’s roof 2.1. Safety instructions Danger of severe injuries or Warning! fatal fall! • The safety instructions outlined on pages 3 and 4 must be read and noted before starting work. -
Page 6: Fastening Drill Holes
Preparation for installation Citysphere S 2.5. Fastening drill holes The air-conditioning unit is fastened to the vehicle’s shell with nuts (M8) and matching washers. For this purpose, corresponding stable retaining plates/bows must be provided on the shell. We suggest making the drill holes sufficiently large or long to compensate for the frame tolerances. -
Page 7: Cleaning The Vehicle's Roof And The Ac Unit
Citysphere S Preparation for installation 2.6. Cleaning the vehicle’s roof and the AC unit Once all cut-outs and drill holes are made on the vehicle’s roof the areas must be cleaned with compressed air. Roughen bonding area of the base pan and the roof surface according to the adhesive joint, clean with Sika Cleaner, and preprocess with Sika Primer (follow product information). -
Page 8: Mounting The Air-Conditioning Unit
Mounting the air-conditioning unit Citysphere S 3. Mounting the air-conditioning unit Danger of injuries due to air- Warning! conditioning unit crashing down 3.1. Applying the adhesive The best method for preparing sealing between the air-conditioning unit and the vehicle’s roof is to apply the adhesive material onto the base pan when the AC unit is lying. -
Page 9: Position The Air-Conditioning Unit
Citysphere S Mounting the air-conditioning unit 3.3. Fastening the unit 3.2. Position the air-conditioning unit Position the air-conditioning unit onto the roof and insert the Fix all fastening screws from inside using adequately large washers fastening bolts through the drill holes on the roof. (Follow pro- and nuts M8 and tighten them uniformly (torque: 14 ±1 Nm). -
Page 10: Connecting The Air-Conditioning Unit
Connecting the air-conditioning unit Citysphere S 4. Connecting the air-conditioning unit The plus pole must be protected after installation with the included cap to prevent anyone touching it. Use Tyco/AMP ST-GEH 2.5mm socket housing fort the control signals. 4.1. Connecting the refrigerant / water piping... - Page 11 Citysphere S Connecting the air-conditioning unit Connecting bolt (+) Signal ON Connecting plate G1+ System must be protected by a 75A (max.) 5A fuse must be used! fuse! (3.5A fuse is permitted!) Power supply must be uninterruptible! Connect system directly to the...
-
Page 12: Evacuation And Charging Of The Refrigerant Cycle
Connecting the air-conditioning unit Citysphere S 4.3. Evacuation and charging of the refrigerant cycle Danger to human life and Warnung! health! The safety instructions on page 3 and 4 must be observed. Evacuate the front box inclusive the piping. Ensure the system is leak proof. -
Page 13: Troubleshooting
Citysphere S Troubleshooting 5. Troubleshooting 5.3. Cause of faults in the air-conditioning system − defective condenser fan 5.1. General − soiled condenser fins − shortage of refrigerant in the system a) A systematic approach is advisable for troubleshooting. Appropriate action must be undertaken as described below for −... - Page 14 memos...
- Page 15 Valeo Thermal Commercial Vehicles Germany GmbH Postfach 1371 - 82198 Gilching - Germany - Tel. +49 (0)8105 7721-0 - Fax +49 (0)8105 7721-889 www.valeo-thermalbus.com - service-valeobus@valeo.com...


Need help?
Do you have a question about the Citysphere S and is the answer not in the manual?
Questions and answers