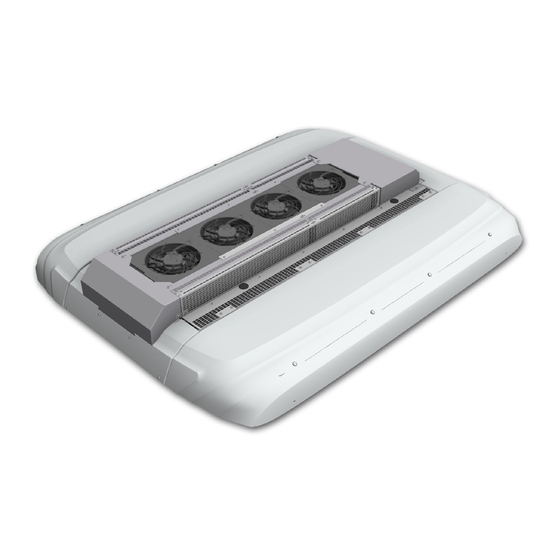
Valeo REVO-E Installation Instructions Manual
Hide thumbs
Also See for REVO-E:
- Evacuation and charging instructions (24 pages) ,
- Workshop manual (88 pages)
Table of Contents
Advertisement
Available languages
Available languages
Quick Links
Advertisement
Table of Contents

Subscribe to Our Youtube Channel
Related Manuals for Valeo REVO-E


Summary of Contents for Valeo REVO-E
- Page 1 AIR CONDITIONING REVO ® Einbauanweisung Installation instructions • Klimaanlage • Wärmepumpe • ohne Frequenzumrichter (compact) • Air conditioning unit • Heat pump • without frequency converter (compact) Rev. 06/2019 Id.No. 11120407A...
- Page 2 HINWEIS: Änderungen vorbehalten. Im Fall einer mehrsprachigen Version ist Deutsch verbindlich. Die aktuelle Fassung dieses Dokuments steht unter www.valeo-thermalbus.com zum Download bereit. / NOTE: Subject to modification. In multilingual versions the German language is binding. The latest version of this document is pro-...
-
Page 3: Table Of Contents
4.5 Fastening the unit Anschluss der Klimaanlage Connecting the air-conditioning unit 5.1 Elektrische Anschlüsse 5.1 Electrical connections 5.2 Elektrische Anschlüsse REVO-E ohne 5.2 Electrical connections REVO-E without Frequenzumrichter (compact) frequency converter (compact) 5.3 Montage des Kondenswasserschlauches 5.3 Installation of the condensate hose pipe 5.4 Anschluss und Befüllung des Heizwasser-... - Page 4 Einbauanweisung REVO-E...
-
Page 5: Allgemeines
Für kleinere oder größere Dachradien muss zwingend der kon- struktiv bedingte Spalt zwischen Anlage und Busdach durch Distanz- stücke (sind von Valeo zu beziehen) oder Aufbaurahmen ausge-glichen werden. Durch den integrierten Verdichter der REVO-E bedarf es einer entprechenden Steifigkeit des Busdaches. Detaillierte Informationen sind bei Valeo zu erfragen. -
Page 6: Sicherheitsbestimmungen
– benachbarte, unter Spannung stehende Teile abdecken oder abschranken Die Nichtbeachtung der Einbauanweisung und der darin enthaltenen Hinweise führen zum Haftungsausschluss seitens Valeo. Gleiches gilt für nicht fachmännisch oder nicht unter Verwendung von Originaler- Elektrische Leitungen und Bedienelemente der Klimaanlage müssen im satzteilen durchgeführte Reparaturen. - Page 7 Einbauanweisung REVO-E Sicherheitsbestimmungen Gefährdung von Leben Warnung! und Gesundheit! Bei Arbeiten auf dem Busdach bzw. auf Hubeinrichtungen, Rüs- tungen etc. geeignete Maßnahmen zum Verhindern des Herabstür- zens treffen. Für das Heben der Klimaanlage ist geeignetes und sicheres Gerät zu verwenden.
-
Page 8: Vorbereitung Des Busdaches
Umluftansaugung, Ausblasöffnungen, Bohrungen für Befestigung) müs- sen am Dach angezeichnet werden. Bei Arbeiten auf dem Busdach bzw. auf Hubeinrichtungen, Rüs- HINWEIS: Zeichnungen und Dokumente sind bei Valeo anzufragen! tungen etc. geeignete Maßnahmen zum Verhindern des Herabstür- zens treffen. Gefahr von Schnittverletzungen... -
Page 9: Befestigungsbohrungen - Aufbau Mit Armaflexrahmen
Einbauanweisung REVO-E Vorbereitung des Busdaches 3.2. Befestigungsbohrungen - Aufbau mit Armaflexrahmen Die Klimaanlage wird mit dem Fahrzeuggerippe mit Muttern (M8) sowie passenden Unterlegscheiben verschraubt. Dafür müssen am Gerippe entsprechende stabile Haltebleche/Spriegel vorgesehen werden. Es wird vorgeschlagen zum Ausgleich der Toleran- zen die Bohrungen entsprechend größer vorzusehen bzw. -
Page 10: Reinigung Des Fahrzeugdaches
Vorbereitung des Busdaches Einbauanweisung REVO-E 3.3. Reinigung des Fahrzeugdaches Nachdem alle Dachausschnitte angebracht sind, muss das Dach ge- reinigt werden. 3.4. Aufbau mit Armaflexrahmen Beim Aufbau / Abdichtung der Klimaanlage mit einem Armaflexrahmen müssen die Bereiche am Fahrzeugdach mit einem entsprechenden Reiniger / Primer für die Klebung vorbehandelt werden. -
Page 11: Montage Der Klimaanlage
Einbauanweisung REVO-E Montage der Klimaanlage Montage der Klimaanlage 4.1. Anheben der Klimaanlage Das richtige Anheben der Klimaanlage muss analog der unten ge- zeigten Bilder erfolgen. ACHTUNG: Verletzungsgefahr durch he- Warnung! Die Hauben der Klimaanlage müssen geschlossen und verschraubt rabstürzende Klimaanlage! sein! Die Unterstützung der Seitenhauben ist unbedingt erforderlich, da es... - Page 12 Montage der Klimaanlage Einbauanweisung REVO-E Hebepunkt Bereiche für das Ansetzen der Saugnäpfe des Trage- gestells Positionen der Hebepunkte Bild 10:...
-
Page 13: Hebegestell
Einbauanweisung REVO-E Montage der Klimaanlage 4.2. Hebegestell Hakenausführung verstellbar für unterschiedliche Schwerpunkte je nach Ausstattung 4x Sauger für die Hauben DETAIL A Sicherungshaken feste Scheibe 4x Sicherungshaken - 90° drehbar Feder bewegliche Scheibe Bild 11:... -
Page 14: Aufbringen Des Klebers
Montage der Klimaanlage Einbauanweisung REVO-E 4.3. Aufbringen des Klebers Verletzungsgefahr durch Warnung! herabstürzende Klimaanlage oder Teilen davon! Absturzsicherung der Anlage bei Arbeiten unter der schwebenden Last ist unbedingt vorzusehen. 1. Den Armaflexrahmen mit Druckluft von Staub und Schmutz befreien. 2. Die Kleberaupe muss mittig zum Armaflexrahmen aufgebracht werden. -
Page 15: Aufsetzen Der Klimaanlage
Einbauanweisung REVO-E Montage der Klimaanlage 4.4. Aufsetzen der Klimaanlage Klimaanlage auf das Fahrzeugdach heben, mittig aufsetzen und die Befestigungsbolzen durch die Bohrungen im Dach einführen, Montagehilfen verwenden (Verarbeitungszeit, angegeben durch den Kleberhersteller, beachten!). ACHTUNG: Auf die Kondenswasserstutzen achten! Bei Berührung mit dem Rohbau können diese beschädigt werden. -
Page 16: Anschluss Der Klimaanlage
Anschluss der Klimaanlage Einbauanweisung REVO-E Anschluss der Klimaanlage 5.1. Elektrische Anschlüsse Hochspannung! Warnung! Vorsicht Lebensgefahr! Die Sicherheitsbestimmungen im Abschnitt 2 dieser Einbauanwei- sung bezüglich der Arbeiten an der Elektroanlage sind unbedingt einzuhalten. Der elektrische Anschluss ist gemäß der folgenden Darstellungen vor- zunehmen. - Page 17 Einbauanweisung REVO-E Anschluss der Klimaanlage Bild 18: Bild 19: Pos. 3 600V DC Pos. 4 PE (Potential Equalization)
-
Page 18: Elektrische Anschlüsse Revo-E Ohne Frequenzumrichter (Compact)
Anschluss der Klimaanlage Einbauanweisung REVO-E 5.2. Elektrische Anschlüsse REVO-E ohne Frequenzumrichter (compact) Bild 20: Bild 21: + 24V DC - 24V DC PE (Potential Equalization) Anschluss Öffnung Leerrohr für 400V AC Kabel (Bild 22) - Page 19 Einbauanweisung REVO-E Anschluss der Klimaanlage Leerrohr für 400V AC Kabel Bild 22: Bild 23: Anschlusskasten REVO-E ohne Frequenzumrichter (compact) HINWEIS: Anschließen 400V AC Kabel an Verdichter gemäß Werkstatt-Handbuch (WHB) Kap. 6.5.
- Page 20 Anschluss der Klimaanlage Einbauanweisung REVO-E Die Auslegung des Kabelquerschnittes erfolgt nach folgender Tabelle: In Fahrzeugen montierte Klimaanlagen Kabel gemäß ISO 6722 class B (-40°C … 100°C) Max. Umgebungstemperatur Nennquerschnitt Max. Stromlast errechnet Max. Wert der Sicherung [°C] [mm²] entspr. DIN VDE 0298-4 entspr.
-
Page 21: Montage Des Kondenswasserschlauches
Die Kondenswasserschläuche müssen alle 30 - 40 cm befestigt werden. Das Anbringen von zusätzlichen Lasten (z.B. Kabelbäume) ist nicht zu- lässig, da ein Abbrechen des Stutzens die Folge sein kann. Bild 24: Um einen besseren Wasserablauf zu gewährleisten, empfiehlt Valeo den Einsatz von Lippenventilen. -
Page 22: Anschluss Und Befüllung Des Heizwasserkreislaufes
Bild 25) in der Verdampfereinheit zu öffnen bis dort Wasser austritt. Der Entlüftungsvorgang ist so oft zu wiederholen, bis bei beiden Was- serwärmetauschern Wasser blasenfrei austritt. Bild 26: Bild 25: Pos. B Zur Entlüftung öffnen. Wasserzulauf Wasserrücklauf Bild 27: REVO-E Compact (ohne Frequenzumrichter) -
Page 23: Befüllung Des Kältekreislaufes
Gesundheit! Die Sicherheitsbestimmungen in der REVO-E Evakuier- und Befüllanweisung sind unbedingt einzuhalten. Die Befüllung des Kältekreislaufs darf ausschließlich mit Kältemittel R134a, welches den SAE J2776 Reinheitsstandard aufweist, befüllt werden. Die Bestimmung der Füllmenge erfolgt nach der REVO-E Evakuier- und Befüllanweisung. - Page 24 Einbauanweisung REVO-E Für Notizen:...
-
Page 25: 1 General
Contents and deployment These mounting instructions contain important information with regard to the correct installation of your REVO-E rooftop air-conditioning unit (in the following referred to as air-conditioning unit). Users must adhere to these instructions and directions during the installation procedure for safe and fault-free operation of the equipment. -
Page 26: 2 Safety Regulations
Electrical cables and operating elements of the air-conditioning unit Valeo. The same applies to repairs carried out by unqualified personnel must be arranged in the vehicle in such a way that their functioning is or without the use of original spare parts. - Page 27 Installation instructions REVO-E Safety regulations Hazardous to human life Warning! and health! When working on the bus roof or on any hoisting equipment, scaffolding etc. suitable safety precautions must be taken to pre- vent falls. For lifting the air-conditioning unit suitable and safe devices must be used.
-
Page 28: 3 Preparation Of The Bus Roof
When working on the bus roof or on any hoisting equipment, NOTE: Drawings and documents can be obtained from Valeo! scaffolding etc. suitable safety precautions must be taken to pre- vent falls. Danger of cut injuries due to... -
Page 29: Mounting Holes - Installation With Armaflex Frame
Installation instructions REVO-E Preparation of the bus roof 3.2. Mounting holes - installation with Armaflex frame The air-conditioning unit is fastened to the vehicle’s shell with nuts (M8) and matching washers. For this purpose, corresponding stable retaining plates/bows must be provided on the shell. -
Page 30: Cleaning The Vehicle's Roof
Preparation of the bus roof Installation instructions REVO-E 3.3. Cleaning the vehicle’s roof Once all roof cut-outs are made, the roof must be cleaned. 3.4. Installation using Armaflex frame When mounting / sealing the air-conditioning unit with an Armaflex frame, the areas on the vehicle’s roof must be pre-treated with a clean- sing agent / primer for bonding. -
Page 31: 4 Installation Of The Air-Conditioning Unit
Installation instructions REVO-E Installation of the air-conditioning unit Installation of the air-conditioning unit 4.1. Lifting the air-conditioning unit The figures below show the method of lifting the air-conditioning unit cor- rectly. ATTENTION: Danger of injuries due to air- Warning! The hoods of the air conditioning unit must be closed and screwed! - Page 32 Installation of the air-conditioning unit Installation instructions REVO-E Lifting point Areas for the placement of the suction cups of the lifting frame Positions of lifting points Figure 10:...
-
Page 33: 4.2 Lifting Frame
Installation instructions REVO-E Installation of the air-conditioning unit 4.2. Lifting frame Hook version adjustable for different center of gravity depending on equipment 4x suction cups for covers DETAIL A safety hook fixed washer 4x safety hooks - 90° rotatable spring... -
Page 34: Applying The Adhesive
Installation of the air-conditioning unit Installation instructions REVO-E 4.3. Applying the adhesive Danger of injuries due to air- Warning! conditioning unit or components of it crashing down accidentally! The equipment must be secured firmly against crashing during work under suspended loads. -
Page 35: Mounting The Air-Conditioning Unit
Installation instructions REVO-E Installation of the air-conditioning unit 4.4. Mounting the air-conditioning unit Lift the air-conditioning unit over the vehicle’s roof, place it centrally and insert the fastening bolts through the drill holes on the roof, use as- sembly aids (follow processing time prescribed by the manufacturer of the adhesive material). -
Page 36: Connecting The Air-Conditioning Unit
Connecting the air-conditioning unit Installation instructions REVO-E Connecting the air-conditioning unit 5.1. Electrical connections High voltage! Warning! Warning Danger to life The safety regulations in section 2 of this Installation instructions regarding the work on the electrical system must be complied with. - Page 37 Installation instructions REVO-E Connecting the air-conditioning unit Figure 18: Figure 19: Item 3 600 V DC Item 4 PE (Potential Equalization)
-
Page 38: Electrical Connections Revo-E Without Frequency Converter (Compact)
Connecting the air-conditioning unit Installation instructions REVO-E 5.2. Electrical connections REVO-E without frequency converter (compact) Figure 20: Figure 21: + 24V DC - 24V DC PE (Potential Equalization) connection Empty conduit for the 400V AC cable (Fig. 22) - Page 39 Installation instructions REVO-E Connecting the air-conditioning unit Empty conduit for 400V AC cable Figure 22: Figure 23: Junction box REVO-E without frequency converter (compact) NOTE: Connection of the 400V AC cable to the compressor according to the workshop manual cha. 6.5.
- Page 40 Connecting the air-conditioning unit Installation instructions REVO-E The following table lists the cable cross-section specifications: Vehicle mounted A/C-units Wires according ISO 6722 class B (-40°C … 100°C) Max. ambient temperature Normal cross section Max. current carrying Max. allowed fuse rating [°C]...
-
Page 41: Installation Of The Condensate Hose Pipe
The condensate pipes must be fastened at every 30 - 40 cm. Adding more weight (e.g. cable harnesses) is not permissible since the drainage pipe may break. Figure 24: To ensure better water flow Valeo recommends usage of lip valves. -
Page 42: Connection And Charging The Heating Water Cycle
The exhaust procedure must be repeated often until water emerges from both water heat exchangers without bubbles. Figure 26: Figure 25: Item B, open here for bleeding. Water supply Water return Figure 27: REVO-E Compact (without frequency converter) -
Page 43: Charging The Refrigerant Cycle
Warning! Danger to human life and health! Safety regulations prescribed in the REVO-E Evacuation and Char- ging Instructions must be followed. For charging the refrigerant cycle use only R134a as refrigerant which has the SAE J2776 grade of purity standard. The charging volume is de- termined according to the REVO-E Evacuation and Charging Instruc- tions. - Page 44 Installation instructions REVO-E Für Notizen / for notes...
- Page 45 Installation instructions REVO-E Für Notizen / for notes...
- Page 46 Installation instructions REVO-E Für Notizen / for notes...
- Page 47 memos...
- Page 48 Valeo Thermal Commercial Vehicles Germany GmbH Friedrichshafener Str. 7 - 82205 Gilching - Germany - Tel. +49 (0)8105 7721-0 - Fax +49 (0)8105 7721-889 www.valeo-thermalbus.com - service-valeobus@valeo.com...
Need help?
Do you have a question about the REVO-E and is the answer not in the manual?
Questions and answers