Table of Contents
Advertisement
WARNING
!
To reduce the risk of serious injury
or death, read this owner's manual prior
to installing and using this child restraint.
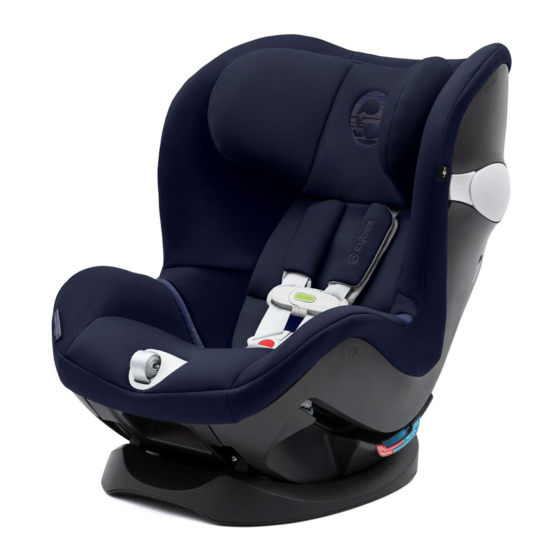
SIRONA M
Owner's Manual
Keep for future use.
Manual del Propietario
Guarde para uso futuro.
ADVERTENCIA
!
Para reducir el riesgo de lesiones graves
o muerte, lea este manual del usuario antes
de instalar y usar el asiento infantil para el automóvil.
Advertisement
Table of Contents

Subscribe to Our Youtube Channel
Related Manuals for CYBEX Sirona M


Summary of Contents for CYBEX Sirona M
- Page 1 SIRONA M Owner’s Manual Manual del Propietario Keep for future use. Guarde para uso futuro. WARNING ADVERTENCIA Para reducir el riesgo de lesiones graves To reduce the risk of serious injury o muerte, lea este manual del usuario antes or death, read this owner’s manual prior de instalar y usar el asiento infantil para el automóvil.
- Page 2 Keep this Owner’s Manual for Sirona M. We are proud to bring this side impact crashes. recommend keeping your child future reference by storing it in the...
-
Page 3: Table Of Contents
This information cannot be used for marketing Information........5 Install Forward-Facing purposes, only for recalls, so please register your seat immediately. Send your Overview of the Sirona M using Latch ........43 name, address, e-mail address if available, and the restraint’s model number Child Restraint ........11... -
Page 4: Important Warnings And Safety Information
IMPORTANT WARNINGS AND SAFETY INFORMATION WARNING! DEATH or SERIOUS INJURY can occur, WARNING ADVERTENCIA AIRBAG WARNING • FAILURE TO FOLLOW these instructions and the labels on your • NEVER place this Child Restraint on a Child Restraint can result in DEATH or DO NOT place rear-facing child seat on front seat with air front seat with an active airbag. - Page 5 Child Restraint could injure vehicle • NEVER USE this Child Restraint on by CYBEX. Use of accessories or parts occupants in a sudden stop or crash. • NEVER LEAVE your child boats, low speed vehicles (LSV), from other manufacturers could reduce the UNATTENDED or alone in the vehicle.
- Page 6 WARNING! WARNING! DEATH or SERIOUS INJURY can occur, DEATH or SERIOUS INJURY can occur, • Not every location within a vehicle • NEVER LEAVE a vehicle seat back SAFE PRACTICES • DO NOT LEAVE loose objects (e.g. may be safe for the installation of this with a folding mechanism unlocked.
-
Page 7: Overview Of The Sirona M Child Restraint
OVERVIEW OF THE SIRONA M CHILD RESTRAINT OVERVIEW OF THE SIRONA M CHILD RESTRAINT Adjustment FRONT VIEW BACK VIEW Handle Magnetic Buckle Headrest Tongue Holders Seat Cover L.S.P. device (fully extended) Shoulder Pads Newborn Insert L.S.P. device (Stored) Harness Straps... -
Page 8: Latch System Components
LATCH SYSTEM COMPONENTS LATCH SYSTEM COMPONENTS LATCH TETHER 1. Latch Strap 5. Tether Strap 2. Latch Adjuster 6. Tether Adjuster 3. Latch Release Strap 7. Tether Hook 4. Latch Connector... -
Page 9: Latch System Storage
LATCH SYSTEM STORAGE LATCH SYSTEM STORAGE Always make sure LATCH System Components are properly stored in Always make sure LATCH System Components are properly stored in the compartments when not in use. the compartments when not in use. LATCH STORAGE: 4. -
Page 10: Child Size Requirements
CHILD SIZE REQUIREMENTS CHILD SIZE REQUIREMENTS REAR-FACING use of this Child Restraint is ONLY for children who meet ALL of FORWARD-FACING use of this Child Restraint is ONLY for children who meet the requirements shown here. If the child is not within these requirements because ALL of the requirements shown here. -
Page 11: Activating The L.s.p
ACTIVATING THE L.S.P. ACTIVATING THE L.S.P. ALWAYS activate the L.S.P. on the side of the seat directly facing the car door. Do not deploy if used in the center seating position, or on the side placed next to another person or Child Restraint. The L.S.P. -
Page 12: Vehicle Seat Location Requirements
NEVER place this child restraint on a front seat with an active airbag. DEATH or SERIOUS INJURY The Sirona M is allowed to touch the vehicle seat(s) in front of it, as long may occur. The REAR seat is the safest place for the recline angle of the Sirona M is not affected. -
Page 13: Using Latch
VEHICLE SEAT LOCATION REQUIREMENTS USING LATCH NEVER INSTALL THIS CHILD RESTRAINT WITH ANY OF THE NEVER use the lower LATCH anchors together with the vehicle belts to FOLLOWING VEHICLE BELTS: install this Child Restraint. Using both is not approved and may cause serious injury or death to your child. - Page 14 LATCH anchors from the outboard seating positions to install a Child Restraint. CYBEX allows this Child Restraint to be installed using the two inner lower LATCH anchors from the outboard seating positions if the distance between the inner lower LATCH anchors is between 11 and 20 in.
-
Page 15: What Is A Tether
WHAT IS A TETHER? ADJUSTING CROTCH STRAP WHAT IS A TETHER? As your child grows, you will need to change the Crotch Strap position so that it is in the slot closest to your child. The Crotch Strap should ALWAYS A tether reduces be as close as possible to, but NEVER under, the child's bottom. -
Page 16: Newborn Insert
Owner’s Manual must be followed. Do NOT use any other infant insert or pillows. Only use the one provided by CYBEX for this Child Restraint. This seat works with the SensorSafe Application* which can be downloaded from: The App Store ®... -
Page 17: Rear-Facing Installation
REAR-FACING SETUP REAR-FACING SETUP Infants may have difficulty breathing when in an upright seated 3. Place Child Restraint rear-facing on selected vehicle seat. Make sure it is not position. Make sure they recline enough for their head to lie back blocking the vehicle belt buckle. -
Page 18: Install Rear-Facing Using Latch
INSTALL REAR-FACING USING LATCH INSTALL REAR-FACING USING LATCH 1. Locate the LATCH Connector Storage compartment. See LATCH Storage on page 15. Remove LATCH Straps. Route the LATCH Straps out through the Forward-Facing Belt Path openings. Make sure LATCH Adjuster Strap is loosened to its full length. - Page 19 INSTALL REAR-FACING USING LATCH INSTALL REAR-FACING USING LATCH 5. Locate the LATCH anchor bars in your vehicle. Attach both LATCH Connectors to the vehicle LATCH anchor bars. 6. While pushing down on the Child Restraint, pull up on the end of the LATCH Adjuster Strap until strap is tight using adjuster on either side of the Child Restraint.
-
Page 20: Install Rear-Facing Using Lap/Shoulder Belt
INSTALL REAR-FACING USING LAP/SHOULDER BELT INSTALL REAR-FACING USING LAP/SHOULDER BELT The Lock-Off provides a way to lock the Child Restraint without needing to lock CHECK YOUR WORK your vehicle seat belt. • HOLD Child Restraint at each side near Rear-Facing Belt Paths. Pull side to 1. - Page 21 INSTALL REAR-FACING USING LAP BELT ONLY INSTALL REAR-FACING USING LAP BELT ONLY The Lock-Off is for lap/shoulder belt systems only and is not needed for lap belt only installation. 1. Route vehicle lap belt through the blue Rear-Facing Belt Path on the side of the Child Restraint.
-
Page 22: Lap Belt Only
FORWARD-FACING SETUP FORWARD-FACING SETUP When installing this Child Restraint with lower LATCH Connectors OR the vehicle 4. Place Child Restraint forward-facing on selected vehicle seat. Make sure it is seat belt, always use the Tether, if a tether anchor is available. not blocking the vehicle belt buckle. -
Page 23: Install Forward-Facing Using Latch
INSTALL FORWARD-FACING USING LATCH INSTALL FORWARD-FACING USING LATCH Do not use the Lower LATCH Anchors of the Child Restraint to attach this Child Restraint forward-facing when restraining a child weighing more than 40 lbs (18 kg) with the internal harness of the Child Restraint. When not using LATCH Straps, ALWAYS keep LATCH Connector in Storage Compartment. - Page 24 INSTALL FORWARD-FACING USING LATCH INSTALL FORWARD-FACING USING LATCH 4. Locate the lower LATCH anchor bars in your vehicle. Attach both LATCH 6. Locate Tether anchor in your vehicle. Attach Tether Hook. Pull Tether Adjuster Connectors to the vehicle lower LATCH anchor bars. Strap to tighten.
-
Page 25: Install Forward-Facing Using Lap/Shoulder Belt
INSTALL FORWARD-FACING USING LAP/SHOULDER BELT INSTALL FORWARD-FACING USING LAP/SHOULDER BELT The Lock-Off provides a way to lock the Child Restraint without needing to lock 4. While pushing down on the Child Restraint , pull the vehicle shoulder belt your vehicle seat belt. tighten the vehicle lap belt. -
Page 26: Install Forward-Facing Using Lap Belt Only
INSTALL FORWARD-FACING USING LAP BELT ONLY INSTALL FORWARD-FACING USING LAP BELT ONLY Note: The Lock-Off is for lap/shoulder belt systems only and is not needed for lap 4. While pushing down on the Child Restraint , pull the loose end of the vehicle belt only installation. -
Page 27: Securing Child With Harness
SECURING CHILD WITH HARNESS SECURING CHILD WITH HARNESS For a better fit with smaller infants, the Newborn Insert may need to be used. 4. Place Buckle Tongues on Magnetic Buckle Tongue Holders for easier placement Refer to page 29. of your child. If Crotch Strap is under the child, the Crotch Strap will need to be adjusted. - Page 28 SECURING CHILD WITH HARNESS SECURING CHILD WITH HARNESS 6. To adjust Harness Strap height position up or down, squeeze Adjustment Handle on top of Headrest. Make sure Headrest locks into position before tightening Harness. REAR-FACING - Position the Harness Straps at or just below the child's shoulders FORWARD-FACING - Position the Harness Straps at or just above the child's shoulders.
- Page 29 SECURING CHILD WITH HARNESS SECURING CHILD WITH HARNESS . Pull up firmly on 7. Insert Buckle Tongues into Harness Buckle: listen for a click 8. Fasten Chest Clip by snapping both sides together; listen for a click. both Buckle Tongues to make sure they are securely latched 9.
-
Page 30: Securing Child Checklist
SECURING CHILD WITH HARNESS SECURING CHILD CHECKLIST • To ensure a better fit with smaller infants, the Newborn Insert may need to 10. Tighten the Harness by pulling on the Harness Adjustment Strap until the Harness is snug on the child. If you can pinch the strap at the child's shoulders be used. -
Page 31: General Information About Sensorsafe
Google Play . Additional Receiver Plugs can be purchased for additional devices. vehicles. If you have questions, please contact CYBEX at: 1-877-242-5676 or online at: http://cybex-online.com/us/contact.html IMPORTANT USAGE INFORMATION BATTERY USAGE •... - Page 32 If this equipment does cause Or call CYBEX at: 1-877-242-5676 harmful interference to radio or television reception, which can be determined by turning the equipment off and on, the user is encouraged to try to correct the This device meets the requirements of SAE J3005.
-
Page 33: Using Sensorsafe
GENERAL INFORMATION ABOUT SENSORSAFE USING SENSORSAFE This device complies with RSS-247 of Industry Canada. Operation is subject to 1. INSTALL THE SENSORSAFE RECEIVER. the condition that this device does not cause harmful interference. This Class B Locate the 16PIN OBDII port in your vehicle. - Page 34 SensorSafe reminder, alerting you that your baby is in the vehicle. If you don’t hear the reminder tone, test your SensorSafe by following steps 1-5 again. Contact CYBEX at: 1-877-242-5676 or online at: http://cybex-online.com/us/contact.html if the reminder tone again fails to sound.
- Page 35 6. Place the Circuit Board with the new Battery in the Chest Clip. Replace the Cover and tighten the screws. This completes the battery replacement process. If you have questions, please contact CYBEX at: 1-877-242-5676 or online at: http://cybex-online.com/us/contact.html BR2032...
-
Page 36: Securing Child Restraint In An Aircraft
SECURING CHILD RESTRAINT IN AN AIRCRAFT INSTALLING CHILD RESTRAINT REAR-FACING IN AN AIRCRAFT Note: Do not use Lock-Off with Aircraft seat belt because it is for use with lap/ shoulder belt systems only. The Federal Aviation Administration (FAA) recommends that you secure your child IMPORTANT: Before installing the Child Restraint make sure the aircraft seat is for air travel in an appropriate Child Restraint based on your child's weight and in a fully upright position. -
Page 37: Installing Child Restraint Rear-Facing In An Aircraft
INSTALLING CHILD RESTRAINT REAR-FACING IN AN AIRCRAFT INSTALLING CHILD RESTRAINT REAR-FACING IN AN AIRCRAFT 2. ROUTE AIRCRAFT SEAT BELT 3. FASTEN THE AIRCRAFT SEAT THROUGH REAR-FACING BELT BELT, THEN REMOVE ALL SLACK PATH. FROM THE BELT. Route the aircraft seat belt buckle The aircraft seat belt must be as tight through the blue Rear-Facing Belt Path as possible. -
Page 38: Installing Child Restraint Forward-Facing In An Aircraft
INSTALLING CHILD RESTRAINT REAR-FACING IN AN AIRCRAFT INSTALLING CHILD RESTRAINT FORWARD-FACING IN AN AIRCRAFT 4. CHECK YOUR WORK. Do not use Lock-Off with Aircraft seat belt because it is for use with lap/shoulder belt systems only. With your hand holding the seat shell at the Rear-Facing Belt Path, as shown, try to IMPORTANT: Before installing the Child Restraint, make sure the aircraft seat is move the Child Restraint from side to side. - Page 39 For your child's comfort, CYBEX recommends cushioning the child's back by placing a small pillow or folded-up blanket, or a folded-up jacket, over the belt buckle.
-
Page 40: Attach Cup Holder
INSTALLING CHILD RESTRAINT FORWARD-FACING IN AN AIRCRAFT ATTACH CUP HOLDER 4. CHECK YOUR WORK. USE PLASTIC CONTAINERS ONLY - No glass or metal containers. Only use cups with less than 12 oz. capacity. Never place cups that contain With your hand holding the seat shell at the hot liquids in the cup holder. -
Page 41: Care And Cleaning
CARE AND CLEANING CARE AND CLEANING 1. REMOVING SHOULDER PADS The integrated Harness System cannot be removed from the seat. NEVER remove or attempt to remove parts of the Harness System. Unsnap and remove Shoulder Pads as shown. DO NOT damage, remove or dispose of any EPS foam. 2. -
Page 42: Cleaning
CARE AND CLEANING CARE AND CLEANING SPOT CLEANING HARNESS STRAPS Spot clean Seat Covers, Shoulder Pads, Sponge clean using warm water and mild soap. Air dry. Do not iron. Buckle Pad, and the Infant Insert as HARNESS BUCKLE needed with a clean cloth using mild Sponge clean or thoroughly rinse Harness Buckle with warm water. -
Page 43: Safety Checklist
SAFETY CHECKLIST SAFETY CHECKLIST Did you read and understand this Owner’s Manual and all labels found on this SAFE CAR PRACTICES Child Restraint? • NEVER drive under the influence of alcohol or drugs. Is the Child Restraint positioned correctly (rear-facing or forward-facing) for the •... -
Page 44: Resources
• https://www.nhtsa.gov/equipment/car-seats-and-booster-seats page 4 of this Owner’s Manual, or on the underside of your Child Restraint. Please contact the U.S. CYBEX Distributor, Columbus Trading Partners USA, RECYCLING Inc. Once your seat has reached its expiration date, we recommend recycling the seat. -
Page 45: Warranty
Register online at http://register.cybex-online.com/carseats or mail in the separate or abuse of this product. It is expressly agreed that the obligations of CYBEX and registration card provided. the original consumer purchaser’s remedies under the limited warranty contained LIMITED WARRANTY herein are exclusive and are strictly limited to the repair or replacement of the product. - Page 46 560 HARRISON AVENUE | BOSTON, MA 02118 USA TOLL FREE: 1-877-242-5676 | E-MAIL: SUPPORT.US@COLUMBUSTP.COM | WWW.CYBEX-ONLINE.COM/US © 2017 CYBEX Industrial Limited All rights reserved. Printed in China. This product and its components are subject to change without notice. Patents pending.
Need help?
Do you have a question about the Sirona M and is the answer not in the manual?
Questions and answers