
Subscribe to Our Youtube Channel
Related Manuals for bora CT1


Summary of Contents for bora CT1
- Page 1 Operating and assembly instructions CT1 Tepan cooktop CT1UMEN-002 1037331 www.bora.com...
- Page 2 T +49 (0) 8035 / 907-240 F +49 (0) 8035 / 907-249 info@bora.com www.bora.com The distribution and duplication of this document, as well as the use and disclosure of its contents are prohibited unless expressly authorised. © BORA Lüftungstechnik GmbH, 2016 All rights reserved.
-
Page 3: Table Of Contents
Decommissioning, disassembly and disposal Decommissioning ..........20 Disassembly ............20 Disposing of the product in an environmentally friendly way ......20 Warranty, service and spare parts 10.1 Warranty ............21 10.2 Service .............. 21 10.3 Spare parts ............21 Notes www.bora.com... -
Page 4: General
INFO BORA Holding GmbH, BORA Vertriebs Safety and warning instructions GmbH & Co KG, BORA APAC Pty Ltd and BORA Lüftungstechnik GmbH - hereinafter referred The safety and warning instructions in this manual are to as BORA - shall not assume any liability for emphasised with symbols and signal words. - Page 5 Caution Indicates a possible hazardous situation which can cause minor injury if not respected. — Caution Indicates a situation which can cause minor injury if not respected. Tab. 1.2 Meaning of the warning symbols and signal words www.bora.com...
-
Page 6: Safety
Steam can cause a short circuit on live released into the room air. parts and thus lead to property damage (see the Cleaning chapter). XDo not place any hot cookware in the area of the control panel so as not to damage the underlying electronics. www.bora.com... -
Page 7: Safety Instructions, Operation
Objects (pot lid, cooktop extractor cover) on the cooktop become hot very quickly and can lead to serious burns. XDo not leave any objects on the cooktop. XUse suitable aids (pot cloths, thermal glove). www.bora.com... -
Page 8: Safety Instructions, Assembly
3 mm (miniature and automatic Work on electrical parts may only be carried circuit breakers, fuses, contactors). out by trained electrical personnel. www.bora.com... -
Page 9: Safety Instructions, Spare Parts
Disconnecting the device incorrectly beyond the purpose described here. from the mains poses a risk of electric shock. BORA shall not assume any liability for XSafely disconnect the device from damages caused by improper use or incorrect the mains using miniature or auto- operation. -
Page 10: Technical Data
Weight (incl. accessory/packaging) 12 kg Cooktop Power levels 1 - 9, infinitely variable Cooking zone 270 x 360 mm 2800 W Temperature control range approx. 90 - 240 °C Tab. 3.1 Technical data Device dimensions Fig. 3.1 Device dimensions www.bora.com... -
Page 11: Device Description
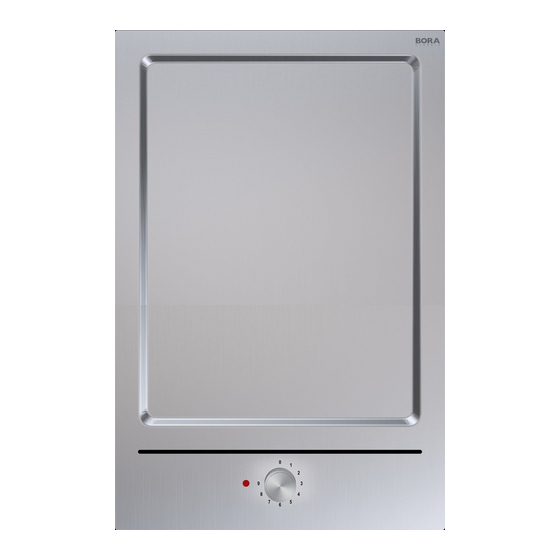
Browning potato fritters, prawns, corn on the cob and escalopes Fast browning beef, fish, meatballs Tab. 4.2 Recommendations for power levels The specifications provided in the table are standard values. Fig. 4.2 Operating panel Control knobs Operating indicator light www.bora.com... -
Page 12: Installation
Check the scope of delivery for damage and make sure it is complete (see Tab. 5.1). Cut-out dimensions If there are any missing or damaged parts, please notify BORA Customer Services. Do not under any circumstances install parts which are Preparing the worktop damaged. - Page 13 Installation Flush installation Cut-out dimensions when installing cooktops or cooktops and the BORA cooktop extractor next to each other: Cooktops / cooktop extractor A in mm B in mm 1026 1002 1208 1184 1549 1525 Fig. 5.2 Flush installation Tab. 5.2...
-
Page 14: Installing The Cooktop
Verify that the alignment is correct. INFO The cooktop [1] rests on the lateral bar of the Seal the devices with black heat-resistant silicone cooktop extractor [2] and is thereby stabilised. sealing compound after the installation work is completed. www.bora.com... -
Page 15: Power Connection
Once installation is done: Explain the important functions to the user. Explain all safety-relevant aspects of operation and handling to the user. Provide the user with the accessories and operating and installation instructions to be kept in a safe place. www.bora.com... -
Page 16: Operation
Turn the control knob to power level 1 to switch on the cooktop. The operating indicator light is active. Switching off Turn the control knob to power level 0 to switch off the cooktop. The operating indicator light is inactive. www.bora.com... -
Page 17: Cleaning And Maintenance
Dissolve a tablespoon of citric acid (approx. 10 - 15 ml) with hot water (approx. 200 ml) in a separate bowl. Now apply the liquid to the warm stainless steel grill surface. Leave the liquid to soak for approx. 5 - 8 minutes. www.bora.com... -
Page 18: Cleaning The Control Knobs
Pull off the control knob. Clean the control knob with a soft brush. Rinse the control knob well after cleaning. Allow the control knob to dry thoroughly. Re-insert the clean and dry control knob into the slot after the cleaning is completed. www.bora.com... -
Page 19: Troubleshooting
Wait a few operating hours. Contact the new cooktop is put into operation. BORA Service Team if the odour persists. Tab. 8.1 Resolving a fault In all other instances, call the BORA Service Team (see the Warranty, service and spare parts chapter). www.bora.com... -
Page 20: Decommissioning, Disassembly And Disposal
Remove the device from the worktop upwards. for return and recycling of electronic and electrical Remove further accessory parts. parts and other materials. Remove the old appliance and dirty accessory as described under “Disposing of the product in an environmentally friendly way”. www.bora.com... -
Page 21: Warranty, Service And Spare Parts
10.3 Spare parts Only use original spare parts when making repairs. INFO Spare parts can be obtained from your BORA dealer, the BORA online service website at www.bora.com/service or by calling the service number provided. -
Page 22: Notes
Notes: 11 Notes: www.bora.com... - Page 24 F +49 (0) 8035 / 907-249 F +61 2 8076 3514 info@bora.com info@boraapac.com.au www.bora.com www.boraapac.com.au Austria: BORA Vertriebs GmbH & Co KG Prof.-Dr.-Anton-Kathrein-Straße 3 6342 Niederndorf Österreich T +43 (0) 5373 / 62250-0 F +43 (0) 5373 / 62250-90 mail@bora.com www.bora.com...
Need help?
Do you have a question about the CT1 and is the answer not in the manual?
Questions and answers