
Related Manuals for bora PG11


Summary of Contents for bora PG11
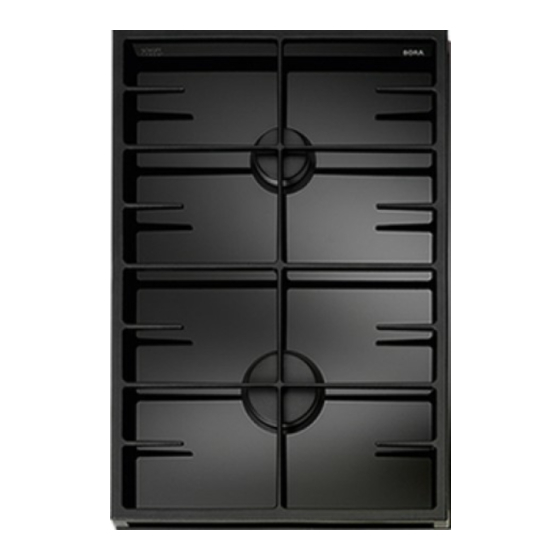
- Page 1 Operating and installation instructions PG11 Gas glass ceramic cooktop with 2 cooking zones PG11UMEN-000 1034765 www.bora.com...
- Page 2 T +49 (0) 8035 / 907-240 F +49 (0) 8035 / 907-249 info@bora.com www.bora.com The distribution and duplication of this document, as well as the use and disclosure of its contents are prohibited unless expressly authorised. © BORA Lüftungstechnik GmbH, 2014 All rights reserved.
-
Page 3: Table Of Contents
Handover to user ........... 22 Nozzle table ...........23 Operation Ignite the gas burner ........24 Adjusting the power level ......24 Correct use of the gas hob ......25 Use the gas cooktop with a BORA cooktop extractor ........ 25 www.bora.com... -
Page 4: General
General General INFO BORA Holding GmbH, BORA Vertriebs GmbH & Co KG, BORA APAC Pty Ltd and BORA Lüftungstechnik GmbH - hereinafter referred Target group to as BORA - shall not assume any liability for damage caused by non-compliance with these... - Page 5 CAUTION Indicates a possible hazard- ous situation which can cause minor injury if not respected. — CAUTION Indicates a situation which can cause minor injury if not respected. Tab. 1.2: Meaning of the warning symbols and signal words www.bora.com...
-
Page 6: Safety
Ensure a normal and comfortable indoor climate Always lift (do not drag!) the cookware to prevent (45-60% humidity), e.g. through natural ventilation scratching and abrasion on the surface. openings or domestic ventilation systems. www.bora.com... -
Page 7: Safety Instructions, Operation
60°C first. Touching hot surfaces can lead to serious burns. Do not touch the hot cooktop. Keep children away from the hot cooktop unless they are under constant supervision. www.bora.com... -
Page 8: Safety Instructions, Assembly
Work on electrical parts may only be carried out by trained electrical personnel. Work on the gas connection may only be carried out by an authorised gas fitter in accordance with legal applicable regulations. Comply with local regulations of the utility companies. www.bora.com... -
Page 9: Safety Instructions, Spare Parts
Store packaging materials away from the intended, as is using it beyond the purpose described here. reach of children. Dispose of packaging correctly and BORA shall not assume any liability for damages caused by promptly. improper use or incorrect operation. All misuse is prohibited! -
Page 10: Technical Data
Back normal burner 350-1750 W Cooktop energy consump- tion Front high-power burner 600-4000 W 58.1% Back normal burner 350-1750 W 56.3% Total (average) 57.2% Tab. 3.1: Technical data Device dimensions Fig. 3.1 Device dimensions Fig. 3.2 Control box dimensions www.bora.com... -
Page 11: Device Description
Pan support Control knob for the back hob The cooking zone indicator is not active for gas cooktops Control knob for the front hob because the cooktop function can be monitored based on the active burner flame. www.bora.com... -
Page 12: Functional Principle
If the burner flame goes out unintentionally, the appliance interrupts the gas supply. The appliance does Burner position Recommended Minimum not automatically ignite the burner. pan diameter pan diameter Normal burner 140-200 mm 120 mm High-power 180-240 mm 160 mm burner Tab. 4.2: Pan diameters www.bora.com... -
Page 13: Installation
Check the scope of delivery for damage and make sure it is complete. If there are any missing or damaged parts, please notify BORA After Sales Service immediately. Do not under any circumstances install parts which are damaged. Dispose of transport packaging in the proper manner (see the Decommissioning and Disposal chapter). -
Page 14: Cut-Out Dimensions
Fig. 5.3 Dimension of groove for flush installation 1116 1088 INFO If the induction glass ceramic wok is used, the groove dimensions must be increased to 7 mm for flush installation. 1338 1310 1709 1681 Tab. 5.2: Cut-out dimensions www.bora.com... -
Page 15: Installing The Cooktop
Fig. 5.8 Control box structure Control box Adjustment plates Fixed front panel (not included in scope of delivery) Power level sleeve Nuts Control knobs Draw the bore holes accordingly with the aid of the drilling template provided. www.bora.com... - Page 16 For fine adjustment, the distance between the control plates knob and the power level sleeve can be set. [mm] Fig. 5.11 Position control knob 18,5 mm Tab. 5.3: Adjustment plate overview Fig. 5.12 Distance of the control knob www.bora.com...
-
Page 17: Installing The Cooktop
Firstly connect the yellow/green earthing cable to the indicated point on the control box. Cooktop Height adjustment plates Earthing symbol Now connect the multi-pin, colour-coded plugs on the relevant cooking zone to the corresponding colour-coded sockets on the control box. www.bora.com... -
Page 18: Power Connection
Switch off the main switch/automatic circuit breaker before connecting the cooktop. Protect the main switch/automatic circuit breaker from being switched on without permission. Make sure the device is not energised. Only connect the cooktop using a permanent connection to a power supply cable. www.bora.com... -
Page 19: Gas Installation
DIN 3383 with a maximum length of 1500 mm. The connection bracket and connection pieces must be equipped with a 1/2 inch external thread in accordance with the regulatory country requirements (see table 6.2 Connection bracket). www.bora.com... -
Page 20: Additional Installation Notes For Australia And New Zealand (Aus/Nzs)
Check the tightness of the gas connection by conducting a leak test (see Leak test section). Switch on the main switch/automatic circuit breaker. Put the cooktop into operation (see the Operation chapter). Check all the functions and the burner flame are working correctly. www.bora.com... - Page 21 Put the cooktop into operation (see the Operation chapter). Check all the functions and the burner flame are working correctly. Fig. 6.2 Connection to the test point adapter (LPG) Test point adapter Seal Transition piece Gas connection to the gas cooktop www.bora.com...
-
Page 22: Leak Test Of The Gas Connection
Screw the corresponding nozzle for the gas type to be used into the gas burner [2]. Position the gas burner cover correctly on the gas burner [1] so that it lies flat. www.bora.com... -
Page 23: Nozzle Table
G 30/31 Butane/propane Back 28-30/37 0.38 1.75 G 30/31 Butane/propane Front G 30/31 Butane/propane Back 0.38 1.75 Tab. 6.4: Nozzle table Total nominal connection values for liquid gas: 4.75 kW/347 g/h Total nominal connection values for natural gas: 5.75 kW/0.588 m www.bora.com... -
Page 24: Operation
Adjusting the power level This thermocouple detects if the flame has gone out and switches off the gas supply. Turn the control knob to set the respective power No more gas will flow. level. Fig. 7.1 Push and pull control knob www.bora.com... -
Page 25: Correct Use Of The Gas Hob
Once the pan contents are simmering, put the gas burner on the lowest power level (small flame). Centrally position the cookware on the gas hob. Use the gas cooktop with a BORA cooktop extractor INFO The cooktop should only be operated if the... -
Page 26: Cleaning And Maintenance
Do not push or pull cookware across the cooktop. Always lift pots and pans. Keep the cooktop clean. Remove any kind of soiling immediately. Only use cookware which is suitable for glass ceramic cooktops (see the Device description chapter). www.bora.com... -
Page 27: Cleaning Of The Gas Burners
Position the burner head [2] correctly on the gas out- let valve. Make sure that the safety thermocouple and the elec- trical ignition device are positioned in the correct opening. Put the burner cover [1] straightly and evenly on the burner head [2]. www.bora.com... -
Page 28: Troubleshooting
Dirt in the gas outlet openings on the Clean the gas burner parts gas burner head. (see the Cleaning chapter). Tab. 9.1: Resolving a fault In all other instances, call BORA After Sales Service (see the Warranty, After Sales and Spare parts chapter). www.bora.com... -
Page 29: Decommissioning, Disassembly And Disposal
Remove the old appliance and dirty accessory as described under 9.3. Therefore do not dispose of your old appliance as household waste. Take the old appliance to a regional collection centre for return and recycling of electronic and electrical parts and other materials. www.bora.com... -
Page 30: Warranty, After Sales Service And Spare Parts
11.3 Spare parts Only use original spare parts when making repairs. INFO Spare parts can be obtained from your BORA dealer, the BORA online service website at www.bora.com/service or by calling the service number provided. - Page 32 F +49 (0) 8035 / 907-249 F +61 297 /124 131 info@bora.com info@boraapac.com.au www.bora.com www.boraapac.com.au Austria: BORA Vertriebs GmbH & Co KG Prof.-Dr.-Anton-Kathrein-Straße 3 6342 Niederndorf Österreich T +43 (0) 5373 / 62250-0 F +43 (0) 5373 / 62250-90 mail@bora.com www.bora.com...
Need help?
Do you have a question about the PG11 and is the answer not in the manual?
Questions and answers