
Subscribe to Our Youtube Channel
Related Manuals for bora CG11


Summary of Contents for bora CG11
- Page 1 Operating and installation instructions CG11 Gas glass ceramic cooktop with 2 cooking zones CG11UMAU-002 VB2VRAM0G0NNGQ2 www.bora.com...
- Page 2 Please accept our apologies in this eventuality. An updated version can be requested from the BORA Service Team. Subject to printing errors and mistakes.
-
Page 3: Table Of Contents
Ignite the gas burner ......... 24 Adjusting the power level ........24 Correct use of the gas hob ........ 24 Using the gas cooktop with a BORA cooktop extractor ........25 Cleaning and Maintenance Cleaning agents ..........26 Maintaining the cooktop ........26 Cleaning the cooktop ........ -
Page 4: General Information
& Co KG, BORA APAC Pty Ltd and BORA Lüftungstechnik GmbH - hereinafter referred Target group to as BORA - do not assume any liability for damage arising from non-adherence to these These operating and installation instructions apply for the... -
Page 5: Safety And Warning Information
Caution Indicates a potentially hazardous situation which could lead to slight or minor injuries if ignored. — Caution Indicates a situation which could result in material damage if ignored. Tab. 1.2 Meaning of warning symbols and signal words www.bora.com... -
Page 6: Safety
Do not store any items that could be of interest to children in storage spaces above or behind the appliance. Children will otherwise be encourage to climb on the appliance. www.bora.com... -
Page 7: Safety Instructions - Operation
LS switches, fuses, automatic circuit breakers or contactors. DANGER! Risk of explosion from gas! Gas leaks can cause explosions and serious injuries. Keep ignition sources (naked flames, heaters) away. Close the gas supply and switch the building supply off. www.bora.com... - Page 8 Liquid between the cooking zone cooktop when it is hot or ensure and the pan base can evaporate and they are supervised at all times. cause burns. Make sure that the cooking zone and the pan base are always dry. www.bora.com...
-
Page 9: Safety Instructions - Installation
Comply with local regulations of the utility companies. Objects such as pan lids on the cooktop can damage the glass ceramics. Do not leave objects on the hot cooktop. www.bora.com... -
Page 10: Safety Instructions - Disassembly And Disposal
Securely disconnect the appliance from the mains using LS switches, fuses, automatic circuit breakers or contactors. Use an authorised measuring device to ensure that there is no power to the appliance. www.bora.com... -
Page 11: Safety Instructions - Spare Parts
Safety DANGER! INFO BORA Holding GmbH, BORA Vertriebs Risk of asphyxiation! GmbH & Co KG, BORA APAC Pty Ltd and BORA Lüftungstechnik GmbH do Packagingcomponents(e.g.film, not assume any liability for damage polystyrene) can be life-threatening arising from non-adherence to the for children. -
Page 12: Technical Data
2800 – 2900 W 56,6 % Tab. 3.1 Technical data ** Pursuant to EU Regulation No 66/2014 implementing Directive 2009/125/EC, the power (energy consumption) has been checked and calculated in line with EN 30-2-1 using G20. Device dimensions Fig. 3.1 Device dimensions www.bora.com... -
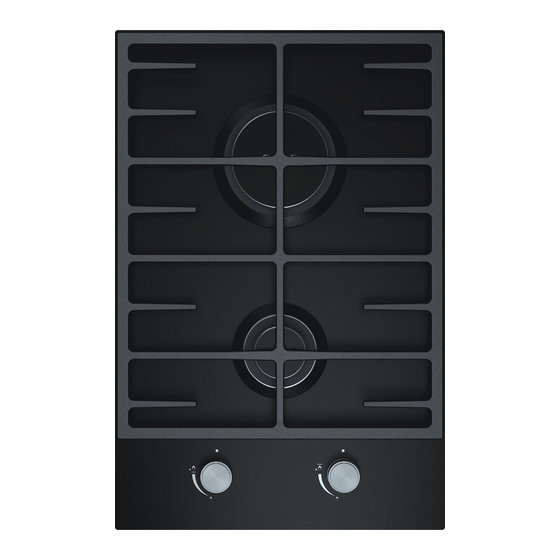
Page 13: Device Description
Cookware with this symbol is suitable for gas cooktops. Fig. 4.1 Underside of the cooktop Suitable cookware is made of: Copper Cooktop Stainless steel Gas connection hose Aluminium cast iron www.bora.com... -
Page 14: Power Levels
The gas burners are equipped with a safety thermocouple. This thermocouple monitors the burner flame when the gas supply is active. If the burner flame goes out unintentionally, the appliance interrupts the gas supply. The appliance does not automatically ignite the burner. www.bora.com... -
Page 15: Installation
Comply with the instructions of the worktop If there are any missing or damaged parts, please manufacturer. notify BORA After Sales Service. Do not under any circumstances install parts which are damaged. Dispose of transport packaging in the proper manner (see the Decommissioning and Disposal section). - Page 16 Installation Flush installation Cut-out dimensions when installing cooktops or cooktops and the BORA cooktop extractor next to each other: Cooktops/cooktop extractor A in mm B in mm 1026 1002 1208 1184 1549 1525 Fig. 5.2 Flush installation Tab. 5.2 Cut-out dimensions Preparing the worktop Create the worktop cut-out.
-
Page 17: Installing The Cooktop
The drawers and/or shelves in the floor unit must be removable for maintenance and cleaning purposes. Fig. 5.10 Cooktop and height adjustment plates Cooktop Height adjustment plates For surface mounting Make sure that the sealing tape for the cooktop is flat against the worktop. www.bora.com... -
Page 18: Power Connection
H05VV-F or H05VVH2-F as a minimum. Cross-section: 3G 1.5 mm² If the connection line has been damaged this must be replaced by a special connection line. This may only be done by an authorised member of the After Sales Service team. www.bora.com... -
Page 19: Gas Installation
DIN 3383 with a maximum length of 1500 mm. The connection bracket and connection pieces must be equipped with a 1/2 inch external thread in accordance with the regulatory country requirements (see table 6.2 Connection bracket). www.bora.com... -
Page 20: Additional Installation Notes For Australia And New Zealand (Aus/Nzs)
If the cooktop is connected to a natural gas (NG) supply, a gas regulator must be installed with a test point. The gas regulator and the transition piece are included in the scope of delivery of the appliance. www.bora.com... -
Page 21: Leak Test Of The Gas Connection
Unscrew the test point screw completely. Connect your measuring device to the test point connection. Open the gas supply. Set the gas pressure at the gas supply pipe (LPG pressure bottle) to 2.75 kPa. Ignite the burner (see the Operation chapter). www.bora.com... -
Page 22: Setting Up Gas Taps
Explain all safety-related aspects of operation and 6.4.1 Setting up gas taps handling to the user. Provide the user with the accessories and operating and installation instructions to be kept in a safe place. Fig. 6.4 Set the gas tap Throttling screw www.bora.com... -
Page 23: Nozzle Table
(MJ/n) NG (natural gas) G30 butane 2.75 Back 10.4 G31 propane 2.75 Back 10.4 G20 natural gas 01:00 Back 12.0 G30 butane 2.75 Front G31 propane 2.75 Front G20 natural gas 01:00 Front Tab. 6.3 Australia/New Zealand nozzle table www.bora.com... -
Page 24: Operation
Use suitable pans on each gas burner. Once the pan contents are simmering, put the gas burner on the lowest power level (small flame). Centrally position the cookware on the gas hob. Fig. 7.1 Push and pull control knob www.bora.com... -
Page 25: Using The Gas Cooktop With A Bora Cooktop Extractor
Operation Using the gas cooktop with a BORA cooktop extractor INFO The cooktop should only be operated if the cover plate for its extractor is attached in the correct position on the extractor frame and can function as an air baffle. -
Page 26: Cleaning And Maintenance
Do not push or pull cookware across the cooktop. Always lift pots and pans. Keep the cooktop clean. Remove any kind of soiling immediately. Only use cookware which is suitable for glass ceramic cooktops (see the Device description chapter). www.bora.com... -
Page 27: Cleaning Of The Gas Burners
[2]. The electrical ignition will not work if burner parts are not put back in place correctly. Put the pot holder straightly and evenly on the gas cooktop. Put the gas burner into operation (see the Operation chapter). www.bora.com... -
Page 28: Troubleshooting
Dirt in the gas outlet openings on the gas Clean the gas burner parts burner head. (see the Cleaning chapter). Tab. 9.1 Resolving a fault In all other instances, call the BORA Service Team (see the Warranty, service and spare parts chapter). www.bora.com... -
Page 29: Decommissioning, Disassembly And Disposal
Remove the device from the worktop by lifting it components and other materials. upwards. Remove any other accessories. Dispose of the old device and any contaminated accessories as described under “ Environmentally- friendly disposal”. www.bora.com... -
Page 30: Warranty, Technical Service And Spare Parts
BORA specialist supplier or the BORA Service Team. The BORA Service Team requires the type designation and the build number of your appliance (FD number). Both pieces of information can be found on the nameplate on the back of the instructions and on the appliance base. - Page 32 F +49 (0) 8035 / 907-249 F +61 2 8076 3514 info@bora.com info@boraapac.com.au www.bora.com www.bora-australia.com.au Austria: BORA Vertriebs GmbH & Co KG Prof.-Dr.-Anton-Kathrein-Straße 3 6342 Niederndorf Austria T +43 (0) 5373 / 62250-0 F +43 (0) 5373 / 62250-90 mail@bora.com www.bora.com...
Need help?
Do you have a question about the CG11 and is the answer not in the manual?
Questions and answers