
Subscribe to Our Youtube Channel
Related Manuals for bora CCH1


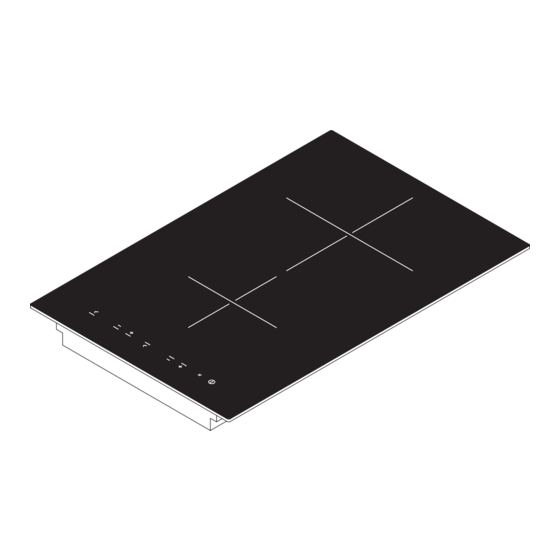
Summary of Contents for bora CCH1
- Page 1 Operating and installation instructions CCH1 Hyper glass ceramic cooktop with 2 cooking zones CCH1UMEN-000 1034813 www.bora.com...
- Page 2 T +49 (0) 8035 / 907-240 F +49 (0) 8035 / 907-249 info@bora.com www.bora.com Distribution and duplication of this document, use and disclosure of its contents are not permitted unless expressly authorised. © BORA Lüftungstechnik GmbH, 2014 All rights reserved.
-
Page 3: Table Of Contents
Switching the power setting off early .... 18 6.1.6 Switching off the cooking zone ..... 18 6.1.7 Pause function ..........18 6.1.8 Automatic heat up function ......18 6.1.9 Heat retention level ........19 6.1.10 Using the timer function ........ 19 www.bora.com... -
Page 4: General
General General INFO BORA Holding GmbH, BORA Vertriebs GmbH & Co KG, BORA APAC Pty Ltd and BORA Lüftungstechnik GmbH - hereinafter referred Target group to as BORA - shall not assume any liability for damage caused by non-compliance with these... - Page 5 CAUTION Indicates a possible hazard- ous situation which can cause minor injury if not respected. — CAUTION Indicates a situation which can cause minor injury if not respected. Tab. 1.2: Meaning of the warning symbols and signal words www.bora.com...
-
Page 6: Safety
Ensure a normal and comfortable indoor climate Always lift (do not drag!) the cookware to prevent (45-60% humidity), e.g. through natural ventilation scratching and abrasion on the surface. openings or domestic ventilation systems. www.bora.com... -
Page 7: Safety Instructions, Operation
Do not leave any objects on the cooktop. Installation and assembly of the device may only be carried out by trained personnel who are familiar with and comply with common national regulations and supplementary regulations of the local utility companies. www.bora.com... -
Page 8: Safety Instructions, Disassembly And Disposal
Check the device for visible damages before installing it. Do not install a damaged device. A damaged device may put your safety at risk! Repair and maintenance work may only be carried out by specialists authorised by the manufacturer. www.bora.com... -
Page 9: Use As Intended
Not using the device as described in this operating and assembly manual is considered not using the device as intended, as is using it beyond the purpose described here. BORA shall not assume any liability for damages caused by improper use or incorrect operation. All misuse is prohibited! INFO BORA Holding GmbH, BORA Vertriebs GmbH &... -
Page 10: Technical Data
1 ring back cooking zone with Ø215mm 2100 W hyper stage 3000 W Cooktop energy consumption Front cooking zone Ø150 mm 187.5 (Wh/kg) Back cooking zone Ø215mm 179.3 (Wh/kg) Total (average) 183.4 (Wh/kg) Tab. 3.1: Technical data Device dimensions Fig. 3.1 Device dimensions www.bora.com... -
Page 11: Device Description
[10] reduce power level Indicator light for the activated timer [11] Cooking zone indicator [12] Timer button Fig. 4.1 Cooktop Front cooking zone Back hyper cooking zone Operating panel for the back cooking zone Operating panel for the front cooking zone www.bora.com... -
Page 12: Functional Principle
4.3.1 Power levels power level set. The specifications provided in the following table are stan- dard values. Power level Cooking 00:50 01:30 02:30 03:40 05:20 09:00 02:30 04:00 duration in min:sec Tab. 4.3: Overview of the automatic heat up function www.bora.com... -
Page 13: Heat Retention Level
The bottom of the cookware must not have Where necessary, switch the cooktop back on. any sharp grooves or sharp edges to avoid scratching the cooktop. Place the cookware (without a mat or similar) directly onto the glass ceramic. www.bora.com... -
Page 14: Installation
Check the scope of delivery for damage and make sure it is complete (see Tab. 5.1). If there are any missing or damaged parts, please notify BORA Customer Services. Do not under any circumstances install parts which are damaged. Dispose of transport packaging in the proper manner (see Decommissioning and Disposal chapter). -
Page 15: Cut-Out Dimensions
Fig. 5.4 Surface installation Fig. 5.2 Flush installation Fig. 5.5 Surface mounting cut Cut-out dimensions when installing cooktops or cooktops and the BORA cooktop extractor next to each other: Cooktops / cooktop extractor A in mm B in mm Fig. 5.3 Flush installation cut... -
Page 16: Installing The Cooktop
Fig. 5.9 Built-in cooktop with cooktop extractor Insert the cooktop [1] next to the cooktop extractor [2] already installed in the centre. INFO The cooktop [1] rests on the lateral bar of the cooktop extractor [2] and is thereby stabilised. www.bora.com... -
Page 17: Power Connection
[2]. Tighten the mounting bracket screws [1] with max. 10 Nm. Verify that the alignment is correct. Seal the devices with black heat-resistant silicone sealing compound after the installation work is com- pleted. www.bora.com... -
Page 18: Operation
If the power setting is increased to , the power level will prematurely if you switch back to Continue pressing until power level is displayed press the on the cooking zone. in the cooking zone indicator. activate the power setting HY. www.bora.com... -
Page 19: Heat Retention Level
If the cooktop is switched off with the on/off button , the cooking zone control light will become active INFO If a cooking zone shows then alternately, and the remaining time will be displayed. the cooking zone is still hot. www.bora.com... - Page 20 All cooking zone indiators show the power level The child safety lock is deactivated. The power level you require can now be set for each cooking zone. After the cooktop has been switched off, the child safety lock is activated again. www.bora.com...
-
Page 21: Cleaning And Maintenance
Discolourations to the cooktop arise from residues which are not removed and have been burnt in. Glossy spots are caused by the abrasion of the pot base, especially when using cooking utensils with aluminium bases, or by unsuitable cleaning agents. They are very hard to remove. www.bora.com... -
Page 22: Troubleshooting
The power setting is automatically The overheat protection has tripped. (see Device Description chapter) shut off prematurely. Tab. 8.1: Resolving a fault In all other instances, call BORA After Sales Service (see the Warranty, After Sales and Spare parts chapter). www.bora.com... -
Page 23: Decommissioning, Disassembly And Disposal
Therefore do not dispose of your old appliance as household waste. Take the old appliance to a regional collection centre for return and recycling of electronic and electrical parts and other materials. www.bora.com... -
Page 24: Warranty, After Sales Service And Spare Parts
10.3 Spare parts Only use original spare parts when making repairs. INFO Spare parts can be obtained from your BORA dealer, the BORA online service website at www.bora.com/service or by calling the service number provided. -
Page 25: Notes
Notes: 11 Notes: www.bora.com... - Page 26 Notes: www.bora.com...
- Page 28 F +49 (0) 8035 / 907-249 F +61 297 /124 131 info@bora.com info@boraapac.com.au www.bora.com www.boraapac.com.au Austria: BORA Vertriebs GmbH & Co KG Prof.-Dr.-Anton-Kathrein-Straße 3 6342 Niederndorf Österreich T +43 (0) 5373 / 62250-0 F +43 (0) 5373 / 62250-90 mail@bora.com www.bora.com...
Need help?
Do you have a question about the CCH1 and is the answer not in the manual?
Questions and answers