
Related Manuals for soundsation LST-3000


Summary of Contents for soundsation LST-3000
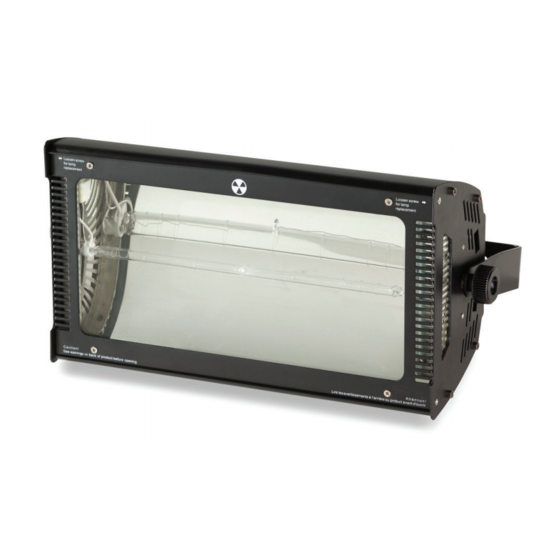
- Page 1 USER’S MANUAL LST-3000 3000W DMX Strobe Lighting Please read this manual carefully and proper take care of this manual.
- Page 2 ENGLISH...
- Page 3 ENGLISH Dear customer, First of all thanks far purchasing a SOUNDSATION® product. Our mission is to satisfy all possible needs of musical instrument, professional audio and lighting users offering a wide range of products using the latest technologies. We hope you will be satisfied with this item and, if you want to collaborate, we are looking for a feedback from you about the operation of the product and www.
-
Page 4: Table Of Contents
ENGLISH TABLE OF CONTENTS 1. GETTING STARTED ..................6 1.1 Important Safety Symbols ..................6 1.2. Important Safety Instructions ...................6 2. INTRODUCTION ..................9 2.1. Instructions against electric shock ................9 2.2. Instructions against UV radiations and fire ..............9 2.3. instructions against falls ..................10 2.4. - Page 5 ENGLISH TABLE OF CONTENTS 9. DMX PROTOCOLS ..................27 9.1. 1-CHANNEL DMX MODE ..................27 9.2. 3- AND 4-CHANNEL DMX MODES ..............27 10. MAINTENANCE AND CLEANING ............28 10.1. Replacing The Fuse ....................28 11. WARRANTY AND SERVICE ..............30 12. WARNING ....................31...
-
Page 6: Getting Started
ENGLISH 1. GETTING STARTED 1.1 IMPORTANT SAFETY SYMBOLS The symbol is used to indicate that some hazardous live termi- nals are involved within this apparatus, even under the normal operating conditions, which may be sufficient to constitute the risk of electric shock or death. The symbol is used in the service documentation to indicate that specific component shall be replaced only by the compo- nent specified in that documentation for safety reasons. - Page 7 ENGLISH LST-3000 User’s manual warranty. Water / Moisture This lighting is intended to indoor use only. To prevent risk of fire or shock, do not expose fixture to rain or moisture. Make sure there are no flammable, explosive or corrosive materials surrounded in 10 meters while operating.
- Page 8 ENGLISH LST-3000 User’s manual Fuse To prevent the risk of fire and damaging the unit, please use only of the rec- ommended fuse type as described in the manual. Before replacing the fuse, make sure the unit turned off and disconnected from the AC outlet.
-
Page 9: Introduction
LST-3000 User’s manual 2. INTRODUCTION Thanks for purchasing our LST-3000 strobe light. This fixture has been de- signed for indoor use only and thought for professional use, for example, on stages, in discotheques, theatres, etc. Lighting effects are not designed for permanent operation. -
Page 10: Instructions Against Falls
ENGLISH LST-3000 User’s manual f Do not stare directly into the light. Never look at an exposed lamp while it is lit. f Replace the lamp when it becomes defective or worn out. f When replacing the lamp, allow the fixture to cool for at least 10 minutes before opening the fixture or removing the lamp. -
Page 11: Features
ENGLISH LST-3000 User’s manual 3. FEATURES 3.1. TECHNICAL SPECIFICATIONS Power supply 90-250V 50/60Hz Size (without bracket) 530 x 230x 340 mm Weight 7.5 kg (16.5 lbs.) Maximum ambient temperature 40° C (104° F) DMX-512 (1990) control 1, 3, and 4 channel modes... - Page 12 ENGLISH LST-3000 User’s manual radiators or power amplifiers. The fixture is connected to mains through the supplied cable. The product meets the required safety standards. Blown fuses must be replaced with fuses of the same type and specification. Make sure that all units must be properly grounded. For your safe- ty, you should never remove any ground connector from electrical devices or power cables, or make them inoperative.
-
Page 13: Preparation For Use
90 to 260 volts. No adjustment is necessary. Note that the XOP 15-0F lamp does not operate below 125 volts. The current required by the LST-3000 varies according to lamp type, power mode, and usage. To avoid overload, allow one 16 or 20 amp branch circuit per fixture to operate the XOP 15-0F model at full power. - Page 14 ENGLISH LST-3000 User’s manual 3. Place one end of the bracket on one of the mounting studs. Bend the other end of the mounting bracket open slightly and work it onto the oppo- site stud. 4. Place a hand knob on each stud. Tighten both hand knobs to lock the mounting bracket in place.
-
Page 15: Lamp Fitting/Replacing
Low power settings 5.2. COMPATIBLE LAMPS The LST-3000 is available in two models for different lamps: XOP 7-0F and XOP 15-0F. The XOP 7 model operates on AC mains supplies from 90 to 260 volts and is recommended for use with mains supplies under 200 volts. The XOP 15 model operates on AC mains supplies from 125 to 260 volts and is recommended for use with mains supplies over 200 volts. -
Page 16: Lamp Replacement
ENGLISH LST-3000 User’s manual tion wire. XOP lamps without an ionization wire will not work. Warning: Installing any other lamp may create a safety hazard or damage the fixture! 5.3. LAMP REPLACEMENT End of life can be confirmed with the Flash LED on the rear panel. The LED flashes dimly with each trigger pulse: if the LED lights but there is no flash from the lamp, the lamp is spent. - Page 17 ENGLISH LST-3000 User’s manual the mains cable. Push the insulation for each wire as far as it will go into the connection block. 6. Lift and tum the lamp over so that the leads loop around the ends as shown, then press the lamp into the clips.
-
Page 18: Controller Operation
OUTPUT INPUT 6.1.1 To connect the data link 1. Connect the DMX data input from the controller to the LST-3000’s 3-pin or 5-pin input (male) socket. 2. Connect up to 31 additional fixtures output-to-input. 3. Insert a termination plugin the output of the last fixture on the link. -
Page 19: Dmx Control Modes
The address may be any channel from 1 to 511 and is set on the Address DIP switch. The LST-3000 uses 1, 3, or 4 channels depending on the control mode. For independent control, each fixture must be assigned its own address and no-o- verlapping control channels. -
Page 20: Dmx Control Summary
ENGLISH LST-3000 User’s manual setting for the address in the table below. 2. Set pins 1 through 9 ON (1) or OFF (0) as listed in the table. Set pin 10 to OFF. Find the address in the table. Read the settings for pins 1 - 5 to the left and read the settings for pins 6 -9 above the address. - Page 21 ENGLISH LST-3000 User’s manual 6.4.1. INTENSITY Flash intensity can be set from minimum (blackout) to maximum on channel 1 in the 3- and 4-channel DMX modes. Intensity is maximum in 1-channel DMX mode. The maximum intensity can be reduced by selecting low power mode as de- scribed on paragraph “5.1.
- Page 22 ENGLISH LST-3000 User’s manual of 0.05 seconds (50 ms) and a flash rate of 20 flashes per second. In 3- and 4-channel DMX mode, the intensity of the blinder effect is control- lable on channel 1. Lamp power is electronically regulated to prevent the lamp from overheating.
-
Page 23: Stand Alone Operation
ENGLISH LST-3000 User’s manual 7. STAND ALONE OPERATION This section describes how to operate the LST-3000 in stand-alone mode without a DMX controller or Detonator remote control. 7.1. STANDALONE FLASH RATE To program stand-alone execution: f Apply power to the fixture. -
Page 24: Remote Controls
Important: Do not terminate the data link when using the Remote Control The Detonator connects to the LST-3000 with a 3-pin XLR data cable. Additio- nal LST-3000s may be connected in series, output to input, for remote control of up to 20 fixtures. Note, however, that the data link must not be terminated as described DMX controllers. -
Page 25: Operation
ENGLISH LST-3000 User’s manual powers the remote control. Setting pins 2 and 3 of the Mode DIP switch to select the Remote Control master fixture ON. Use this setting to operate a single fixture 1 2 3 4 5 6 with the remote control. -
Page 26: Programming A Multi-Fixture Chase
ENGLISH LST-3000 User’s manual The flash rate cycle can be restarted, for example to synchronize with a beat, by pressing the Single Flash button while continuous flash is running. 8.5. PROGRAMMING A MUL TI-FIXTURE CHASE f Connect the fixtures and Remote Control f Select the fixture to start the flash sequence and set it to master mode as described above. -
Page 27: Dmx Protocols
ENGLISH LST-3000 User’s manual 9. DMX PROTOCOLS 9.1. 1-CHANNEL DMX MODE Channel Value Percent Function Blackout 6-249 2-98 Flash rate, slow to fast 250-255 98-100 Continuous ”Blinder” effect 9.2. 3- AND 4-CHANNEL DMX MODES Channel Function DMX value Feature Blackout... -
Page 28: Maintenance And Cleaning
ENGLISH LST-3000 User’s manual 10. MAINTENANCE AND CLEANING The operator must make sure that correlative safety equipment and an expert inspects machine’s technical installations after every four years in the course of an acceptance test. The operator must make sure that correlative safety equipment and machine’s technical installations are inspected by a skilled technician once a year. - Page 29 ENGLISH LST-3000 User’s manual from the housing (anti-clockwise). f STEP 2: Remove the old fuse from the fuse-holder. f STEP 3: Install the new fuse in the fuse-holder. f STEP 4: Replace the fuse-holder. Should you need any spare parts, please use genuine parts.
-
Page 30: Warranty And Service
Alternatively you can send the product to SOUNDSATION SERVICE CENTER – Via Enzo Ferrari , 10 – 62017 Porto Recanati - Italy . In order to send a product to ser- vice center you need an RMA number. -
Page 31: Warning
WEEE scheme or your household waste disposal service. This product is imported in EU by FRENEXPORT SPA – Via Enzo Ferrari, 10 - 62017 Porto Recanati - Italy www.soundsa tionmusic.com Soundsation® is a registered trademark of FRENEXPORT SPA - Italy... - Page 32 www.soundsa tionmusic.com Ver 1.0 - August 2015...
Need help?
Do you have a question about the LST-3000 and is the answer not in the manual?
Questions and answers