Table of Contents
Advertisement
Advertisement
Table of Contents

Subscribe to Our Youtube Channel
Related Manuals for Westinghouse WSU67381


Summary of Contents for Westinghouse WSU67381
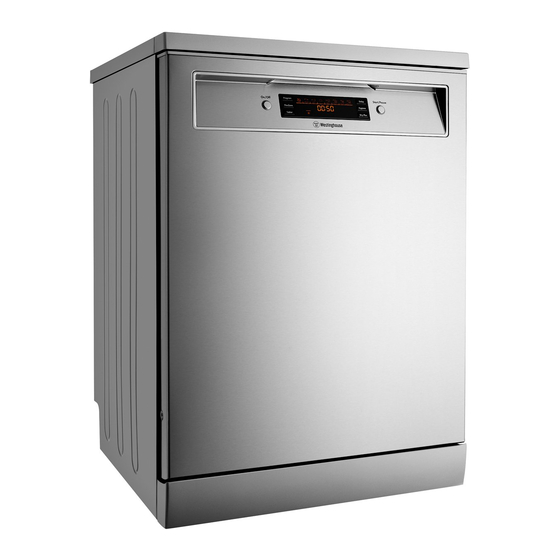
- Page 1 USER MANUAL DISHWASHER WSF67381 WSU67381...
-
Page 2: Table Of Contents
Dear customer, Safety information �������������������������������������������������������������������������������3 Safety instructions ������������������������������������������������������������������������������ 4 Congratulations on the purchase of your new Westinghouse dishwasher� Product description ����������������������������������������������������������������������������5 Technical specifications ��������������������������������������������������������������������5 Before you use the dishwasher, we recommend that you read through the whole user manual which provides the Control panel �����������������������������������������������������������������������������������������... -
Page 3: Safety Information
GENERAL WARNINGS Please read the user manual carefully and store in a handy place for later reference� Pass the user manual on to WARNING WARNING possible new owners of the appliance� It is important to use your appliance safely. Check these safety points before using your appliance. -
Page 4: Safety Instructions
SAFETY INSTRUCTIONS WARNING WARNING WARNING WARNING Risk of fire and electrical shock. Dangerous voltage • If the water inlet hose is damaged, immediately Electrical connection disconnect the mains plug from the mains socket� Contact the Authorised Service Centre to replace the •... -
Page 5: Product Description
PRODUCT DESCRIPTION Worktop Upper spray arm Lower spray arm Filters Rating plate Air vent Rinse aid dispenser Detergent dispenser Lower basket Upper basket Cutlery drawer Ceiling spray Turbo drying vent TECHNICAL SPECIFICATIONS MODEL WSF6738I - freestanding WSU6738I - built under Capacity 15 place settings 15 place settings... -
Page 6: Control Panel
CONTROL PANEL On/off button Rinse aid level warning display Door handle Remaining time/delay Start/standby button Progress indicator • Washing phase FlexZone button • Rinsing phase Program button • Drying phase Tablet detergent button • End indicator Hygiene button Delay indicator Delay button Child Lock indicator Dry Plus button... -
Page 7: Control Description
CONTROL DESCRIPTION Power on/off button Delay button When you press the on/off button, the machine is Once a program is selected and before the program switched on and the display shows the Eco 50 program, starts, you may adjust the delay time by pressing the the dishwasher is off when the LEDs on the display are off�... -
Page 8: Programs
PROGRAMS DISPLAY SYMBOL FAST QUICK TIMESAVE PROGRAM PREWASH 30 MINS ECO 50°C AUTO AUTO AUTO 18 MINS 50 MINS 40°C WASHING 35°C 40°C ***50°C 65°C 30-50°C 50-60°C 60-70°C TEMP Old soups, Fresh light Fresh light sauces, Fresh light Fresh light contamination, contamination, FOOD... -
Page 9: Settings
SETTINGS Starting the machine Cancelling program 1� Press on/off switch� If you want to cancel the program once it has started; 2� Select the appropriate program for your dishes using • Hold the start/standby button for 3 seconds� the program button� •... -
Page 10: Hints And Tips
HINTS AND TIPS If one of program monitor lights is on and If there are partial food wastes left on the dishes start/pause light is flashing • Dishes are placed incorrectly into the machine, sprayed water did not reach related places� •... -
Page 11: Installation
INSTALLATION General Inlet water supply • When determining where to put your machine, • Water pressure: 800kPa max – 50 kPa min� choose a place where you can easily load and unload • Water flow rate 10 L/minute� your dishes� •... -
Page 12: Installing A Freestanding Dishwasher
INSTALLATION Installing a freestanding dishwasher If the under counter height is greater than 850mm, the dishwasher can be installed without removing the worktop� remove entire internal If the under counter space is less than 850mm but greater membrane than 820mm the worktop will need to be removed� To remove the worktop, remove the screws located at the rear of the machine, then, from the front, push the worktop towards the rear and lift�... - Page 13 INSTALLATION In some cases you may need to remove the top concrete Finishing the installation counterwieght and trim the felt with a knife� To remove 1� Fit the steam protection tape to the underside of the the counterweight, follow the steps below� countertop�...
- Page 14 INSTALLATION Installing a built under dishwasher fastening bracket to countertop Built under dishwashers have been designed without a worktop and fixed plinth for undercounter installation where the space under the countertop is between 820-870mm� For taller cabinets where the undercounter space is 870-920mm, longer levelling legs and metal plinth must be purchased (kit #52075772)�...
- Page 15 INSTALLATION Fit the 2 side spacers� Adjust the legs (both back and front) until the top of the dishwasher contacts the underside of the countertop and check that the dishwasher is level� side spacers 20mm 20mm Fit the dishwasher by carefully sliding it into the cavity� 570mm 820mm min.
- Page 16 INSTALLATION Installing a built under dishwasher The dishwasher has been designed to allow clearance for the kitchen cabinet kickboard to be installed in front of it, or to fit the adjustable metal plinth supplied with the product. When installing the kitchen cabinet kickboard, a cutout is required to provide clearance for the dishwasher door.
- Page 17 INSTALLATION Based on the undercounter height, add the required Location of services number of plastic plinth inserts to the metal plinth� All dishwasher services should be located in the cabinet next to the dishwasher opening. the drain hose should not be 80mm extended by more than 2m otherwise water pump out...
-
Page 18: Preparing For Use
PREPARING FOR USE Detergent usage Combined detergent Use a detergent specifically designed for use in domestic Detergent manufacturers also produce combined dishwashers� You can find powder, gel and tablet detergents called “2 in 1”, “3 in 1” or “5 in 1” etc� “2 in 1” detergents in the market that have been designed for detergents contain detergent + rinse aid�... - Page 19 PREPARING FOR USE WARNING CAUTION Solubility of the tablet detergents produced by different companies can vary depending on the temperature and time� Therefore, it is not recommended to use such detergents in short programs� It is more suitable to use powder detergents in such programs�...
-
Page 20: Loading Your Dishwasher
LOADING YOUR DISHWASHER If your dishes are correctly placed in the dishwasher, Top basket folding supports you will be using it in the best way in terms of energy Foldable racks on the upper basket are designed in order consumption, washing and drying performance� to let you place big items easier such as pots, pans, etc�... - Page 21 LOADING YOUR DISHWASHER Upper Cutlery Basket Alternative basket loads The upper cutlery basket is designed for you to place Lower Basket forks, spoons and knives, long and small items� At completion of program your dishes can be taken out along with basket� Top Basket The upper cutlery basket is composed of two pieces;...
- Page 22 LOADING YOUR DISHWASHER Lower Basket Folding Racks Alternate cutlery basket Folding tines (prongs) consisting of four parts that An alternate cutlery basket has been provided for are located on the lower basket of your machine are convenience� The cutlery basket handle is adjustable - designed in order to let you place big items easier such position (a) or (b)�...
- Page 23 LOADING YOUR DISHWASHER Alternative basket loads Lower Basket * Illustration only Top Basket IMPORTANT TIPS & INFORMATION Examples of incorrect loading LOADING YOUR DISHWASHER...
-
Page 24: Maintenance And Cleaning
MAINTENANCE AND CLEANING TIPS & INFORMATION IMPORTANT Cleaning the machine in regular intervals prolongs the machine’s service life� Oil and lime may accumulate in the machine’s washing section. In case of such accumulation; • Fill the detergent compartment without loading any dishes into the machine, select a program that runs at high temperature, and start the machine�... -
Page 25: Troubleshooting
TROUBLESHOOTING ERROR CODE ERROR DESCRIPTION CONTROL • Power off your machine and close the tap� Overfill • Contact the customer service centre� • Water discharge hose is clogged� • The filters of your machine might be clogged� • Power off-on your machine and activate the Not draining�... - Page 26 NOTES NOTES...
-
Page 27: Warranty
(c) ‘ASC’ means Electrolux’s authorised serviced centres; the Appliance; (d) ‘Westinghouse’ is the brand controlled by Electrolux Home Products In addition, Electrolux is not liable under this warranty if: Pty Ltd of 163 O’Riordan Street, Mascot NSW 2020, ABN 51 004... - Page 28 The Electrolux Group to consumers including delivery, home service and spare parts� and WESTINGHOUSE are trademarks of Westinghouse Electric Corporation� Used under license by Electrolux Home Products Pty Ltd� All Rights Reserved� © 2017 Electrolux Home Products Pty Ltd�...
Need help?
Do you have a question about the WSU67381 and is the answer not in the manual?
Questions and answers