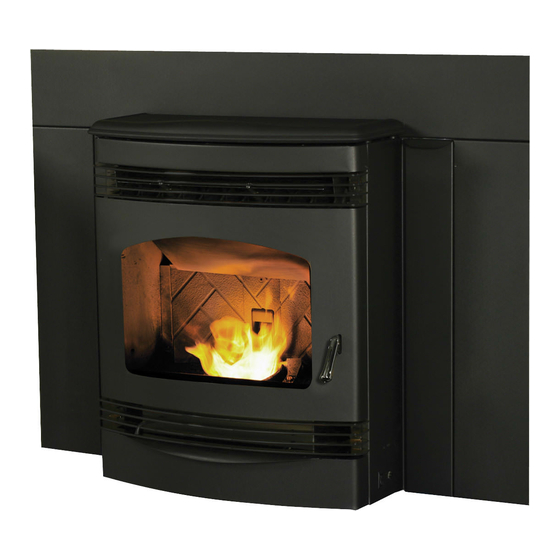
Quadra-Fire SANTAFEI-MBK Installation Manual
Hide thumbs
Also See for SANTAFEI-MBK:
- Owner's manual (52 pages) ,
- Owner's manual installation and operation (52 pages) ,
- Installation manual (28 pages)
Table of Contents
Advertisement
Quick Links
INSTALLER: Leave this manual with party responsible for use and operation.
OWNER: Retain this manual for future reference.
SANTA FE PELLET INSERT
APPLIANCE
Model: SANTAFEI-MBK
CAUTION
Tested and approved for wood pellets and corn pellets.
Burning of any other type of fuel voids your warranty.
CAUTION
Check building codes prior to installation.
• Installation MUST comply with local, regional, state and na-
tional codes and regulations.
• Consult local building, fire officials or authorities having juris-
diction about restrictions, installation inspection, and permits.
Installation and service of this appliance should be performed by
qualified personnel. Hearth & Home Technologies recommends
HHT Factory Trained or NFI certified professionals.
1
Installation Manual
Installation & Appliance Set-Up
NOTICE: DO NOT DISCARD THIS MANUAL
O-T L
Tested and
Portland
Listed by
Oregon USA
C
US
OMNI-Test Laboratories, Inc.
If the information in these instruc-
tions is not followed exactly, a
fire could result causing property
damage, personal injury, or death.
• Do not store or use gasoline or other flam-
mable vapors and liquids in the vicinity of
this or any other appliance.
• Do not over fire - If appliance or chimney
connector glows, you are over firing. Over
firing will void your warranty.
• Comply with all minimum clearances to
combustibles as specified. Failure to
comply may cause house fire.
Hot glass will cause burns.
•
Do not touch glass until it is cooled
•
NEVER allow children to touch glass
•
Keep children away
•
CAREFULLY SUPERVISE children in same room as
fireplace.
•
Alert children and adults to hazards of high temperatures
•
High temperatures may ignite clothing or other
flammable materials.
•
Keep clothing, furniture, draperies and other flammable
materials away.
To obtain a French translation of this manual, please contact
your dealer or visit www.quadrafire.com
Pour obtenir une traduction française de ce manuel, s'il vous
plaît contacter votre revendeur ou visitez www.quadrafire.com
7019-230G
WARNING
WARNING
HOT SURFACES!
Glass and other surfaces are hot
during operation AND cool down.
NOTE
June 5, 2017
Advertisement
Table of Contents

Related Manuals for Quadra-Fire SANTAFEI-MBK


Summary of Contents for Quadra-Fire SANTAFEI-MBK
- Page 1 WARNING If the information in these instruc- SANTA FE PELLET INSERT tions is not followed exactly, a fire could result causing property APPLIANCE damage, personal injury, or death. Model: SANTAFEI-MBK • Do not store or use gasoline or other flam- mable vapors and liquids in the vicinity of this or any other appliance. • Do not over fire - If appliance or chimney connector glows, you are over firing. Over firing will void your warranty. • Comply with all minimum clearances to combustibles as specified. Failure to...
-
Page 2: Table Of Contents
Santa Fe Pellet Insert Safety Alert Key: • DANGER! Indicates a hazardous situation which, if not avoided will result in death or serious injury. WARNING! Indicates a hazardous situation which, if not avoided could result in death or serious injury. • • CAUTION! Indicates a hazardous situation which, if not avoided, could result in minor or moderate injury. • NOTICE: Indicates practices which may cause damage to the appliance or to property. TABLE OF CONTENTS Important Safety Information ....3 Vent Information .......12 A. Appliance Certification ............3 A. Venting Termination Minimum Requirements ....12 B. BTU & Efficiency Specifications.........3 B. Avoiding Smoke and Odors ..........13 C. Glass Specifications ............3 C. Negative Pressure .............14 D. Electrical Rating..............3 D. Draft.. ................14 E. Mobile Home Approved ............. 3 E. Chimney and Exhaust Connection ........14 F. Equivalent Feet of Pipe .............15 Getting Started ........4 G. Pipe Selection Chart ............15... -
Page 3: Important Safety Information
• Outside Air Kit, part OAK-ACC must be installed in a mobile home installation. NOTE: This installation must conform with local codes. In the absence of local codes you must comply with the ASTM E1509-2004, ULC S628-93, ULC/ORD-C-1482-M1990, WARNING (UM) 84-HUD The Quadra-Fire Santa Fe Pellet Insert meets the U.S. Fire Risk. Environmental Protection Agency’s emission limits for pellet Hearth & Home Technologies disclaims any inserts sold after May 15, 2015. responsibility for, and the warranty will be voided by, This pellet insert needs periodic inspection and repair for the following actions: proper operation. It is against federal regulations to operate • Installation and use of any damaged appliance. -
Page 4: Getting Started
Santa Fe Pellet Insert Install Guide Getting Started A. Design, Installation & Location Considerations Since pellet exhaust can contain ash, soot or sparks, you must consider the location of: 1. Appliance Location • Windows NOTICE: Check building codes prior to installation. • Air Intakes • Installation MUST comply with local, regional, state and • Air Conditioner national codes and regulations. -
Page 5: Thermostat Wall Control Location
Santa Fe Pellet Insert B. Thermostat Wall Control Location WARNING The thermostat wall control’s location will have some affect on the appliance’s operation. Fire Risk. • Maximum wire length from appliance is 100 feet (30.48m) Damaged parts could impair safe operation. Do continuous non-spliced wire. Recommended 20 gauge NOT install damaged, incomplete or substitute wire, solid copper . components. • When located close to the appliance, it may require a slightly higher temperature setting to keep the rest of the house comfortable. -
Page 6: Install Checklist
Santa Fe Pellet Insert E. Install Checklist ATTENTION INSTALLER: Follow this Standard Work Checklist This standard work checklist is to be used by the installer in conjunction with, not instead of, the instructions contained in this installation manual. Customer: __________________________________________________________________________ Date Installed: __________________________________________________________________________ Lot/Address: __________________________________________________________________________ Location of Appliance:... -
Page 7: Dimensions And Clearances
Santa Fe Pellet Insert Dimensions and Clearances A. Appliance Dimensions 28-7/8 in [732mm] 23-5/8 in [600mm] 8 in [203mm] 23 in [584mm] 12-3/4 in 11-1/8 in 25-3/8 in 9-5/8 in [325mm] [283mm] [644mm] [246mm] 17-7/8 in [453mm] 9-1/2 in [243mm] 8-5/8 in 12-3/4 in 21-1/2 in [546mm]... -
Page 8: Clearance To Combustibles, Ul And Ulc
Santa Fe Pellet Insert B. Clearance To Combustibles, UL and ULC 25 in 25 in (635mm) (635mm) 32-7/8 in. (835mm) 15-1/4 in* (387mm) Be sure to follow vent manufacturers clearance to combustibles. *If interior of chase will be drywalled, add the thickness to this measurement. Figure 8.1 WARNING NOTE:... -
Page 9: Minimum Opening For Masonry And Zero Clearance Fireplaces
Santa Fe Pellet Insert C. Minimum Opening for Masonry and Zero Clearance Fireplaces TOP TRIM 26-3/4 in 20-3/4 in (679mm) (527mm) 29-3/4 in (1010mm) 16 in HEARTH (406mm) EXTENSION Figure 9.1 Figure 9.3 Note: If trim measurement is over 3/4 in (19mm) in depth use mantle or side clearances to combustibles. Location Inches Millimeters Height 23-1/4 Front Width 29-1/8 Rear Width... -
Page 10: Installation Into A Factory-Built Fireplace
Santa Fe Pellet Insert D. Installation into a Factory-Built Fireplace The following is only one example as there are many differ- ent models of factory-built fireplaces. The following modifications are permissible: NOTE: This example is for reference only. Any modifica- • Removal of damper or locked in open position tions must not compromise the structural integrity • Removal of smoke shelf or baffle or reduce the protection for combustible materials. • Removal of ember catches • Removal of fire grate • Removal of view screen/curtain... -
Page 11: Installation Into A Masonry Fireplace
Santa Fe Pellet Insert F. Prefabricated Metal Chimney Example Removal of Factory-Built Fireplace Cont. The chimney can be new or existing, masonry or prefabricated and must meet the following minimum requirements: • M ust be minimum 6 inch (152mm) inside diameter of Keep sharp edge of high temperature chimney listed to UL 103 HT (2100 metal floor away from or ULC-S628. power cord • M ust use components required by the manufacturer for installation. -
Page 12: Vent Information
Santa Fe Pellet Insert Vent Information A. Venting Termination Minimum Requirements Electrical Service Inside Corner FIXED FIXED OPEN CLOSED CLOSED OPEN J or K Figure 12.1 Termination Cap Restricted Area Air Supply Inlet Gas Meter All minimum clearances are listed with an Outside Air Kit (OAK) installed, unless otherwise noted in table below. 12 in. -
Page 13: Avoiding Smoke And Odors
Santa Fe Pellet Insert B. Avoiding Smoke and Odors Vent Configurations To reduce probability of reverse drafting during shut-down Negative Pressure, Shut-Down and Electrical Power conditions Hearth & Home Technologies strongly recom- Failure mends: To reduce the probability of back-drafting or burn-back in • I nstalling the pellet vent with a minimum vertical run of the pellet appliance during power failure or shut down con- 5 feet (1.52m). Preferably terminating above the roof... -
Page 14: Negative Pressure
• Ensure furnace and air conditioning return vents are not 2. Mobile Home: Approved for all Listed pellet vent. If using the located in the immediate vicinity of the appliance 3 inch (76mm) vertical Top Vent Adapter Kit or the 3 to 6 inch • Avoid installing the appliance near doors, walkways or (76-152mm) Top Vent Offset Adapter, use Listed double wall small isolated spaces flue connector. A Quadra-Fire Outside Air Kit must be used with manufactured home installations. • Recessed lighting should be a “sealed can” design 3. Residential: The 3 inch (76mm) vertical Top Vent Adapter Kit and • Attic hatches weather stripped or sealed the 3 to 6 inch (76-152mm) Top Vent Offset Adapter are tested • Attic mounted duct work and air handler joints and seams to use 24 gauge single wall flue connector or Listed double wall... -
Page 15: Equivalent Feet Of Pipe
Santa Fe Pellet Insert F. Equivalent Feet of Pipe WARNING The table below can help you calculate the equivalent feet Vent surfaces get HOT, can cause burns if of pipe which is a method used to determine pellet vent size. touched. Non-combustible shielding or guards Figure 15.1. may be required. Example of 3 Elbow-Rear Vent Termination Calculation Pellet Venting # of Feet of Multiplied Equivalent Components Component Elbows Pipe Feet Equivalent Feet 2 ft. Elbow or Tee Elbow Horizontal Pipe... -
Page 16: Venting Systems
Santa Fe Pellet Insert Venting Systems A. Full Reline With Outside Air - Horizontal CAUTION WARNING Fire Risk. Never draw outside combustion air from: Inspection of Chimney: • Wall, floor or ceiling cavity • Masonry chimney must be in good condition. • Enclosed space such as an attic or garage • Meets minimum standard of NFPA 211 • Factory-built chimney must be a minimum 6 inch (152mm) UL103 HT. NOTE; Use metal plate around exhaust vent pipe and seal all edges with non-flammable insu- lation such as fiberglass, mineral wool or ceramic. -
Page 17: Full Reline With Outside Air - Vertical
Santa Fe Pellet Insert B. Full Reline With Outside Air - Vertical NOTE: Check clearances carefully for this type of instal- lation to ensure adequate room for outside air venting. 12” (305mm) min. above 12” (305mm) CAUTION min. below Check building codes prior to installation. • Installation MUST comply with local, regional, state and national codes and regulations. • Consult local building, fire officials or authorities having juris- diction about restrictions, installation inspection, and permits. NOTE; Use metal Side view of Santa Fe Insert with side panel plate around removed. -
Page 18: Appliance Set-Up
Santa Fe Pellet Insert Appliance Set-Up A. Leveling System B. Outside Air Kit Instructions The leveling bolts are located at the rear of the appliance. To Parts Included in Kit: 1 piece of 2 inch x 3 ft. flex hose, 2 access the bolts, remove the front access panels. Reach in hose clamps, 1 collar assembly, 1 termination cap assem- and turn the bolt to the desired height to level the appliance. bly, 1 trim ring, fasteners. Tools Needed: Phillips head screwdriver; wire cutters; hole saw or jig saw. Measure distance from floor to air vent opening in appliance and mark location on wall. Use saw to cut opening in wall. Cut a 2-1/2 to 3 inch (64-76mm) opening on inside wall and a 3 to 3-1/2 inch (76-89mm) opening on outside of house. Use hose clamp to secure flex pipe to collar as- sembly. Slide trim ring over flex pipe and run pipe through wall. Attach hose to outside termination cap with second hose clamp. Secure termination cap to outside surface. Secure trim ring to interior wall. CAUTION Never draw outside combustion air from: Leveling Bolt on Each Side • Wall, floor or ceiling cavity • Enclosed space such as an attic or garage Figure 18.1... -
Page 19: Optional Grille Removal And Installation
Santa Fe Pellet Insert C. Optional Grille Removal and Installation 6. The upper grille has 2 separate parts. Install the 3 grilles attached together first. Angle the grilles downward and Included in Kit: (4) lower grilles; (3) upper grilles, (1) insert the heat exchanger cleaning rods through the holes upper grille; (4) grille bracket covers; fasteners in the second grille and then twist forward until horizon- Tools Required: #2 Phillips head screwdriver tally level. Attach the grille with only the bottom 2 screws on each side of grille. Do not finger bend the cover brack- 1. Open the door. Remove the top 2 screws on each side ets at this time. of upper grille and remove the single grille. Remove the 7. Position the single top grille over the 3 already in place. bottom 2 screws on each side and remove the 3 grilles Attach with one screw on each side through the top grille attached together. and the other 3 grilles to secure to appliance. 2. Removing the ash drawer before taking off the lower 8. Finger bend the bracket covers on the upper grille into grille will make the lower grille easier to remove. Using a place. -
Page 20: Adjustable Hearth Support
Santa Fe Pellet Insert F. Adjustable Hearth Support Size: 9”d x 45”w, 2” to 10” Height Adjustment EXPLODED VIEW OF SCISSORS Included in Kit: (1) trim top, (1) trim front, (2) trim sides, double-sided tape (already installed) Tools Needed: Phillips head screwdriver, sheet metal SCREWS ARE CIRCLED shears, measuring tape, gloves 1. The 10 screws on each set of scissors will already be loose when shipped. Figure 20.1. -
Page 21: Panel And Trim Set
Santa Fe Pellet Insert G. Panel and Trim Set Open Hopper Lid for 1. Lay panel top and legs face down on protective covering Easier Placement of to prevent scratching. Panel Set Magnet 1. Attach the panel legs to the top panel using a Phillips head screwdriver. There are 2 screws for each leg. Figure 21.2. -
Page 22: Thermostat Installation
Santa Fe Pellet Insert H. Thermostat Installation There is a 4 screw terminal block located on the junction box to the right of the power cord inlet. The center 2 screws are for the thermostat wires. The outer 2 are the mounting screws for the terminal block. Figure 22.1. The appliance comes standard with a wall thermostat and 25’ of wire. If you need to run more than 25’ make sure you use a continuous strand of 18 to 22 gauge thermostat wire. For optimum performance your thermostat should be located on an inside wall approximately 5’ up from the floor. How to Install Your Wall Thermostat Cut Away 1. Separate the body of the thermostat from the mounting plate by gently pulling the two pieces apart 2. Connect your thermostat wire to the W and R terminals LEFT SIDE (see Figure 22.2) 3. Screw the backer plate to the wall using the hardware included Junction Box 4. Snap the thermostat to the backer plate Junction Box, Front 5. Connect the wires to the 2 center screws on the terminal block on the back of the product... -
Page 23: Thermostat Operation
Santa Fe Pellet Insert J. Optional Log Set Placement Press and pull Press and pull Two Piece Log Set Installation to remove to remove Open door to expose the firebox. 2. Install the left log first and then the right log. Figure 23.3 3. Lean the logs against the cast iron brick in the back of the firebox. 4. Push the logs to the far left and far right against the sides of the firebox. Figure 23.4. 5. To clean the logs, use a vacuum cleaner and a soft brush attachment or a paint brush. -
Page 24: Mobile Home Installation
Santa Fe Pellet Insert Mobile Home Installation You must use a Quadra-Fire Outside Air Kit CAUTION for installation in a mobile home. THE STRUCTURAL INTEGRITY OF THE MOBILE HOME An outside air inlet must be provided for the combustion air and FLOOR, WALL AND CEILING/ROOF MUST BE MAINTAINED must remain clear of leaves, debris, ice and/or snow. It must Do NOT cut through: be unrestricted while the appliance is in use to prevent room • Floor joist, wall, studs or ceiling trusses. air starvation which causes smoke spillage. Smoke spillage • Any supporting material that would affect the structural can also set off smoke alarms. integrity. The combustion air duct system must be made of metal. It must permit zero clearance to combustible construction and This appliance is to be connected to a factory-built chimney prevent material from dropping into the inlet or into the area conforming to CAN/ULC-S629, Standard for 650°C Facto- beneath the dwelling and contain a rodent screen. -
Page 25: Reference Materials
Santa Fe Pellet Insert Reference Materials A. Service & Maintenance List Date of Service Performed By Description of Service June 5, 2017 7019-230G... - Page 26 Santa Fe Pellet Insert Date of Service Performed By Description of Service 7019-230G June 5, 2017...
-
Page 27: Accessory List
Trim Plate, Outside Air Kit 412-7100 Black Nickel SP-SFI3350-NB Panel Set, Large No longer available SP-SFI3350-GD Nickel SP-SFI3350-NL Bracket, -L-, Trim 832-0840 Logo, Quadra-Fire Pkg of 10 7000-649/10 Black Nickel 7019-027 Trim, Panel Set Gold SRV250-4660 Black Nickel SP-SFI3040-NB Panel Set, Small... - Page 28 Hearth & Home Technologies 352 Mountain House Road Halifax, PA 17032 Division of HNI INDUSTRIES Please contact your Quadra-Fire dealer with any questions or concerns. For the number of your nearest Quadra-Fire dealer log onto www.quadrafire.com CAUTION DO NOT DISCARD THIS MANUAL...
Need help?
Do you have a question about the SANTAFEI-MBK and is the answer not in the manual?
Questions and answers