Alpha ESS Storion-SMILE5 Installation Manual
Energy storage system (ess)
Hide thumbs
Also See for Storion-SMILE5:
- Installation, operation & maintenance manual (75 pages) ,
- Installation manual (40 pages) ,
- Installation, operation & maintenance manual (53 pages)
Table of Contents
Advertisement
Advertisement
Table of Contents

Related Manuals for Alpha ESS Storion-SMILE5


Summary of Contents for Alpha ESS Storion-SMILE5
- Page 1 Installation Manual Energy Storage System (ESS) Storion-SMILE 5 V1.3...
- Page 2 Web: www.alpha-ess.com Add: JiuHua Road 888, High-Tech Industrial Development Zone 226300 Nantong City, Jiangsu Province Australia Alpha ESS Australia Pty. Ltd. Tel.: +61 1300 968 933 E-mail: australia@alpha-ess.com Web: www.alpha-ess.com.au Add: Suite 2, Level 1, 530 Botany Road, Alexandria, NSW, 2015 10.08.2017...
-
Page 3: Table Of Contents
Your Smart Energy Copyright Statement This manual is under the copy right of Alpha ESS Co., Ltd, with all rights reserved. Please keep the manual properly and operate in strict accordance with all safety and operating instructions in this manual. Please do not operate the system without reading through the manual. -
Page 4: Introduction
Have the system installed and commissioned by qualified people with the appropriate skills only. Prior to performing any work on the inverter or the battery pack, disconnect the inverter from all voltage sources as described in this document. Alpha ESS Co., Ltd. - Page 5 The inverter and battery are heavy. There is risk of injury if the inverter or battery is lifted incorrectly or dropped during transport or when attaching to or removing from the wall. Lifting and transporting the inverter and battery must be carried out by more than 2 people. Alpha ESS Co., Ltd.
- Page 6 SMA 60A or ADL 3000 1pcs User manual (1 black, 1 red) 1pcs SMILE5-BAT M8*60 M6 *15 4pcs Network Cable RJ45 Plug 4pcs 6pcs Mounting Bracket 1 pcs Power cable 2pcs User manual 1pcs (1black,1 red) Panel 1pcs Alpha ESS Co., Ltd.
-
Page 7: Delivery Scope
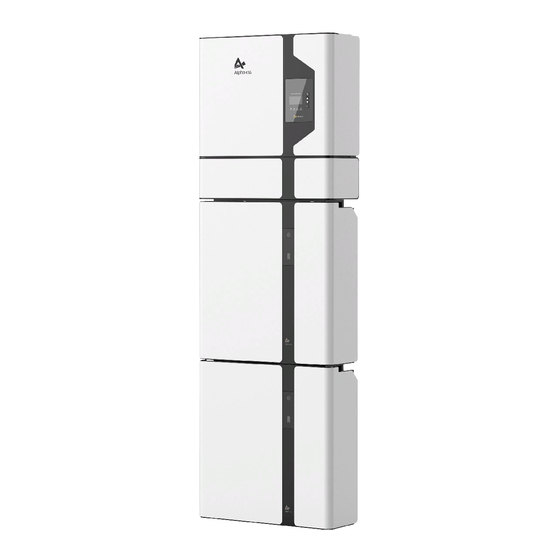
Your Smart Energy 1.4 System Appearance Storion-SMILE5 Delivery Scope Item Components Hybrid Inverter Display Screen Cable Box SMILE5-BAT battery 1 SMILE5-BAT battery 2 Alpha ESS Co., Ltd. - Page 8 Figure 7 Cable box- back PV1,PV2 PV Connector METER RS485 connection for meter GRID/BACKUP Terminal Board AC/Grid LAN1 Ethernet connection LAN2 Ethernet for EVEGEN DRMS DRED connect for SAA Battery communication Dry Contact Terminal 1,2 Battery connect terminal Alpha ESS Co., Ltd.
-
Page 9: Liability Limitation
• The storage system door can be opened easily, • There is sufficient space for carrying out maintenance work. This manual carefully describes the basic steps on how to install and set up the AlphaESS SMILE5. Alpha ESS Co., Ltd. -
Page 10: Installation Site And Its Environment
Open battery housing case and remove communication wiring baffle (each battery has two of these located on both sides). Place it aside and close the housing case. Note: The battery front cover should not open exceeding 90 ° Alpha ESS Co., Ltd. - Page 11 Close the battery front cover and connect the power cable at the top. One end need to be connected and the other end be left and exposed outside. (Each open battery has to be connected). After all have been connected, set aside. Alpha ESS Co., Ltd.
- Page 12 Screw off the big and small waterproof terminals and pass the network cable through the terminals, into the switch box. At the same time connect the power cable of output side through waterproof terminal following the diagram. (Here the network cable is not equipped with RJ45 plug). Alpha ESS Co., Ltd.
- Page 13 Step8: Lock the cable box back cover, leave the power line and communication line hang on the outside. Follow the diagram, pass the BAT communication line through the battery communication baffle in Step2 and connect the RJ45 plug. Leave the device aside. Alpha ESS Co., Ltd.
- Page 14 Install the assembled mounting panels and brackets onto the wall with wall plugs. Note: The bottom must be parallel to the ground, use a level if necessary and make sure the bracket is in a horizontal position. Alpha ESS Co., Ltd.
- Page 15 Entire Inverter Installation Step12 Hang the inverter onto the mounting panels, adjust the entire system and ensure that the battery and the inverter have been securely hung on the panels and brackets. Alpha ESS Co., Ltd.
- Page 16 Step14 Connect the communication cable of cable box from step8 to the battery. Use the communication cable from step13 to connect the two batteries at the side. After all above connection’s done, lock all communication baffles. Alpha ESS Co., Ltd.
- Page 17 Take out the power cable and connect the batteries according to the above diagram. Wiring the power cable of the cable box Step16 Connect the power cable from Step4 to the terminals of cable box. Make sure that red connects to red and black connects to black. Alpha ESS Co., Ltd.
- Page 18 Open battery housing case and remove DIP baffle, set the DIP switch 2 to “on” mode at the bottom of the module. Then close the DIP baffle and battery housing case. Note: Only the farthest battery from inverter need to set DIP. Alpha ESS Co., Ltd.
- Page 19 If you want to add more batteries, please install the extra ones by the side as shown below. Increase the battery modules Note: When adding on battery modules, please install only by side. You can add up to 6 extra batteries with each two in a string. Alpha ESS Co., Ltd.
-
Page 20: Power Meter
ADL-3000 connect(without CT, without meter plug)( if applicable): ADL-3000 connect(with CT, without meter plug) ( if applicable): Note: Meter 7, 8 connect the RJ45 3, 6, then RJ45 connect the cable box/super cable box. ADL-3000 connect(without CT,with meter plug) ( if applicable): Alpha ESS Co., Ltd. -
Page 21: Meter Sm 60A
Note:CT connect, Connect S1 to L1, S2 to L1’; For AC/Hybrid system, there are two meter needed: Two meter connect(with meter plug) without meter plug 2.4.2 Meter SM 60A (If Applicable) SM60A connect(with meter plug) ( if applicable): Alpha ESS Co., Ltd. -
Page 22: Backup Box
GRID AC_L2 GRID_L3 BAK_L2 ON_GRID_L3 LOAD_L3 AC_L3 GRID_N BAK_L3 ON_GRID_N On_Grid_ On_Grid_ LOAD_N meter Storion_S5 meter Storion_S5 Inverter Inverter AC_N GRID_PE BACK BAK_N ON_GRID_PE Meter Port DSP_BackupBox For SMILE5, you must turn on DIP switch 1. Alpha ESS Co., Ltd. -
Page 23: Operation The System
Step 6 Turn on the Battery switch. Step 7, Press button 1 on all the batteries, and the indicator light 2 will be on. Step 8 Close the inner cover and outer shell of Cable box. Alpha ESS Co., Ltd. -
Page 24: Switch Off
Step 5, If backup load is applied, turn off the Backup switch. Step 6, Turn off the PV switch on the cable box. Step 7, Close the inner cover and outer shell of Cable box. More information can be found in SMILE5-BAT user manual. Alpha ESS Co., Ltd. -
Page 25: Ems Introduction /Set Up
In the Main interface, press ENT key to enter the Menu main interface. Through the up and down key, select the sub- menu, press theENT key to enter the select sub-menu, press Return key to return to the previous layer. Alpha ESS Co., Ltd. - Page 26 U, current I, power P, residual capacity of Battery (SOC), the internal environmental temperature Temp EPS interface displays the real-time information in this mode: voltage U, current I, power P, frequency F. Alpha ESS Co., Ltd.
-
Page 27: History
Inverter Yield interface displays the related information of electric quantity of inverter. Error Logs interface displays 10 pieces of the latest fault records of device, including the name of the fault and time of error. Alpha ESS Co., Ltd. -
Page 28: Set Up
Setting interface (administrator permissions). Step3: Click PV Connection to set PV Step2: Click Function to enter function data. setting. Step4: Set PV capacity. Step5: Set PV input number (MPPT number). Alpha ESS Co., Ltd. - Page 29 Step13: Set the UPS Reserve Soc, it time. means how much battery energy to keep for UPS function. Step14: Click the Safty in the setting Step15: Set safty standard.( AS4777 for display. AU, VDE for DE) Alpha ESS Co., Ltd.
- Page 30 MAC Address:display MAC Address. Step20: Click Reset to clear power Step21: Click New Password to set new generation. password if you need. Step22: Click Language to set Step23: Make sure all the folliwing language. number is correct: Alpha ESS Co., Ltd.
-
Page 31: Online Monitoring
Please fill in “Username”, “Password” and click “Login”, if you have registered. If not, please register following these steps In this form, all blanks marked with an asterisk must be filled out. More detailed information can be obtained Online Monitoring Webserver installation Manual. Alpha ESS Co., Ltd. -
Page 32: Annex
Your Smart Energy 6. Annex 6.1 Datasheet – AlphaESS Storion-SMILE5 System Model Storion-SMILE5 Battery SMILE5-BAT Installed Capacity 5.7/11.5/17.2/22.9/28.7/34.4 kWh Usable Capacity 5.2/10.3/15.5/20.6/25.8/30.9 kWh Cycle Life ≥6000 Product Warranty 5 Years Performance Warranty 10 Years Phase Single Phase Display Communication Ethernet Operating Temperature Range -10℃...
Need help?
Do you have a question about the Storion-SMILE5 and is the answer not in the manual?
Questions and answers