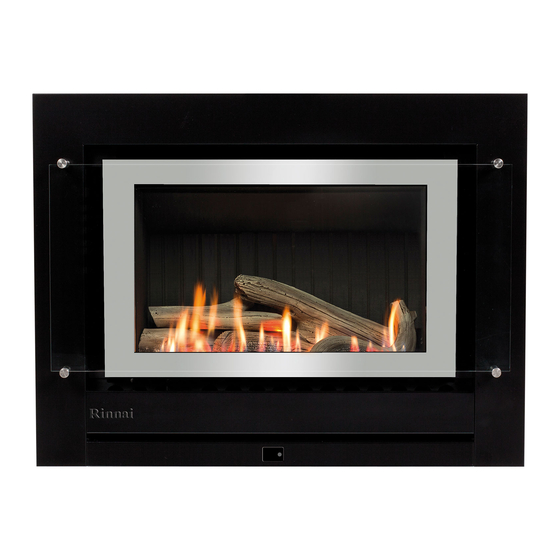
Rinnai Neo RIB2311N Installation Manual
Hide thumbs
Also See for Neo RIB2311N:
- Installation manual (32 pages) ,
- Installation manual (32 pages)
Table of Contents
Advertisement
Quick Links
Download this manual
See also:
Installation Manual
Advertisement
Table of Contents

Subscribe to Our Youtube Channel
Related Manuals for Rinnai Neo RIB2311N


Summary of Contents for Rinnai Neo RIB2311N
-
Page 1: Installation Guide
Installation guide RIB2311N/RIB2311L... - Page 2 Important: For installations into a combustible opening, a Rinnai zero clearance box and flue kit are mandatory. Appliance must be installed with a Rinnai approved flue system. This appliance shall be installed in accordance with: Manufacturer’s installation instructions AS/NZS 5601 Gas Installations...
-
Page 3: Table Of Contents
Checklist ..............4 Specification ...............5 Dimensions ..............6 Location ..............7 Mantels and surrounds ..........8 Hearths ...............8 Electrical connection ..........9 TV installation above a fireplace .........10 Enclosure dimensions ..........11 Gas supply ..............12 Flueing guidelines ............13 Masonry installations ..........14 Mock chimney installations ........15 Freestanding installations ..........16 Log set installation .............17 Granule pack installation ..........18 Inner frame and control panel ........19... -
Page 4: Checklist
Checklist Engine: Masonry installations Rinnai Neo heater (engine) Standard 2. Outer frame (standard or classic) frame 3. Glass outer dress guard—standard frame Mesh dress guard—classic frame (inbuilt models) Classic 4. Inner frame frame 5. Log set and granule pack (inside appliance) 6. -
Page 5: Specification
Inside appliance on the front left hand side. Noise level Flue - masonry 37-45 dB(A) Rinnai strongly recommends the use of a Rinnai flexiliner flue system (flexi Ø 100 mm). Failure to meet this criteria may result in an unsafe situation. Power consumption... -
Page 6: Dimensions
Dimensions (mm) Inbuilt masonry Inbuilt mock chimney Freestanding console Freestanding plinth Model External dimensions Gas connection Inbuilt masonry Inbuilt mock chimney Freestanding console Freestanding plinth 6 | Neo installation guide: 11906-F 06-14... -
Page 7: Location
Location The main points governing location are flueing and warm air distribution. The heater must not be installed where curtains or other combustible materials could come into contact with the appliance. In some cases curtains may need restraining. The Neo gas fireplace is not designed to be built into bookcases. Standard flued appliances draw the air for combustion from the room so there is a need for adequate ventilation. -
Page 8: Mantels And Surrounds
Mantels and surrounds A mantel and surround are allowed providing they are outside the minimum clearances shown below. Due to the number of different sized Neo frames, the dimensions are taken from the edge of the glass. E - Minimum width for surround B - Mantel depth A - Mantel height from top... -
Page 9: Electrical Connection
If changing the electrical position use the rubber grommet from the rear of the appliance for cable protection. Rinnai recommend the heater is plugged into a dedicated 240 V, 10 A earthed power point. The power point must not be located above the heater (potential fire hazard). -
Page 10: Tv Installation Above A Fireplace
Some TV manufacturers have warranty conditions that state a TV is not to be installed above a fireplace. Rinnai does not accept any responsibility for damage to a TV resulting from the use of this information. -
Page 11: Enclosure Dimensions
Enclosure dimensions The enclosure dimensions specified are critical to the successful installation of this appliance. The appliance must be positioned within the enclosure on a flat level surface. If the appliance is to be elevated from the ground, a base must be constructed with supporting joists capable of supporting a minimum of 1.5 times the weight of the appliance. -
Page 12: Gas Supply
Gas supply Gas pipe sizing must consider the gas input to this appliance as well as all other gas appliances in the premises. The gas meter and regulator must be specified for the total gas rate. An approved sizing chart such as the one in AS/NZS 5601.1 should be used. The gas supply termination is inside the heater and enters through the rear of the appliance. -
Page 13: Flueing Guidelines
Masonry installations Flashings be self-supporting. Rinnai strongly recommends the use of a Flashings to the top of the chimney Supporting the flue is Rinnai flexiliner flue system (flexi Ø structure do not form part of the flue kit usually completed during 100 mm). -
Page 14: Masonry Installations
Rinnai the enclosure ensuring the gas strongly recommends the use supply feeds into the rear access Adpator of a Rinnai flexiliner flue system hole and fasten the heater to the Flexible Minimum chimney liner for masonry installations. Failure fireplace. -
Page 15: Mock Chimney Installations
Mock chimney installations For installations into a mock chimney a Rinnai zero clearance box and zero clearance flue kit is required to isolate the appliance from combustible materials. Failure to meet this installation criteria will void any product warranty. Construct the frame and install the zero clearance box Refer ‘Enclosure dimensions’... -
Page 16: Freestanding Installations
Freestanding installations While the following diagrams depict the Neo Freestanding Console model, the steps to construct the Neo Freestanding Plinth model are the same. Attach the flue spigot to the Attach flue spigot Neo engine Using a 3.3 mm drill bit drill through the four dimples at the rear of the back panel of the Neo engine. -
Page 17: Log Set Installation
Log set installation The granule pack and log set, consisting of five log pieces, comes packaged inside the appliance. The glass retainer will need to be removed before installing the granules and log set. Use extreme care when handling the log pieces, they are made from a fragile material and will damage easily. -
Page 18: Granule Pack Installation
Granule pack installation The granules as well as being added to create a more realistic log flame affect (by diffusing the gas flames through the burner ports) also assist in soot prevention and are CRITICAL to the performance of the heater. Never pour the granules directly from the pack as dust particles from the plastic bag may block the ports. -
Page 19: Inner Frame And Control Panel
Inner frame and control panel Before fitting the frame assembly ensure that it is not scratched or damaged. When placing the assembly down ensure it is placed on its lower edge or flat. If it is placed WARNING on its left or right edge the glass may slide out off the stand-off posts. If this should occur ensure that the silicon mounts are not dislodged when sliding the glass back into position. -
Page 20: Test Pressures
Test pressures Check and set the burner 3. Reconnect the power to pressures the GCV by rejoining the connector (yellow wires). Refer to the data plate located Gas control inside the appliance on the valve front left hand side for the 4. -
Page 21: Outer Frame And Dress Guard
Outer frame and dress guard Locate and remove the two 8 g x 10 mm frame assembly securing screws pre-positioned in the mounting tabs in the heater engine body. These screws have been pre-inserted to ensure correct threading of the frame securing tabs. Attach the frame Top fold Carefully pick up the outer frame... -
Page 22: Flame Pattern
It is the responsibility of the installer to check that under normal conditions of the appliance, all flue gases are exhausted to the outside atmosphere, and that there is no spillage of combustion gases into the room. If the appliance cannot be made to perform correctly please contact Rinnai. Soot build up Normal flame pattern... -
Page 23: Wiring Diagram
Wiring diagram (11904-B) Neo installation guide: 11906-F 06-14 | 23... - Page 24 Experience our innovation Rinnai.co.nz 0800 746 624 http://www.youtube.com/rinnainz...
Need help?
Do you have a question about the Neo RIB2311N and is the answer not in the manual?
Questions and answers