urmet domus IPERVOICE SYSTEM Installation And User Manual
Switchboard
Hide thumbs
Also See for IPERVOICE SYSTEM:
- Installation manual (293 pages) ,
- Installation manual (310 pages) ,
- Installation manual (22 pages)
Table of Contents
Advertisement
Quick Links
Advertisement
Table of Contents

Related Manuals for urmet domus IPERVOICE SYSTEM


Summary of Contents for urmet domus IPERVOICE SYSTEM
- Page 1 IPERVOICE SYSTEM DS1039-035B LBT8599 SWITCHBOARD INSTALLATION AND USER MANUAL...
-
Page 2: Table Of Contents
SWITCHBOARD TABLE OF CONTENTS Version 4.01 Introduction ..........................4 Hardware and Software Requirements ....................4 Pre-installation Checks / Updates ......................5 Installation ..........................5 Windows Firewall Configuration ......................6 Usage in Systems with more than one Ethernet Interface ..............6 Door Phone 1039/41 Installation ...................... - Page 3 Call to a User with a Code ........................21 Call to a User with the Address Book ....................22 Receiving a Call from a Door Unit and Forwarding to a User (Concierge Service)........24 Receiving a Call from an Apartment Station and Forwarding to another User ........26 Door Lock Release Commands and Special Codes ................27 5.7.1 Door Opening ................................
-
Page 4: Introduction
1 1 1 1 I I I I NTRODUCTION NTRODUCTION NTRODUCTION NTRODUCTION The user-friendly “Switchboard” software has been designed and realized to allow a concierge attendant of a building to perform and manage all switchboard calls and typical functions. The software is provided on a CD-ROM with IP system server 1039/1 or can be downloaded from Urmet Internet site (http://www.urmet.com). -
Page 5: Installation
Select the tab “Security” and check that the user or the group have the “Full control” of the folder In order to use the Switchboard application in IPervoice system, the switchboard must be configured as described in paragraph “Concierge switchboard configuration” in “Installation technical manual” of IPervoice system. - Page 6 W W W W F F F F C C C C INDOWS INDOWS INDOWS INDOWS IREWALL IREWALL IREWALL IREWALL ONFIGURATION ONFIGURATION ONFIGURATION ONFIGURATION During the first concierge switchboard execution, Windows operating system could ask the user to open the communication ports on IP network used to communicate with IPervoice server. This operation is needed to make the system work properly.
- Page 7 Open the file and perform the following operations, as shown in Figure 4: If there are more than one network interface, to solve connection problems follow the procedure below: If the Switchboard is used in a multi-server environment (for further details, see “Menu Settings – Multi-server configuration“...
-
Page 8: Starting The Program
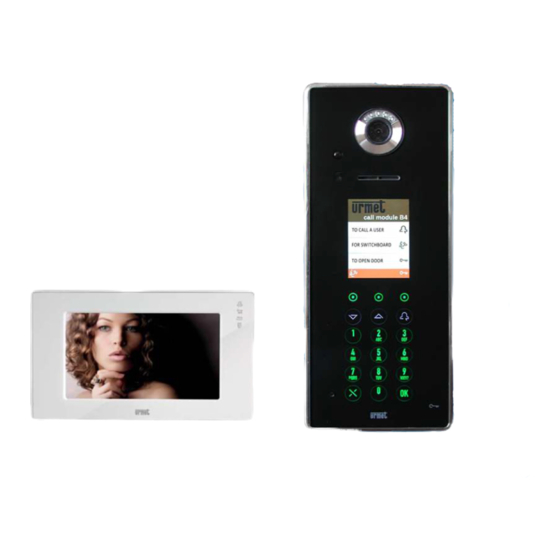
MAC_ADDRESS: <MAC address of the network interface connected to IPervoice> Figure 4: Switchboard Installation – Network interface configuration except for MAC_ADDRESS parameter, the other configuration data can be set using Note: the application. It is not necessary to modify “manually” the configuration file. D D D D P P P P 1039/41... - Page 9 Connect the door phone 1039/41 to a free USB port of the PC. Perform also the other audio connections, as shown in Figure 5. Wait until the display shows a window with the message “A USB Door Phone 1039-41 has been detected”...
- Page 10 Select the device and press the button “Properties” to open the respective window (Figure 7). In the section “Enhancements” check that all audio effects are disabled, with reference to the option “Voice cancellation”. Figure 7: Disabling sound effects 2.4.2 2.4.2 M M M M (R (R (R (R D D D D...
- Page 11 Select Mic Boost option Custom: Check that the microphone level is sufficient (greater or equal to 50) Levels: Select options “Allow application to take exclusive control of this device” and Advanced: “Give exclusive mode applications priority”. Figure 9: Playback device properties DS1039-035A LBT8599...
- Page 12 3 3 3 3 S S S S P P P P TARTING THE TARTING THE ROGRAM ROGRAM TARTING THE TARTING THE ROGRAM ROGRAM To start the program “Switchboard”, select the icon, as shown below. for a more comfortable use, it is suggested to use a touch screen monitor, to Note: directly select all software functions.
- Page 13 Figure 12: Program start-up – Login phase If the authentication has been successful, the system will allow the application to access. Username and password used to access the system are defined during IPervoice system installation/configuration phase; please refer to the system administrator. DS1039-035A...
- Page 14 The display will show: 1. Pull-down menus bar 16. Last code repetition 2. Address book 17. Alphanumeric keyboard 3. Call 1 data area 18. Call waiting notification 4. Call 1 data area activation 19. Special code activation 5. Call transfer 20.
- Page 15 PGRAD PGRADE E E E IPervoice system can automatically upgrade its IP devices in order to keep the consistency with the software executed in IPervoice server. When the Switchboard application is launched, it could happen that the upgrade procedure is automatically activated. This will download the upgrade package (Figure 13) from the server and upgrade locally the application .
-
Page 16: Operating Mode
The definition of competence areas with respective users and door units managed by the switchboard is performed during programming phases. See paragraph “Concierge switchboard – Competence Area” in “Installation technical manual” of IPervoice system. Switchboard operating behaviors depend on its operating status. -
Page 17: Switchboard In Night Mode
S S S S N N N N M M M M WITCHBOARD IN WITCHBOARD IN WITCHBOARD IN WITCHBOARD IN IGHT IGHT IGHT IGHT This mode is indicated by in “switchboard status” area. In this mode, the concierge service is disabled and calls coming from door units are directly addressed to users. -
Page 18: Switchboard In Day Mode
S S S S D D D D M M M M WITCHBOARD IN WITCHBOARD IN WITCHBOARD IN WITCHBOARD IN AY AY This mode is indicated by in “switchboard status” area. In this mode the switchboard performs the concierge service and intercepts calls coming from apartment stations and addressed to the users of the competence area. - Page 19 5 5 5 5 S S S S U U U U WITCHBOARD WITCHBOARD S S S S AG AGE E E E WITCHBOARD WITCHBOARD C C C C R R R R D D D D U U U U ECEIVED IVED IVED...
- Page 20 C C C C R R R R F F F F U U U U ECEIVED IVED IVED IVED ROM A ROM A ROM A ROM A If a user calls the switchboard which is not in standby mode, the switchboard software shows the following information: The caller is shown in the call data area (3);...
-
Page 21: Call To A User With A Code
C C C C U U U U C C C C ALL TO A ALL TO A ALL TO A ALL TO A SER WITH WITH WITH WITH A A A A If the user code to be called is known, operate as follows: Press the button to activate the respective call data area;... -
Page 22: Call To A User With The Address Book
When the user picks the handset up, a communication is established with the switchboard; In this case, in the call data area appears the message “Connected” and the video images area (6) shows the same image displayed on the video door phone monitor. At the end of conversation, when the user hangs the handset up, the switchboard goes back to the previous state;... - Page 23 To perform a call, select a user in the “user list” area or write the name, or part of it, in the “user search” area and press the button If the switchboard has been configured to manage several IPervoice servers, select Warning: the server where to perform the search, then enter the name to be searched.
-
Page 24: Receiving A Call From A Door Unit And Forwarding To A User (Concierge Service)
R R R R C C C C D D D D U U U U F F F F U U U U ECEIVING A ECEIVING A ECEIVING A ECEIVING A ALL FROM A ALL FROM A ALL FROM A ALL FROM A NIT AND NIT AND... - Page 25 To call the user in the apartment, the attendant must operate as follows: Select the second call data area by clicking on the button Enter the code of the desired user and press or select the name from the directory (see paragraph “Call to a User with the Address Book ”...
-
Page 26: Receiving A Call From An Apartment Station And Forwarding To Another User
R R R R C C C C A A A A S S S S F F F F ECEIVING A ECEIVING A ECEIVING A ECEIVING A ALL FROM AN ALL FROM AN ALL FROM AN ALL FROM AN PARTMENT PARTMENT PARTMENT... -
Page 27: Door Lock Release Commands And Special Codes
1039/41 depend on system conditions and settings performed during programming phase. See “Installation technical manual” of IPervoice system. If a specific lock must be activated, regardless of its configuration, operate as follows: With the pull-down menu “Tool”... - Page 28 Select a lock and activate it by pressing the button If the switchboard has been configured to manage several IPervoice servers, select Warning: the server from the list on the left of the opening door mask; the switchboard will update the door list in the selected server, then the door to be managed. If the switchboard has received a call from a door unit, use the button to activate one of the two electric locks connected to the caller device.
-
Page 29: Use Of Special Codes
This function allows to send a specific command to a “Special Decoder” module (1039/80) in IPervoice system. The attendant can activate an output by entering the code assigned during configuration. For further details, see paragraph “Special Decoder” in chapter “IPervoice system advanced configuration” of “Installation technical manual” of IPervoice system. -
Page 30: Pull-Down Menu Bar
6 6 6 6 P P P P - - - - D D D D M M M M B B B B At the top of the “Switchboard” software window there are the following pull-down menus: “View” menu contains the following commands: “Tools”... -
Page 31: View Menu
V V V V M M M M 6.1.1 6.1.1 A A A A 6.1.1 6.1.1 CTIVE CALLS CTIVE CALLS CTIVE CALLS CTIVE CALLS In “View” menu, press this command; the following window will appear, where all system communications and the following commands are listed: Figure 21: Active communications list In multi-server systems, the list on the left allows to select the server where to check active communications. -
Page 32: Address Book
6.1.2 6.1.2 6.1.2 6.1.2 A A A A DDRESS BOOK DDRESS BOOK DDRESS BOOK DDRESS BOOK As already mentioned in chapter “Call to a User with the Address Book ” on page 22, it is possible to call a user by selecting the code from a list. To display the list, press the button or select the command “Address book –... -
Page 33: Alarms
The functions available in this window are the same described for the window of user list, except for the button , which allows to change the message displayed on door units when the user is absent, as shown in the following figure: Figure 25: Absence message setting 6.1.3 6.1.3... - Page 34 Warning: it, prevents the switchboard to receive another call, as putting it in hold state, until the room-monitor has been terminated.
-
Page 35: Broken Devices
6.1.4 6.1.4 6.1.4 6.1.4 B B B B ROKEN DEVICES ROKEN DEVICES ROKEN DEVICES ROKEN DEVICES In normal operating mode, the switchboard checks periodically that all devices are working properly. If a failure is detected, in the main screen the icon starts blinking. -
Page 36: Camera
At the bottom of the window the following commands are available: Used to recall the user left without answer Call Used to update the call list Refresh Used to delete the unanswered call from the list Used to close the window and go back to switchboard default operating Cancel mode Figure 28: List of unanswered calls... - Page 37 Figure 29: Event log displaying the events shown in the result window are referred to the selected IPervoice server; Warning: if there are more than one server, it could be necessary to repeat the search for all the servers managed by the switchboard. Display the page with the advanced search filters Log Search Update the event log...
- Page 38 Figure 30: Event Log – advanced search It is possible to perform specific searches by setting the following filters: Event Start date/time (to enable the filter, select the check box) Event End date/time Event type Device generating the event Device receiving the event Signal type Crossing through a specific door/gate in the system Use of key or door code of a resident or external people...
-
Page 39: Opened Doors
6.1.8 6.1.8 6.1.8 6.1.8 O O O O PENED DOORS PENED DOORS PENED DOORS PENED DOORS It is possible to display the status of the connected doors of devices equipped with open door sensor (see note on page 28). In menu “View” select the command “Opened doors”; a window will appear, containing the list of doors opened since at least 30 seconds The same window can be displayed by clicking on the icon , which blinks each time a door is left... -
Page 40: Menu Tools
M M M M T T T T OOLS OOLS OOLS OOLS 6.2.1 6.2.1 C C C C 6.2.1 6.2.1 ALL MODULE MESSAGES ALL MODULE MESSAGES ALL MODULE MESSAGES ALL MODULE MESSAGES To customize the welcome text message displayed on call modules, access the menu “Call module messages –... - Page 41 To enter a new temporary message, follow the procedure below: Select from the servers list the desired IPervoice server; Press the button A new window will open; enter the message name and the text to be displayed and confirm with the button Open the list of call modules to which to associate the message by pressing the button Select the call modules where the message will be displayed and confirm with...
-
Page 42: Concierge Service Config
At the top it is possible to set time bands with start date/time and end date/time; this solution can be applied, for example, during holidays. At the bottom it is possible to set weekly displaying times, for example during weekends or night time. To confirm settings, press the button in the “calendar”... -
Page 43: Lift Interface Commands
IFT INTERFACE COMMAN IFT INTERFACE COMMAN If one or more lift interfaces (1039/37) are installed in IPervoice system, lifts can be enabled in order to allow the user to reach only the desired floor or apartment (according to lift interfaces management mode for the specific stair). -
Page 44: Output List
If a command device has been configured in “Monostable” mode, only the button Warning: “On” will be enabled, that will activate the output for the configured time. For further information, refer to chapter “IPervoice devices advanced configuration”, paragraph “Special decoder” in “Installation technical manual” of IPervoice system. DS1039-035A LBT8599... -
Page 45: Door Opener
6.2.5 6.2.5 6.2.5 6.2.5 D D D D OOR OPENER OOR OPENER OOR OPENER OOR OPENER Select this function in the menu “Tools” to display the list of all electric locks managed by IPervoice system. To select and activate a lock, press the button Figure 38: Door lock release commands Press the button to close the window and go back to switchboard default operating mode. -
Page 46: Text Message
Press the button to see images and establish a bidirectional audio communication with the camera module, or the button to display images and hear sounds coming from the camera module, without establishing a communication In the first case, the camera leds will turn on, in the second case they will stay off to Warning: keep audio-video control secret. - Page 47 Per poter creare un nuovo messaggio procedere come indicato di seguito: To create a message follow the procedure below: Press the button Enter at the top left of the window a mnemonic name to identify the text message Type desidered text at the top right text box area; Press the button to save the new message Warning: the maximum characters per line is 22, the maximum rows is 7.
- Page 48 → It is also possible to identify the destination apartment by selecting the apartment user. To do this, press the button after selecting it from the list and confirm with the button Press the button to send the message. To delete one or more messages previously recorded, select them and press the button “Delete”. Press the button “OK”...
-
Page 49: Voicemail
6.2.8 6.2.8 6.2.8 6.2.8 V V V V OICEMAIL OICEMAIL OICEMAIL OICEMAIL This function can also be selected with the button in address book main screen (see paragraph “Call to a User with the Address Book ” on page 22). It allows to record audio messages and send them to system users. - Page 50 If one or more of the 4 code fields has not been filled in, the message will be sent to Warning: all the users belonging to the block, stair or floor indicated. For example, if the code S1 is selected in field “stair”, all the apartments with stair code S1 will receive the message.
-
Page 51: Call Divert Config
6.2.9 6.2.9 6.2.9 6.2.9 C C C C D D D D C C C C IVERT IVERT IVERT IVERT ONFIG ONFIG ONFIG ONFIG This function allows to activate the call divert; the calls addressed to the switchboard will be redirected to a VoIP telephone in the system. -
Page 52: Trade
6.2.10 6.2.10 6.2.10 6.2.10 T T T T RADE RADE RADE RADE This function allows to configure automatic door lock release profiles associated to call modules. The configuration window is shown in Figure 43. Figure 43: Automatic door lock release profiles configuration The window shows the list of previously configured profiles, if present, grouped by belonging server;... -
Page 53: Access Control
intervals must not overlap, otherwise the system will not save the parameters Warning: From the right list, select the call modules where the automatic door lock release profile must be activated; If the call module has already been associated to another profile, the character will be displayed near its name. - Page 54 The main window is shown in Figure 44. The three buttons allow to access the available functions. Figure 44: Access control extension – Main window A A A A DDING DDING DDING A A A A NEW DDING NEW USER USER USER USER (WITH...
- Page 55 Press again the button In both cases, select from the list the Profile which the new user must be associated to. According to the characteristics of this profile, only the fields that can be used and changed will be displayed Fill in the requested fields and press the button The system checks if all the mandatory fields have been filled in and are valid;...
- Page 56 S S S S ( ( ( ( / / / / ) ) ) ) EARCHING AN EXISTING USER EARCHING AN EXISTING USER FOR MODIFICATION FOR MODIFICATION DELETE DELETE EARCHING EARCHING AN EXISTING USER AN EXISTING USER FOR MODIFICATION FOR MODIFICATION DELETE DELETE...
- Page 57 Click on the row of the desired user to access the detail page; select “Delete” to delete the user. To perform a new search, change data in the filter fields and press again the button In the detail page, press one of the buttons on the lower side of the page; the following operations are available →...
-
Page 58: Menu Settings
M M M M S S S S ETTINGS ETTINGS ETTINGS ETTINGS 6.3.1 6.3.1 S S S S 6.3.1 6.3.1 WITCHBOARD CONFIGURA WITCHBOARD CONFIGURA WITCHBOARD CONFIGURA WITCHBOARD CONFIGURATION TION TION TION Access this window with the command “Switchboard Configuration” in “Settings” menu in order to change the PC peripherals used by the switchboard to perform audio communications and images shooting. -
Page 59: Melody Configuration
6.3.2 6.3.2 6.3.2 6.3.2 M M M M ELODY CONFIGURATION ELODY CONFIGURATION ELODY CONFIGURATION ELODY CONFIGURATION To change melodies played by the switchboard according to call types, access the following window with the command “Melody Configuration”. Figure 46: Melody configuration Audio file for incoming call Clip for incoming calls Audio file for alarm event... -
Page 60: Multi-Server Configuration
Several servers can communicate among them to extend IPervoice system features. To operate in more than one server, concierge switchboards must be enabled on respective servers during system installation with IPervoice FrontEnd. -
Page 61: Menu Help
Enter the server address in the box “IP address”; Enter the unique server name in the box “Site Name”: this will be the name shown by the switchboard to the user when the application is running; Enable the switchboard to registration to the server by selecting the check box “Enable”; Press the button to save information and go back to the previous page.
Need help?
Do you have a question about the IPERVOICE SYSTEM and is the answer not in the manual?
Questions and answers