Table of Contents

Summary of Contents for Sunny Health & Fitness SF-B1421B
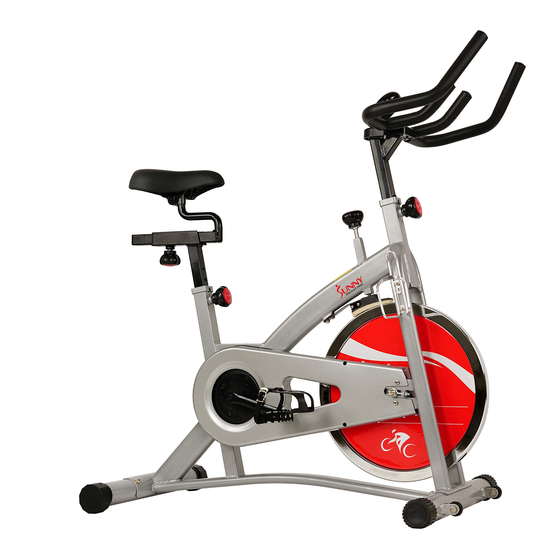
- Page 1 BELT DRIVE INDOOR CYCLING BIKE SF-B1421B USER MANUAL IMPORTANT: Read all instructions carefully before using this product. Retain owner’s manual for future reference. For customer service, please contact: support@sunnyhealthfitness.com...
-
Page 2: Important Safety Information
IMPORTANT SAFETY INFORMATION We thank you for choosing our product. To ensure your safety and health, please use this equipment correctly. It is important to read this entire manual before assembling and using the equipment. Safe and effective use can only be assured if the equipment is assembled, maintained, and used properly. -
Page 3: Exploded Drawing
EXPLODED DRAWING 1 7 24... - Page 4 EXPLODED DRAWING 2...
-
Page 5: Parts List
PARTS LIST Description Description Spacer Φ18*Φ12.2*4 Computer Foam grip Φ23*3*480 Nut M12*1*H6*S19 End cap ф25*16 End cap Φ22*16 Foam grip Φ23*3*190 Spacer Φ18*Φ12.2*4 Handlebar Bearing 6001-2RS Screw ST4.8*10*Φ8 Handlebar cover 125*80*42 Washer d8*Φ16*1.5 Flywheel cover Round magnet Φ10*3 3600 Screw M8*16*S6 Spring washer d8 Front cover Flywheel 13*Φ460... - Page 6 Description Description Bearing 6203-2RS Belt 5PK510 Wave washer d17*Φ22*0.3 Outer chain cover Middle axle Screw ST4.8*16*Φ10 Φ17*175*57*74.2*S25 Belt wheel Φ204*20*5PK Shrouding board for flywheel Screw ST4.2*13*Φ8 Inner chain cover...
-
Page 7: Hardware Package
HARDWARE PACKAGE #8 M8*16*S6 8PCS #9 d8 4PCS #27 d8*Φ20*2*R30 4PCS #21 M5*16*Φ10 2PCS #20 d5*Φ10*1 2PCS #13 M16*1.5*24*Φ56 3PCS... - Page 8 #8 M8*16*S6 4PCS #27 d8*Φ20*2*R30 4PCS #13 M16*1.5*24*Φ56 2PCS STEP 1: Attach the Front and Rear Stabilizers (No. 26 & No. 29) to the Main Frame (No. 31) using 4 Screws (No. 8) and 4 Arc Washers (No. 27). Tighten and secure with Allen Wrench (No.
- Page 9 #21 M5*16*Φ10 2pcs #20 d5*Φ10*1 2pcs STEP 2: Before you begin, immobilize the crank arms by turning the tension knob all the way to the right. Left Pedal: Align the Left Pedal (No. 30L) with the Left Crank Arm (No. 72L) at 90 degrees.
- Page 10 #13 M16*1.5*24*Φ56 1PC STEP 3: Loosen and remove the [handlebar] Adjustment Knob (No. 13). Insert Handlebar Post (No. 11) into the sleeve located on the front of the Main Frame (No. 31). Adjust the Handlebar Post (No. 11) to the desired position and reinsert and tighten the Adjustment Knob (No.
- Page 11 Insert the link wire of the Computer (No. 1) to the middle hole of the Handlebar Cover (No. 6) as shown above in Figure I. Attach the Handlebar Cover (No. 6) to the Handlebar (No.5) as shown above in Figure II. Attach the Computer (No.
-
Page 12: Exercise Computer
EXERCISE COMPUTER SPECIFICATIONS: TIME------------------------------------------- 00:00-99:59 MIN:SEC SPEED---------------------------------------- 0.0-999.9 MPH DISTANCE----------------------------------- 0.00-99.99 MI CALORIES----------------------------------- 0.0-999.9 KCAL FUNCTION KEY: MODE: Press to select function (Time, Speed, Distance, Calories) OPERATION PROCEDURES: 1. AUTO ON/OFF: Start pedaling or press the MODE button. The computer will turn on and stay on while the machine is in use. -
Page 13: Adjusting The Balance
ADJUSTMENTS & USAGE GUIDE ADJUSTING THE BALANCE In order to achieve a smooth and comfortable ride, you must ensure that the stability of the bike is secured. If you notice that the bike is unbalanced during use, you should adjust the foot levelers located beneath the front and rear stabilizers. -
Page 14: Adjusting The Height
ADJUSTING THE HEIGHT Loosen and pull out the [seat height] Adjustment Knob (No. 13) to adjust the height of the saddle. You may also slide the seat forward or backwards by loosening and pulling out the [seat] Adjustment Knob (No. 13) on the Seat Slider (No. 16). You may adjust the height of the handlebar by using the [handlebar] Adjustment Knob (No.


Need help?
Do you have a question about the SF-B1421B and is the answer not in the manual?
Questions and answers