Chapters
Table of Contents
Troubleshooting

Related Manuals for Yanmar 3TNV82A-B


Summary of Contents for Yanmar 3TNV82A-B
- Page 1 SERVICE MANUAL 3TNV82A 4TNV84 3TNV82A-B 4TNV84T 3TNV84 4TNV84T-Z 3TNV84T 4TNV88 3TNV84T-B 4TNV88-B 3TNV88 4TNV88-U 3TNV88-B 4TNV94L 3TNV88-U 4TNV98 4TNV98-Z 4TNV98-E 4TNV98T 4TNV98T-Z 4TNV106 4TNV106T...
-
Page 2: Proposition 65 Warning
California California Proposition 65 Warning Proposition 65 Warning Diesel engine exhaust and some of its Battery posts, terminals, and related accessories contain lead and lead constituents are known to the state of compounds, chemicals known to the California to cause cancer, birth state of California to cause cancer and defects, and other reproductive harm. - Page 3 TNV DI Service Manual series SERVICE MANUAL 3TNV82A(-B) • 3TNV84 • 3TNV84T(-B) • 3TNV88(-B)(-U) 4TNV84 • 4TNV84T(-Z) • 4TNV88(-B)(-U) 4TNV94L 4TNV98(-Z)(-E) • 4TNV98T(-Z) 4TNV106 • 4TNV106T P/N: 0BTNV-G00101 INDUSTRIAL ENGINES...
- Page 4 / or safely. Please contact an authorized Yanmar repair or service professional before working on your Yanmar product.
-
Page 5: Table Of Contents
TNV DI Service Manual Section 1 TABLE OF CONTENTS Page Table of Contents ................... iii Introduction ..................1-1 Yanmar Warranties................2-1 Safety....................3-1 General Service Information .............. 4-1 Periodic Maintenance ................. 5-1 Engine ....................6-1 Fuel System ..................7-1 Cooling System ................... 8-1 Lubrication System ................ - Page 6 TABLE OF CONTENTS This Page Intentionally Left Blank TNV DI Service Manual...
- Page 7 Refer to the documentation supplied by the optional equipment manufacturer for specific service instructions. Yanmar products are continuously undergoing improvement. This Service Manual might not address possible field modifications to the equipment. Contact an authorized Yanmar industrial engine dealer or distributor for answers to any questions relating to field modifications.
- Page 8 INTRODUCTION This Page Intentionally Left Blank TNV DI Service Manual...
- Page 9 What is Covered by this Warranty? .......... 2-3 How Long is the Warranty Period? ........... 2-3 What the Engine Owner Must Do: ..........2-3 To Locate an Authorized Yanmar Industrial Engine Dealer or Distributor: ..............2-4 What Yanmar Will Do: ............... 2-4 What is Not Covered by this Warranty? ........
-
Page 10: Yanmar Warranties
YANMAR WARRANTIES This Page Intentionally Left Blank TNV DI Service Manual... -
Page 11: Yanmar Limited Warranty
What the Engine Owner Must Do: If you believe your Yanmar engine has experienced a failure due to a defect in material and / or workmanship, you must contact an authorized Yanmar industrial engine dealer or distributor within thirty (30) days of discovering the failure. -
Page 12: To Locate An Authorized Yanmar Industrial Engine Dealer Or Distributor
• “Click” on the desired country or Associate company to locate your nearest authorized Yanmar industrial engine dealer or distributor. • You may also contact Yanmar by clicking on “Inquiry” in the website heading and typing in your question or comment. -
Page 13: Warranty Limitations
At the time of purchase, Yanmar highly recommends registering the retail purchaser’s information through the website http://www.yanmar.co.jp as soon as possible. If it is not possible to access the website, please contact the nearest authorized Yanmar industrial engine dealer or distributor. -
Page 14: Emission System Warranty
The California Air Resources Board (CARB), the Environmental Protection Agency (EPA) and Yanmar Co., Ltd. hereafter referred to as Yanmar, are pleased to explain the emission control system warranty on your industrial compression-ignition engine. In California, model year 2000 or later off-road compression- ignition engines must be designed, built and equipped to meet the State’s stringent anti-smog standards. -
Page 15: Warranty Coverage
Warranty Coverage: This warranty is transferable to each subsequent purchaser for the duration of the warranty period. Repair or replacement of any warranted part will be performed at an authorized Yanmar industrial engine dealer or distributor. Warranted parts not scheduled for replacement as required maintenance in the Operation Manual shall be warranted for the warranty period. -
Page 16: Exclusions
You are responsible for initiating the warranty process. You must present your engine to a Yanmar dealer as soon as a problem exists. The warranty repairs should be completed by the dealer as expeditiously as possible. -
Page 17: Safety
Section 3 TNV DI Service Manual SAFETY Page Safety Statements ................3-3 Safety Precautions ................3-4 TNV DI Service Manual... - Page 18 SAFETY This Page Intentionally Left Blank TNV DI Service Manual...
-
Page 19: Periodic Maintenance
Safety Statements SAFETY SAFETY STATEMENTS CAUTION Yanmar is concerned for your safety and your Caution (the word “CAUTION” is in black machine’s condition. Safety statements are one of letters with a yellow rectangle behind it) the primary ways to call your attention to the –... -
Page 20: Fuel System
SAFETY Safety Precautions SAFETY PRECAUTIONS DANGER DANGER FIRE AND EXPLOSION HAZARD! • Diesel fuel is flammable and explosive under certain conditions. SCALD HAZARD! • When you remove any fuel system • NEVER remove the radiator cap if the component to perform maintenance engine is hot. - Page 21 Safety Precautions SAFETY DANGER DANGER FIRE AND EXPLOSION HAZARD! FIRE AND EXPLOSION HAZARD! • Diesel fuel is flammable and explosive • Diesel fuel is flammable and explosive under certain conditions. under certain conditions. • If the unit has an electric fuel pump, •...
- Page 22 SAFETY Safety Precautions DANGER DANGER FIRE AND EXPLOSION HAZARD! CRUSH HAZARD! • Diesel fuel is flammable and explosive • When you need to transport an engine under certain conditions. for repair, have a helper assist you to • Be sure to place the diesel fuel attach it to a hoist and load it on a container on the ground when truck.
- Page 23 Safety Precautions SAFETY DANGER DANGER FIRE AND EXPLOSION HAZARD! EXPLOSION HAZARD! • Diesel fuel is flammable and explosive • NEVER check the remaining battery under certain conditions. charge by shorting out the terminals. • NEVER use diesel fuel as a cleaning This will result in a spark and may agent.
- Page 24 SAFETY Safety Precautions WARNING WARNING SEVER HAZARD! EXHAUST HAZARD! • Keep hands and other body parts • NEVER operate the engine in an away from moving / rotating parts enclosed area such as a garage, such as the cooling fan, flywheel or tunnel, underground room, manhole or PTO shaft.
- Page 25 Safety Precautions SAFETY WARNING WARNING BURN HAZARD! • If you must drain the engine oil while it EXPOSURE HAZARD! is still hot, stay clear of the hot engine • Wear personal protective equipment oil to avoid being burned. such as gloves, work shoes, eye and •...
- Page 26 ALWAYS use a piece of wood is operating, remove all jewelry, tie or cardboard. Have your authorized back long hair, and keep your hands, Yanmar industrial engine dealer or other body parts and clothing away distributor repair the damage. from moving / rotating parts.
- Page 27 Safety Precautions SAFETY WARNING WARNING SUDDEN MOVEMENT HAZARD! • Engaging the transmission or PTO at an elevated engine speed could result in unexpected movement of the equipment. FUME / BURN HAZARD! • Failure to comply could result in death • Always read and follow safety related or serious injury.
- Page 28 Yanmar. Doing data in the E-ECU. so could result in the violation of Be sure to contact your local Yanmar emission control regulations and will dealer before replacing the fuel void the product warranty.
-
Page 29: Alternator
CAUTION 0000015en CAUTION • Only use diesel fuels recommended by Yanmar for the best engine performance, to prevent engine damage and to comply with EPA / ARB FLYING OBJECT HAZARD! warranty requirements. • ALWAYS wear eye protection when •... -
Page 30: Starter Motor
This may cause serious engine damage. • The standard range of ambient 0000010enTNV temperatures for the normal operation of Yanmar engines is from +5°F (-15°C) to +113°F (+45°C). • If the ambient temperature exceeds +113°F (+45°C) the engine may overheat and cause the engine oil to break down. - Page 31 • Prevent dirt and debris from CAUTION contaminating the engine oil. Carefully For maximum engine life, Yanmar clean the oil cap / dipstick and the recommends that when shutting the surrounding area before you remove engine down, you allow the engine to the cap.
- Page 32 • Failure to comply may impair the engine’s safety and performance characteristics and shorten the engine’s life. Any alterations to this engine may affect the warranty coverage of your engine. See Yanmar Limited Warranty in Warranty Section. 0000044enTNVDISM 3-16 TNV DI Service Manual...
-
Page 33: General Service Information
NEVER attempt to adjust the low or high the warranty coverage on your engine. idle speed limit screw. This may impair See Yanmar Limited Warranty in the safety and performance of the Warranty Section. machine and shorten its life. If the idle... - Page 34 SAFETY Safety Precautions CAUTION CAUTION • When the engine is operated in dusty Do not loosen or remove the four bolts conditions, clean the air cleaner retaining the fuel injection pump drive element more frequently. gear to the fuel injection pump hub. Do not disassemble the fuel injection pump •...
- Page 35 (boiling) drive gear, do not rotate the engine and charging malfunctions. Consult crankshaft. Rotating the crankshaft will Yanmar before using the equipment in cause the fuel injection pump to become such an environment or the warranty is misaligned.
-
Page 36: Electric Wiring
SAFETY Safety Precautions CAUTION CAUTION Make sure that the combined total Removing the battery cables or the resistance of the battery cable in both battery while the engine is operating directions between the starter motor may cause damage to the current limiter and the battery is within the value depending on the electrical equipment indicated on the wiring diagram. - Page 37 Any alterations to this in one position for any length of time. engine may void its warranty. Be sure Damage to the cylinder wall will occur. to use Yanmar genuine replacement Keep the tool in constant up-and-down parts. motion.
- Page 38 Otherwise the starter could suffer regulations and then replace the damage. tamper-proof seals. 9999998en • Tampering with or removing these devices may void the “Yanmar Limited CAUTION Warranty.” • High-pressure washing not 0000146en recommended. CAUTION •...
- Page 39 Safety Precautions SAFETY CAUTION • Do not plug or unplug the E-ECU for a period of at least 6 seconds after power to the unit has been turned on or off. • Do not touch connector pins of the E- ECU with bare hands.
- Page 40 SAFETY Safety Precautions This Page Intentionally Left Blank 3-24 TNV DI Service Manual...
-
Page 41: Cooling System
Section 4 TNV DI Service Manual GENERAL SERVICE INFORMATION Page Component Identification..............4-3 Location of Labels ................4-5 Engine Nameplate (Typical) ............4-6 Emission Control Regulations ............4-6 EPA / ARB Regulations - USA Only .......... 4-6 Emission Control Labels..............4-6 The 97/68/EC Directive Certified Engines........ - Page 42 4TNV98T (~ EPA Tier2) ............4-32 4TNV106 (~ EPA Tier2) ............4-33 4TNV106T (~ EPA Tier2) ............4-34 3TNV82A-B (complies with EPA Interim Tier4)......4-35 3TNV84T-B (complies with EPA Interim Tier4) ......4-36 3TNV88-U (complies with EPA Interim Tier4) ......4-37 3TNV88-B (complies with EPA Interim Tier4) ......
-
Page 43: Component Identification
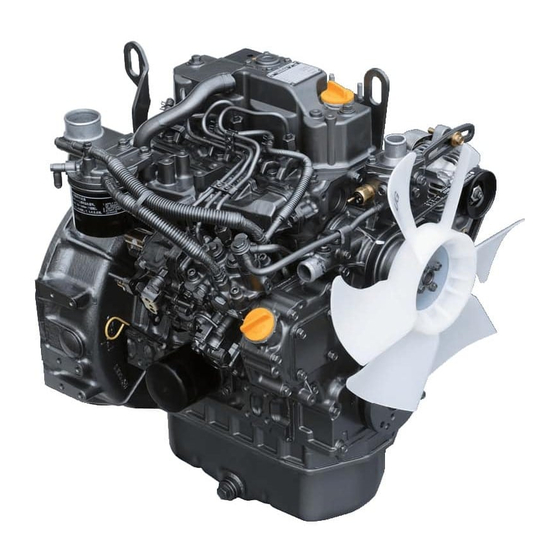
Component Identification GENERAL SERVICE INFORMATION COMPONENT IDENTIFICATION Figure 4-1 shows where the major engine components are located. 3TNV82A(-B),3TNV84,3TNV84T(-B),3TNV88(-B)(-U),4TNV84,4TNV88(-B)(-U), 4TNV94L,4TNV984TNV106,4TNV106T (20) (19) (18) (17) (16) (15) (21) (14) (25) (13) (24) (22) (23) 0000015B (12) (11) (10) 1 – Lifting Eye (Flywheel End) 14 –... - Page 44 GENERAL SERVICE INFORMATION Component Identification Figure 4-2 shows where the major engine components are located. 4TNV84T-Z, 4TNV98-E, 4TNV98-Z, 4TNV98T-Z (19) (4) (20) (26) (18) (17) (28) (27) (16) (15) (21) (14) (25) (13) (22) (24) (23) (12) (11) (10) (8) (7) 1 –...
-
Page 45: Location Of Labels
Location of Labels GENERAL SERVICE INFORMATION LOCATION OF LABELS Figure 4-3 shows the location of regulatory and safety labels on Yanmar TNV series engines. 0000019A-01 Figure 4-3 Location of labels/nameplates on direct injection model engines EPA/ARB Certification 97/68/EC Emission Control... -
Page 46: Engine Nameplate (Typical)
REGULATIONS (EPA) EPA / ARB Regulations - USA Only EMISSION CONTROL INFORMATION Yanmar TNV engines meet Environmental THIS ENGINE COMPLIES WITH U. S. EPA AND CALIFORNIA REGULATIONS M. Y. NONROAD/OFF-ROAD DIESEL ENGINES. Protection Agency (EPA) (U. S. Federal) emission LOW SULFUR FUEL OR ULTRA LOW SULFUR FUEL ONLY... -
Page 47: The 97/68/Ec Directive Certified Engines
Engine Family designation: 1.33 Method of air aspiration Number of cylinders Engine speed specifications Displacement (liter) Non-road / Off-road engine Yanmar Diesel *2005 Model Year 5*: 2005 6 : 2006 7: 2007 8: 2008 9: 2009 TNV DI Service Manual... -
Page 48: Function Of Major Engine Components
Air Cleaner engineer. It is not part of the basic engine package as shipped from the Yanmar factory. Periodic replacement of the air cleaner filter element is necessary. See the Periodic Maintenance Schedule on page 5-17 for the replacement frequency. -
Page 49: Main Electronic Control Components And Features
MAIN ELECTRONIC CONTROL COMPONENTS AND FEATURES GENERAL SERVICE INFORMATION MAIN ELECTRONIC CONTROL COMPONENTS AND FEATURES 4TNV84T-Z, 4TNV98-E, 4TNV98-Z, 4TNV98T-Z Component/Feature Description Engine controller (E-ECU) Adjusts the rack position of the fuel injection pump depending on the speed command signal from the accelerator sensor, thus regulating the engine speed and power. - Page 50 GENERAL SERVICE INFORMATION MAIN ELECTRONIC CONTROL COMPONENTS AND FEATURES Component/Feature Description Engine diagnosis tool Allows the operator to troubleshoot the cause of a problem based on detailed information regarding the problem occurring in the E-ECU or Eco-governor. This tool can also be used for data maintenance tasks including programming and mapping.
-
Page 51: Function Of Cooling System Components
The application specific items are not part of the basic engine package as shipped from the Yanmar factory. The engine cooling fan is driven by a V-belt which is powered by the crankshaft Engine Cooling Fan V-pulley. -
Page 52: Diesel Fuel
4TNV98-Z, 4TNV98-E, and 4TNV98T-Z, it is mandatory to use fuel that does not contain 0.1% Yanmar approves the use of bio-diesel fuels that do or more sulfur content. not exceed a blend of 5% (by volume) of FAME with... -
Page 53: Filling The Fuel Tank
See • Failure to comply will result in death or Yanmar Limited Warranty on page 2-3. serious injury. 0000005en TNV DI Service Manual 4-13... - Page 54 • Failure to comply will result in death or CAUTION serious injury. 0000014en • Only use diesel fuels recommended by Yanmar for the best engine performance, to prevent engine damage and to comply with EPA / ARB warranty requirements. • Only use clean diesel fuel.
-
Page 55: Priming The Fuel System
Engine Oil GENERAL SERVICE INFORMATION Note that a typical fuel tank is shown. The fuel tank 2. NEVER use the starter motor to crank the on your equipment may be different. engine in order to prime the fuel system. This may cause the starter motor to overheat and 1. -
Page 56: Engine Oil Viscosity
• Select the oil viscosity based on the ambient temperature where the engine is being operated. See the SAE Service Grade Viscosity Chart (Figure 4-5). • Yanmar does not recommend the use of engine oil “additives.” Additional Technical Engine Oil Requirements: The engine oil must be changed when the Total Base Number (TBN) has been reduced to 1.0... -
Page 57: Adding Engine Oil
5. Add more oil if necessary. 6. Reinstall the oil cap (Figure 4-6, (4)) and The following are the engine oil capacities for hand-tighten. Over-tightening may damage the various Yanmar TNV engines. cap. Dipstick Upper Engine Model Limit / Lower Limit 5.8 / 3.8 qt... -
Page 58: Engine Coolant
GENERAL SERVICE INFORMATION Engine Coolant ENGINE COOLANT CAUTION DANGER COOLANT HAZARD! • Wear eye protection and rubber gloves SCALD HAZARD! when you handle long life or extended • NEVER remove the radiator cap if the life engine coolant. If contact with the engine is hot. -
Page 59: Engine Coolant Specifications
(Figure 4-8, (1)) in the • Water quality is important to coolant cylinder block is closed or the oil coolant hoses performance. Yanmar recommends that soft, (Figure 4-9, (1)) are installed at the oil cooler. distilled, or demineralized water be used to mix with coolants. -
Page 60: Engine Coolant Capacity (Typical)
Refer to the operation manual provided by the driven machine manufacturer for the actual engine coolant capacity on your machine. The following are the engine coolant capacities for various Yanmar TNV engines. Engine Coolant Engine Model Capacity 0001579B 3TNV82A(-B) 1.9 qt (1.8 L) -
Page 61: Specifications
Specifications GENERAL SERVICE INFORMATION SPECIFICATIONS Description of Model Number TNV 82 Customer Code Rated RPM Governor Type Symbol (Indicating Conformance to EPA Tier 3/Interim Tier 4 Standards) Governor Type Symbol Governor Type Applicable engine Electronic Governor (Eco-governor) Non-derated engine Mechanical Governor Electronic Governor (Eco-governor) Derated engine Mechanical Governor... -
Page 62: Engine General Specifications
• Fuel Feeding Pressure: 20 ± 10 kPa (net) after engine break-in has been performed with the cooling fan, air cleaner and muffler installed to the engine. • With Cooling Fan, Air Cleaner, Muffler: Yanmar Standard • After the Engine Break-In Period. Output Allowable Deviation: ± 3% •... -
Page 63: Principal Engine Specifications
Principal Engine Specifications GENERAL SERVICE INFORMATION PRINCIPAL ENGINE SPECIFICATIONS 3TNV82A (~ EPA Tier2) Engine Model 3TNV82A Version Type Vertical In-line Diesel Engine Combustion System Direct Injection Aspiration Natural No. of Cylinders Bore × Stroke 82 × 84mm Displacement 1.331L 1500 1800 Continuous Rated Output 12.0... -
Page 64: 3Tnv84 (~ Epa Tier2)
GENERAL SERVICE INFORMATION Principal Engine Specifications 3TNV84 (~ EPA Tier2) Engine Model 3TNV84 Version Type Vertical In-line Diesel Engine Combustion System Direct Injection Aspiration Natural No. of Cylinders Bore × Stroke 84 × 90mm Displacement 1.496L 1500 1800 Continuous Rated Output 11.3 13.5 15.3... -
Page 65: 3Tnv84T (~ Epa Tier2)
Principal Engine Specifications GENERAL SERVICE INFORMATION 3TNV84T (~ EPA Tier2) Engine Model 3TNV84T Version Type Vertical In-line Diesel Engine Combustion System Direct Injection Aspiration Turbocharged No. of Cylinders Bore × Stroke 84 × 90mm Displacement 1.496L 1500 1800 Continuous Rated Output 14.0 16.5 19.0... -
Page 66: 3Tnv88 (~ Epa Tier2)
GENERAL SERVICE INFORMATION Principal Engine Specifications 3TNV88 (~ EPA Tier2) Engine Model 3TNV88 Version Type Vertical In-line Diesel Engine Combustion System Direct Injection Aspiration Natural No. of Cylinders Bore × Stroke 88 × 90mm Displacement 1.642L 1500 1800 Continuous Rated Output 12.3 14.8 16.7... -
Page 67: 4Tnv84 (~ Epa Tier2)
Principal Engine Specifications GENERAL SERVICE INFORMATION 4TNV84 (~ EPA Tier2) Engine Model 4TNV84 Version Type Vertical In-line Diesel Engine Combustion System Direct Injection Aspiration Natural No. of Cylinders Bore × Stroke 84 × 90mm Displacement 1.995L 1500 1800 Continuous Rated Output 14.9 17.7 20.3... -
Page 68: 4Tnv84T (~ Epa Tier2)
GENERAL SERVICE INFORMATION Principal Engine Specifications 4TNV84T (~ EPA Tier2) Engine Model 4TNV84T Version Type Vertical In-line Diesel Engine Combustion System Direct Injection Aspiration Turbocharged No. of Cylinders Bore × Stroke 84 × 90mm Displacement 1.995L 1500 1800 Continuous Rated Output 19.1 24.3 26.0... -
Page 69: 4Tnv88 (~ Epa Tier2)
Principal Engine Specifications GENERAL SERVICE INFORMATION 4TNV88 (~ EPA Tier2) Engine Model 4TNV88 Version Type Vertical In-line Diesel Engine Combustion System Direct Injection Aspiration Natural No. of Cylinders Bore × Stroke 88 × 90mm Displacement 2.190L 1500 1800 Continuous Rated Output 16.4 19.6 22.3... -
Page 70: 4Tnv94L (~ Epa Tier2)
GENERAL SERVICE INFORMATION Principal Engine Specifications 4TNV94L (~ EPA Tier2) Engine Model 4TNV94L Version Type Vertical In-line Diesel Engine Combustion System Direct Injection Aspiration Natural No. of Cylinders Bore × Stroke 94 × 110mm Displacement 3.054L 1500 1800 Continuous Rated Output 26.1 31.3 35.5... -
Page 71: 4Tnv98 (~ Epa Tier2)
Principal Engine Specifications GENERAL SERVICE INFORMATION 4TNV98 (~ EPA Tier2) Engine Model 4TNV98 Version Type Vertical In-line Diesel Engine Combustion System Direct Injection Aspiration Natural No. of Cylinders Bore × Stroke 98 × 110mm Displacement 3.319L 1500 1800 Continuous Rated Output 30.9 36.8 42.0... -
Page 72: 4Tnv98T (~ Epa Tier2)
GENERAL SERVICE INFORMATION Principal Engine Specifications 4TNV98T (~ EPA Tier2) Engine Model 4TNV98T Version Type Vertical In-line Diesel Engine Combustion System Direct Injection Aspiration Turbocharged No. of Cylinders Bore × Stroke 98 × 110mm Displacement 3.319L 1500 1800 Continuous Rated Output 37.9 45.6 51.5... -
Page 73: 4Tnv106 (~ Epa Tier2)
Principal Engine Specifications GENERAL SERVICE INFORMATION 4TNV106 (~ EPA Tier2) Engine Model 4TNV106 Version Type Vertical In-line Diesel Engine Combustion System Direct Injection Aspiration Natural No. of Cylinders Bore × Stroke 106 × 125mm Displacement 4.412L 1500 1800 Continuous Rated Output 41.2 49.3 56.0... -
Page 74: 4Tnv106T (~ Epa Tier2)
GENERAL SERVICE INFORMATION Principal Engine Specifications 4TNV106T (~ EPA Tier2) Engine Model 4TNV106T Version Type Vertical In-line Diesel Engine Combustion System Direct Injection Aspiration Turbocharged No. of Cylinders Bore × Stroke 106 × 125mm Displacement 4.412L 1500 1800 Continuous Rated Output 51.5 61.8 70.0... -
Page 75: 3Tnv82A-B (Complies With Epa Interim Tier4)
Principal Engine Specifications GENERAL SERVICE INFORMATION 3TNV82A-B (complies with EPA Interim Tier4) Engine Model 3TNV82A-B Version Type Vertical, 4-cycle water-cooled diesel engine Combustion System Direct Injection Aspiration Natural aspiration No. of Cylinders φ82 × 84mm Bore × Stroke Displacement 1.331L... -
Page 76: 3Tnv84T-B (Complies With Epa Interim Tier4)
GENERAL SERVICE INFORMATION Principal Engine Specifications 3TNV84T-B (complies with EPA Interim Tier4) Engine Model 3TNV84T-B Version Type Vertical, 4-cycle water-cooled diesel engine Combustion System Direct Injection Aspiration Turbocharged No. of Cylinders φ84 × 90mm Bore × Stroke Displacement 1.496L Continuous Rated Output 2400 2500... -
Page 77: 3Tnv88-U (Complies With Epa Interim Tier4)
Principal Engine Specifications GENERAL SERVICE INFORMATION 3TNV88-U (complies with EPA Interim Tier4) Engine Model 3TNV88-U Version Type Vertical, 4-cycle water-cooled diesel engine Combustion System Direct Injection Aspiration Natural aspiration No. of Cylinders φ88 × 90mm Bore × Stroke Displacement 1.642L Continuous Rated Output 2200... -
Page 78: 3Tnv88-B (Complies With Epa Interim Tier4)
GENERAL SERVICE INFORMATION Principal Engine Specifications 3TNV88-B (complies with EPA Interim Tier4) Engine Model 3TNV88-B Version Type Vertical, 4-cycle water-cooled diesel engine Combustion System Direct Injection Aspiration Natural aspiration No. of Cylinders φ88 × 90mm Bore × Stroke Displacement 1.642L 1500 1800 Continuous Rated... -
Page 79: 4Tnv84T-Z (Complies With Epa Interim Tier4)
Principal Engine Specifications GENERAL SERVICE INFORMATION 4TNV84T-Z (complies with EPA Interim Tier4) Engine Model 4TNV84T-Z Version Type Vertical, 4-cycle water-cooled diesel engine Combustion System Direct Injection Aspiration Turbocharged No. of Cylinders φ84 × 90mm Bore × Stroke Displacement 1.995L 1500 1800 Continuous Rated 19.1... -
Page 80: 4Tnv88-U (Complies With Epa Interim Tier4)
GENERAL SERVICE INFORMATION Principal Engine Specifications 4TNV88-U (complies with EPA Interim Tier4) Engine Model 4TNV88-U Version Type Vertical, 4-cycle water-cooled diesel engine Combustion System Direct Injection Aspiration Natural aspiration No. of Cylinders φ88 × 90mm Bore × Stroke Displacement 2.190L Continuous Rated Output 2700... -
Page 81: 4Tnv88-B (Complies With Epa Interim Tier4)
Principal Engine Specifications GENERAL SERVICE INFORMATION 4TNV88-B (complies with EPA Interim Tier4) Engine Model 4TNV88-B Version Type Vertical, 4-cycle water-cooled diesel engine Combustion System Direct Injection Aspiration Natural aspiration No. of Cylinders φ88 × 90mm Bore × Stroke Displacement 2.190L 1500 1800 Continuous Rated... -
Page 82: 4Tnv98-E (Complies With Epa Interim Tier4)
GENERAL SERVICE INFORMATION Principal Engine Specifications 4TNV98-E (complies with EPA Interim Tier4) Engine Model 4TNV98-E Version Type Vertical, 4-cycle water-cooled diesel engine Combustion System Direct Injection Aspiration Natural aspiration No. of Cylinders Bore × Stroke 98 × 110mm Displacement 3.319L Continuous Rated Output 2100... -
Page 83: 4Tnv98-Z (Complies With Epa Interim Tier4)
Principal Engine Specifications GENERAL SERVICE INFORMATION 4TNV98-Z (complies with EPA Interim Tier4) Engine Model 4TNV98-Z Version Type Vertical, 4-cycle water-cooled diesel engine Combustion System Direct Injection Aspiration Natural aspiration No. of Cylinders Bore × Stroke 98 × 110mm Displacement 3.319L 1500 1800 Continuous Rated... -
Page 84: 4Tnv98T-Z (Complies With Epa Tier3)
GENERAL SERVICE INFORMATION Principal Engine Specifications 4TNV98T-Z (complies with EPA Tier3) Engine Model 4TNV98T-Z Version Type Vertical, 4-cycle water-cooled diesel engine Combustion System Direct Injection Aspiration Turbocharged No. of Cylinders Bore × Stroke 98 × 110mm Displacement 3.319L 1500 1800 Continuous Rated 37.9 45.6... -
Page 85: Engine Service Standards
Engine Service Standards GENERAL SERVICE INFORMATION ENGINE SERVICE STANDARDS Reference Inspection Item Standard Limit page All models except 0.006 - 0.010 in. See Measuring 4TNV106 and (0.15 - 0.25 mm) and Adjusting Intake / Exhaust Valve Clearance 4TNV106T Valve Clearance on page 6-66 4TNV106 and 0.010 - 0.014 in. -
Page 86: Tightening Torques For Standard Bolts And Nuts
GENERAL SERVICE INFORMATION Tightening Torques for Standard Bolts and Nuts TIGHTENING TORQUES FOR STANDARD BOLTS AND NUTS Use the correct amount of torque when you tighten CAUTION the fasteners on the machine. Applying excessive torque may damage the fastener or component and The tightening torque in the Standard not enough torque may cause a leak or component Torque Chart (see General Service... - Page 87 Tightening Torques for Standard Bolts and Nuts GENERAL SERVICE INFORMATION Nominal Thread Item x Pitch Tightening Torque Remarks Diameter 9 - 12 ft-lb (112 - 148 in.-lb, 12.7 - 16.7 N·m, 1.3 - 1.7 kgf·m) 14 - 19 ft-lb (173 - 225 in.-lb, 19.6 - 18.734 N·m, 2.0 - 3.5 kgf·m) Pipe Joint Bolt...
-
Page 88: Abbreviations And Symbols
GENERAL SERVICE INFORMATION Abbreviations and Symbols ABBREVIATIONS AND JASO Japanese Automobile Standards Organization SYMBOLS kelvin kilogram Abbreviations kgf/cm² kilogram force per square centimeter kgf/m kilogram force per meter ampere kilometers kilopascal alternating current kilowatt ACEA Association des Constructeurs liter Européens d’Automobilies L/hr liter per hour ampere-hour... -
Page 89: Unit Conversions
Unit Conversions GENERAL SERVICE INFORMATION UNIT CONVERSIONS Units of Torque ft-lb 1.3558 = N·m Unit Prefixes ft-lb 0.1383 = kgf/m in.-lb 0.1130 = N·m Prefix Symbol Power mega x 1,000,000 in.-lb 0.0115 = kgf/m kilo x 1,000 kgf/m 7.2330 = ft-lb centi x 0.01 kgf/m... - Page 90 GENERAL SERVICE INFORMATION Unit Conversions This Page Intentionally Left Blank 4-50 TNV DI Service Manual...
- Page 91 Introduction..................5-16 The Importance of Periodic Maintenance........ 5-16 Performing Periodic Maintenance ........... 5-16 Yanmar Replacement Parts ............ 5-16 Required EPA / ARB Maintenance -USA Only......5-16 EPA / ARB Installation Requirements - USA Only ....5-16 Periodic Maintenance Schedule............ 5-17 Periodic Maintenance Procedures ..........
- Page 92 PERIODIC MAINTENANCE This Page Intentionally Left Blank TNV DI Service Manual...
-
Page 93: Before You Begin Servicing
Before You Begin Servicing PERIODIC MAINTENANCE BEFORE YOU BEGIN DANGER SERVICING DANGER SCALD HAZARD! • NEVER remove the radiator cap if the engine is hot. Steam and hot engine EXPLOSION HAZARD! coolant will spurt out and seriously • NEVER check the remaining battery burn you. - Page 94 PERIODIC MAINTENANCE Before You Begin Servicing DANGER DANGER FIRE AND EXPLOSION HAZARD! FIRE AND EXPLOSION HAZARD! • Diesel fuel is flammable and explosive • Diesel fuel is flammable and explosive under certain conditions. under certain conditions. • Before you operate the engine, check •...
- Page 95 Before You Begin Servicing PERIODIC MAINTENANCE DANGER DANGER FIRE AND EXPLOSION HAZARD! CRUSH HAZARD! • Diesel fuel is flammable and explosive • When you need to transport an engine under certain conditions. for repair, have a helper assist you to •...
- Page 96 PERIODIC MAINTENANCE Before You Begin Servicing DANGER DANGER FIRE AND EXPLOSION HAZARD! FIRE AND EXPLOSION HAZARD! • Diesel fuel is flammable and explosive • Diesel fuel is flammable and explosive under certain conditions. under certain conditions. • When you remove any fuel system •...
- Page 97 Before You Begin Servicing PERIODIC MAINTENANCE WARNING WARNING EXHAUST HAZARD! SEVER HAZARD! • NEVER operate the engine in an • Keep hands and other body parts enclosed area such as a garage, away from moving / rotating parts tunnel, underground room, manhole or such as the cooling fan, flywheel or ship’s hold without proper ventilation.
- Page 98 PERIODIC MAINTENANCE Before You Begin Servicing WARNING WARNING SUDDEN MOVEMENT HAZARD! • Engaging the transmission or PTO at an elevated engine speed could result in unexpected movement of the equipment. ALCOHOL AND DRUG HAZARD! • Failure to comply could result in death •...
- Page 99 • NEVER check for a fuel leak with your hands. ALWAYS use a piece of wood or cardboard. Have your authorized Yanmar industrial engine dealer or distributor repair the damage. • Failure to comply could result in death or serious injury.
- Page 100 PERIODIC MAINTENANCE Before You Begin Servicing WARNING WARNING BURN HAZARD! SHOCK HAZARD! • If you must drain the engine oil while it • Turn off the battery switch (if is still hot, stay clear of the hot engine equipped) or disconnect the negative oil to avoid being burned.
- Page 101 Before You Begin Servicing PERIODIC MAINTENANCE CAUTION CAUTION • Only use diesel fuels recommended by Yanmar for the best engine performance, to prevent engine damage and to comply with EPA / ARB warranty requirements. • Only use clean diesel fuel.
- Page 102 • The standard range of ambient engine’s life. Any alterations to this temperatures for the normal operation engine may void its warranty. Be sure of Yanmar engines is from +5°F (-15°C) to use Yanmar genuine replacement to +113°F (+45°C). parts.
- Page 103 CAUTION engine oil leaks, coolant leaks, and for proper operation of the indicators For maximum engine life, Yanmar and / or gauges. recommends that when shutting the • During the first hour of operation, vary...
- Page 104 Consult the machine and shorten its life. If the idle local authorities or reclamation facility. speed limit screws require adjustment, see your authorized Yanmar industrial • NEVER dispose of hazardous engine dealer or distributor. materials irresponsibly by dumping...
- Page 105 Before You Begin Servicing PERIODIC MAINTENANCE CAUTION If the fuel filter / water separator is positioned higher than the fuel level in the fuel tank, water may not drip out when the fuel filter / water separator drain cock is opened. If this happens, turn the air vent screw on the top of the fuel filter / water separator 2-3 turns counterclockwise.
-
Page 106: Introduction
The Importance of Periodic Yanmar Replacement Parts Maintenance Yanmar recommends that you use genuine Yanmar parts when replacement parts are needed. Engine deterioration and wear occurs in proportion Genuine replacement parts help ensure long to length of time the engine has been in service and engine life. -
Page 107: Periodic Maintenance Schedule
See Yanmar Limited Warranty in Warranty Section. Consult your authorized Yanmar dealer or distributor for assistance when checking items marked with a . - Page 108 PERIODIC MAINTENANCE Periodic Maintenance Schedule : Check : Replace : Contact your authorized Yanmar industrial engine dealer or distributor Periodic Maintenance Interval Every Every Every Every Every Every System Check Item Daily 1000 1500 2000 hours hours hours hours hours...
- Page 109 Periodic Maintenance Schedule PERIODIC MAINTENANCE : Check : Replace : Contact your authorized Yanmar industrial engine dealer or distributor Periodic Maintenance Interval Every Every Every Every Every Every System Check Item Daily 1000 1500 2000 hours hours hours hours hours...
-
Page 110: Periodic Maintenance Procedures
PERIODIC MAINTENANCE Periodic Maintenance Procedures PERIODIC MAINTENANCE CAUTION PROCEDURES • Only use the engine oil specified. Other engine oils may affect warranty After Initial 50 Hours of Operation coverage, cause internal engine components to seize and / or shorten engine life. Perform the following maintenance after the initial 50 hours of operation. - Page 111 Periodic Maintenance Procedures PERIODIC MAINTENANCE The engine oil in a new engine becomes 7. After all oil has been drained from the engine, contaminated from the initial break-in of internal reinstall the oil drain plug (Figure 5-2, (1)) and parts. It is very important that the initial oil and filter tighten to 139.8 - 47.0 ft·lb (53.9 - 63.7 N·m;...
- Page 112 PERIODIC MAINTENANCE Periodic Maintenance Procedures Engine Oil Filter Part No. Standard Dust proof * 3TNV82A 3TNV84 - 4TNV98 3TNV82A-B 129150-35153 3TNV88-B - 4TNV98-Z 119005-35151 4TNV98-E 4TNV98T 4TNV98T-Z 119005-35151 4TNV106, 4TNV106T * Consult the operation manual for the driven machine for applicability of the dust proof filter.
- Page 113 Periodic Maintenance Procedures PERIODIC MAINTENANCE Used V-Belt Tension 3/8 - 1/2 in. 1/4 - 3/8 in. 5/16 - 1/2 in. (10 - 14 mm) (7 - 10 mm) (9 - 13 mm) Note: A “Used V-Belt” refers to a V-belt which has been used on a running engine for five minutes or more.
-
Page 114: Every 50 Hours Of Operation
PERIODIC MAINTENANCE Periodic Maintenance Procedures 4. Check the V-belt for cracks, oil or wear. If any of Every 50 Hours of Operation these conditions exist, replace the V-belt. 5. Install the new V-belt. Refer to the table for After you complete the initial 50 hour maintenance proper tension. - Page 115 Periodic Maintenance Procedures PERIODIC MAINTENANCE The cup of the separator is made from semi- CAUTION transparent material. In the cup is a red colored float ring. The float ring will rise to the surface of the If the fuel filter / water separator is water to show how much needs to be drained.
- Page 116 PERIODIC MAINTENANCE Periodic Maintenance Procedures 5. Open the fuel cock (Figure 5-7, (3)). WARNING 6. Be sure to prime the diesel fuel system when you are finished. See Priming the Fuel System on page 4-15. 7. Check for leaks. Check Battery BURN HAZARD! •...
-
Page 117: Every 250 Hours Of Operation
• Diesel fuel is flammable and explosive • If the engine still will not start after charging, under certain conditions. have your authorized Yanmar industrial engine dealer or distributor check the battery and the • When you remove any fuel system engine’s starting system. - Page 118 PERIODIC MAINTENANCE Periodic Maintenance Procedures 4. Drain the tank until clean diesel fuel with no CAUTION water and dirt flows out. Reinstall and tighten the drain plug firmly. 5. Reinstall the fuel cap. 6. Check for leaks. Replace Engine Oil and Engine Oil Filter •...
- Page 119 Periodic Maintenance Procedures PERIODIC MAINTENANCE Check and Clean Radiator Fins CAUTION CAUTION • ALWAYS be environmentally responsible. • Follow the guidelines of the EPA or FLYING OBJECT HAZARD! other governmental agencies for the • ALWAYS wear eye protection when proper disposal of hazardous servicing the engine and when using materials such as engine oil, diesel compressed air or high-pressure...
- Page 120 This may impair speed control. the safety and performance of the machine and shorten its life. If the idle speed limit screws require adjustment, see your authorized Yanmar industrial engine dealer or distributor. 0000017en 5-30 TNV DI Service Manual...
- Page 121 Periodic Maintenance Procedures PERIODIC MAINTENANCE Clean Air Cleaner Element 3. Blow air (Figure 5-12, (3)) through the element from the inside out using 42 - 71 psi Note that a typical air cleaner is shown in (0.29 - 0.49 MPa; 3.0 - 5.0 kgf/cm Figure 5-12 and Figure 5-13 for illustrative compressed air to remove the particulates.
-
Page 122: Every 500 Hours Of Operation
PERIODIC MAINTENANCE Periodic Maintenance Procedures 6. Replace the element with a new one if the Every 500 Hours of Operation element is damaged, excessively dirty or oily. 7. Clean inside of the air cleaner cover. Perform the following maintenance every 500 hours 8. - Page 123 2. Close the fuel cock of the fuel filter / water separator. CAUTION 3. Remove the fuel filter with a filter wrench, For maximum engine life, Yanmar turning it to the left (Figure 5-14, (1)). When recommends that when shutting the removing the fuel filter, carefully hold it to engine down, you allow the engine to prevent the fuel from spilling.
- Page 124 • When you remove any fuel system 3TNV82A, component to perform maintenance -4TNV98 119802-55801 (such as changing the fuel filter) place 3TNV82A-B, an approved container under the -4TNV98-B 129907-55801 opening to catch the fuel. 4TNV98T, • NEVER use a shop rag to catch the...
- Page 125 Periodic Maintenance Procedures PERIODIC MAINTENANCE Periodically clean the fuel filter / water separator CAUTION element and inside cup. 1. Position an approved container under the cup (Figure 5-15, (1)) of the fuel filter / water separator to collect the contaminants. •...
-
Page 126: Every 1000 Hours Of Operation
PERIODIC MAINTENANCE Periodic Maintenance Procedures 6. Remove the float ring (Figure 5-15, (8)) from Every 1000 Hours of Operation the cup. Pour the contaminants into the container and dispose of it properly. Perform the following maintenance every 1000 7. Clean the element (Figure 5-15, (9)) and inside hours of operation. - Page 127 Periodic Maintenance Procedures PERIODIC MAINTENANCE CAUTION WARNING BURN HAZARD! • ALWAYS be environmentally • Wait until the engine cools before you responsible. drain the engine coolant. Hot engine • Follow the guidelines of the EPA or coolant may splash and burn you. other governmental agencies for the •...
- Page 128 PERIODIC MAINTENANCE Periodic Maintenance Procedures F U L L O W 0000074A Figure 5-16 4. Drain the coolant from the engine block. • On models not equipped with an oil cooler, remove the coolant drain plug (Figure 5-17, (1)) from the engine block. 0000027B Figure 5-17 5-38...
-
Page 129: Every 1500 Hours Of Operation
• NEVER check for a fuel leak with your hands. ALWAYS use a piece of wood or cardboard. Have your authorized Yanmar industrial engine dealer or distributor repair the damage. • Failure to comply could result in death or serious injury. - Page 130 This procedure is considered normal maintenance resulting in deterioration in exhaust gas cleanup and is performed at the owner’s expense. This performance. procedure is not covered by the Yanmar Limited Warranty. To prevent such a problem, clean the cooler at least every 1500 hours.
- Page 131 Periodic Maintenance Procedures PERIODIC MAINTENANCE The non-turbo TNV engines use a crankcase Failure of the diaphragm and / or spring will cause breather system that has a spring-backed the loss of pressure control and allow an excessive diaphragm (Figure 5-20, (1)) in the valve cover amount of crankcase fumes to be routed to the (Figure 5-20, (2)).
-
Page 132: Every 2000 Hours Of Operation
PERIODIC MAINTENANCE Periodic Maintenance Procedures Lap the Intake and Exhaust Valves Every 2000 Hours of Operation Adjustment is necessary to maintain proper contact of the valves and seats. See Inspection of Intake Perform the following maintenance every 2000 and Exhaust Valves on page 6-42. hours of operation. - Page 133 Section 6 TNV DI Service Manual ENGINE Page Before You Begin Servicing ............6-3 Introduction..................6-6 Cylinder Head Specifications ............6-6 Adjustment Specifications ............6-6 Cylinder Head................6-6 Intake / Exhaust Valve and Guide ..........6-7 Push Rod................... 6-9 Rocker Arm and Shaft ............... 6-9 Valve Spring ................
- Page 134 ENGINE Components of a two-valve cylinder head ....... 6-35 Disassembly of 2-Valve Cylinder Head ........6-36 Cleaning of Cylinder Head Components ........6-40 Inspection of Cylinder Head Components........ 6-40 Reassembly of Cylinder Head..........6-44 4-Valve Cylinder Head ..............6-49 4-Valve Cylinder Head Components ........6-49 Disassembly of 4-Valve Cylinder Head ........
-
Page 135: Before You Begin Servicing
Before You Begin Servicing ENGINE BEFORE YOU BEGIN WARNING SERVICING WARNING FUME / BURN HAZARD! • Always read and follow safety related precautions found on containers of hazardous substances like parts To prevent possible eye injury, always cleaners, primers, sealants and wear SAFETY GLASSES while servicing sealant removers. - Page 136 ENGINE Before You Begin Servicing CAUTION CAUTION • Only use the engine oil specified. Any part which is found defective as a Other engine oils may affect warranty result of inspection or any part whose coverage, cause internal engine measured value does not satisfy the components to seize and / or shorten standard or limit must be replaced.
- Page 137 Before You Begin Servicing ENGINE CAUTION Keep the piston pin parts, piston assemblies, and connecting rod assemblies together to be returned to the same position during the reassembly process. Label the parts using an appropriate method. 0000088en CAUTION Do not allow the honing tool to operate in one position for any length of time.
-
Page 138: Introduction
ENGINE Introduction INTRODUCTION This section of the Service Manual describes servicing of the engine. CYLINDER HEAD SPECIFICATIONS Adjustment Specifications Valve Bridge Clearance Model Valve Clearance (4-Valve Head Only) 0.006 - 0.010 in. All except 4TNV106, 4TNV106T (0.15 - 0.25 mm) 0.010 - 0.014 in. -
Page 139: Intake / Exhaust Valve And Guide
Cylinder Head Specifications ENGINE Intake / Exhaust Valve and Guide Reference Inspection Item Standard Limit Page 0.2756 - 0.2762 in. 0.2787 in. Guide Inside Diameter (7.000 - 7.015 mm) (7.08 mm) Valve Stem Outside 0.2734 - 0.2740 in. 0.2717 in. Intake Diameter (6.945 - 9.960 mm) - Page 140 ENGINE Cylinder Head Specifications (Intake / Exhaust Valve and Guide Cont.) Reference Inspection Item Standard Limit Page 0.2756 - 0.2762 in. 0.2787 in. Guide Inside Diameter (7.000 - 7.015 mm) (7.08 mm) Valve Stem Outside 0.2734 - 0.2740 in. 0.2717 in. Intake Diameter (6.945 - 6.960 mm)
-
Page 141: Push Rod
Cylinder Head Specifications ENGINE Reference Inspection Item Standard Limit Page Valve Stem Seal Projection From Cylinder Head 0.618 - 0.629 in. 3TNV82A (15.7 - 16.0 mm) 4TNV84 2 Valves 0.736 - 0.748 in. 3TNV84 (T) Reassembly (18.7 - 19.0 mm) 4TNV88 of Intake and Exhaust... -
Page 142: Valve Spring
ENGINE Cylinder Head Specifications Valve Spring Reference Inspection Item Model Standard Limit Page 1.7480 in. 1.7283 in. 3TNV82A (2-Valve Head) (44.4 mm) (43.9 mm) 4TNV84, 3TNV84, 3TNV84T, 4TNV88 1.6535 in. 1.6339 in. (2-Valve Head) (42.0 mm) (41.5 mm) 1.4724 in. 1.4528 in. -
Page 143: Camshaft And Timing Gear Train Specifications
Camshaft and Timing Gear Train Specifications ENGINE CAMSHAFT AND TIMING GEAR TRAIN SPECIFICATIONS Camshaft Reference Inspection Item Standard Limit Page See Removal 0.0020 - 0.0079 in. 0.0118 in. of Camshaft End Play (0.05 - 0.20 mm) (0.030 mm) page 6-76. 0 - 0.0008 in. - Page 144 ENGINE Camshaft and Timing Gear Train Specifications (Camshaft Cont.) Reference Inspection Item Standard Limit Page 1.9681 - 1.9707 in. 1.9736 in. Bushing Inside Diameter (49.990 - 50.055 mm) (50.130 mm) 1.9655 - 1.9665 in. 1.7673 in. Gear End Camshaft Outside Diameter (49.925 - 49.950 mm) (49.890 mm) 0.0016 - 0.0051 in.
-
Page 145: Idler Gear Shaft And Bushing
Camshaft and Timing Gear Train Specifications ENGINE Idler Gear Shaft and Bushing Reference Inspection Item Standard Limit Page 1.8091 - 1.8100 in. 1.8071 in. Shaft Outside Diameter (45.950 - 45.975 mm) (45.900 mm) Inspection of 1.8110 - 4.8120 in. 1.8140 in. Bushing Inside Diameter Idler Gear (46.000 - 46.025 mm) -
Page 146: Crankshaft And Piston Specifications
ENGINE Crankshaft and Piston Specifications CRANKSHAFT AND PISTON SPECIFICATIONS Crankshaft Note: Check appropriate parts catalog for various sizes of replacement main bearing inserts. Reference Inspection Item Standard Limit Page 0.0008 in. Bend (1/2 the dial gauge reading) (0.02 mm) Journal Outside 1.6910 - 1.6914 in. -
Page 147: Thrust Bearing
Crankshaft and Piston Specifications ENGINE (Crankshaft Cont.) Reference Inspection Item Standard Limit Page Journal Outside 1.8485 - 1.8489 in. 1.8465 in. Diameter (46.952 - 46.962 mm) (46.902 mm) Bearing Inside 1.8504 - 1.8516 in. Diameter (47.000 - 47.032 mm) 3TNV82A Bearing Insert 0.0782 - 0.0787 in. -
Page 148: Piston
ENGINE Crankshaft and Piston Specifications Piston Reference Inspection Item Standard Limit Page 3.2264 - 3.2275 in. 3.2246 in. 3TNV82A (81.950 - 81.980 mm) (81.905 mm) 3TNV84, 3TNV84T, 3.3047 - 3.3059 in. 3.3029 in. 4TNV84, 4TNV84T (83.940 - 83.970 mm) (83.895 mm) 3.4622 - 3.4634 in. - Page 149 Crankshaft and Piston Specifications ENGINE (Piston Cont.) Reference Inspection Item Standard Limit Page 0.9055 - 0.9059 in. 0.9070 in. Hole Inside Diameter (23.000 - 23.009 mm) (23.039 mm) 0.9053 - 0.9055 in. 0.9041 in. 3TNV82A Pin Outside Diameter (22.995 - 23.000 mm) (22.965 mm) 0.0000 - 0.0006 in.
-
Page 150: Piston Ring
ENGINE Crankshaft and Piston Specifications Piston Ring Reference Model Inspection Item Standard Limit Page 0.0813 - 0.0819 in. Ring Groove Width (2.065 - 2.080 mm) 0.0776 - 0.0783 in. 0.0768 in. Ring Width (1.970 - 1.990 mm) (1.950 mm) Top Ring 0.0030 - 0.0043 in. - Page 151 Crankshaft and Piston Specifications ENGINE (Piston Ring Cont.) Reference Model Inspection Item Standard Limit Page 0.0811 - 0.0817 in. Ring Groove Width (2.060 - 2.075 mm) 0.0776 - 0.0783 in. 0.0768 in. Ring Width (1.970 - 1.990 mm) (1.950 mm) Top Ring 0.0028 - 0.0041 in.
- Page 152 ENGINE Crankshaft and Piston Specifications (Piston Ring Cont.) Reference Model Inspection Item Standard Limit Page 0.0803 - 0.0811 in. Ring Groove Width (2.040 - 2.060 mm) 0.0764 - 0.0772 in. 0.0756 in. Ring Width (1.940 - 1.960 mm) (1.920 mm) Top Ring 0.0031 - 0.0047 in.
- Page 153 Crankshaft and Piston Specifications ENGINE (Piston Ring Cont.) Reference Model Inspection Item Standard Limit Page 0.0992 - 0.1000 in. Ring Groove Width (2.520 - 2.540 mm) 0.0961 - 0.0969 in. 0.0953 in. Ring Width (2.440 - 2.460 mm) (2.420 mm) Top Ring 0.0024 - 0.0039 in.
-
Page 154: Connecting Rod
ENGINE Crankshaft and Piston Specifications Connecting Rod Connecting Rod Small End Reference Model Inspection Item Standard Limit Page Wrist Pin Bushing 0.9065 - 0.9070 in. 0.9082 in. Inside Diameter (23.025 - 23.038 mm) (23.068 mm) Wrist Pin Outside 0.9053 - 0.9055 in. 0.9042 in. -
Page 155: Tappet
Crankshaft and Piston Specifications ENGINE Tappet Reference Model Inspection Item Standard Limit Page Tappet Bore (Block) Inside 0.4724 - 0.4734 in. 0.4742 in. Diameter (12.000 - 12.025 mm) (12.045 mm) 3TNV82A, 3TNV84, 3TNV84T, 3TNV88, 0.4715 - 0.4720 in. 0.4707 in. Tappet Stem Outside Diameter 4TNV84, 4TNV84T, (11.975 - 11.990 mm) -
Page 156: Cylinder Block Specifications
ENGINE Cylinder Block Specifications CYLINDER BLOCK SPECIFICATIONS Cylinder Block Reference Inspection Item Model Standard Limit Page 3.2283 - 3.2295 in. 3.2362 in. 3TNV82A (82.000 - 82.030 mm) (82.200 mm) 3TNV84, 3TNV84T, 3.3071 - 3.3083 in. 3.3150 in. 4TNV84, 4TNV84T (84.000 - 84.030 mm) (84.200 mm) 3.4646 - 3.4657 in. -
Page 157: Special Torque Chart
Special Torque Chart ENGINE SPECIAL TORQUE CHART Torque for Bolts and Nuts Lubricating Oil Thread Diameter Application Component Model Torque and Pitch (Thread Portion and Seat Surface) 46 - 49 ft·lb 3TNV82A M9 x 1.25 mm (61.7 - 65.7 N·m; 6.3 - 6.7 kgf·m) 3TNV82A, 3TNV84, 63 - 67 ft·lb... - Page 158 ENGINE Special Torque Chart (Torque for Bolts and Nuts Cont.) Lubricating Oil Thread Diameter Application Component Model Torque and Pitch (Thread Portion and Seat Surface) 56 - 60 ft·lb 3TNV82A M10 x 1.25 mm (76.4 - 80.4 N·m; 7.8 - 8.2 kgf·m) 3TNV84, 3TNV84T, 69 - 72 ft·lb 3TNV88, 4TNV84,...
- Page 159 148 - 199 in·lb Cover 4TNV106, 4TNV106T M8 x 1.25 mm (16.7 - 22.5 N·m; Not Applied Bolt 1.7 - 2.3 kgf·m) 3TNV82A-B, 133 - 177 in·lb Glow Plug 3TNV88-B,-U, M10 x 1.25 mm (15 - 20 N·m Not Applied 4TNV88-B,-U 1.53 - 2.04 kgf·m)
-
Page 160: Special Service Tools
(13 mm) (16 mm) 4TNV98T 4TNV106, 0.535 in. 2.559 in. 0.512 in. 0.630 in. 4TNV106T (13.6 mm) (65 mm) (13 mm) (16 mm) Locally Manufactured Fuel Injector Removal Tool Yanmar Part No. 129470-92305 (2-Valve Head) 6-28 TNV DI Service Manual... - Page 161 0.787 in. 3.937 in. 1.457 in. 1.575 in. 4TNV106T (20 mm) (100 mm) (37 mm) (40 mm) Locally Manufactured Valve Spring Compressor Yanmar Part No. (For Removal/ 129100-92630 Installation of 0000830 Valve Spring) Model 0.598 0.827 0.472 0.622 2.559 0.157 3TNV82A (15.2...
- Page 162 (89 - 101 mm) 4TNV106, 3.740 - 4.252 in. 129400-92450 4TNV106T (95 - 108 mm) Piston Ring Yanmar Part No. 95550-002476 Compressor The Piston Insertion Tool is Applicable for (For Installing 2.362 - 4.921 in. (60 - 125 mm) Diameter Pistons Piston) 0000824...
- Page 163 Special Service Tools ENGINE (Special Service Tools Cont.) Tool Name Applicable Model and Tool Size Illustration 0000826 Crankshaft Pulley Locally Manufactured Installing Tool (4TNV94L, 4TNV98(T) series) (For taper pilot) (Knurl knob (1)) 0002134 Knuri knob m0.3 Crankshaft Pulley Locally Manufactured Installing Tool M14×1.5 (4TNV94L, 4TNV98(T) series)
-
Page 164: Measuring Instruments
ENGINE Measuring Instruments MEASURING INSTRUMENTS Instrument Name Application Illustration Dial Indicator Locally Available Measure shaft bend and end play 0000831 Measurements of narrow or deep portions that Test Indicator Locally Available cannot be measured by dial gauge 0000832 Magnetic Stand Locally Available For holding the dial gauge when measuring 0000833... - Page 165 Measuring Instruments ENGINE Instrument Name Application Illustration V-Block Locally Available For measuring shaft bend 0000839 For tightening nuts and bolts to the specified Torque Wrench Locally Available torque 0000840 For measuring piston ring gaps, piston ring Feeler Gauge Locally Available clearance, and valve adjustment clearance 0000841 TNV DI Service Manual...
-
Page 166: 2-Valve Cylinder Head
ENGINE 2-Valve Cylinder Head 2-VALVE CYLINDER HEAD 2-Valve Cylinder Head Components (34) (32) (33) (10) (11) (12) (29) (13) (17) (14) (30) (18) (15) (28) (31) (19) (16) (20) (27) (21) (22) (23) (26) (24) (25) 0001919 Figure 6-1 6-34 TNV DI Service Manual... -
Page 167: Components Of A Two-Valve Cylinder Head
4 – Diaphragm Spring Cylinder head with glow plugs (two-valve 5 – Diaphragm Plate type)Applicable Model 6 – Crankcase Breather Diaphragm 3TNV82A-B, 3TNV88-B,-U, 4TNV88-B,-U (non-turbocharged engines only) 7 – Oil Fill Cap 8 – Valve Cover Gasket 9 – Rocker Arm Shaft Spring 10 –... -
Page 168: Disassembly Of 2-Valve Cylinder Head
ENGINE 2-Valve Cylinder Head Disassembly of 2-Valve Cylinder Head Prepare a clean, flat working surface on a workbench large enough to accommodate the cylinder head assembly. Discard all gaskets, O-rings and seals. Use new gaskets, O-rings and seals on reassembly of the cylinder head. 1. - Page 169 2-Valve Cylinder Head ENGINE Removal of Valve Cover Removing the glow plugs 1. Remove the valve cover nuts (Figure 6-7, (1)). 1. Remove the glow plug harness (Figure 6-6, (2)) from each glow plug 2. Remove the O-ring (Figure 6-7, (2)) on each (Figure 6-6, (1)).
- Page 170 ENGINE 2-Valve Cylinder Head Removal of Rocker Arm Assembly 1. Remove the bolts (Figure 6-8, (1)) that retain the rocker arm shaft supports. 2. Remove the rocker arm shaft assembly from the cylinder head. Note: Identify the push rods so they can be reinstalled in their original locations.
- Page 171 2-Valve Cylinder Head ENGINE 2. Remove the cylinder head bolts Removal of Intake / Exhaust Valves (Figure 6-11, (1)). 1. Place the cylinder head on the work bench with 3. Lift the cylinder head away from the cylinder the combustion side down. block.
-
Page 172: Cleaning Of Cylinder Head Components
ENGINE 2-Valve Cylinder Head Note: If the valves are to be reused, identify Cleaning of Cylinder Head them so they can be installed in their Components original location. 8. Turn the cylinder head so the exhaust port side WARNING faces down. Remove the intake and exhaust valves (Figure 6-13, (6)) from the cylinder head. - Page 173 2-Valve Cylinder Head ENGINE Inspect the contact areas (Figure 6-16, (1)) for CAUTION excessive wear or damage. Any part determined to not meet the service standard or limit before the next service, as determined from the state of current rate of wear, should be replaced even though the part currently meets the service standard limit.
- Page 174 ENGINE 2-Valve Cylinder Head Use a telescoping gauge and micrometer to Valve Stem Diameter measure the inside diameter at each end of the Use a micrometer to measure the valve stem valve guide. Measure in three places and 90° apart diameter.
- Page 175 2-Valve Cylinder Head ENGINE Coat the valve seat with a thin coat of bluing compound. Install the valve and rotate it to distribute bluing onto the valve face. The contact pattern should be approximately centered on the valve face (Figure 6-24, (1)) and even in width. 0000193 Figure 6-22 0001691B...
-
Page 176: Reassembly Of Cylinder Head
ENGINE 2-Valve Cylinder Head Grind the valve face and / or valve seat only Free Length enough to return them to serviceable condition. Use a caliper to measure the length of the spring Grinding is needed if the valve and the valve seat (Figure 6-27). - Page 177 2-Valve Cylinder Head ENGINE 2. Immediately after removing the valve guides Reassembly of Intake and Exhaust Valves from the freezer, insert the valve guides IMPORTANT (Figure 6-28, (1)) in their proper positions. Always install new valve stem seals. The exhaust valve stem seals are different than the intake valve stem seals and can be identified by either the paint marks on the outside of the seals or by the color of the...
- Page 178 ENGINE 2-Valve Cylinder Head 7. Insert the valve keepers (Figure 6-32, (2)) and slowly release the tension on the valve spring. Install the valve cap (Figure 6-32, (1)). Repeat the steps on all the remaining valves. Reassembly of Cylinder Head 1.
- Page 179 2-Valve Cylinder Head ENGINE 3. Lightly oil the threads of the cylinder head bolts 1. Lubricate the rocker arm shaft. Slide the rocker (Figure 6-33, (1)). Tighten the bolts to the arm supports (Figure 6-36, (5)), springs specified torque in two steps as shown in the (Figure 6-36, (1)) and rocker arms chart below.
- Page 180 ENGINE 2-Valve Cylinder Head 6. Tighten the rocker arm shaft alignment studs. 6. Install each glow plug (Figure 6-38, (1)), and tighten it with the specified torque. Install each 7. Adjust the valve clearance. See Measuring and electrical harness (Figure 6-38, (1)), and Adjusting Valve Clearance on page 6-66.
-
Page 181: 4-Valve Cylinder Head
4-Valve Cylinder Head ENGINE 4-VALVE CYLINDER HEAD 4-Valve Cylinder Head Components (36) (35) (34) (11) (12) (10) (33) (14) (15) (13) (31) (30) (32) (29) (28) (27) (16) (26) (24) (25) (23) (17) (18) (22) (19) (21) (20) 0001861 Figure 6-39 TNV DI Service Manual 6-49... -
Page 182: Disassembly Of 4-Valve Cylinder Head
ENGINE 4-Valve Cylinder Head 1 – Crankcase Breather Cover Disassembly of 4-Valve Cylinder 2 – Diaphragm Spring Head 3 – Diaphragm Cup 4 – Crankcase Breather Diaphragm Prepare a clean, flat working surface on a 5 – Oil Fill Cap workbench large enough to accommodate the 6 –... - Page 183 4-Valve Cylinder Head ENGINE CAUTION Remove or install the high-pressure fuel injection lines as an assembly whenever possible. Disassembling the high-pressure fuel injection lines from the retainers or bending any of the fuel lines will make it difficult to reinstall the fuel lines.
- Page 184 ENGINE 4-Valve Cylinder Head Removal of Valve Cover Note: The high pressure fuel injection lines and valve cover grommets must be removed prior to removing the valve cover. See Removal of Fuel Injectors on page 7-35. 1. Remove the high-pressure fuel lines. 2.
- Page 185 4-Valve Cylinder Head ENGINE Removal of Rocker Arm Assembly Disassembly of Rocker Arm Assembly 1. Remove the fuel injectors from the cylinder Note: Identify the rocker arms so they can be head. See Removal of Fuel Injectors on reinstalled with the original matching page 7-35.
- Page 186 ENGINE 4-Valve Cylinder Head Removal of Cylinder Head 1. Loosen the cylinder head bolts following the sequence shown in (Figure 6-46). 0001864 1 – Cooling Fan End 2 – Camshaft Side Figure 6-46 0001872 Figure 6-47 2. Remove the cylinder head bolts (Figure 6-47, (1)).
-
Page 187: Cleaning Of Cylinder Head Components
4-Valve Cylinder Head ENGINE Removal of Valve Guides 3. Remove the valve keepers (Figure 6-49, (1)). 4. Slowly release the tension on the valve spring. Note: Removal of the valve guides should be postponed until inspection and 5. Remove the spring retainer (Figure 6-49, (2)), measurement procedures have been valve spring (Figure 6-49, (3)). -
Page 188: Inspection Of Cylinder Head Components
ENGINE 4-Valve Cylinder Head Thoroughly clean all components using a non- Inspection of Push Rods metallic brush and an appropriate solvent. Each Push Rod Bend part must be free of carbon, metal filings and other debris. 1. Place the push rods on a flat inspection block or layout bed. - Page 189 4-Valve Cylinder Head ENGINE Inspection of Valve Guides Valve Guide Inside Diameter Visually inspect the valve guides for distortions, scoring or other damage. Note: Measure the valve guides while they are installed in cylinder head. Use a telescoping gauge and micrometer to measure the inside diameter at each end of the valve guide.
- Page 190 ENGINE 4-Valve Cylinder Head If distortion exceeds the service limit, resurface or Valve Stem Bend replace the cylinder head. Remove only enough Place the valve stem on a flat inspection block or material to make the cylinder head flat, but do not layout bed.
- Page 191 4-Valve Cylinder Head ENGINE Coat the valve seat with a thin coat of bluing compound. Install the valve and rotate to distribute bluing onto the valve face. The contact pattern should be approximately centered on the valve face (Figure 6-60, (1)) and even in width. 0001755 Figure 6-59 Valve Face and Valve Seat...
- Page 192 ENGINE 4-Valve Cylinder Head Grind the valve face and/or valve seat as necessary Free Length to return them to serviceable condition. Grinding is Use a caliper to measure the length of the spring needed if the valve and valve seat do not contact (Figure 6-63).
-
Page 193: Reassembly Of Cylinder Head
4-Valve Cylinder Head ENGINE Reassembly of Cylinder Head 3. Finish installing the valve guides (Figure 6-66, (1)) into the cylinder head to the Use new gaskets, O-rings, and seals on proper height (Figure 6-66, (3)) using the valve reassembly of the cylinder head. guide installation tool (Figure 6-66, (2)). - Page 194 ENGINE 4-Valve Cylinder Head 0001873 Figure 6-67 0001867 2. Measure the distance (Figure 6-68, (1)) from Figure 6-69 the cylinder head to the valve stem seal to 5. Place the cylinder head on the workbench with ensure proper clearance (Figure 6-68, (2)) the combustion side down.
- Page 195 4-Valve Cylinder Head ENGINE 0001875 1 – Fan End 2 – Camshaft Side Figure 6-71 Reassembly of Rocker Arm Assembly 1. Reinstall the valve bridges (Figure 6-72, (3)) in their original locations and ensure each seat (Figure 6-72, (4)) is in place. 0001872 2.
- Page 196 ENGINE 4-Valve Cylinder Head IMPORTANT Note: To properly align the rocker arm shaft with the rocker arm shaft supports, first The wave washers (Figure 6-73, (2)) must reinstall one of the end rocker arm be installed with the bow facing the rocker supports (Figure 6-75, (6)) with a hole arms (Figure 6-73, (1)).
- Page 197 4-Valve Cylinder Head ENGINE Reassembly of the Valve Cover 9. Reinstall the high pressure and fuel return lines. See Installation of the Fuel Injectors on 1. Lightly grease a new valve cover gasket page 7-42. (Figure 6-76, (6)). Place the gasket in the 10.
-
Page 198: Measuring And Adjusting Valve Clearance
ENGINE Measuring and Adjusting Valve Clearance MEASURING AND ADJUSTING • If there is no valve clearance, and the cylinder is at TDC of the compression stroke, extreme VALVE CLEARANCE wear, or damage to the cylinder head or valves may be possible. Measure and adjust while the engine is cold. -
Page 199: 2-Valve Cylinder Heads
Measuring and Adjusting Valve Clearance ENGINE 2-Valve Cylinder Heads 1. Remove the valve cover. See Removal of Valve Cover on page 6-52. Note: If adjusting each cylinder individually, the cylinder to be adjusted first does not have to be the No. 1 cylinder. Select and adjust the cylinder where the piston is nearest to the top dead center after turning, and make adjustment for other... -
Page 200: 4-Valve Cylinder Heads
ENGINE Measuring and Adjusting Valve Clearance 4-Valve Cylinder Heads IMPORTANT Do not loosen or tighten the valve adjusting The 4-valve cylinder head operates two valves with screw lock nut without holding the valve a single rocker arm by employing a valve bridge bridge. - Page 201 Measuring and Adjusting Valve Clearance ENGINE 7. Tighten the lock nut (Figure 6-83, (1)), while holding the valve bridge (Figure 6-83, (3)) with a wrench (Figure 6-83, (2)). Verify that the valve clearance (Figure 6-84, (2) is zero “0”. 0001917A Figure 6-83 0003566 Figure 6-85...
- Page 202 ENGINE Measuring and Adjusting Valve Clearance 0001918 Figure 6-86 12. Hold the adjusting screw (Figure 6-86, (4)) while tightening the valve adjusting screw lock nut (Figure 6-86, (5)). Recheck the clearance. 13. Apply oil to the contact surface between the adjusting screw and push rod.
-
Page 203: Crankshaft And Camshaft Components
Crankshaft and Camshaft Components ENGINE CRANKSHAFT AND CAMSHAFT COMPONENTS 0001963 Figure 6-87 TNV DI Service Manual 6-71... -
Page 204: Disassembly Of Engine
ENGINE Crankshaft and Camshaft Components 1 – Cylinder Block CAUTION 2 – Camshaft Bushing 3 – Gear Case (3TNV94 - 4TNV106) Identify all parts and their location using 4 – Dowel (2 used) an appropriate method. It is important 5 – O-Ring that all parts are returned to the same 6 –... -
Page 205: Disassembly Of Camshaft And Timing Components
Crankshaft and Camshaft Components ENGINE 9. Remove the fuel injection pump from the gear case / front plate only if it must be sent out for repair, or will interfere with other procedures such as “hot tank” cleaning. If the fuel injection pump does not need to be repaired, leaving it mounted to the timing gear case or plate will eliminate the need to re-time it during... - Page 206 ENGINE Crankshaft and Camshaft Components Measuring Idler Gear-to-Camshaft Gear Backlash 1. Drive a small wooden wedge between the crankshaft gear and idler gear to prevent the idler gear from rotating. 2. Install the dial indicator to read the camshaft gear backlash. Rotate the camshaft drive gear against the idler gear to measure the backlash.
- Page 207 Crankshaft and Camshaft Components ENGINE CAUTION Do not loosen or remove the four bolts retaining the fuel injection pump drive gear to the fuel injection pump hub. Do not disassemble the fuel injection pump drive gear from the hub. Correct fuel injection timing will be very difficult or impossible to achieve.
- Page 208 ENGINE Crankshaft and Camshaft Components 3. Remove the oil pickup tube (Figure 6-94, (1)) and O-ring (Figure 6-94, (2)). 0002085A Figure 6-95 • Method B: Use a feeler gauge to measure the clearance between the thrust plate (Figure 6-96, (1)) and front camshaft bearing (Figure 6-96, (2)).
- Page 209 Crankshaft and Camshaft Components ENGINE 2. Remove the two bolts (Figure 6-97, (3)) Removal of Gear Case or Front Plate retaining the camshaft thrust plate Note: The camshaft must be removed before (Figure 6-97, (1)). the gear case / front plate can be removed.
-
Page 210: Disassembly Of Crankshaft And Piston Components
ENGINE Crankshaft and Camshaft Components 6. TNV84 - TNV88: Remove the O-ring 1. Using a feeler gauge, measure the connecting (Figure 6-99, (2)) and dowels rod side clearance as shown (Figure 6-100). (Figure 6-99, (5)). See Connecting Rod on page 6-22 for the standard limit. - Page 211 Crankshaft and Camshaft Components ENGINE IMPORTANT (g) Repeat with remaining connecting rods. Mark the connecting rod caps and IMPORTANT connecting rods so the caps and connecting Do not allow the connecting rod to contact rods stay together. the crankshaft journal during piston (a) Remove the bearing cap.
- Page 212 ENGINE Crankshaft and Camshaft Components Removal of Crankshaft • Method B: Use a feeler gauge to measure the clearance (Figure 6-106, (3)) between the 1. Remove the flywheel (Figure 6-104, (1)) from thrust bearing (Figure 6-106, (1)) and the crankshaft. crankshaft (Figure 6-106, (2)).
- Page 213 Crankshaft and Camshaft Components ENGINE 4. Remove the main bearing caps (Figure 6-107, (3)). Be sure to note the markings on the main bearing caps, or mark them yourself, so they can be reinstalled in the same order as they were removed. Do not remove the bearing inserts at this time.
-
Page 214: Inspection Of Crankshaft And Camshaft Components
8. If necessary, remove the crankshaft gear 2. Apply a continuous bead of ThreeBond Liquid (Figure 6-110, (1)), parallel pin Gasket No. 1212, Yanmar Part No. 977770- (Figure 6-110, (2)) and key (Figure 6-110, (3)). 01212 to the outside diameter of a new oil seal... - Page 215 Crankshaft and Camshaft Components ENGINE Measure Crankshaft Bearing Oil Clearance • On an engine with high hours, the pistons rings should be replaced and the cylinder honed Oil clearance should be checked during (See Honing and Boring on page 6-88) or disassembly to determine the extent of wear, and replaced.
- Page 216 ENGINE Crankshaft and Camshaft Components 0000237 0001892 Figure 6-115 Figure 6-117 7. Measure the outside diameter of the wrist pin in three places and at 90° (Figure 6-116). See Piston on page 6-16 for specifications. Record the measurements. 0001889 Figure 6-116 8.
- Page 217 Crankshaft and Camshaft Components ENGINE 10. To measure piston ring end gap, insert each compression piston ring (Figure 6-118, (1)), one at a time, into the cylinder. Use a piston with the piston rings removed to slide the ring into the cylinder bore until it is approximately 1.18 in.
- Page 218 ENGINE Crankshaft and Camshaft Components 2. Measure the outside diameter of the tappet 4. Use the color check method or Magnaflux® to stem (Figure 6-121, (1)). See Tappet on inspect the crankshaft for cracks. Replace the page 6-23 for the service limit. crankshaft if evidence of fractures are found.
- Page 219 Crankshaft and Camshaft Components ENGINE Inspection of Camshaft 1. Use V-blocks and a dial indicator to check camshaft bend (Figure 6-124). Place the indicator on the center bearing journal. 0001713A Figure 6-126 0001711 Inspection of Camshaft Bushing and Bores 1. Measure the I.D. of the front bushing and the Figure 6-124 remaining bores in the cylinder block.
-
Page 220: Honing And Boring
ENGINE Crankshaft and Camshaft Components Honing and Boring CAUTION Pistons must move freely in the cylinders while Do not allow the honing tool to operate maintaining adequate compression and oil sealing. in one position for any length of time. If the cylinder walls are scuffed, scored, Damage to the cylinder wall will occur. -
Page 221: Reassembly Of Crankshaft And Piston Components
Crankshaft and Camshaft Components ENGINE • When honing is completed, wash the cylinder block with hot water and soap. The cylinder wall is adequately cleaned when a white rag wiped in cylinder comes out clean. Use brushes to clean all passages and crevices. Rinse with hot water and dry with compressed air. - Page 222 ENGINE Crankshaft and Camshaft Components Note: The actual appearance of the match Piston Assembly - All TNV models - 82, 84(T), 88, 94, and 98(T) marks on the piston and connecting rod may vary, but they will always be in the When correctly assembled, the piston same locations.
- Page 223 Crankshaft and Camshaft Components ENGINE Piston Assembly - Only TNV models 106(T) When correctly assembled, the identification mark (Figure 6-133, (2)) stamped into the top of the piston will be on the opposite side of the connecting rod as the match marks (Figure 6-133, (4)) stamped into the connecting rod and connecting rod cap.
- Page 224 ENGINE Crankshaft and Camshaft Components IMPORTANT Always use a piston ring installation tool (expander) when installing piston rings. Never attempt to install piston rings by hand. 3. Reinstall the oil ring expander (Figure 6-136, (4)). Reinstall the oil ring (Figure 6-136, (3)) with the end gap at 180° from the expander end gap.
- Page 225 Figure 6-138 6. Rotate the crankshaft to assure it turns freely. 7. Apply ThreeBond Liquid Gasket No. 1212, Yanmar Part No. 977770-01212 to the mounting 1 – Top Compression Ring End Gap flange of the seal housing (Figure 6-139, (2)).
- Page 226 ENGINE Crankshaft and Camshaft Components Piston Installation - Only TNV models 106(T) Orient the piston Orient the piston identification mark identification mark When correctly assembled, the identification stamped on top of the stamped on top of the mark (Figure 6-142, (2)) stamped into the top of piston on the fuel injection piston on the camshaft the piston will be on the opposite side of the...
-
Page 227: Reassembly Of Camshaft And Timing Components
(1/2 2. Apply a continuous bead of ThreeBond Liquid then full torque). See Special Torque Chart on Gasket No. 1212, Yanmar Part No. 977770- page 6-25 for specifications. 01212 to the mounting area of the gear case or front plate. - Page 228 ENGINE Crankshaft and Camshaft Components 4. TNV84 - TNV88: Reinstall the dowels Note: The tappets are “mushroom” shaped and (Figure 6-145, (5)) and a new O-ring must be installed from inside the engine (Figure 6-145, (2)). crankcase. 3. Lubricate the tappets with clean oil or assembly lube.
- Page 229 Installation of Gear Case Cover 1. Apply a continuous bead of ThreeBond Liquid Gasket No. 1212, Yanmar Part No. 977770- 01212 to the mounting area of the gear case cover (Figure 6-149, (1)). Be sure to circle the 0001709A bolt holes.
- Page 230 (Figure 6-150, (2)) from damage. 0001696A Figure 6-151 2. Apply a continuous bead of ThreeBond Liquid Gasket No. 1212, Yanmar Part No. 977770-01212 to the mounting surface of the oil pan (Figure 6-152, (1)). Be sure to circle each 0002133 bolt hole.
-
Page 231: Final Reassembly Of Engine
Crankshaft and Camshaft Components ENGINE Final Reassembly of Engine 1. Reinstall the starter motor. 2. Reinstall the cylinder head. See Reassembly of Cylinder Head on page 6-46 for the 2-valve cylinder head or 6-62 for the 4-valve cylinder head. 3. Reinstall the engine in the machine. 4. -
Page 232: Egr System
ENGINE EGR system EGR SYSTEM EGR system Applicable engines : 4TNV98-E, 4TNV98-Z (8) (11) (12) Figure 6-153 6-100 TNV DI Service Manual... - Page 233 EGR system ENGINE Applicable engines : 4TNV84T-Z, 4TNV98T-Z (11) (12) (13) (10) Figure 6-154 1 – Exhaust manifold 8 – Intake manifold 2 – Elbow, EGR cooler inlet 9 – Cooling water hose, EGR cooler inlet 3 – EGR cooler 10 –...
- Page 234 ENGINE EGR system EGR system WARNING DANGER BURN HAZARD! • Keep your hands and other body parts SCALD HAZARD! away from hot engine surfaces such as the muffler, exhaust pipe, • NEVER remove the radiator cap if the turbocharger (if equipped) and engine engine is hot.
- Page 235 EGR system ENGINE WARNING CAUTION FUME / BURN HAZARD! COOLANT HAZARD! • Always read and follow safety related • Wear eye protection and rubber gloves precautions found on containers of when you handle long life or extended hazardous substances like parts life engine coolant.
- Page 236 ENGINE EGR system 1. Drain the engine cooling water. 4TNV84T-Z, 4TNV98T-Z 2. Remove the battery cable from the battery's 1. Disconnect the cooling water inlet and outlet minus (-) terminal. hoses from the EGR cooler by loosening the hose clips. 3.
-
Page 237: Inspecting/Cleaning Egr Related Components
EGR system ENGINE Inspecting/cleaning EGR related EGR valve operation checks components 1. After removing each EGR valve from the engine, connect the valve with the connector. EGR Valve 2. Connect the valve to the battery's minus (-) terminal. Each EGR valve has four built-in coils. The power to each of the four coil is either ON or OFF at any 3. - Page 238 ENGINE EGR system Cleaning the EGR valves To remove deposited carbon, use compressed air (0.19MPa(2kg/cm2) or lower). If the valves are heavily fouled, use carbon cleaner, kerosene, or WARNING some other liquid capable of removing carbon as well as a soft brush to clean the valves, taking care not to damage their parts.
- Page 239 EGR system ENGINE To remove deposited carbon, use carbon cleaner, EGR cooler kerosene, or some other liquid capable of removing The EGR cooler must be periodically cleaned every carbon as well as a soft brush or cloth to clean the 1500 hours because the exhaust gas passage is valves, taking care not to damage their parts.
- Page 240 ENGINE EGR system Installing EGR related components/parts CAUTION To install these components/parts, reverse the disassembly procedure described above: thus install the lead valve, spacer, EGR valve, EGR pipe, EGR cooler, elbow, cooler cooling water hose, and EGR cooling water hose exactly in this order. The EGR system uses steel gaskets at the joints •...
- Page 241 Section 7 TNV DI Service Manual FUEL SYSTEM Page Before You Begin Servicing ............7-3 Introduction..................7-8 Fuel Injection Pump..............7-8 Stop Solenoid ................7-9 Cold Start Device............... 7-9 Trochoid Fuel Pump ..............7-10 Electronically controlled governor..........7-10 Fuel System Specifications ............7-11 Special Torque Chart...............
- Page 242 FUEL SYSTEM Fuel Injectors.................. 7-35 Removal of Fuel Injectors............7-35 Testing of Fuel Injectors ............7-38 Disassembly and Inspection of Fuel Injectors ......7-39 Adjusting Fuel Injector Pressure ..........7-41 Reassembly of Fuel Injectors ........... 7-41 Installation of the Fuel Injectors..........7-42 TNV DI Service Manual...
-
Page 243: Before You Begin Servicing
• Never use the E-ECU for other SUDDEN MOVEMENT HAZARD! purposes than intended or in other ways than specified by Yanmar. Doing • Engaging the transmission or PTO at so could result in the violation of an elevated engine speed could result... - Page 244 E-ECU to the new unit. specified by Yanmar. Be sure to contact your local Yanmar Other E-ECU/engine combinations dealer before replacing the E-ECU. than specified will void the engine Failure to migrate the fuel injection warranty.
- Page 245 0000003en tamper-proof seals. CAUTION • Tampering with or removing these devices may void the “Yanmar Limited Warranty.” 0000146en CAUTION Never use a steel wire brush to clean PINCH HAZARD! fuel injectors. Damage to the nozzle and Carefully rotate the alternator toward the other components is likely to result.
- Page 246 FUEL SYSTEM Before You Begin Servicing CAUTION CAUTION Remove or install the high-pressure fuel Shut down the engine if the fault injection lines as an assembly whenever indicator comes on. possible. Disassembling the Continuing running the engine with the high-pressure fuel injection lines from fault indicator being on may result in a the retainers or bending any of the fuel serious malfunction of or damage to the...
- Page 247 Before You Begin Servicing FUEL SYSTEM CAUTION • Do not plug or unplug the E-ECU for a period of at least 6 seconds after power to the unit has been turned on or off. • Do not touch connector pins of the E- ECU with bare hands.
-
Page 248: Introduction
These adjustments have been made at the factory to meet all The Yanmar MP “Mono-Plunger” Fuel Injection applicable emissions regulations and Pump is a distributor type pump which consists of a then sealed. -
Page 249: Stop Solenoid
Cold Start Device When the starter switch is turned to the start The Yanmar TNV model engines are equipped with position, the “pull coil” (36.5 Amp draw / white wire) a cold start device (CSD). inside the solenoid is activated and pulls the solenoid plunger into the solenoid. -
Page 250: Trochoid Fuel Pump
FUEL SYSTEM Introduction Electronically controlled governor Electronically controlled engines 4TNV84T-Z, 4TNV98-Z, 4TNV98-E, and 4TNV98T-Z are quipped with an electronically controlled governor called "Eco Governor". Combined with the rack actuator (Figure 7-2, (3)), engine speed sensor (Figure 7-2, (5)), and other parts, the electronically controlled governor communicates with the engine controller (E-ECU), whereby the engine speed and fuel injection rate are controlled. -
Page 251: Fuel System Specifications
Fuel System Specifications FUEL SYSTEM FUEL SYSTEM SPECIFICATIONS Special Torque Chart Lubricating Oil Application Component Tightening Torque (Thread Portion and Seat Surface) 29 ft·lb Fuel Injector Retainer Bolt Not Applied (39.2 N·m; 4 kgf·m) 3TNV82A 58 - 65 ft·lb Not Applied (78 - 88 N·m;... -
Page 252: Test And Adjustment Specifications
FUEL SYSTEM Fuel System Specifications Test and Adjustment Specifications Engine Injector ID Model Fuel Injector Pressure Fuel Injection Timing Class mark* 2843 - 2988 psi 3TNV82A - 4TNV88 (19.6 - 20.6 MPa; 200 - 210 kgf/cm 2843 - 2988 psi (19.6 - 20.6 MPa;... -
Page 253: Special Service Tools
* These special service tools may also be available as an “MP Fuel Injection Pump Special Tool Set”, under a different part number, in territories serviced by Yanmar America and Yanmar Europe. Contact your authorized Yanmar dealer or distributor for details. -
Page 254: Fuel System Diagram
FUEL SYSTEM Fuel System Diagram FUEL SYSTEM DIAGRAM (20) (21) (18) (17) (19) (16) (22) (15) (17) (14) (13) (11) (12) (10) 0000034B 1 – Diesel Fuel Tank 12 – Engine Crankcase 2 – Fuel Filter / Water Separator 13 – Tappet 3 –... -
Page 255: Fuel System Components
Fuel System Components FUEL SYSTEM FUEL SYSTEM COMPONENTS 2-Valve Cylinder Head (16 ) (15 ) (14 ) (13) (18) (10) (12) (17) (11) (19) 0002128 Figure 7-5 TNV DI Service Manual 7-15... - Page 256 FUEL SYSTEM Fuel System Components 1 – High-Pressure Fuel Injection Lines 9 – Coolant Lines for Cold Start Device 2 – Fuel Return Line 10 – Fuel Injection Pump Insulator 3 – Fuel Injector 11 – Fuel Injection Pump 4 – Front Plate or Timing Gear Case 12 –...
-
Page 257: 4-Valve Cylinder Head
Fuel System Components FUEL SYSTEM 4-Valve Cylinder Head (18) (17) (16) (15) (12) (20) (14) (19) (11) (10) (13) (21) 0002017 Figure 7-6 TNV DI Service Manual 7-17... - Page 258 FUEL SYSTEM Fuel System Components 1 – High-Pressure Fuel Injection Lines 11 – Coolant Lines for Cold Start Device * 2 – Fuel Return Line 12 – Fuel Injection Pump Insulator 3 – Return Line-to-Cylinder Head Bolt 13 – Diesel Fuel Injection Pump 4 –...
-
Page 259: Fuel Injection Pump
Fuel Injection Pump FUEL SYSTEM FUEL INJECTION PUMP CAUTION Remove or install the high-pressure fuel Removal of Fuel Injection Pump injection lines as an assembly whenever 1. Loosen the cooling fan V-belt. possible. Disassembling the 2. Remove the engine coolant fan guard (if high-pressure fuel injection lines from equipped), engine coolant fan (Figure 7-8, (2)), the retainers or bending any of the fuel... - Page 260 FUEL SYSTEM Fuel Injection Pump 10. Remove the fuel supply line (Figure 7-9, (4)). Plug the open end of the line to minimize leakage and prevent contamination. 0000153A Figure 7-11 14. Disconnect the lube oil line (Figure 7-12, (1)) Figure 7-10 and the clamp (Figure 7-12, (2)) from the pump.
- Page 261 Fuel Injection Pump FUEL SYSTEM 16. To position the fuel injection pump for easier removal and installation, install a dial indicator (see Checking and Adjusting Fuel Injection Timing on page 7-30) into the injection pump plunger opening. Using a wrench on the crankshaft pulley bolt, rotate the crankshaft until the dial indicator shows that injection pump plunger is at the bottom of it's stroke.
- Page 262 FUEL SYSTEM Fuel Injection Pump • On TNV94 - 106 model engines, the idler gear is visible. Make a reference mark (Figure 7-15, (1)) across both the fuel injection pump drive gear and the idler gear. 0000162A Figure 7-16 Figure 7-15 19.
- Page 263 Fuel Injection Pump FUEL SYSTEM Note: On TNV82 - 88 models the injection Note: Some model engines may require the pump drive gear will remain “captured” in intake manifold and fuel injection pump the gear case. On TNV94 - 106 models, insulator (Figure 7-20, (2)) be removed the injection pump drive gear can be to access the inner fuel injection pump...
-
Page 264: Installation Of Fuel Injection Pump
• Tampering with or removing these devices may void the “Yanmar Limited 25. If the fuel injection pump requires servicing, it Warranty.” must be sent to an authorized Yanmar FIE repair facility for repair and calibration, or 0000146en replaced with a new fuel injection pump. - Page 265 0000575B 0000575 being serviced use the Timing Index Chart under Figure 7-23 “FIE Specs” on the Yanmar Distributor Website (http://distributor.yanmar.co.jp). If additional assistance is needed in locating the engine timing index number See To Locate an Authorized Yanmar Industrial Engine Dealer or...
- Page 266 FUEL SYSTEM Fuel Injection Pump 0001709A 1 – Fuel Injection Pump Drive Gear 2 – Camshaft Drive Gear 3 – Auxiliary Drive Gear (Optional) 4 – Crankshaft Drive Gear 5 – Direction of Rotation 6 – Oil Pump Drive Gear (4TNV94L - 4TNV106) 7 –...
- Page 267 Fuel Injection Pump FUEL SYSTEM If installing a new fuel injection pump: • Calculate the difference between the timing index numbers (Figure 7-29, (1)) of the fuel • Reinstall the timing grid sticker, provided with injection pump that you removed and the the new fuel injection pump, onto the back of replacement fuel injection pump.
- Page 268 FUEL SYSTEM Fuel Injection Pump The above calculated difference indicates that Tighten the fuel injection pump mounting nuts to the replacement fuel injection pump is to be specification. See Special Torque Chart on installed at +0.5° (advanced) from the “Standard page 7-11.
- Page 269 0000593B Figure 7-33 0000263A 9. Apply ThreeBond Liquid Gasket No. 1212, Yanmar Part No. 977770-01212, or equivalent Figure 7-34 sealant to the sealing surface of the pump cover. Install the pump cover and tighten the 13. Reinstall the coolant pump V-pulley cover bolts.
-
Page 270: Checking And Adjusting Fuel Injection Timing
2. Using the FIR number for the engine being System on page 4-15. serviced use the Fuel Injection Reference (FIR) Chart under “FIE Specs” on the Yanmar 17. Operate the engine and check for fuel and Distributor Website coolant leaks. -
Page 271: Checking Fuel Injection Timing
Checking and Adjusting Fuel Injection Timing FUEL SYSTEM Checking Fuel Injection Timing Note: Use the Yanmar part no. 158090-51831 M14 adapter for the MP2 fuel injection Note: Some fuel may drain from the fuel pumps (TNV82 - 88 model engines) or injection pump during this process. - Page 272 FUEL SYSTEM Checking and Adjusting Fuel Injection Timing The flywheel shown in Figure 7-43 is for a Yanmar “Standard Specification” DI engine. Flywheels used on some “OEM Specific” DI engines may be marked differently. You should contact that specific OEM for information on the identification of the timing marks.
- Page 273 Checking and Adjusting Fuel Injection Timing FUEL SYSTEM • EXAMPLE: If the distance between the two “longer” marks is approximately 2.0 cm and the distance from the TDC mark is approximately 4.0 cm, the answer is approximately 2. This indicates there is 10° (2 x 5°) between the TDC mark and the first “longer”...
-
Page 274: Adjusting Fuel Injection Timing
FUEL SYSTEM Checking and Adjusting Fuel Injection Timing 13. If the injection timing is correct, remove the dial 3. Note the reading on the dial indicator indicator and adapter. Replace the pump (Figure 7-47, (1)). If the reading is less than plunger plug and its copper gasket and tighten 2.5 mm (0.098 in.), the fuel injection timing is to specifications. -
Page 275: Fuel Injectors
Fuel Injectors FUEL SYSTEM 9. Tighten the fuel injection pump mounting nuts Note: To prevent “rounding” the fuel line nuts and rear bracket(s). always use a “line” or “flare nut” wrench. When loosening the fuel line nuts, 10. Remove the dial indicator and adapter. Replace always hold the fuel injection pump the plug in the pump plunger opening and delivery valves with a “back up”... - Page 276 If the fuel injectors cannot be manually removed, use the 7. Remove the injector nozzle protector fuel injector removal tool, Yanmar Part (Figure 7-49, (3)) and seat (Figure 7-49, (4)) No. 129470-92305, and a slide-hammer from the cylinder head.
- Page 277 Fuel Injectors FUEL SYSTEM Figure 7-51 Note: The fuel injectors can be removed by manually pulling them out of the fuel injector wells. 6. Remove the injector nozzle protector (Figure 7-51, (5)) and seat (Figure 7-51, (6)) from the cylinder head. Discard both items. 7.
-
Page 278: Testing Of Fuel Injectors
FUEL SYSTEM Fuel Injectors Testing of Fuel Injectors CAUTION CAUTION Never use a steel wire brush to clean fuel injectors. Damage to the nozzle and other components is likely to result. 0000172en FLYING OBJECT HAZARD! 1. Thoroughly clean the fuel injector nozzle using clean diesel fuel and a brass wire brush. -
Page 279: Disassembly And Inspection Of Fuel Injectors
Fuel Injectors FUEL SYSTEM 5. Pump the operating lever slowly to hold the Disassembly and Inspection of Fuel pressure steady at a point just below the Injectors opening pressure and hold it for 5 seconds. Observe the injector to see that it is sealing CAUTION properly and is not “dripping”. - Page 280 FUEL SYSTEM Fuel Injectors 2. Place the fuel injector in a soft-jawed vise with the nozzle pointing up. 3. Remove the nozzle case nut. 4. Carefully remove the injector from the vise. 5. Turn the injector over and remove the nozzle body, nozzle valve, valve stop spacer, nozzle spring seat, nozzle spring, and shims.
-
Page 281: Adjusting Fuel Injector Pressure
Fuel Injectors FUEL SYSTEM Adjusting Fuel Injector Pressure See the parts catalog for available shims. The fuel injectors open when pressure reaches a CAUTION predetermined pressure threshold. They close when the pressure is reduced below that threshold. Each pressure adjusting shim removed The pressure threshold can be adjusted by adding or added changes the pressure or removing shims (Figure 7-58, (3)). -
Page 282: Installation Of The Fuel Injectors
FUEL SYSTEM Fuel Injectors Installation of the Fuel Injectors 4-Valve Cylinder Head 1. Reinsert a new nozzle seat (Figure 7-60, (6)) 2-Valve Cylinder Head and nozzle protector (Figure 7-60, (5)) in the 1. Reinsert a new nozzle seat (Figure 7-59, (4)) cylinder head for each injector. - Page 283 Fuel Injectors FUEL SYSTEM Fuel injection system (for a four-valve cylinder head) The fuel injection system for a four-valve cylinder head is different, not only in the nozzle valve specifications, but also in the nozzle holder specifications. Therefore, it is marked as follows; take care not to install a wrong part when replacing it with new one.
- Page 284 FUEL SYSTEM Fuel Injectors This Page Intentionally Left Blank 7-44 TNV DI Service Manual...
- Page 285 Section 8 TNV DI Service Manual COOLING SYSTEM Page Before You Begin Servicing ............8-3 Introduction..................8-6 Cooling System Diagram..............8-6 Engine Coolant Pump Components ..........8-7 Engine Coolant System Check............8-8 Engine Coolant Pump ..............8-8 Removal of Engine Coolant Pump ..........8-8 Disassembly of Engine Coolant Pump ........
- Page 286 COOLING SYSTEM This Page Intentionally Left Blank TNV DI Service Manual...
-
Page 287: Before You Begin Servicing
Before You Begin Servicing COOLING SYSTEM BEFORE YOU BEGIN WARNING SERVICING DANGER ENTANGLEMENT HAZARD! • Stop the engine before you begin to service it. • NEVER leave the key in the key switch SCALD HAZARD! when you are servicing the engine. •... - Page 288 COOLING SYSTEM Before You Begin Servicing WARNING CAUTION BURN HAZARD! PINCH HAZARD! • If you must drain the engine oil while it Carefully rotate the alternator toward the is still hot, stay clear of the hot engine cylinder block while loosening the oil to avoid being burned.
- Page 289 Before You Begin Servicing COOLING SYSTEM CAUTION Use a new special O-ring between the engine coolant pump and the joint. Be sure to use the special O-ring for each engine model. Although the O-ring dimensions are the same as a commercially available O-ring, the material is different.
-
Page 290: Introduction
COOLING SYSTEM Introduction INTRODUCTION This section of the Service Manual describes the procedures necessary to service the 4TNV84 engine coolant pump. This engine coolant pump is representative of the coolant pumps used on other TNV model engines. For specific part detail, see the parts catalog for the engine you are working on. COOLING SYSTEM DIAGRAM F U L L O W... -
Page 291: Engine Coolant Pump Components
Engine Coolant Pump Components COOLING SYSTEM ENGINE COOLANT PUMP COMPONENTS (14) (12) (10) (11) (13) 0000031A-01 1 – Thermostat Cover 8 – Gasket 2 – Thermostat Cover Gasket 9 – Engine Coolant Pump Gasket 3 – Thermostat 10 – V-Belt 4 –... -
Page 292: Engine Coolant System Check
COOLING SYSTEM Engine Coolant System Check ENGINE COOLANT SYSTEM 1. Before removing the engine coolant pump or thermostat, it will be necessary to drain the CHECK engine coolant. Drain the coolant into a clean container if the coolant is to be reused. Check the engine coolant system for leakage. - Page 293 Engine Coolant Pump COOLING SYSTEM • On models not equipped with an oil cooler, remove the coolant drain plug (Figure 8-6, (1)) from the engine block. 0000163B 0000027B Figure 8-7 Figure 8-6 7. Disconnect the coolant hoses and the 5. Loosen the alternator mounting bolts. Loosen temperature switch lead wire from the engine and remove the V-belt and rotate the alternator coolant pump.
-
Page 294: Disassembly Of Engine Coolant Pump
COOLING SYSTEM Engine Coolant Pump Disassembly of Engine Coolant Pump 1. Remove the thermostat cover (Figure 8-8, (1)). Discard the gasket. 0000577A Figure 8-9 2. Place the temperature switch and an accurate thermometer (Figure 8-9, (3)) in engine coolant. 3. Slowly increase temperature of the fluid using an external heat source. -
Page 295: Reassembly Of Engine Coolant Pump
Engine Coolant Pump COOLING SYSTEM 2. Dip the water temperature sensor and an Radiator Cap accurate thermometer (Figure 8-10, (2)) into 1. Check for proper operation of the radiator cap. the cooling water. Install the radiator cap (Figure 8-12, (1)) on a 3. -
Page 296: Installation Of Engine Coolant Pump
COOLING SYSTEM Engine Coolant Pump 2. Reinstall the thermostat cover (Figure 8-13, (2)) and a new gasket. Tighten the thermostat cover bolts. 3. Reinstall the temperature switch (Figure 8-13, (3)) and a new gasket (Figure 8-13, (4)). Installation of Engine Coolant Pump 1. - Page 297 Engine Coolant Pump COOLING SYSTEM CAUTION • Only use the engine coolant specified. Other engine coolants may affect warranty coverage, cause an internal buildup of rust and scale and / or shorten engine life. • Prevent dirt and debris from contaminating the engine coolant.
- Page 298 COOLING SYSTEM Engine Coolant Pump This Page Intentionally Left Blank 8-14 TNV DI Service Manual...
-
Page 299: Lubrication System
Disassembly of Oil Pump ............9-10 Cleaning and Inspection ............9-11 Reassembly of Oil Pump ............9-12 Trochoid Oil Pump................. 9-13 3TNV82A-B, 3TNV88-B, 3TNV88-U, 4TNV88-B4TNV88-U, 3TNV84T-Z, 4TNV84T-Z Oil Pump Components....9-13 Disassembly of Oil Pump ............9-14 Cleaning and inspection ............9-14 Reassembly of Oil Pump ............ - Page 300 LUBRICATION SYSTEM This Page Intentionally Left Blank TNV DI Service Manual...
-
Page 301: Before You Begin Servicing
Before You Begin Servicing LUBRICATION SYSTEM BEFORE YOU BEGIN WARNING SERVICING WARNING BURN HAZARD! • Keep your hands and other body parts away from hot engine surfaces such ENTANGLEMENT HAZARD! as the muffler, exhaust pipe, turbocharger (if equipped) and engine •... - Page 302 LUBRICATION SYSTEM Before You Begin Servicing CAUTION CAUTION • Only use the engine oil specified. Other engine oils may affect warranty coverage, cause internal engine components to seize and / or shorten engine life. • Prevent dirt and debris from FLYING OBJECT HAZARD! contaminating the engine oil.
-
Page 303: Introduction
2900 - 3000 0.34 - 0.49MPa 0.39 - 0.54MPa 3TNV82A (3.5 - 5.0kgf/cm (4.0 - 5.5kgf/cm 0.31 - 0.46MPa 0.36 - 0.51MPa 3TNV82A-B (3.2 - 4.7kgf/cm (3.7 - 5.2kgf/cm 3TNV84 3TNV88 0.34 - 0.49MPa 0.39 - 0.54MPa 4TNV84 (3.5 - 5.0kgf/cm (4.0 - 5.5kgf/cm... -
Page 304: Oil Pump Service Information
0.0047 - 0.0083 in. 0.0118 in. Rotor Outside 3TNV88, 4TNV84, 4TNV88, (0.12 - 0.21 mm) (0.30 mm) Clearance on 4TNV84T page 9-11 3TNV82A-B Check Outer 3TNV88-B, 3TNV88-U 0.0035 - 0.0063 in. 0.0098 in. Rotor Outside 4TNV88-B, 4TNV88-U (0.09 - 0.16 mm) (0.25 mm) - Page 305 (0.2 - 0.5 mm) (0.7 mm) Width Across Flat of 1.9665 - 1.9705 in. Clearance Rotor (49.95 - 50.05 mm) Rotor Shaft Clearance <Trochoid type 3TNV82A-B - 4TNV88-B, 4TNV94L - 4TNV106T> Reference Model Inspection Item Standard Limit Page 0.3937 - 0.3943 in.
-
Page 306: Lubrication System Diagram
LUBRICATION SYSTEM Lubrication System Diagram LUBRICATION SYSTEM DIAGRAM Oil Filter Turbocharger* Bypass Valve Oil Cooler * Fuel Injection Pump Oil Pressure Switch Cylinder Body - Main Gallery Pressure Regulator Valve Camshaft Crank Idle Gear Oil Pump Journal Shaft Bearing Piston Cooling Rocker Arm Crank Pin Oil Suction Pipe... -
Page 307: Checking Engine Oil Pressure
Checking Engine Oil Pressure LUBRICATION SYSTEM CHECKING ENGINE OIL TROCHOID OIL PUMP PRESSURE 3TNV82A TO 4TNV88 Oil Pump Perform an engine oil pressure check if there is any Components indication of low oil pressure such as the oil pressure indicator is on or the oil pressure gauge On these model engines, the oil pump is located indicates low oil pressure. -
Page 308: Disassembly Of Oil Pump
LUBRICATION SYSTEM Trochoid Oil Pump Disassembly of Oil Pump CAUTION If the oil pump must be replaced, replace it as an assembly only. Do not replace individual components. 0000030en 1. Remove the engine cooling fan guard (if equipped), engine cooling fan (Figure 9-4, (3)), spacer (Figure 9-4, (2)), engine coolant pump V-pulley (Figure 9-4, (1)) and V-belt. -
Page 309: Cleaning And Inspection
Trochoid Oil Pump LUBRICATION SYSTEM 6. Remove the oil pressure regulator valve Record the measurement(s) and see Outer (Figure 9-7, (1)) from the oil pump cover Rotor Outside Clearance on page 9-6 for the (Figure 9-7, (2)). service limits. 0001151A Figure 9-8 0001642 Outer Rotor to Inner Rotor Tip Clearance... -
Page 310: Reassembly Of Oil Pump
LUBRICATION SYSTEM Trochoid Oil Pump Check Outer Rotor Side Clearance Record the measurement(s) and see Inner Rotor and Gear Boss Clearance <Multiple tooth trochoid Determine the side clearance of the outer rotor type 3TNV82A - 4TNV88> on page 9-7 for the across the pump cavity. -
Page 311: Trochoid Oil Pump
6. Reinstall the gear case cover and crankshaft TROCHOID OIL PUMP pulley. See Installation of Gear Case Cover on page 6-97. 3TNV82A-B, 3TNV88-B, 3TNV88- 7. Reinstall the engine coolant pump V-pulley U, 4TNV88-B4TNV88-U, (Figure 9-13, (1)), spacer (Figure 9-13, (2)),... -
Page 312: Disassembly Of Oil Pump
LUBRICATION SYSTEM Trochoid Oil Pump Disassembly of Oil Pump CAUTION If the oil pump must be replaced, replace it as an assembly only. Do not replace individual components. 0000030en Remove the cooling water fan guard (if equipped), cooling fan (Figure 9-15, (3)), spacer (Figure 9-15, (2)), cooling water pump V-pulley (Figure 9-15, (1)), and V-belt. - Page 313 Trochoid Oil Pump LUBRICATION SYSTEM Record the measurement(s) and see Outer Rotor to Inner Rotor Tip Clearance on page 9-6 for the service limits. Check Outer Rotor Side Clearance Inspect the side clearance between the lubricating oil pump body and the outer rotor. To measure the side clearance, use a straight edge and feeler gauge (as shown in Figure 9-19) or a depth micrometer.
-
Page 314: Reassembly Of Oil Pump
Trochoid Oil Pump Figure 9-20 Record the measurement(s) and see Rotor Shaft 0000163C Clearance <Trochoid type 3TNV82A-B - 4TNV88-B, Figure 9-21 4TNV94L - 4TNV106T> on page 9-7 for the service limits. 8. Install the V-belt. Adjust the belt to uniform... -
Page 315: Trochoid Oil Pump
Trochoid Oil Pump LUBRICATION SYSTEM Disassembly of Oil Pump TROCHOID OIL PUMP CAUTION 4TNV94L/98/106 Oil Pump If the oil pump must be replaced, replace Components it as an assembly only. Do not replace The oil pump on these model engines is located in individual components. -
Page 316: Cleaning And Inspection
LUBRICATION SYSTEM Trochoid Oil Pump Outer Rotor to Inner Rotor Tip Clearance Determine the outer rotor to inner rotor tip clearance. Insert a feeler gauge between the top of an inner rotor tooth (Figure 9-26, (1)) and the top of an outer rotor tooth (Figure 9-26, (2)) and measure the clearance. -
Page 317: Reassembly Of Oil Pump
5. Reinstall the engine coolant pump V-pulley Record the measurement(s) and see Rotor Shaft (Figure 9-31, (1)), spacer (Figure 9-31, (2)), Clearance <Trochoid type 3TNV82A-B - 4TNV88-B, engine cooling fan (Figure 9-31, (3)) and 4TNV94L - 4TNV106T> on page 9-7 for the service engine cooling fan guard (if equipped). - Page 318 LUBRICATION SYSTEM Trochoid Oil Pump This Page Intentionally Left Blank 9-20 TNV DI Service Manual...
- Page 319 Section 10 TNV DI Service Manual TURBOCHARGER Page Before You Begin Servicing ............10-3 Introduction..................10-5 Specifications ................10-5 Turbocharger Service Information ........... 10-5 Troubleshooting................10-6 Excessive Exhaust Smoke ............10-6 Generates White Smoke ............10-7 Sudden Oil Decrease .............. 10-7 Decrease in Output..............
- Page 320 TURBOCHARGER This Page Intentionally Left Blank 10-2 TNV DI Service Manual...
-
Page 321: Before You Begin Servicing
/ rotating parts. 0000003en • Failure to comply could result in death CAUTION or serious injury. For maximum engine life, Yanmar 0000010en recommends that when shutting the engine down, you allow the engine to WARNING idle, without load, for five minutes. This... - Page 322 TURBOCHARGER Before You Begin Servicing CAUTION Avoid damage to the turbocharger or the engine. Do not spray blower wash fluid or water too quickly. Use short strokes from a spray bottle to inject blower wash fluid or water into the turbocharger.
-
Page 323: Introduction
Introduction TURBOCHARGER INTRODUCTION This section of the Service Manual describes the servicing of the RHF5, RHB31 and RHB51 model turbochargers. SPECIFICATIONS Turbocharger Service Information 3TNV84T (CL, 4TNV106T Applicable Engine Model (application) 3TNV84T (VM) 4TNV98T (CL, VM) 4TNV84T (CL) Turbocharger Model RHB31 RHB51 RHF5... -
Page 324: Troubleshooting
TURBOCHARGER Troubleshooting TROUBLESHOOTING The following troubleshooting procedures apply to problems identified as turbocharger related. Consider all other troubleshooting possibilities before cleaning or removing the turbocharger. Excessive Exhaust Smoke Cause Corrective action Clogged air cleaner element Clean or replace the air cleaner element Blocked air intake port Correct the condition Leak from a joint in intake line... -
Page 325: Generates White Smoke
Troubleshooting TURBOCHARGER Generates White Smoke Cause Corrective action Correct the condition Clogged or deformed oil return pipe causing oil flow to the blower on the turbine side Excessive bearing wear causing abnormal wear or damage of the seal ring Repair the turbocharger. Send to a qualified repair facility. Sudden Oil Decrease Cause Corrective action... -
Page 326: Turbocharger Components
Turbocharger Components TURBOCHARGER COMPONENTS Note: The following illustration is provided for informational purposes only. Yanmar does not offer individual service parts for turbochargers. If the turbocharger is worn or damaged, it should be replaced or repaired by a qualified repair facility. - Page 327 Turbocharger Components TURBOCHARGER 1 – Turbine Shaft 17 – Bolt 2 – Thrust Bearing 18 – Lock Plate 3 – Oil Thrower 19 – Bearing Housing 4 – Seal Ring 20 – Retaining Ring 5 – Seal Ring 21 – Bolt 6 –...
-
Page 328: Turbocharger Component Functions
TURBOCHARGER Turbocharger Component Functions TURBOCHARGER COMPONENT FUNCTIONS (13) (14) (12) (15) (8) (9) (10) (17) (19) (18) (16) (11) (20) 0000077A 1 – Turbine Shaft 11 – Turbine Housing 2 – Oil Thrower 12 – M6 Hex Bolt 3 – Turbine Side Seal Ring 13 –... -
Page 329: Theory Of Operation
Turbocharger Component Functions TURBOCHARGER Theory of Operation Bearings Normally aspirated engines produce horsepower Thrust Bearing that is limited by the atmospheric pressure of the A thrust force is continuously imposed on the induction air. The turbocharger is an exhaust gas turbine shaft during engine operation. -
Page 330: Washing Procedure
TURBOCHARGER Washing Procedure WASHING PROCEDURE Note: Inspection, cleaning and repair of the internal turbocharger components must be performed by a qualified repair facility. The washing procedure described in this section is intended to clean the impeller on the compressor only if the engine loses rpm, seems sluggish or has insufficient boost pressure. -
Page 331: Periodic Inspection
Periodic Inspection TURBOCHARGER PERIODIC INSPECTION Inspect the turbocharger at regularly scheduled intervals. Inspection interval Application 200 hours 400 hours 500 hours 800 hours 1000 hours 2000 hours First 6 First 12 Every 24 Construction Equipment months months months or 500 hrs or 1000 hrs or 2000 hrs First 6... -
Page 332: Checking Rotor Play
TURBOCHARGER Periodic Inspection Checking Rotor Play Note: If rotor play measurements are not within specification, replace the turbocharger assembly or have it repaired by a qualified facility. Standard Dimension Wear Limit Rotor Play RHF5 RHB31 RHB51 RHF5 RHB31 RHB51 0.0011 - 0.0024 in. 0.0009 - 0.0021 in. -
Page 333: Waste Gate Actuator Leak Test
Periodic Inspection TURBOCHARGER 1. Connect a hand-operated air pump to the waste • If the pressure reading is equal to or greater gate actuator pipe (Figure 10-6, (1)). The pump than 15.9 psi (0.11 MPa; 1.1 kgf/cm ), the should be equipped with a 30 psi (0.21 MPa; waste gate actuator is not leaking and is operating properly. - Page 334 TURBOCHARGER Periodic Inspection This Page Intentionally Left Blank 10-16 TNV DI Service Manual...
- Page 335 Section 11 TNV DI Service Manual STARTER MOTOR Page Before You Begin Servicing ............11-3 Introduction..................11-5 Starter Motor Information .............. 11-5 3TNV82A to 4TNV88 - Standard and Optional......11-5 Starter Motor Specifications ............11-7 Starter Motor Troubleshooting............11-8 Starter Motor Components ............11-9 Starter Motor ................
- Page 336 STARTER MOTOR This Page Intentionally Left Blank 11-2 TNV DI Service Manual...
-
Page 337: Before You Begin Servicing
Before You Begin Servicing STARTER MOTOR BEFORE YOU BEGIN WARNING SERVICING WARNING SHOCK HAZARD! • Turn off the battery switch (if equipped) or disconnect the negative ENTANGLEMENT HAZARD! battery cable before servicing the • Stop the engine before you begin to electrical system. - Page 338 STARTER MOTOR Before You Begin Servicing CAUTION CAUTION The starter motor is water-proofed according to JIS D 0203, R2 which protects the motor from rain or general cleaning. Do not use high-pressure wash or submerse the starter motor in water. FLYING OBJECT HAZARD! 0000055en •...
-
Page 339: Introduction
STARTER MOTOR INTRODUCTION This section of the Service Manual covers the servicing of the starter motor. Yanmar Part No. 129900- 77010 is standard equipment on 4TNV94-98 model engines and is used in this section to show the service procedures for a representative starter motor. For specific part detail, see the Yanmar Parts Catalog for the engine you are working on. - Page 340 STARTER MOTOR Starter Motor Information 4TNV94L to 4TNV106T - Standard and Optional No Load Loaded YANMAR Mfg. Part Mfg. Part Specification Terminal Amperag Terminal Amperag Torque Number Number Voltage e Draw Voltage e Draw 97 in.-lb 129900- DC12V-3.1 hp 140A...
-
Page 341: Starter Motor Specifications
Starter Motor Specifications STARTER MOTOR STARTER MOTOR SPECIFICATIONS Yanmar Part Number 129900-77010 Nominal Output 3.0 hp (2.3 kW) 12.1 lb Weight (5.5 kg) Revolution Direction (As Viewed From Pinion) Clockwise Engagement System Magnetic Shift Terminal Voltage / Current 11 V / 140 A max... -
Page 342: Starter Motor Troubleshooting
STARTER MOTOR Starter Motor Troubleshooting STARTER MOTOR TROUBLESHOOTING 0000102 11-8 TNV DI Service Manual... -
Page 343: Starter Motor Components
Starter Motor Components STARTER MOTOR STARTER MOTOR COMPONENTS (13) (14) (12) (11) (10) (23) (15) (18) (22) (21) (19) (20) (17) (16) 0000103A 1 – Pinion Shaft 13 – Magnetic Switch Assembly (Solenoid) 2 – M4 Bolts (3 used) 14 – Cover 3 –... -
Page 344: Starter Motor
STARTER MOTOR Starter Motor STARTER MOTOR WARNING SHOCK HAZARD! • Turn off the battery switch (if equipped) or disconnect the negative 0002126 battery cable before servicing the Figure 11-2 electrical system. Disassembly of Starter Motor • Check the electrical harnesses for cracks, abrasions, and damaged or 1. - Page 345 Starter Motor STARTER MOTOR Figure 11-6 6. Pull the armature assembly (Figure 11-6, (3)) 0000105A out from the field coil assembly Figure 11-4 (Figure 11-6, (2)). 7. Remove the two M6 bolts (Figure 11-7, (1)) 3. Remove the two M5 through bolts retaining the magnetic switch assembly (Figure 11-4, (4)).
-
Page 346: Cleaning And Inspection
STARTER MOTOR Starter Motor 9. Remove the three M4 bolts (Figure 11-9, (1)) securing the bearing retainer assembly (Figure 11-9, (2)) to the gear housing. Remove the bearing retainer assembly from the gear housing. 0000112A Figure 11-11 Cleaning and Inspection Armature Commutator Surface Inspection If the commutator surface is rough, polish the... - Page 347 Starter Motor STARTER MOTOR Armature Coil Continuity Test Check for continuity between the commutator segments using a multimeter (Figure 11-15). The multimeter should indicate continuity. 0000113 Figure 11-13 See Starter Motor Specifications on page 11-7 for the service limit. 0000114 Measure Commutator Insulation Depth Figure 11-15 Measure the depth of the insulating material...
- Page 348 STARTER MOTOR Starter Motor Measure Armature and Commutator Run-Outs Field Coil Insulation Test Measure the armature core run-out and the Check for continuity between the field coil terminal commutator run-out using a dial indicator and the yoke using a multimeter (Figure 11-19). (Figure 11-17).
- Page 349 Starter Motor STARTER MOTOR Magnetic Switch Series Coil Continuity Test Check for continuity between the “S” and “M” If the starter motor becomes wet, replace the terminals using a multimeter (Figure 11-22). The magnetic switch even if the magnetic switch multimeter should indicate continuity.
- Page 350 STARTER MOTOR Starter Motor Contact Continuity Test Slide the pinion clutch assembly on the shaft. It should slide smoothly on the shaft (Figure 11-25). Depress the plunger at the bottom of the magnetic Rust, too much grease or damage could prevent switch.
-
Page 351: Reassembly Of Starter Motor
Starter Motor STARTER MOTOR Reassembly of Starter Motor 1. Apply the appropriate starter bendix grease (obtain locally) to the pinion shaft. Reassemble the pinion shaft (Figure 11-27, (5)), pinion clutch assembly (Figure 11-27, (1)), return spring (Figure 11-27, (4)) and pinion stop (Figure 11-27, (3)). -
Page 352: Check Pinion Projection Length
STARTER MOTOR Starter Motor 7. Carefully install the armature assembly 12. Reinstall the two M4 through bolts (Figure 11-30, (1)) into the field coil assembly (Figure 11-32). Securely tighten the through (Figure 11-30, (2)). bolts. Reconnect the wire to the magnetic switch assembly. -
Page 353: No-Load Test
Starter Motor STARTER MOTOR 5. If the measured L dimension is outside the standard range, adjust the dust covers to obtain the standard range. Dust covers (Figure 11-34, (1)) are available in 0.020 in (0.5 mm) and 0.031 in (0.8 mm) thicknesses. 0002127A Figure 11-35 3. -
Page 354: Installation Of Starter Motor
STARTER MOTOR Starter Motor Installation of Starter Motor 1. Reinstall the starter motor to the flywheel housing. 2. Reinstall the starter mounting bolts (Figure 11-36, (1)). Tighten the bolts to specification. See Tightening Torques for Standard Bolts and Nuts on page 4-46. 0002126 Figure 11-36 3. - Page 355 Section 12 TNV DI Service Manual ALTERNATOR Page Before You Begin Servicing ............12-3 Introduction..................12-6 Dynamo and Alternator Information ..........12-6 3TNV82A to 4TNV106T - Standard and Optional Dynamos ... 12-6 3TNV82A to 4TNV106T - Standard and Optional Alternators . 12-6 Alternator Specifications..............
- Page 356 ALTERNATOR Dynamo..................12-20 Removal of Dynamo............... 12-20 Disassembly of Dynamo............12-21 Reassembly of Dynamo ............12-21 Installation of Dynamo............12-22 12-2 TNV DI Service Manual...
-
Page 357: Before You Begin Servicing
Before You Begin Servicing ALTERNATOR BEFORE YOU BEGIN WARNING SERVICING WARNING SHOCK HAZARD! • Turn off the battery switch (if equipped) or disconnect the negative ENTANGLEMENT HAZARD! battery cable before servicing the • Stop the engine before you begin to electrical system. - Page 358 • Failure to comply may result in minor • See your authorized Yanmar industrial or moderate injury. engine dealer or distributor for 0000003en additional training.
- Page 359 This will corrode the conductor and result in battery over-charging (boiling) 0000037en and charging malfunctions. Consult Yanmar before using the equipment in CAUTION such an environment or the warranty is Do not turn the battery switch OFF while voided.
-
Page 360: Introduction
Introduction INTRODUCTION This section of the Service Manual describes the servicing of the dynamos and alternators. Yanmar Part No. 129423-77200 alternator is used in this section to show the service procedures for the representative alternator. Yanmar Part No. 171301-77201 dynamo is used in this section to show the service procedures for the representative dynamo. -
Page 361: Alternator Specifications
12 Volts Rated Revolution 3500 rpm Operating Range 1400 - 6600 rpm Grounding Characteristics Negative (-) Side of Circuit Current Limiter (Yanmar Part No. Regulator 119653-77710) A-Belt 2.56 in. (65 mm) Outside Diameter of Pulley Special M-Belt 2.28 in. (58 mm) -
Page 362: Alternator Troubleshooting
ALTERNATOR Alternator Troubleshooting ALTERNATOR TROUBLESHOOTING 12-8 TNV DI Service Manual... -
Page 363: Alternator Components
Alternator Components ALTERNATOR ALTERNATOR COMPONENTS Yanmar Part No. 129423-77200 alternator is used in this section to show the service procedures for the representative alternator. For specific part detail, see the Parts Catalog for the engine you are working on. 0000255 1 –... -
Page 364: Alternator Wiring Diagram
ALTERNATOR Alternator Wiring Diagram ALTERNATOR WIRING DIAGRAM 1 – Key Switch 4 – Battery 2 – Charge Lamp (3.4 Watts Max.) 5 – Alternator Assembly 3 – Load 6 – IC Regulator Assembly Figure 12-2 CAUTION CAUTION Do not short-circuit the charging system Do not remove the positive (+) battery between alternator terminals IG and L. -
Page 365: Alternator Standard Output
Alternator Standard Output ALTERNATOR ALTERNATOR STANDARD OUTPUT Output Current Cold Alternator RPM (x10³ min¯¹) Figure 12-3 TNV DI Service Manual 12-11... -
Page 366: Alternator
ALTERNATOR Alternator ALTERNATOR 4. Remove the nut (Figure 12-4, (2)) from the gear case stud. Remove the alternator. WARNING SHOCK HAZARD! • Turn off the battery switch (if 0000264 equipped) or disconnect the negative Figure 12-4 battery cable before servicing the electrical system. - Page 367 Alternator ALTERNATOR 2. Remove the three bolts (Figure 12-6, (1)) 5. Remove the bolts retaining the holder retaining the rear cover (Figure 12-6, (2)) to the (Figure 12-7, (2)) to the rear frame housing. rear frame assembly. Remove the holder. 6.
-
Page 368: Reassembly Of Alternator
ALTERNATOR Alternator 9. Remove the stator assembly (Figure 12-10, (1)) from the front frame housing. 0000260A Figure 12-11 Reassembly of Alternator 0000259A 1. If removed, reinstall the two trust washers (Figure 12-12, (3)) and bearing cover Figure 12-10 (Figure 12-12, (2)) in the rear frame housing. Lubricate the outside diameter of a new bearing 10. - Page 369 Alternator ALTERNATOR 2. If removed, lubricate the outside diameter of a 5. Align the front frame housing with the rear new front frame housing bearing. Press the frame housing. Reinstall the two bolts bearing (Figure 12-13, (2)) into the front frame (Figure 12-15, (1)) and two nuts housing.
-
Page 370: Installation Of Alternator
ALTERNATOR Alternator 8. Reinstall the brush holder (Figure 12-17, (3)), Installation of Alternator springs (Figure 12-17, (4)) and brushes 1. Position the alternator on the gear case. (Figure 12-17, (5)). Loosely reinstall the nut (Figure 12-19, (2)) on 9. Reattach the regulator assembly and holder to the gear case stud and the V-belt adjuster bolt the rear frame housing. -
Page 371: Dynamo Component Location
ALTERNATOR DYNAMO COMPONENT LOCATION Yanmar Part No. 171301-77201 dynamo is used in this section to show the service procedures for the representative dynamo. For specific part detail, see the Parts Catalog for the engine you are working on. (10) (11) -
Page 372: Dynamo Wiring Diagram
ALTERNATOR Dynamo Wiring Diagram DYNAMO WIRING DIAGRAM 0002137 1 – Dynamo 2 – Current Limiter 3 – Key Switch 4 – Charge Lamp (3.4 Watts Max.) 5 – Battery 6 – Load Figure 12-21 OPERATION OF DYNAMO The dynamo consists of a series of permanent magnets that rotate around a stationary stator coil. -
Page 373: Dynamo Standard Output
Dynamo Standard Output ALTERNATOR DYNAMO STANDARD OUTPUT 0002138 Figure 12-22 TNV DI Service Manual 12-19... -
Page 374: Testing Of Dynamo
ALTERNATOR Testing of Dynamo TESTING OF DYNAMO DYNAMO Use a circuit tester or multimeter to perform the Removal of Dynamo following tests. 1. Disconnect the output wire connector from the Testing Stator Coil Continuity dynamo. 1. Disconnect the dynamo output wire connector. 2. - Page 375 Dynamo ALTERNATOR Disassembly of Dynamo 4. Remove the screws (Figure 12-26, (1)) and the stator assembly (Figure 12-26, (2)). 1. Remove the rear cover (Figure 12-24, (1)). 5. Remove the rear bearing (Figure 12-26, (3)). 2. Remove the nut (Figure 12-24, (2)), lock washer (Figure 12-24, (3)), and flat washer (Figure 12-24, (4)).
- Page 376 ALTERNATOR Dynamo 3. Reinstall the front bearings (Figure 12-28, (5)) Installation of Dynamo and spacer (Figure 12-28, (6)). 1. Position the dynamo on the gear case. Loosely 4. Reinstall the flat washer (Figure 12-28, (4)), reinstall the nut (Figure 12-30, (2)) on the gear flywheel (Figure 12-28, (3)), pulley half case stud and the V-belt adjuster bolt (Figure 12-28, (2), and through bolt...
- Page 377 Section 13 TNV DI Service Manual ELECTRONIC CONTROL SYSTEM Page Engines available with the electronic control system ....13-2 Before You Begin Servicing ............13-2 Introduction..................13-4 ELECTRONIC CONTROL SYSTEM..........13-4 Electronic control harness connections......... 13-5 TNV DI Service Manual 13-1...
- Page 378 ELECTRONIC CONTROL SYSTEM This Page Intentionally Left Blank 13-2 TNV DI Service Manual...
-
Page 379: Engines Available With The Electronic Control System
SYSTEM involves rewriting the fuel injection data in the E-ECU. The electronic control system is available for four Be sure to contact your local Yanmar engine models: 4TNV84T-Z, 4TNV98-E, 4TNV98- dealer before replacing the fuel Z, and 4TNV98T-Z. injection pump. - Page 380 ELECTRONIC CONTROL SYSTEM Before You Begin Servicing CAUTION CAUTION Do not energize the starter for a period • Do not plug or unplug the E-ECU for a of longer than 15 seconds. period of at least 6 seconds after power to the unit has been turned on Take a pause of at least 30 seconds or off.
-
Page 381: Introduction
Introduction ELECTRONIC CONTROL SYSTEM INTRODUCTION Features of the electronic engine control system include: None of the components of the electronic control • Engine speed control schemes system can be individually repaired. When any Droop control / Low-idling speed up / Auto component is faulty and needs repair, the entire deceleration / High-idling speed down / Black assembly must be replaced. -
Page 382: Electronic Control Harness Connections
ELECTRONIC CONTROL SYSTEM Electronic control harness connections ELECTRONIC CONTROL HARNESS CONNECTIONS 13-6 TNV DI Service Manual... - Page 383 Electronic control harness connections ELECTRONIC CONTROL SYSTEM TNV DI Service Manual 13-7...
- Page 384 ELECTRONIC CONTROL SYSTEM Electronic control harness connections This Page Intentionally Left Blank 13-8 TNV DI Service Manual...
- Page 385 Section 14 TNV DI Service Manual ELECTRIC WIRING Page Electric Wiring Precautions ............14-3 Electrical Wire Resistance ............14-4 Battery Cable Resistance.............. 14-5 Electrical Wire Sizes - Voltage Drop ..........14-6 Conversion of AWG to European Standards......... 14-7 TNV DI Service Manual 14-1...
- Page 386 ELECTRIC WIRING This Page Intentionally Left Blank 14-2 TNV DI Service Manual...
-
Page 387: Electric Wiring Precautions
Electric Wiring Precautions ELECTRIC WIRING ELECTRIC WIRING CAUTION PRECAUTIONS Removing the battery cables or the battery while the engine is operating Failure to follow these precautions may result in the may cause damage to the current limiter failure of an electrical component and the loss of depending on the electrical equipment warranty coverage on that item as well as related being used. -
Page 388: Electrical Wire Resistance
ELECTRIC WIRING Electrical Wire Resistance ELECTRICAL WIRE RESISTANCE Metric Ohms / Foot Nominal mm² Resistance 0.009967 0.006340 1.25 0.004359 0.002685 0.001704 0.001073 0.000707 0.000421 0.000270 0.000158 0.000130 0 (1/0) 0.000103 00 (2/0) 0.000087 000 (3/0) 0.000066 0000 (4/0) 0.000051 Wiring voltage drop should not exceed 5% [0.05] x 12 Volts = 0.6 Volts. Voltage Drop = Current [Amps] x Length of Wire [Feet] x Resistance per Foot Ω... -
Page 389: Battery Cable Resistance
Battery Cable Resistance ELECTRIC WIRING BATTERY CABLE RESISTANCE Maximum Total Battery Cable Length (Positive Cable + Negative Cable + a*) 12V Starter Motor Output mm² Less Than 2.68 HP (2 kW) Greater Than 2.68 HP (2 kW) 4.75 12.6 15.3 0 (1/0) 19.5 11.6... -
Page 390: Electrical Wire Sizes - Voltage Drop
ELECTRIC WIRING Electrical Wire Sizes - Voltage Drop ELECTRICAL WIRE SIZES - VOLTAGE DROP Total Length of conductor from source of current to device and back to source (in feet) current on circuit in 100 110 120 130 140 150 160 170 amps 12 Volts Wire Size (AWG) -
Page 391: Conversion Of Awg To European Standards
Conversion of AWG to European Standards ELECTRIC WIRING CONVERSION OF AWG TO EUROPEAN STANDARDS Conductor Size Conductor Diameter Conductor Cross-sectional Area (AWG) (mm) 0.455 0.163 0.511 0.205 0.573 0.259 0.644 0.325 0.723 0.412 0.812 0.519 0.992 0.653 1.024 0.823 1.15 1.04 1.29 1.31... - Page 392 ELECTRIC WIRING Conversion of AWG to European Standards This Page Intentionally Left Blank 14-8 TNV DI Service Manual...
- Page 393 Buffalo Grove, IL 60089-4508, U.S.A. TEL: 1-847-541-1900 FAX: 1-847-541-2161 http://www.yanmar.com Yanmar Europe B.V. Brugplein11, 1332 BS Almere -de Vaart, The Netherlands. TEL: 31-36-5493200 FAX: 31-36-5493209 http://www.yanmar.nl Yanmar Asia (Singapore) Corporation Pte. Ltd. 4 Tuas Lane, Singapore 638613 TEL: 65-68615077 FAX: 65-68611509 http://www.yanmar.co.jp/yasc/...
- Page 394 0BTNV-G00101 PRINTED IN JAPAN...
Need help?
Do you have a question about the 3TNV82A-B and is the answer not in the manual?
Questions and answers