Advertisement
Quick Links
Advertisement

Related Manuals for BROSA Gas Lift Bed Frame Base


Summary of Contents for BROSA Gas Lift Bed Frame Base
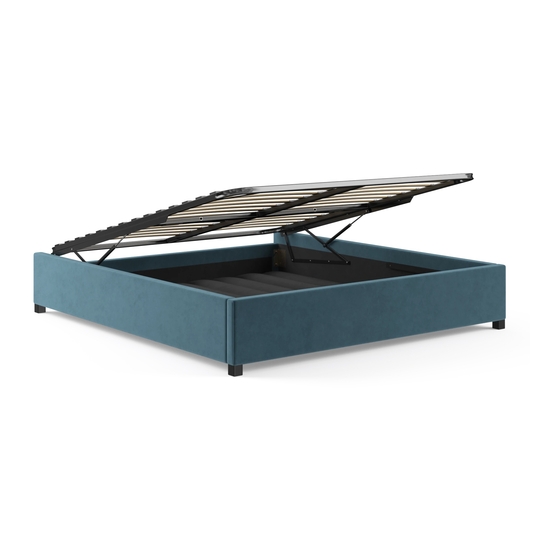
- Page 1 ASSEMBLY GUIDE Gas Lift Bed Frame Base...
- Page 2 Components Upon unpacking your bed from it’s delivery box, you should have the separate pieces shown below. Follow the steps on the next pages to assemble your new bed. Headboard x 1 Sideboard x 1 Floor Board x 2 Slat Set x 1 Footboard x 1 Sideboard x 1 Wooden Support Bar x 3...
- Page 3 Loosen the bolts on the sideboards (2) (3) and foot- Step 1 board using the Allen key to prepare for mounting. I x 1...
- Page 4 Hook the headboard to the front end of both Step 2 sideboards (3). Hook the back end of both sideboards (2) (3) the footboard (4). Tighten the bolts using the Allen key to secure the formed structure. I x 1 Step 2.3 Step 2.1 Step 2.1...
- Page 5 Unscrew and remove the nut from the threaded rod Step 3 on the L-shaped bar of the gas lift mechanism using the spanner (G). Keep the nut as you will need it in the following steps. G x 1...
- Page 6 Lift the L-shaped bar and the gas lift strut so that Step 4 the threaded rod on the L-shaped bar could t into the hole of the gas lift strut. Secure the structure formed in Step 4.1 using the nut removed from Step Repeat the whole process for the other gas lift mech- anism.
- Page 7 Unfold the slat set to make a full size slat set. Step 5 Place the slat set on a level surface, making sure the underside is facing you. Fit a at washer to a bolt (A). Insert the bolt into the hole on the side face of the middle metal bar, making sure it protrudes from the other side.
- Page 8 With the gas lift arms raised, ip the slat set the Step 6 right way up and place it on top of the arms. Insert bolts into corresponding holes from the top. Fit a ange nut into the bolt protruding from the bottom and x them with the screwdriver and the spanner (G).
- Page 9 Fit the wooden support bars into the slots. Step 7 Place the oor boards on top of the wooden support bars. Step 7.1 Step 7.2...
- Page 10 With a friend, push the slats down. It requires a Step 8 fair amount of force because there isn’t a mattress on the slats to add weight yet. e rubber blocks on the mattress retainer bars can be rotated into di erent positions. Rotate both rubber blocks to be vertically longer.
- Page 11 Enjoy your new bed frame base! Step 9...
Need help?
Do you have a question about the Gas Lift Bed Frame Base and is the answer not in the manual?
Questions and answers