Motorola VC70N0 Quick Reference Manual
Hide thumbs
Also See for VC70N0:
- Product reference manual (258 pages) ,
- Quick reference manual (61 pages) ,
- Product reference manual (200 pages)
Table of Contents
Advertisement
Quick Links
Download this manual
See also:
Quick Reference Manual
Advertisement
Table of Contents

Related Manuals for Motorola VC70N0


Summary of Contents for Motorola VC70N0
- Page 1 VC70N_QRG_72-164687-01_English_October 16.fm Page 1 Tuesday, October 16, 2012 2:29 PM VC70N0 Vehicle Computer Quick Reference Guide...
-
Page 2: Warranty
VC70N_QRG_72-164687-01_English_October 16.fm Page 2 Tuesday, October 16, 2012 2:29 PM VC70 Vehicle Computer © 2012 MOTOROLA SOLUTIONS, INC. All rights reserved. Motorola reserves the right to make changes to any product to improve reliability, function, or design. Motorola does not assume any product liability arising out of, or in connection with, the application or use of any product, circuit, or application described herein. -
Page 3: About This Guide
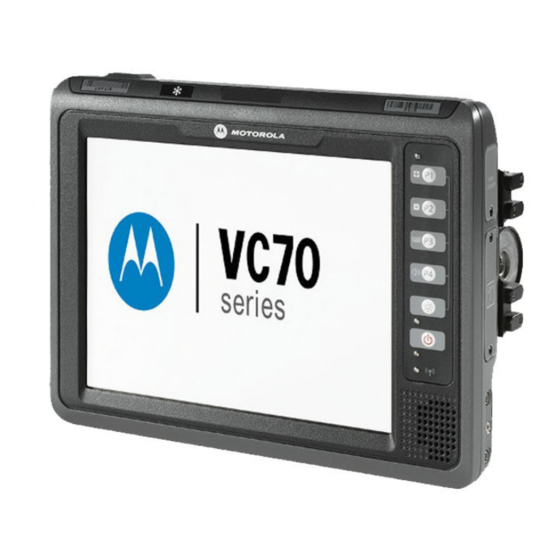
VC70N_QRG_72-164687-01_English_October 16.fm Page 3 Tuesday, October 16, 2012 2:29 PM Quick Reference Guide Introduction The VC70 is Motorola’s ultra-rugged forklift mounted computer. It is designed to maximize productivity in harsh environments. Its rugged construction and high-performance wireless networking enables real-time data access and collection in a wide range of environments —... - Page 4 VC70N_QRG_72-164687-01_English_October 16.fm Page 4 Tuesday, October 16, 2012 2:29 PM VC70 Vehicle Computer Features Antenna Port for Optional External Ambient Light Sensor Antenna +, P1 Key -, P2 Key Keyboard, P3 Key Speaker, P4 Key Brightness Key Display Function LED Power Button Charging LED COMM LED...
-
Page 5: Optional Accessories
VC70N_QRG_72-164687-01_English_October 16.fm Page 5 Tuesday, October 16, 2012 2:29 PM Quick Reference Guide Unpacking The following items are contained in the box: • VC70 vehicle computer • this guide. Optional Accessories • Scanners (corded and wireless) and scanner cables • External speaker •... -
Page 6: U Mount Installation
VC70N_QRG_72-164687-01_English_October 16.fm Page 6 Tuesday, October 16, 2012 2:29 PM VC70 Vehicle Computer U Mount Installation The vehicle computer and bracket must be firmly secured to a NOTE surface that can support the vehicle computer’s weight. Assemble the U mount bracket onto the vehicle computer as shown below. - Page 7 VC70N_QRG_72-164687-01_English_October 16.fm Page 7 Tuesday, October 16, 2012 2:29 PM Quick Reference Guide bracket. If the supplied cap screws are not long enough, use M10 - X stainless steel Allen head screws where X represents the length in millimeters of the required screws. Positioning the Vehicle Computer •...
- Page 8 VC70N_QRG_72-164687-01_English_October 16.fm Page 8 Tuesday, October 16, 2012 2:29 PM VC70 Vehicle Computer Avoid Extreme Wrist Angles Optimum Wrist Position...
- Page 9 Additional plates may be required to achieve this. Mounting Bracket Template Refer to the VC70N0 Product Reference Guide P/N 72-164686-01 for mounting template. Mounting onto an Over-Head Cross-Beam Example The diagram below illustrates a typical installation where the vehicle...
- Page 10 VC70N_QRG_72-164687-01_English_October 16.fm Page 10 Tuesday, October 16, 2012 2:29 PM VC70 Vehicle Computer Nuts Vehicle Cross-Beam Lock Washers Flat Washers Lock Washers U Mount Allen Head Screws Mounting onto an Over-Head Cage Example The diagrams below illustrates a typical installation where the vehicle computer is mounted on an overhead cage.
- Page 11 VC70N_QRG_72-164687-01_English_October 16.fm Page 11 Tuesday, October 16, 2012 2:29 PM Quick Reference Guide Customer Supplied Mounting Plate Nuts Lock Washers Flat Washers Flat Washers U Mount Lock Washers Allen Head Screws Mounting on Flat Overhead Beams Customer Supplied Nuts Mounting Plate Lock Washers Welded to Beams Flat Washers...
- Page 12 VC70N_QRG_72-164687-01_English_October 16.fm Page 12 Tuesday, October 16, 2012 2:29 PM VC70 Vehicle Computer Mounting on a Dashboard or Horizontal Surface Example The diagram below illustrates a typical installation where the vehicle computer is mounted on a dashboard or horizontal flat surface. If mounting to a thin surface, a reinforcing plate is required.
- Page 13 VC70N_QRG_72-164687-01_English_October 16.fm Page 13 Tuesday, October 16, 2012 2:29 PM Quick Reference Guide is enough slack in the cable to accommodate movement without putting tension on the cable. • DO NOT wind a cable in and out of the mesh on a cage. •...
-
Page 14: Installing The Vc70 On A Cart, A Wall, Or A Desktop
VC70N_QRG_72-164687-01_English_October 16.fm Page 14 Tuesday, October 16, 2012 2:29 PM VC70 Vehicle Computer Electric Forklifts See the vehicle Owner's Manual for specific wiring NOTE information. Connecting the Power Cable See the vehicle Owner's Manual for specific wiring NOTE information. Disconnect the vehicle battery. Connect the red wire to the vehicle's positive power source. - Page 15 VC70N_QRG_72-164687-01_English_October 16.fm Page 15 Tuesday, October 16, 2012 2:29 PM Quick Reference Guide Allen Head U Mount Screws Lock Washers Mounting Surface Flat Washers Flat Washers Lock Washers Nuts Insert the DC power cable into the DC connector on the universal power supply.
-
Page 16: Installing The Optional Qwerty/Azerty Keyboard
VC70N_QRG_72-164687-01_English_October 16.fm Page 16 Tuesday, October 16, 2012 2:29 PM VC70 Vehicle Computer Installing the Optional QWERTY/AZERTY Keyboard The keyboard kit contains the following items: • keyboard • right and left mounting arms • four torx head screws with flat and lock washers •... - Page 17 VC70N_QRG_72-164687-01_English_October 16.fm Page 17 Tuesday, October 16, 2012 2:29 PM Quick Reference Guide Insert the keyboard locking knobs through the washers and brackets and screw into the keyboard tray. Tighten fully to lock into place. Torque the mounting arms torx head screws to 40 + 10% kgf-cm (35 + 10% lbs-in).
-
Page 18: Installing The External Roof-Mounted Antenna
VC70N_QRG_72-164687-01_English_October 16.fm Page 18 Tuesday, October 16, 2012 2:29 PM VC70 Vehicle Computer Installing the External Roof-mounted Antenna The antenna must be installed in a location that will ensure WARNING a distance of at least 8” (20cm) between the antenna and any bystander. - Page 19 VC70N_QRG_72-164687-01_English_October 16.fm Page 19 Tuesday, October 16, 2012 2:29 PM Quick Reference Guide Main Power Switch Use the Power button on the Quick Access Panel to place the VC70 into Suspend mode or wake the VC70 from Suspend mode. Power Button This is usually enough to conserve battery power while the VC70 is idle during off time in normal operation.
-
Page 20: Charging The Internal Backup Battery
VC70N_QRG_72-164687-01_English_October 16.fm Page 20 Tuesday, October 16, 2012 2:29 PM VC70 Vehicle Computer Charging the Internal Backup Battery After installing the VC70, leave it powered on for 6 hours to fully charge the internal backup battery. Note that the VC70 can charge the backup battery while in Suspend mode, but not if power is turned Off with the power switch. -
Page 21: Resetting The Vehicle Computer
VC70N_QRG_72-164687-01_English_October 16.fm Page 21 Tuesday, October 16, 2012 2:29 PM Quick Reference Guide Ambient Light Sensor +, P1 Button -, P2 Button Keyboard, P3 Button Speaker, P4 Button Brightness Key Function LED Power Button Charging LED COMM LED Resetting the Vehicle Computer If the vehicle computer stops responding to inputs, perform a warm boot or cold boot. -
Page 22: Programmable Keys
You may also use the USB port for ActiveSync connection, if the serial ports are used for another purpose. This cable is also available from Motorola. Refer to the VC70 Product Reference Guide, P/N 72-164686-01 for information about additional accessories. -
Page 23: Replacing The Desiccant Bag
VC70N_QRG_72-164687-01_English_October 16.fm Page 23 Tuesday, October 16, 2012 2:29 PM Quick Reference Guide • Service door - provides access to the micro USB On-The-Go for ActiveSync without the need to disconnect any accessory, access to the Micro SD card slot and access to the desiccant. •... -
Page 24: Replacing The Backup Battery
VC70N_QRG_72-164687-01_English_October 16.fm Page 24 Tuesday, October 16, 2012 2:29 PM VC70 Vehicle Computer Replacing the Backup Battery To replace the backup battery: Use ESD precautions when installing the backup CAUTION battery. Place the Main Power switch on the right side of the vehicle computer to the off position and perform cold boot to electrically disconnect the battery from the unit. -
Page 25: Troubleshooting
VC70N_QRG_72-164687-01_English_October 16.fm Page 25 Tuesday, October 16, 2012 2:29 PM Quick Reference Guide Torque the screws to 9 +/- 0.5 kgf.cm (7.8 ± 0.4 in-lbs). Place the Main Power switch to the on position. It takes four hours to fully charge the Backup Battery. Troubleshooting Problem Cause... - Page 26 VC70N_QRG_72-164687-01_English_October 16.fm Page 26 Tuesday, October 16, 2012 2:29 PM VC70 Vehicle Computer Problem Cause Solution Optional Scanner is not properly Connect the scanner to the COM1 port scanner does connected to the VC70. and power up the vehicle computer. If not operate.
-
Page 27: Regulatory Information
VC70N_QRG_72-164687-01_English_October 16.fm Page 27 Tuesday, October 16, 2012 2:29 PM Quick Reference Guide Regulatory Information All Motorola Solutions devices are designed to be compliant with rules and regulations in locations they are sold and will be labeled as required. This device is approved under Motorola Solutions, Inc. -
Page 28: Wireless Device Country Approvals
Canada, Japan, China, Australia, and Europe Please refer to the Declaration of Conformity (DoC) for details of other country markings. This is available at http://www.motorola.com/doc. Note 1: For 2.4GHz or 5GHz Products: Europe includes, Austria, Belgium, Bulgaria, Czech Republic, Cyprus, Denmark, Estonia, Finland, France, Germany,... -
Page 29: Health And Safety Recommendations
VC70N_QRG_72-164687-01_English_October 16.fm Page 29 Tuesday, October 16, 2012 2:29 PM Quick Reference Guide Avertissement: Le dispositive fonctionnant dans la bande 5150-5250 MHz est réservé uniquement pour une utilisation à l'intérieur afin de réduire les risques de brouillage préjudiciable aux systèmes de satellites mobiles utilisant les mêmes canaux. - Page 30 VC70N_QRG_72-164687-01_English_October 16.fm Page 30 Tuesday, October 16, 2012 2:29 PM VC70 Vehicle Computer manufacturer or its representative regarding your vehicle. You should also consult the manufacturer of any equipment that has been added to your vehicle. An air bag inflates with great force. DO NOT place objects, including either installed or portable wireless equipment, in the area over the air bag or in the air bag deployment area.
-
Page 31: Rf Exposure Guidelines
The device complies with internationally recognized standards covering human exposure to electromagnetic fields from radio devices. For information on “International” human exposure to electromagnetic fields refer to the Motorola/Symbol Declaration of Conformity (DoC) at http://www.motorola.com/doc Europe To satisfy EU RF exposure requirements, a mobile transmitting device must operate with a minimum separation distance of 20cm or more from a person’s... -
Page 32: Power Supply
20 cm or more from a person's body. Power Supply Use ONLY a LISTED Motorola, Type no. PWRS-14000 (12Vdc, 9A), PWRS-9-60VDC (12Vdc, 9A) power supply, marked Class 2 or LPS (IEC60950-1, SELV). Use of alternative Power Supply will invalidate any approvals given to this unit and may be dangerous. - Page 33 Replace the battery when a significant loss of run time is detected. Standard warranty period for all Motorola batteries is 30 days, regardless if the battery was purchased separately or included as part of the mobile computer or bar code scanner. For more information on Symbol batteries, please visit: http:/mysymbolcare.symbol.com/battery/batbasics1.html.
-
Page 34: Radio Frequency Interference Requirements - Fcc
If contact has been made, wash the affected area with large amounts of water and seek medical advice. • If you suspect damage to your equipment or battery, contact Motorola Enterprise Mobility support to arrange for inspection. -
Page 35: Radio Frequency Interference Requirements - Canada
VC70N_QRG_72-164687-01_English_October 16.fm Page 35 Tuesday, October 16, 2012 2:29 PM Quick Reference Guide or television reception, which can be determined by turning the equipment off and on, the user is encouraged to try to correct the interference by one or more of the following measures: •... -
Page 36: Marking And European Economic Area (Eea)
• Maximum radiated transmit power of 100 mW EIRP in the frequency range 2.400 -2.4835 GHz Statement of Compliance Motorola Solutions, Inc., hereby, declares that this device is in compliance with the essential requirements and other relevant provisions of Directives 1999/5/EC. A declaration of Conformity may be obtained from... -
Page 37: Japan (Vcci) - Voluntary Control Council For Interference
Australia-Use of 5 GHz RLAN's in Australia is restricted in the following band 5.50 - 5.65GHz. Brazil-Nota: A marca de certificação se aplica ao Transceptor, modelo VC70N0. Este equipamento opera em caráter secundário, isto é, não tem direito a proteção contra interferência prejudicial, mesmo de estações do mesmo tipo, e não pode causar interferência a sistemas operando em caráter primário. -
Page 38: Waste Electrical And Electronic Equipment (Weee)
: http://www.motorola.com/recycle/weee. Español: Para clientes en la Unión Europea: todos los productos deberán entregarse a Motorola al final de su ciclo de vida para que sean reciclados. Si desea más información sobre cómo devolver un producto, visite: http://www.motorola.com/recycle/weee. - Page 39 Polski: Klienci z obszaru Unii Europejskiej: Produkty wycofane z eksploatacji nale¿y zwróciæ do firmy Motorola w celu ich utylizacji. Informacje na temat zwrotu produktów znajduj¹ siê na stronie internetowej http://www.motorola.com/recycle/weee. Čeština: Pro zákazníky z EU: Všechny produkty je nutné po skonèení jejich životnosti vrátit spoleènosti Motorola k recyklaci.
-
Page 40: Software Support
• Proof of purchase • Title of the software download you are requesting. If it is determined by Motorola that your device is entitled to the latest software release, you will receive an e-mail containing a link directing you to a Motorola... - Page 41 VC70N_QRG_72-164687-01_English_October 16.fm Page 41 Tuesday, October 16, 2012 2:29 PM Quick Reference Guide...
-
Page 42: Service Information
MOTOROLA, MOTO, MOTOROLA SOLUTIONS and the Stylized M Logo are trademarks or registered trademarks of Motorola Trademark Holdings, LLC and are used under license. All other trademarks are the property of their respective owners. © 2012 Motorola Solutions, Inc. All rights reserved. @72-164687-01@...
Need help?
Do you have a question about the VC70N0 and is the answer not in the manual?
Questions and answers