Table of Contents
Advertisement
Quick Links
Advertisement
Table of Contents

Related Manuals for Dinstar DAG1000-4S-V321


Summary of Contents for Dinstar DAG1000-4S-V321
- Page 1 DAG1000-4S-V321 Quick Installation Manual...
-
Page 2: Packing List
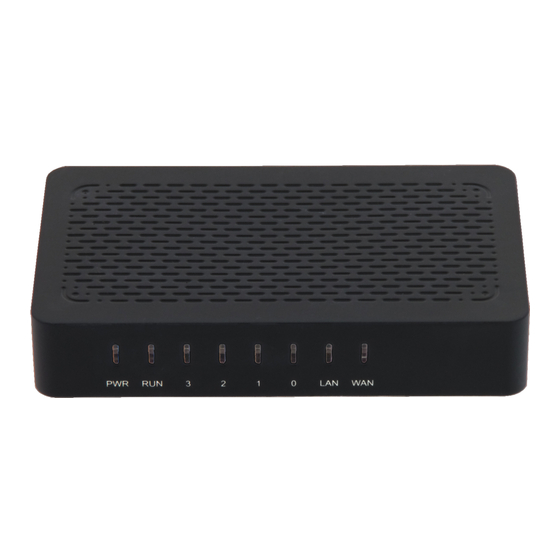
Packing List 1 X DAG1000-4S-V321 VoIP Adapter 1 X Power Adapter 1 X Telephone Line 1 X Ethernet Cable 1 X Quick Installation Guide Product Appearance Front... - Page 3 The gateway provides different LEDs: PWR : power status RUN : running Status 3-0 : indicate the status of FXS ports LAN : LAN port connection status WAN : WAN port connection status Back Back View and Interfaces: DC12V :DC Jack...
-
Page 4: Hardware Connection
WAN: to connect to the IP network over DSL Modem or Router or LANSwitch. LAN:to connect to local network over LANSwitch or PC 0-3: FXS ports to connect to standard telephone set or FAX Machine or a PBX. RST: factory reset button, press 7S to restore factory settings. -
Page 5: Basic Operation
* Router or Bridge work mode configurable on the web page 3. The device is start normally while the RUN LED blinking slowly Basic Operation The gateway supports basic operation through standard analog phone set. With an analog phone set, the users could dial the feature codes to maintain their gateway. -
Page 6: Gateway Configuration
Service Code operation notice *158# Check LAN port IP address *159# Check WAN port IP address *114# Check port account *115# Check port group account Enable Web access through WAN *160*1# port Restore to factory default values of *165*000000# Web login Username/Password and WAN/LAN port IP addresses *166*000000# Restore to default factory settings... - Page 7 1. Login the gateway Open the browser on the computer and enter the default IP address of the LAN port: 192.168.11.1. Input default Username and Password: “admin/admin” 2. Network Settings Click on "Network - > Local Network”, input the WAN port IP address and DNS server address, click “Save”...
- Page 8 3. Configure SIP server Click on "SIP Server”, input SIP server IP address or domain name, SIP port and register interval in Primary...
- Page 9 SIP server field, then click “Save” button to finish the configuration. 4. Port Account configuration Click on "Port -> Add", input SIP account details such...
- Page 10 as Primary Display Name,Primary SIP User ID,Primary Authenticate ID and Primary Authenticate Password...
-
Page 11: Additional Information
Click "Save" button to finish the configuration. 5. Restart the gateway Restart the gateway for the configuration changes take effect. Additional Information For detailed information of parameters, configuration and troubleshooting description of DAG1000-4S, please refer to the user manual or visit the website: www.dinstar.com...
Need help?
Do you have a question about the DAG1000-4S-V321 and is the answer not in the manual?
Questions and answers