Table of Contents
Advertisement
Quick Links
See also:
Manual
Advertisement
Table of Contents

Related Manuals for SHOWTEC EventSpot 1900 MKII


Summary of Contents for SHOWTEC EventSpot 1900 MKII
- Page 1 Eventspot 1900 mkII ORDERCODE 42717 Highlite International B.V. Vestastraat 2 6468 EX Kerkrade The Netherlands Phone: +31 45-5667700...
- Page 2 For more information: iwant@showtec.info You can get some of the best quality, best priced products on the market from Showtec. So next time, turn to Showtec for more great lighting equipment. Always get the best -- with Showtec ! Thank you!
-
Page 3: Table Of Contents
Charging the built in battery ..........................10 Fixture Linking ..............................10 Data Cabling ..............................10 Control Modes ..............................11 One Eventspot 1900 mkII (Built-in Programs) ..................... 11 Multiple Eventspots (Master/Slave control) ....................11 Multiple Eventspots (Wireless DMX Control) ....................11 Multiple Eventspots (DMX Control) ......................11 Control Panel .............................. -
Page 4: Warning
Your shipment includes: • Eventspot 1900 mkII • User manual LED Expected Lifespan LEDs gradually decline in brightness over time. HEAT is the dominant factor that leads to the acceleration of this decline. - Page 5 For adult use only. The device must be installed out of the reach of children. Never leave the unit running unattended. The user is responsible for correct positioning and operating of the Eventspot 1900 mkII. The manufacturer will not accept liability for damages caused by the misuse or incorrect installation of this device.
-
Page 6: Operating Determinations
Operating Determinations • This device is not designed for permanent operation. Consistent operation breaks will ensure that the device will serve you for a long time without defects. • The minimum distance between light-output and the illuminated surface must be more than 0.5 meter. -
Page 7: Description Of The Device
Description of the device The Eventspot 1900 mkII is a wireless LED Eventspot from Showtec. Features Compact and lightweight RGBA color mixing Sealed battery (12 hours at full RGB on) For (temporary) outdoor use Ideal for all kinds of events and a true leader in his class ... -
Page 8: Dmx Channel Summary
DMX Channel Summary TOUR Channel Description Master Dimmer Module 1red Module 1 green Module 1 blue Module 2 red Module 2 green Module 2 blue Color macro White Auto programs Auto speed adjustment Dimmer Speed ARC1 Channel Description Green Blue ARC1+D Channel Description... -
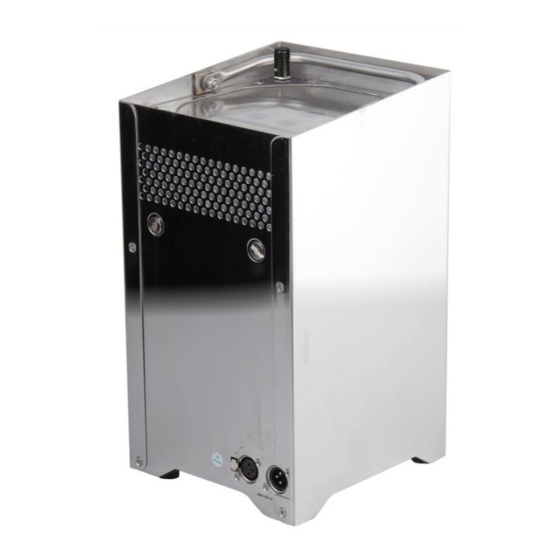
Page 9: Overview
Power on/off button + built in LED Push and hold the power button for 3 seconds to switch the Eventspot 1900 mkII on or off. If the battery needs to be charged, the LED will start blinking. If the battery is empty, the LED will dim. -
Page 10: Installation
Installation Remove all packing materials from the Eventspot 1900 mkII. Check that all foam and plastic padding is removed. Connect all cables. Do not supply power before the whole system is set up and connected properly. Always disconnect from electric mains power supply before cleaning or servicing. Damages caused by non-observance are not subject to warranty. -
Page 11: Charging The Built In Battery
The Eventspot 1900 mkII uses up to 15 channels. Important: Fixtures on a serial data link must be daisy chained in one single line. To comply with the EIA-485 standard no more than 30 devices should be connected on one data link. -
Page 12: Control Modes
• DMX512 One Eventspot 1900 mkII (Built-in Programs) When the Eventspot 1900 mkII is not connected by a DMX-cable and Wireless DMX is switched off, it functions as a stand-alone device. See page 16/17 for more information about the built-in programs. - Page 13 Fig. 5 Note: Link all cables before connecting electric power The Eventspot 1900 mkII has a total of 9 DMX channel configurations, referred to as Personalities. The 9 personalities are [TOUR, ARC1, ARC1+D,ARC1+S, BLOCK]. Each of the different personalities can be accessed from the control panel.
-
Page 14: Control Panel
The control panel on the front side of the base allows you to assign the DMX fixture address, which is the first channel from which the Eventspot 1900 mkII will respond to the controller. Please note when you use the controller, the unit has up to 12 channels (in TOUR mode). I.e.: When using multiple Eventspot 1900 mkII in TOUR mode, make sure you set the DMX addresses right. -
Page 15: Menu Overview
Menu overview... -
Page 17: Main Menu Options
Main Menu Options Press the up (E)/down (F) buttons or the menu (C) button to navigate through the 11 menus: Creating a static color 1. Select the STAT menu and press the enter (D) button. 2. Use the up (E)/down (F) buttons you change the static colors (Red, Green, Blue, White or the strobe speed (0-20Hz). -
Page 18: Activating An Auto Program
Activating an Auto Program 1. Select the AUTO menu and press the enter (D) button. 2. Use the up (E)/ down (F) buttons to select an auto program (AT.01-10) or a custom program (PR.01- 10). 3. Press enter (D) after selecting the desired auto program. You can set up the auto speed of the 10 built-in programs between 000-255. -
Page 19: Personality
Personality 1. Select the PERS menu and press the enter (D) button. 2. Use the up (E)/ down (F) buttons to select a DMX mode: TOUR: 12 channels ARC1: 3 channels AR1+D: 4 channels AR1+S: 5 channels HSV: 3 channels BLOCK 6 channels Changing the Settings... -
Page 20: Edit Custom
CAL2->RGBW. RGB output is adjusted to a standard preset universal color. This way, different versions of Eventspot 1900 mkII’s are color balanced to match each other. Battery life setting 15. Use the up (E)/ down (F) to select the LIFE menu. Press the enter (D) button. -
Page 21: White Settings
White Settings 1. Select the CAL menu and press the enter (D) button. 2. Enter the password by pressing up (E) -> down (F) -> up (E) -> down (F) -> enter (D). 3. Use the up (E)/ down (F) to select the CAL1 menu and press the enter (D) button. 4. -
Page 22: Keylock Settings
Reset the WDMX pairing Use the up (E)/ down (F) to select the REST submenu and press the enter (D) button. Use the up (E)/ down (F) to select YES in order to reset the DMX pairing. Press enter (D) to confirm. Select NO and press the enter (D) button to exit the reset mode. -
Page 23: Dmx Channels
DMX Channels DMX Control TOUR Channel Value Function Dimmer 000 – 255 0 – 100 % Module 1 red 000 – 255 0 – 100 %; CH2 will control the STEP TIME, if CH10 is set to custom 01-10 (only if CH10 141-255) Module 1 green 000 –... -
Page 24: Dmx Control Arc1
Auto Speed. 000 – 255 CH11 will control the Autospeed, if CH10 is set to AUTO 1-AUTO 10 (only if CH10 061-140) Dimmer Speed. 000 – 009 Preset Dimmer Speed from Display Menu 010 – 029 Linear Dimmer 030 – 069 Non Linear Dimmer (fastest) 1 070 –... -
Page 25: Dmx Control Arc1+S
000 – 255 0 – 100 % Maintenance The Eventspot 1900 mkII requires almost no maintenance. However, you should keep the unit clean. Otherwise, the fixture’s light-output will be significantly reduced. Switch of the power on/off (6) switch at the rear and then wipe the cover with a damp cloth. -
Page 26: No Response To Dmx
3. If all of the above appears to be O.K., switch the unit on again. 4. If you are unable to determine the cause of the problem, do not open the Eventspot 1900 mkII, as this may damage the unit and the warranty will become void. -
Page 27: Product Specification
Minimum distance Minimum distance from flammable surfaces: 0,5m Minimum distance to lighted object: 1,3m Max. ambient temperature t : 40°C; Max. housing temperature t : 80°C Design and product specifications are subject to change without prior notice. Website: www.Showtec.info Email: service@highlite.nl...
Need help?
Do you have a question about the EventSpot 1900 MKII and is the answer not in the manual?
Questions and answers